Scheme of an electric kettle with backlight. How to connect an electric kettle directly. Typical disassembly order
If the kettle button does not work or works, but not properly, then such a circumstance can seriously overshadow even the most beautiful morning. It is difficult to start the day without a cup of hot coffee or tea. But this is a lyric...
So, if the case, then the kettle button is a thermostat. Those. element electrical circuit, which is responsible for closing / opening this electrical circuit according to certain thermal (temperature) indicators. In the case of a kettle, the circuit is forced to close by pressing the button (the kettle turns on), and the circuit is opened as a result of exposure to hot steam on the thermostat (the kettle turns off).
A thermostat malfunction can be expressed in the following forms:
- The kettle does not turn on. Most likely the thermostat has failed. In this case, the kettle is repaired by replacing the thermostat with a new one.
- The kettle does not turn off. It is necessary to disassemble the kettle and inspect the thermostat. Depending on the state of the latter, the repair of the kettle is carried out by cleaning the contact groups of the thermostat or (in a more severe case) by replacing it.
- The kettle turns off after several attempts to bring the water to a boil. In this case, the repair consists in cleaning the thermostat contacts.
In any case, to solve any of the above problems, you will need to disassemble the kettle and remove the thermostat. For repairs, we will need the following tools: a Phillips or flat screwdriver (depending on the screws on the kettle) and a voltage tester.
- To get to the cause of the breakdown (thermostat), you need to unscrew the handle from the kettle itself. We remove the lining from the handle, which is mounted on latches or self-tapping screws. You need to be extremely careful and careful not to damage the kettle from the outside.
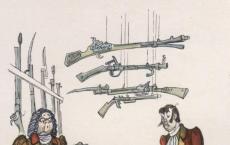
- This is where the button (thermostat) that we need is located. It is worth noting that a sufficiently large current flows through the contacts, namely 1500-2000W, depending on the characteristics of a particular model. This serves as a frequent burning of the contacts, which leads to a malfunction of the device, which is expressed in the fact that the kettle button does not work. Now you need to disassemble the thermostat to get to the contacts. This must be done carefully!

- To disassemble the button, you need to move the upper part to the left and slightly raise it. Then remove the top. As you can see, in this case, the contacts are completely burned out ...

An electric kettle is the most common household appliance that every family probably has today. Its popularity is due to the speed of boiling water, which is superior to other heating methods. Therefore, these simple devices have won a special place for themselves not only in the household, but also in offices and other workplaces where you can enjoy hot tea or coffee during a break. But, like any other technique, an electric kettle can also fail, and its owners will probably have a question, is it possible to fix this device with your own hands, without contacting a repair shop?
The device and principle of operation of electric kettles
An electric kettle is a household appliance, the design and principle of operation of which can be understood even by a person who knows little about technology. All teapots are arranged in the same way, regardless of the model, and work according to the same scheme. They consist of the following main nodes and elements:
- a case, which is also a flask for water (some models of electric kettles have a separate bowl placed in the case);
- a heating element in the form of an open spiral, similar to a boiler, located directly at the bottom of the water tank or (like most modern electric kettles) in the form of a disk heating element;
Such a heating element is located at the bottom of the water flask.
On the inside, the disc has a smooth surface
- stand (base), on which there is a connector for connecting a kettle and a power cord for connecting to a household electrical outlet (all modern electric kettles that are cordless have it);
Base available on cordless models only
- power connector pads on the bottom of the kettle base, which can be central (like most models) or lateral;
- a thermostat used to turn off the kettle when boiling;
This type of thermostat is installed under the button
- power buttons.
Today on sale you can find electric kettles with a thermostat, with which you can heat water not only to 100 ° C, but also to any desired temperature, and even maintain this temperature for a certain time. This property is necessary for the correct brewing of various types of tea (black, green, white, red), each of which requires water of different temperatures from 60 to 90 ° C. An electric kettle with a thermostat is an ideal purchase if there is a small child in the family. Indeed, for the preparation of baby food mixtures, boiling water is not required, and with the help of such a device, you can set the desired temperature. And for adults, repeated boiling of water is highly undesirable if they adhere to a healthy diet.
In this model, the control panel is located on the stand
Naturally, each model of electric kettles has its own design features, but fundamentally they do not differ in structure.
The principle of operation of an electric kettle is also quite simple. When heated, the heating element heats the water in the flask until it boils. Steam is supplied through special channels to a bimetallic thermostat plate made of metals with different coefficients of thermal expansion, it, bending, presses on the button lever or opens the contact terminals, disconnecting the device from the mains.
The diagram shows the movement of steam through the channels in the handle, but a tube in the kettle flask itself can also be used for this purpose.
The most common faults
For electric kettles, the following malfunctions are typical:
- Leakage in the housing of the electrical appliance. This malfunction is more typical for kettles with a plastic case, as well as those equipped with a disk heating element. In the first case, the breakdown may be the result of deformation of the kettle from overheating at the place where the heating element is attached, and with disc heaters, the cause is corrosion along the seam connecting the disc to the body of the electric kettle. Often the cause of such a breakdown is a worn-out seal or cracked glass of the water level indicator.
Failure of the heating element. The cause of the defect is the scale formed on the heating element, as a result of which the transfer of heat to water is difficult, and the coil itself heats up. Most of all, heating elements of a spiral type are more susceptible to such a breakdown than disk-type heating elements, which take longer to form a critical layer of scale. The reason for the burnout of the heating element can also be a violation of the operating rules, for example, if the kettle is plugged into the network, forgetting to pour water into it.
Broken electric kettle button. Two reasons are possible here - the formation of soot and oxidation on the contacts of the button or a break in the thrust connecting it to the power supply terminals.
Premature shutdown of the appliance. This malfunction is a consequence of scale. The water does not have time to boil, and the heating element has already overheated and the thermostat disconnects the device from the network.
Failure of the thermostat. In the design of electric kettles with a thermostat, there are additional components and parts - a thermometer, temperature sensors, a memory unit, an electronic board and a control panel. How more details has a device, the lower its reliability and the higher the probability of failure of any of them. In teapots with thermostats, the regulator itself most often fails, in which the contacts oxidize or burn.
Breakdowns that allow you to return the electric kettle to the store
You can return a faulty electric kettle to the store during the warranty period, if during this period its significant shortcomings have appeared, namely, malfunctions of the following nature:
- irreparable damage;
- recurring failure of the same node;
- a breakdown that cannot be repaired without disproportionate costs close to the cost of the kettle itself;
- a malfunction that takes a long time to resolve, as a result of which the device cannot be used for more than 30 days during the year.
There may be a variety of malfunctions, but the most serious of them are leaks not associated with mechanical damage and a leaky gasket, but caused by deformation of the housing or damage as a result of corrosive processes.
Failure of the heating element can also be attributed to significant breakdowns, provided that the kettle has been properly operated and there is no scale on the heating element.
Electric kettles are household appliances that are included in the list of technically complex products. Therefore, it is possible to return them back to the store, with a refund of the money paid, only if they are of inadequate quality. When contacting the store with a written claim, you need to indicate a breakdown that often repeats or requires costs. comparable to the cost of an electric kettle.
The seller has the right to offer the buyer to contact the service center, but if the breakdown has not been fixed within 20 days, the store is obliged to return the money or exchange the device for a new one. The seller also has the right to appoint, at his own expense, an examination of the goods, which will determine whether the failure occurred due to the fault of the user or whether it is the cause of a manufacturing defect. In the first case, all costs for the examination must be reimbursed by the buyer. In the event of a defect due to the fault of the manufacturer, you can demand not only a refund, but also compensation for moral damage. Moral damage can be claimed only by a court decision.
Diagnosis of malfunction of electric kettles
To determine the reasons for the breakdown of the electric kettle, you only need a screwdriver, which is necessary for disassembling it, and an electrical measuring device - a multimeter or an avometer. The procedure for diagnosing this device is quite simple. It consists in the sequential ringing of the electric chain of the kettle, starting from the plug connecting it to the electrical outlet, and up to the heating element.
Check by tester
If the electric kettle does not turn on, does not heat up, and does not even light up the operation indicator lamp, the diagnosis of the device, no matter how strange it may sound, must be started by checking for voltage in the electrical outlet into which the device is connected. To do this, you can turn on any other known working electrical household appliance to it or measure the voltage with a tester.
If there is voltage in the network, you need to diagnose the kettle itself. This will require:
- Check the serviceability of the plug for connecting the appliance, the connecting cord and the contact group on the stand to which the electric kettle is connected. In the ringing mode, having finished one probe of the multimeter with the pin of the plug, with the second probe we alternately touch the contacts on the base connector. As a rule, there are three of them, and they correspond to two conductive wires and a grounding contact, which is closed to the body of the device. On a stand, they can be located in the middle in the form of circles or on the side in the form of a three-fingered connector. On which contact the signal of the device sounds, it corresponds to the pin of the plug, which indicates the integrity of this cable core and contact groups. We repeat the same operation for the second pin on the plug and the ground contact. If the ringing goes on all three lines, then the base is working and can be put aside, starting to diagnose the kettle.
- Since the malfunction lies in the electrical appliance itself, you need to remove its bottom cover. To do this, you need to unscrew three screws (sometimes there are more - 4 or 6).
- The next step is to ring the power connector terminal block at the base of the kettle. Usually it is combined with a thermostat, and planted on thermal paste. Before unscrewing it, disconnect the cable suitable for it. The left and right contacts of the block, when they are closed to the corresponding elements of the device connector, should ring, respectively, each on its own ring - internal or external. If this does not happen, you need to disassemble the block by removing the bottom plate of the thermostat, and clean the contacts with sandpaper or a needle file, removing carbon deposits and oxidation from them. Along the way, you need to check the availability of contact
After stripping the contacts, the block must be assembled and ringed again. If the defect is fixed, screw it into place.
- Next, the operability of the kettle on button is checked. To do this, we touch with one probe of the multimeter to the contact of the wire going to the button, and with the second - to the wire coming from the button to the heating element. When the switch is in the off position, there should be no reaction, and when the button is turned on, the device will beep, symbolizing that there is a circuit, which means that the button is working. Otherwise, it needs to be replaced or repaired.
- At the last stage of diagnostics, the health of the heating element is checked. To do this, you need to ring the output contacts of the spiral, to which the wires are connected from the central connector of the stand and from the button. If the ringing goes on, then the spiral is not broken. Finishing one of the outputs of the heating element with its body, you can check whether there is a short circuit of the broken spiral on the body of the heating element. If the device gives a signal, a breakdown on the body takes place, and the heating element is considered faulty.
Video: Diagnostics of an electric kettle with a multimeter
Diagnosis of a kettle with a thermostat
The presence of additional structural elements in electric kettles with a thermostat, compared to conventional appliances that can only boil water, somewhat complicates the diagnosis of devices that are more saturated with details. But the difficulty here can arise only when determining the health of the electronic board and memory unit. However, it is quite easy to determine that the cause of the teapot breakage lies precisely in the thermostat.
When diagnosing kettles that heat water to a certain temperature, there are two options for placing the control panel:
- in teapot stand
- on the appliance itself (usually on its handle).
Usually electric kettles with adjustable heating temperature have not three contacts in the connector of the base connection unit with the device, but five. Two more contacts for the thermistor are added to the power circuit for the heating element (two cable cores) and the grounding contact.
The ringing of a kettle with a thermostat is carried out in the same sequence as for a conventional electric kettle:
- First of all, you need to determine which of the contacts on the stand of the device correspond to ground and two cores of the power cable. To do this, in the dialing mode, after finishing one multimeter probe with a pin on the plug, the second one touches the contacts on the stand connector in turn. We repeat a similar operation for the second cable core and grounding.
- The remaining two contact rings included in the thermistor circuit must be checked for resistance. The device should show a certain resistance of about 100 kOhm. For other indications (1 or infinity), it can be concluded that there is a malfunction in the thermostat circuit.
- If everything is in order with the stand, you need to ring the kettle itself, as already described earlier. When ringing individual elements of the circuit (power button, heating element, terminal block with which the thermostat is usually combined), you must first disconnect the electronic part of the thermostat and temperature sensors.
Checking the coil of the heating element
Knowing the power for which the electric kettle is designed, you can easily calculate what resistance the spiral of its heating element should be. To do this, first calculate the current strength, which can be found by dividing the power in watts by the mains voltage (220 V). Further, according to Ohm's law, well known to everyone in the school physics curriculum, in order to find the resistance, we divide the voltage in the network by the current strength. For example, for an electrical appliance with a heating element power of 2000 W, the current strength will be 2000 W / 220 V = 9.09 A, and the resistance of the nichrome spiral is 220 V / 9.09 A = 24.20 Ohm.
The resistance of the heating element spiral obtained by calculation should not differ significantly from the actual one. To measure it, you need to remove the bottom cover of the kettle and measure it with a multimeter, setting it to the resistance measurement mode.
How to fix an electric kettle with your own hands
A fairly simple device of electric kettles allows you to fix many of their malfunctions on your own, without contacting service shops. But you can start repairing with your own hands only on the condition that the warranty period for the electrical appliance has already expired. Let's look at some of the most common problems that can be easily solved if you have the simplest tool at home and, in without fail, electrical measuring instrument.
If the kettle began to leak, you must first of all, establish the place where its tightness is broken. It could be:
- leakage through the gasket installed at the junction of the disk heating element with the inner walls of the housing;
- water seepage at the place of attachment of an open-type heating element;
- flow on the glass of the level gauge, showing to what mark the water is poured into the kettle.
- the presence of a crack in the body of the electric kettle.
In the first case, the cause of depressurization of the flask may be a leaky gasket, or scale getting under the gasket. For any of these options, you must:
- Remove the bottom cover of the kettle.
- Detach the top cover, which is usually held on by latches and can be easily removed.
- Dismantle the heating element together with the gasket by squeezing it out by hand.
- Having removed from the disk heating element rubber gasket, rinse the kettle itself, its heating element and sealing ring well. If the latter has scuffs, tears and excessive wear, the gasket must be replaced with a new one.
- Dry the heating element with all parts attached to it well with a hair dryer.
- Assemble in the reverse order, and after filling the kettle with water, put it on a dry cloth for 15-20 minutes. If there are no more leaks, we can assume that the defect has been eliminated.
This process can be seen more clearly in the next video.
Video: Elimination of leaks in an electric kettle with a disk heating element
If a leak is found in an electric kettle with a heating element in the form of an open spiral at the place where the heating element is attached, it is necessary:
- Remove the bottom cover of the appliance housing, as well as the cover on its handle, to provide access to the heating element fastening nuts.
- If the fastener is loose, you need to tighten it and check if the problem is fixed.
- If the tightness is not restored by tightening the fasteners, you need to dismantle the top cover of the kettle and, having unscrewed the fastening screws, remove the spiral along with the gasket.
- Thoroughly clean the surface of the heating element adjacent to the gasket and the sealing ring itself from scale. If necessary, replace gasket.
How to disassemble a kettle with an open spiral heater and remove the heating element along with the gasket can be seen in detail in the following video.
Video: How to remove a spiral heating element with a gasket from an electric kettle
Leakage of the kettle on the glass of the level gauge may be the result of wear of silicone gaskets or the appearance of microcracks in the plexiglass itself. And if the problem with gaskets is solved quite simply (by replacing them), then to get rid of cracks, you will have to resort to glue.
For gluing plexiglass (or plexiglass), professional glue Acrifix 116 or 117, vinegar essence, moment glue, as well as Сosmofen or Colakril adhesive compositions can be used.
With cracks in the body, it is better to purchase a new kettle, since any glue that you can try will be in contact with water, which is undesirable for health. The process of eliminating leaks on the glass of the level gauge can be seen in the following video.
Video: Eliminating the leakage of the kettle on the glass of the level gauge
The reason that the electric kettle does not turn off when boiling may be:
- not closed or loosely closed top cover;
- clogging of the hole for supplying steam to the bimetallic plate of the thermostat;
- button or thermostat malfunction.
After checking whether the lid is tightly closed, clean the steam outlet with a toothpick, which is located under the lid at the junction of the handle with the body. If the problem persists, you need to remove the bottom cover of the kettle, and then proceed according to the following algorithm:
- Remove the bottom cover of the body of the electric kettle, and the cover on its handle. A bimetallic plate, which should, by bending, turn off the button or access to electricity to it is available both on the button and under the terminal box of the kettle, where the thermostat is usually located.
- Make sure the integrity of the contacts and their ability to open under the action of a bimetallic plate. If the contacts have stuck to each other, or the pin that should open them has melted, you need to restore the operation of this system, and if it is impossible to eliminate the breakdown, replace the problematic part - a button or thermostat.
- Reassemble the device in reverse order and check if this problem is fixed.
Another problem that may arise during the operation of electric kettles is when the water has not yet boiled, and the device is already turning off. This defect can occur due to scale formed on the heating element, which prevents the transfer of heat to water and heats the coil itself. Overheating of the coil triggers a thermal fuse or thermostat at the base of the kettle. In this case, you need to descale the kettle, for which you can use:
- special household chemicals "Antinakipin" or Major Domus;
- coca-cola, which contains phosphoric acid;
- citric acid at the rate of 1 tbsp. spoon for 500 ml of water;
- baking soda 3-4 tbsp. spoons per 1 liter. water.
These solutions should be boiled in a kettle and held for 15-20 minutes, after which clean water should be boiled in it 3-4 times for washing.
If there is no scale on the heating element, you need to check the thermostat contact. It may be too close to the pusher of the bimetal plate, and you just need to bend it a little, as shown in the following video.
Video: What to do if the kettle turns off without boiling
There are times when the kettle does not turn on, which means that in some place there is a break in its electrical circuit. It can be associated with burning and oxidation of contacts. To eliminate the malfunction, you need to find the place of the gap, as it was already described earlier about troubleshooting.
If the electric kettle does not heat the water, and its light is on, this may signal a break in the nichrome spiral of the heating element or the burning of its terminals. In the first case, it will be necessary to replace the heating element, and in the second, cleaning the contacts.
A situation may arise when the button of the electric kettle is not fixed. The cause of such a breakdown is a jumped off, or burst spring. To eliminate the defect, you must:
- Remove the lid from the handle by unscrewing the screws under the top lid of the kettle, and prying with a screwdriver, release its latches from the grooves.
- Remove the button by disconnecting the wires from it and unscrewing the screw.
- Having disassembled the button, put the jumped spring in place.
- If the spring is broken, it will be easiest to replace the button with a new one, because it is unlikely that you will be able to find such a spare part.
- Assemble the kettle in reverse order.
Disc Heater Replacement
Electric kettles with disc heaters are particularly vulnerable to rust, which corrodes the metal, damaging their surface and breaking the tightness of the appliance. With such a defect, the device is not operational. The only way out is to replace the disk, for which you need:
- Remove the bottom of the kettle by unscrewing the screws (in some models it is also held on by latches).
- Detach the top cover.
- Putting your hand into the kettle, squeeze out the heating element together with the silicone gasket.
- Disconnect all components and parts installed on it from the disk.
- Connect the terminal block, thermostat and other elements to the new heating element and assemble the kettle in reverse order.
How to replace a coil
To check the health of the spiral heating element, you need to measure its resistance. If the multimeter shows one or infinity, the heating element must be replaced. For this you need:
- Remove the bottom, the lid of the kettle and the trim on the handle to get to the heating element fixing screws.
- Disconnect lead wires from coil leads.
- Unscrew the three screws securing the heating element and remove it from the kettle.
- Put a silicone gasket on the new heating element (it can be removed from the burned-out coil if it has no scuffs and damage) and, having installed it in the mounting hole, tighten it with screws.
- Assemble the device in reverse order.
The process of replacing the spiral is clearly shown in the following video.
Video: Replacing the spiral heating element of an electric kettle
How to connect an electric kettle directly
Connecting the electric kettle directly is performed as a temporary measure in case of failure of the power button. If it cannot be repaired, and at the moment there is nothing to replace it with, you just need to disconnect the wires suitable for the button and connect them with a twist. When connected directly, the device will stop automatically turning off, and it must be turned off so that the heating element does not burn out.
An electric kettle is now available to people with different incomes, who can simply buy a new appliance when the old one breaks down. But if at the moment this is not possible, you can easily fix it yourself, without spending money on paying for the services of a repairman.
An electric kettle has become an indispensable attribute of any kitchen and is a sales leader in comparison with other household appliances. This appliance is widely used both at home, in the kitchen and in the office. But unfortunately, like any electrical appliance, the kettle fails after some time of operation. Since the price of this water heater is not too high, it is easier to buy a new one than to repair it. But if you consider yourself a home master, or a device for boiling water is dear to you as a memory, you can try to repair the electric kettle with your own hands.
An electric kettle works on a fairly simple principle, regardless of whether it is an expensive model or a budget one. At the bottom of the device is a heating element connected to a thermostat, consisting of bimetal plate. A tubular heater, when an electric current is applied to it, heats the liquid to a boil. When steam is formed during the boiling process, it passes through a special channel to the thermostat, as a result of which the latter turns off the power supply.
If you look at the scheme of operation of the device, you can see that it works on the principle of an iron, and does not differ in the complexity of the design. But before you repair the electric kettle, there are always difficulties with case disassembly, since the latches (holding the handle) are located differently for different models of units, in addition, the mounting screws can be with a cap for a special screwdriver.
Typical malfunctions
The electric kettle is simple device, which contains few elements that can fail. However, there are still common problems, among which are the following:
- slow heating of the liquid;
- the device turns off prematurely;
- the kettle does not turn off;
- the device does not turn on;
- burnout of the heating element;
- water is leaking from the body.
Slow heating of the liquid
If you notice that the kettle does not heat water quickly, then pay attention to the condition of the heating element. Thick layer of scale on it, formed due to insufficiently good maintenance of the unit, has poor thermal conductivity, which takes more time to heat the water. If the scale is not removed, the heating element may burn out.
In addition, the entire contact group of the device suffers from overheating, as a result of which the contacts melt or burn.
To get rid of scale, you can use the usual citric acid sold in stores. It is enough to pour 1-2 sachets of citric acid (20 grams each) into the tank, bring it to a boil and leave the heated solution in the tank for 30 minutes. After that, the container must be thoroughly rinsed with running water to remove scale residues. If necessary, the procedure can be repeated.
Device turns off prematurely
This behavior of the electric water heater is explained by the fact that the shutdown of the device may be due to scale formed on the heating element. Since the heating element has a fuse against overheating, it works and breaks the electrical network. To eliminate the malfunction, it is necessary to descale the heaters.
Kettle won't turn off
During the boiling of water in the tank of the apparatus, the steam must be collected under the lid and sent through a special channel to the thermostat. If the lid is not closed tightly, then this does not happen, and the appliance will work without shutting down. If everything is in order with the lid, check that the steam hole, which is located on the side of the handle, is not contaminated with scale. In the case when everything is in order with the hole, it can be assumed that the kettle does not turn off due to thermostat breakdowns.
The thermostat at the electric kettle is located at the bottom of the case, and in order to get to it for replacement, you will have to disassemble the device completely.
For example, a regular budget device was taken, which does not differ in design from more expensive models - an electric kettle Vitek, Tefal, Polaris, Scarlett and others. By the way, in this model, as well as in the Vitek VT-7009(TR) device, the container is made of heat resistant glass. So, let's analyze the unit according to the following algorithm.
- Kettle repair should begin with unplugging it from the mains. Next, remove the device from the stand (base) and unscrew all the screws located on its bottom panel.

- After that, it is necessary with special care to pry off the plastic cover located on the handle using a thin screwdriver. This should be done carefully because in different models of devices, the latches can be located in different places, and they can be easily broken.

- After removing the cover, you can see the mounting screws. They also need to be removed.

- After unscrewing all the fasteners, applying a little effort, disconnect the handle with the cover from the body.

- Next, disconnect the housing from the bottom of the unit.

- At the bottom of the case you will see all the main elements of the device: a contact group, a thermal relay and a heating element.


- pay attention to bimetallic plate(on the right in the picture). If damage is visible on it or it has a worn out appearance, then this may be the reason that the appliance has stopped turning off. The plate is not repaired, but replaced with a new one.
But how to disassemble the Bosch kettle, if when unscrewing all the screws on the bottom, it is not removed? Those who disassembled such a device encountered difficulties that often ended in a breakdown of the device. Since the process is quite difficult to describe, it is better to watch a video on this topic.
The device does not turn on
The reasons why your boiler does not turn on can be different.
- Faulty electrical cord and plug. To do this, you will need to “ring out” the cord using the tester, touching the probes to the plug contacts and the contacts on the stand (base). If a break is found, replace the cord with a new one.
- Bad contact in the stand(base). From prolonged operation, the contacts can burn, which is why their conductivity is disturbed. If burns have formed on the contacts, they can be cleaned using fine sandpaper. But in the case when they are melted, they will need to be completely replaced.
- Faulty internal switch in the device. Since the switch has to experience fairly large loads (from 1500 to 2000 W), its contacts may melt over time. This may cause the machine to not work. The switch is located at the bottom of the handle, and in the event of a malfunction, it looks as shown in the figure below.

In this case, the button must be replaced. But there is a button malfunction, in which you can fix the kettle with your own hands without replacing it. If you look at the button from the side, you can see 2 contacts that close in the “on” position. If on them soot is formed, the device will not turn on.

To remove carbon deposits, you can use fine-grained sandpaper, a nail file, or a thin file. To make it more convenient to do the stripping, you will need a small “refinement” of the button, namely, removing the sides with the help of wire cutters.

Another reason that the device does not want to work can be called malfunction of the mechanical power button. This breakdown is most common in the Tefal vitesse model, since plastic rails are built into the handle of the appliance, which transmit translational movement from the external button to the internal one located at the bottom of the unit.

After this part breaks, turning on the Tefal kettle becomes impossible. To understand in more detail how to repair an element that has broken, you can watch the video, which discusses one original way to fix a defect.
Heating element burnout
When repairing electric kettles, both old models and newer ones, the most common failure is the burnout of the heating element. The problem with heating elements arises, first of all, due to their overheating due to untimely descaling.
Before repairing a kettle with a disc heater or a heating element in the form of a spiral, it is necessary to disassemble the unit in the manner described above. After that, take the tester and connect the probes of the device to the output contacts of the heater. If the lamp lights up on the device, or it makes a sound, then the heating element can be considered serviceable.
How to check the heating element if no measuring device? It turns out it's very simple. It is necessary to connect zero from the mains to one contact of the heater, and the phase to the other. Next, insert a 220 bulb into the socket, from which 2 insulated wires are removed. Touch one stripped end of the wire to one contact of the heater, and the other to the opposite. If the light is on, then the heating element is working.

If it turns out that the disk heater has burned out, then it cannot be replaced, since it is one with the bottom of the appliance, such as, for example, in the Scarlett kettle, or Vitek VT-7009 (TR). Therefore, you will have to buy a new unit. Only open-type heater is subject to replacement.
water flowing
If you notice that water is leaking (leaking) from the reservoir of the device, then it is recommended to use such an apparatus for a while until scale forms in the microcracks, which can block the leakage of liquid. If this does not help, then you will have to buy a new “boiler” if the warranty period has expired.
Another reason that the reservoir is leaking may be loose connection of the electric heater with the body of the device(if the heating element is open type). In this case, you can tighten the fasteners holding it. If this does not help, then you will have to remove the heating element and change the rubber seal that has worn out.
Thus, we can summarize: in some cases it is quite possible to repair a unit for boiling water on your own. But if you lack certain skills in the repair of household appliances, then the best option will buy a new kettle. Repair in a service center, from a financial point of view, does not justify itself, and there is no guarantee that the breakdown will not happen again.
The lid of the Polaris PWK 1766CWr kettle has stopped opening. The button is pressed, but the latch does not open. A small material - a review of the kettle and how to disassemble its lid.
Looking ahead, I’ll say that the copy that came to me had a hidden manufacturing defect. Therefore, when returning under warranty, it makes sense to give it back with a note, “I ask you to carry out an examination in my presence”, so that a negligent examination does not write that the breakdown is your fault (fell, crushed a button, etc.).
We open the jammed lid by inserting a thin awl, knitting needle or steel wire into the slot next to the spout. Then from the bottom up we draw over the spout, at the location of the latch, we press the latch. You can try using a bent paperclip.
We start disassembling POLARIS PWK by removing the plug.

It is soft and if you pick it, for example with an awl, a trace will remain, traces of parsing will be visible.
Unscrew the screw under the cap.
We unscrew the two screws under the cover.

We take away the pen.
Below the lid is a tin. We simply hook it from the side, it is better to start closer to the handle. The clamps on which it rests unbend and it will be removed.

After that, a broken element spilled out - a lever that transmits pressing from the button to the latch.

As stated above, this is a manufacturing defect. If you look at the scrap, on both sides it was clear that the plastic inside was not solid. There were large bubbles.
It was possible to try to glue it, but on the kettle for work, I simply removed the latch from the lid and removed the spring at the place where the lid was attached to the handle that holds the lid open. As a result, the steam does not lift the lid, the kettle boils and turns off normally.
To securely put the tin in place or get to the latch mechanism, the lid must be completely disassembled.
To remove the upper tin, its clamps are bent from the inside and it is squeezed out similarly to the lower one.
The lid consists of 2 plastic parts. First, 2 external latches at the base of the handle are released.
Then internal, around the perimeter of the cover. The plastic inside is soft, there was no fear of breaking them off.
Then the lower and upper tins are put on, the halves of the lid snap into place, the latches near the handle snap into place.

The promised review of the kettle PWK 1766CWr
Before this trouble it worked properly, no complaints.
Pros: Loved the build. Everything is well fixed, does not hang out. The presence of a constant heating mode. The wires at the bends, next to the connections, are protected by additional thick insulation, and not just a thin shrink tube.
Cons: Lid won't open. Like most kettles, the water level is inserted into the body on two silicone gaskets. Sooner or later kettles with levels start to leak. Heating - I saw a burnt kettle and part of the room with it, which was left on heating.
Most of the breakdowns in electric kettles cannot be repaired. That's what the service center will tell you. But it's such a pity to throw away a brand new-looking teapot. It makes you want to take a screwdriver and twist where necessary. It's just not clear how to disassemble the electric kettle. Let's analyze this issue based on the breakdown of the device.
The reason is the power button
To fix this problem, follow these steps:
1. Work begins with unscrewing the screws from the bottom of the device. A suitable screwdriver is used for this. The screws also hold the teapot handle. To remove it, first we twist the bolt located at the bottom of the handle.
2. Having removed the bottom of the electric kettle, we see a thermocouple in front of us. After that, you can proceed to the analysis of the handle of the electric kettle. You can see that it has two parts. One is screwed to the body, and the second is its cover. To remove the handle, you need to remove all the screws and press the latches at its base.
3. You should now be able to see the pull. It makes its way from the power button to the thermocouple.
After these steps, you can fix the problem. If the cause is a damaged connection, then it must be restored, for example, using a regular paper clip.

The reason is the heating element
If the kettle stops heating water, then the first thing to do is unplug it and pour all the water out of it. Next, you need to check the integrity of the stand and the cord of the device. Then you need to ring the electric kettle. The resistance must be within 60 ohms. If during the procedure the light comes on or the buzzer sounds, then the kettle is in order. The device does not show the described symptoms? Then you have to take it apart.
The process of spinning the kettle is the same as described above. Only we need to get to the heating element of the technique. It is best to start work by dismantling the handle. The switch is then carefully removed. Next comes the call. At the beginning of the heating element, and if everything is in order with it, then the switch. Defective parts are replaced. The described procedure is suitable for a spiral heating element.
If you have a closed type of kettle, then after removing the handle, you need to dismantle the bottom of the appliance. Further, the serviceability of the elements is also checked and their replacement is carried out. There are times when the device turns off even without having time to heat the water. If an electric kettle fell into your hands with such complaints, then check the condition of the heating element. Perhaps it is covered in plaque. Take it away mechanically or with citric acid.
Start disassembling the kettle only if you are sure that you can handle the repair and can put it back together.