How to find an electrical leak in a car. What is the danger of such a phenomenon. What causes leakage current
If your vehicle has a long service life, then one of the problems that often occurs in this case may be the loss / leakage of current in the wire circuit. Due to the fact that our conditions, both climatic and road, lead to the destruction, cracking and abrasion of the wire insulation layer, as well as to the oxidation of the electronics connection sockets and terminal block contacts.
As soon as the vehicle comes to a stop, stop the engine and turn off the ignition to cut off the fuel or oil supply systems. The next step is to get out of the car and remove all of its passengers as far away from it as possible to avoid inhaling the fumes. Once you are safe, 112 will be called to tell you about the accident.
How to determine that the problem is in the battery, and what tool is required
The spark plug cable is a major component, but essential to the operation of the engine. It carries the high voltage, which is 30 to 50 kV volts, produced by the ignition coil to the spark plug. In order for the engine to run properly, it is essential that the spark plug wires do not leak and, as far as possible, avoid noise and static electricity. For this reason, it is recommended to carry out a periodic inspection, at least once a year, of the entire electrical installation, while we ensure that there is no damage or wear in the installation that could cause problems and malfunctions in the car.
Such leaks in the car's electrical system can lead to battery discharge, and in extreme cases, to a short circuit and fire. In a modern car, with many electrical appliances, the risk of such a problem increases. More often, such a leak occurs in the winter, since at low temperatures the battery is not able to maintain its nominal capacity for a long time. However, among the more accurate reasons, incorrectly connected devices (radio recorders, TVs, amplifiers, signaling) that are not included in the basic equipment of the machine can be noted.
Damage to spark plug wires and caps can be caused by wear, engine vibration, brake fluid leakage, battery acid, or poor installation during repairs, this deterioration is reflected in reduced conductivity between the coil and spark plugs. To make sure the spark plug wires are in good condition, start the engine in a low light area and be aware of small electrical discharges near the cables or crackling noises. If one of these two signs occurs, there is a leak electric current high voltage.
Search for current leakage. Example
For everyday use of the car, leakage current is compensated by charging the battery from the generator, but if the car has not been used for a long time, then in the future, with such a leak, the battery simply will not allow the engine to start. According to the recommendations of many experts, it is necessary to periodically check all electrical appliances in order to identify a possible current leakage in the car. And so, how to check the leakage current in a car?
When determining these signals, it is important to immediately replace the spark plug wires, while we avoid. Increased fuel consumption due to current leakage which prevents sparking with energy, creating imperfect combustion. Casting caps or cables in places where heat generated during engine operation. Damage to sensors and vehicles. . To check that the spark plug wires are working properly, we recommend that you follow the instructions below.
If the arc is close to the spark plug, turn off the engine, remove Charger from the plug and check if the carbon component is present, you should also replace the spark plug. Cable resistance test: look at the resistance rating of the spark plug in the car service manual, use an ohmmeter to determine if the cable resistance is within the manufacturer's recommendations. Checking fasteners: make sure that the spring clips holding the cables in the distributor cap are well positioned, as if they are in poor condition they can cause the cables to slip. Make sure the cables are routed according to the manufacturer's manual, because if they do not follow the manual, power loss can be generated. Cable routing. . Winter arrives, and with it a terrible drop in temperatures that forces us to check our face car to avoid any damage or mishaps.
Almost every one of us experienced the unpleasant sensations from the failure of the car to start. Sometimes this situation causes a feeling of hopelessness, because it is completely incomprehensible what is the reason for the lack of charge in the battery. Let's figure it out how to check current leakage in a car quickly and easily.
The most common reasons for this situation are:
There are a lot of things we need to check in our car with the arrival of the cold, but one of the most important is checking our battery and making sure our car's wiring is in the right condition. To show the importance of checking our battery with just one piece of information, and in winter almost 25% of road breaks are related to battery failures.
Winter makes us spend more and exposes all the shortcomings of the electrical installation. With a decrease in temperature and an increased presence of moisture, the battery is not only repelled by altered properties of its composition, especially those using acid, but electrical installations cause them to lead out and make poor contacts. This means that the same installation, with its more than likely faults and parasites present throughout the year, suffers more in winter when there is increased current leakage or increased resistance.
- at the locations of the wiring harnesses, dirt accumulates and high humidity is observed;
- violation of the integrity of the insulating coating;
- too frequent connection of additional consumers;
- related equipment is connected incorrectly;
- violation of the established rules for arranging wiring during repairs.
To do this, we must add more consumption that we require at a time with worse climatology and fewer hours of light, which already forces us to use for longer and more demanding ways of working electrical system for lighting, windshield wipers or demister systems. But the real problem with consumption is found in the mechanics itself, since the process requires more current to run the process to overcome the resistance of materials and liquids and use the combustion chamber heaters, fuel or cooling system, as the case may be.
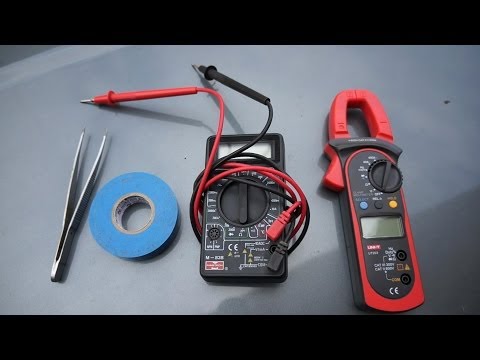
This greatly increases the risk of a fire. To start the test procedure, complete the tool kit in the machine with a tester. For beginners, it is enough to purchase an inexpensive, simple device. It will cost you literally two or three hundred rubles, but its service life will be short.
What to do if you need a check urgently, but you don’t have a tester? Then we recommend the following:
In winter, it costs us a lot more amplifiers not only to start the engine, but also to reach its operating temperature. But we still have to know one of the most forgotten aspects when it comes to understanding why we ran out of our battery in the winter. We use the car a lot more during these times, and primarily use it for routes that don't allow the battery to recover from cold starts, forcing the battery to empty its load almost until it's depleted.
A multimeter will be our best ally to find out how our battery is. Checking the status of a modern battery is relatively easy if you have access to it, of course. Taking advantage of these visits to our workshop of trust, we can find out the true state of our battery, as they will have the most reliable tools for this. But still we will try to find out the state of the battery ourselves. The first thing to do is to make sure that the battery terminals are properly tightened and free of deposits, otherwise this is a clear sign of wear and tear which increases the load on the electrical installation and consumption.
- We check the strength of the fastening of the cables on the battery terminals.
- Thorough check of all freelance electrical appliances in the cabin for quality work.
- For a short time, turn on and off all lighting fixtures. In the event of interruptions in the work of one of them, a short circuit in this place is quite likely.
- Inspection of the line of the questionable consumer from the battery to the device.
A common cause, which is especially true for older vehicles, is a short to the body due to the destruction of the wire insulation.
With all consumers and respecting the polarity of the battery and the meter, we continue to measure the voltage drop of the battery. A value below this measurement indicates that the battery is low or that it has a fault that prevents charging. If we find low voltage values in our battery, then don't rush, changing the battery in advance can not only save you time, but also money.
The generator and its health is one of the elements that we also need to consider. Common sense will help us save our battery. If you use it more logically, you will have to wait until it is recharged. The first thing to do is to make sure the connections are secure and check for signs of corrosion. This step will ensure that your battery reaches its maximum lifespan. Those batteries that also have the ability Maintenance, require periodic additions of distilled water to their vessels to keep their internal chemical solution in shape.
Diagnosis can be performed with a conventional light bulb. Consider an example with a 12V light bulb:
- disconnect the wire from the positive battery terminal;
- we attach one light bulb wire to the specified terminal, and the second to the cable that was removed from the terminal;
- we close all doors and completely turn off consumption devices;
- in normal condition, the light should not light up;
- burning indicates a current leakage;
- We are looking for a problem area.
This technique is very primitive; for optimal operation, a tester is much more convenient.
This step requires exceptional protective measures such as goggles or gloves and we work with acid and there is never zero risk in handling this type of automotive element. If you are not sure about doing this process, it is best to go to a specialized workshop.
Additional checks with a multimeter
But there is one factor that will keep your battery in good condition for longer: common sense. Now we use the car even more because we need adverse weather, so we need to know that our car consumes more fuel as well as more electricity. Thus, we must consider that our battery is subject to more energy consumption and takes longer to recharge, so it is better to avoid those small routes where the battery cannot be recharged, or at least to make sure that we make a periodic journey that will allow battery to be charged to the maximum point.
Using a multimeter
To determine the leak you will need:
- Universal type parameter meter.
- Set of wrenches.
- Ordinary pliers.

It should be noted that in this case you will need the help of another person. The testing process itself goes like this:
Exit from experiments, cheap dear. Whether you're late to this entry, you've lashed out at your batteries, or you're just a victim of bad luck, we recommend some actions to avoid the greater evil. Do not attempt to charge the battery yourself. Avoid this solution as you may run the risk of battery explosion. We don't know why the battery is dead, so he avoids inventions or magical solutions.
Do not use cables or starters without consulting the manufacturer. Electronics is responsible for any relatively modern car, and therefore special attention must be paid when introducing external elements that change the voltage and intensity values that the components of our car operate with. The vast majority of manufacturers indicate in their manuals whether their models are compatible using cables or starters and where to connect them. Paying for a new battery is expensive, fixing a mistake luring the car in for a lot more.
- We disconnect the lighting and on-board devices, turn off the radio and remove the ignition key.
- The negative battery terminal is unscrewed with a wrench.
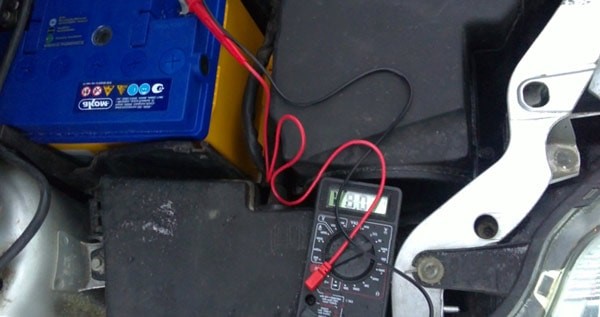
- The tester, set in the “10 A” mode, is applied with the leads to the wire removed from the battery and the negative terminal.
- If the current exceeds 70 mA, the search for the source of the loss begins.
- The assistant opens the safety block if the reading is higher than the specified rating, and in turn pulls the built-in elements from the sockets. For this, pliers with well-insulated handles are used.
- The chain is subject to further verification, during the recess of which the normal amperage returned.
- We disconnect the links of the suspicious circuit after installing the fuse in its socket. Restoring the parameters will help to clearly identify the defective device.
- We eliminate the breakdown and put the battery terminal in its place.

Is there a leak?
Don't buy batteries. Each manufacturer designs an electrical installation with the electrical consumption of the entire vehicle in mind, so never let yourself be guided by offers or generic batteries that cost any vehicle.
The second terminal on the motor is grounded through a wire tape that runs from the motor or gearbox and the case back to the battery ground terminal. Modern cars have a pre-wired starter motor that has a body-mounted solenoid. Many older cars have a pull starter with a separate solenoid mounted elsewhere in the engine bay.
Take care of observing safety rules - in order to avoid problems with the operation of the central lock, you need to lower the windows, and do the work itself in.
It also happens that a thorough check of all circuits did not show normal amperage.
Verification and what is needed for this
Turn on the headlights and try to start. If the headlights dim, the starter sprocket is probably stuck on the steering wheel. Check the square cable at the end of the starter shaft. If so, turn it with the key to release the gear. Do not operate starter until gear is loose.
Checking electrical faults
If the headlights do not dim, check for an electrical failure. To check if current reaches the solenoid, connect a test lamp between its power terminal and ground. To check that the solenoid is supplying current to the starter, connect a test light between the solenoid output connector and ground, preferably the battery ground terminal. When working on the start switch, the lamp should light up.
Example for VAZ
To perform testing, you will need the same tools as in the previous case. And the sequence of actions looks like this:
- Let's imagine that alternately removing the fuses still gives indicators increased consumption amps.
- We go further and inspect the generator.
- After starting the engine, we turn on the fog lights, dimensions and instruments, and in the voltage mode we check the voltage at the motor terminals. Its value should be 12V or more.
- If everything is fine here, we test the starter. We check the current losses in the breaks in the electrical wiring - battery terminals by disconnecting the starter wires.
- Finally, let's test the alarm. We look at the change in readings in the segment of the security mode.
What Not to Do
The table will tell you about the most common mistakes made during diagnostics:
| Applied method | What is | Potential Hazard |
| Connecting the tester directly to the battery terminals | The red lead of the ammeter is connected to the positive terminal, and the black lead to the negative terminal. | A short circuit may occur in the internal part of the device, its fuse fails. |
| Using the wrong fuse | When a standard fuse burns out, another element with higher allowable amperage parameters is installed to continue the diagnostic process. | There is a very high probability of burnout in certain links of the entire wiring and a fire. |
These are the two main mistakes that inexperienced motorists often make. We discussed the correct implementation of determining the causes of current leakage above.
The information presented, with a description of the most popular algorithms, will be especially useful if you are on the road and there is no way to use the services of professional repairmen.
And best of all, apply our tips when preparing for a long trip.


