Sheathing the balcony with plastic panels step by step instructions. Finishing the loggia with plastic panels: step-by-step instructions for wall insulation and installation of PVC panels
Many apartment owners want to increase the total living space by adding loggias and balconies to the used premises. To do this, these structures are insulated, glazed and sheathed. Finishing the loggia plastic panels recommended to be done in last turn, but this is not a requirement. If desired, the surfaces can be sheathed separately without insulation and glazing.
For sheathing loggias, you can use the following building materials:
- metal profiles. Pretty cheap materials, have excellent performance characteristics. Universal use, can be used for both internal and external walls;
- wooden lining. An expensive way to finish, requires a careful approach. Recommended for decoration only internal surfaces. On the outer walls of the loggia are exposed to the negative effects of precipitation, the service life is significantly reduced. In addition, wooden elements require periodic renewal of protective coatings;
- plastic panels and plastic lining. The most budget option for finishing, universal use. For exterior surfaces, UV-resistant panel grades should be used.
In the article we will focus on the last option for finishing the loggia - plastic panels.
We will consider the most best option- sheathing of a pre-glazed loggia with installation of insulation. Work can only start after very important preconditions have been met.
After completing all the preparatory measures, you can proceed to the direct finishing.
Algorithm for sheathing loggias with plastic panels
As an example, we will consider the option of mounting panels on a wooden frame with simultaneous wall insulation. Only internal walls will be sheathed.
Step 1. Count required amount and the choice of specific materials and technologies.
Warming can be done using pressed or rolled mineral wool, as well as foam boards - these are the most effective materials, they have the necessary thickness to achieve heat saving performance. Thinner insulation is not recommended because of their low efficiency.
Do not believe the advisers that thin foam-based insulation will make the loggia warm. It is better not to insulate the room at all than to waste money in vain. Wooden slats or metal profiles can be used as a supporting frame. Both options are almost equivalent in terms of durability, but it is cheaper to use the option with wooden slats in terms of cost.
Remove the dimensions of the surfaces of the loggia, make a margin for the amount of materials within 10%. Please note that during the production of any construction works there will always be unproductive waste. At the same time, count the number of wooden slats, the dimensions of the lumber are approximately 50 × 50 mm. The thickness of the bars is selected depending on the thickness of the heat insulators. If there are concerns about durability, then you can soak them with an antiseptic solution, but this procedure is optional. Structures will not be directly exposed to water, wood rotting is excluded. To fix the plastic panels and frame elements, you need to use self-tapping screws and dowels.
Step 2 Carry out a careful inspection of the surfaces, if necessary, seal large gaps. The distance between the rails must be consistent with the dimensions of the heaters and take into account specifications panels. Carefully read the manufacturer's instructions for the best methods of fixing them.
Step 3 Fix the extreme corner rails, check their position using a level or an ordinary plumb line. Corner cladding elements are attached to them. Mark the location of the remaining rails of the supporting frame. If the walls of the loggia have large irregularities, then they must be removed, the surface does not have to be leveled to an ideal state, deviations within a centimeter do not play any negative role.
Step 4 Pull two ropes between the extreme rails, one at the bottom and the other at the top. According to the level of the ropes, you need to put all the other slats, constantly monitor their position. The frame elements must lie in the same plane and be strictly vertical. Fastening is done with dowels. To level the position, use various gaskets. Take all measures so that these wedges do not fall out over time, fix them with glue or small nails.
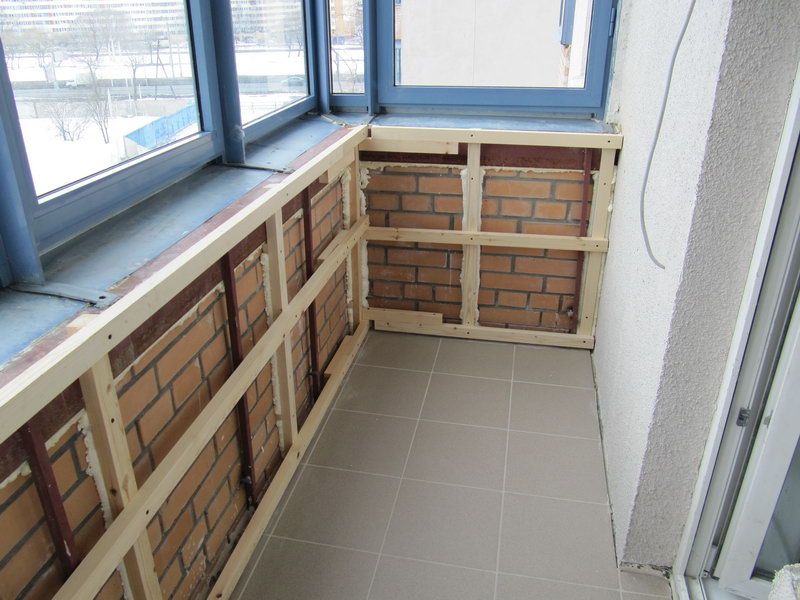
Crate for insulation - photo
Practical advice. There is another way to attach the rails to the walls, it is very convenient, it allows you to use thin rails and easily adjust their position vertically and horizontally, set the distance between the wall and the frame, depending on the thickness of the insulation. To do this, you need to buy U-shaped perforated mounts. They are fixed to the wall, and with the help of numerous holes, the right place for fastening the rails is selected. The "antennae" protruding beyond the plane of the frame are bent towards the plane of the wall.
Inexperienced craftsmen sometimes face the problem of fixing dowels in brick or concrete surfaces, the plastic part does not fully fit into the hole. To prevent this from happening, holes should be made 2-3 cm larger than the length of the dowels, this space is enough to fit the dust not removed by the drill.
In the photo - installation of wooden slats
A Pobedite drill will have to drill holes in a wooden lath and wall at the same time. The location of the soldering makes drilling in wood rather difficult. To facilitate this process, do not be lazy to grind it more often. This can be done using an ordinary circular grinder (grinder). It is advisable to install a thick disk, keep the car motionless. The sharpening angle must correspond to the original factory. If it is made sharper, then the drill will quickly sit down, if it is more blunt, then the characteristics of gouging concrete or brick will deteriorate.
Carefully mount the frame near windows and doors. In these places, be sure to install the rails, the end and corner elements of the plastic panels will be fixed to them. It is desirable to buy additional elements from the same manufacturers as the panels. The distance between the dowels is 30-40 centimeters. At the ends, fixation is required. Do not allow the rails to crack, they cannot be left in this state, they will have to be completely replaced with new ones.
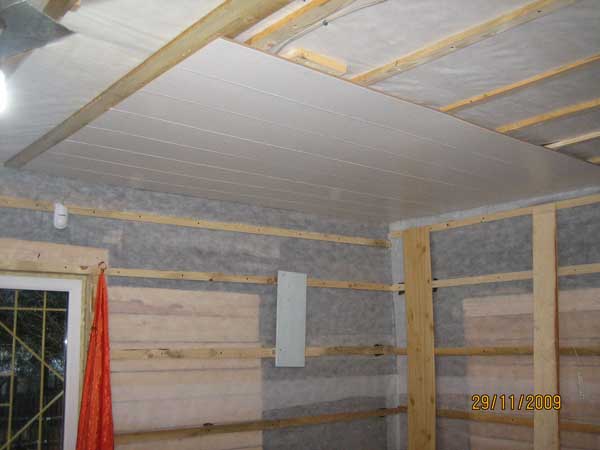
Step 5 Fix the heater.
Styrofoam can be fixed with liquid nails or special dowels with wide caps. Mineral wool is attached only with special dowels. Make sure that the fit of the insulation to the rails is as tight as possible. If for some reason there are gaps between the frame and the rails, then they should be sealed with mounting foam. By the way, foam boards can be glued to brick or concrete walls with foam.
Step 6 Install the end elements, the corner elements are mounted as the plastic panels are attached. It is better to start work from the simplest angle, as you move along the perimeter of the loggia, you will have practical experience in performing work, all problems that arise are much easier to solve.
Step 7 Prepare the panels, cut them to length. Accurately take measurements, deviations should not exceed ± 5 mm. Such a disadvantage can be "hidden" in the end strips. The panels are fixed to wooden slats with a stapler, the length of the staples is not more than 6 mm. Adjust the impact force of the stapler, do this with the help of the upper spring. During adjustment, check the force of impact on the sections of the rail and the panel; during the clogging of the bracket, the integrity of the panel should not be violated.
Step 8 Start mounting the panels, the first one should go into the corner or end element, the lower parts into special strips. Plastic panels are interconnected in a spike / groove, the groove should “look” towards the dead-end wall.
Very important. The quality of the entire skin largely depends on the correct position of the first panel. Only deviations within a millimeter can be imperceptibly corrected, everything that is more will be visible.
After the spike of the first panel is fixed with a stapler, the second panel is inserted into the groove, its position is checked and fixed. Along the axis of the panel, they are perfectly cut with an ordinary sharp mounting knife. If you have experience, then you can cut off the front and back surfaces in one pass.
Experience is not enough - first cut one side, bend the panel and cut off the second. In the transverse direction, an electric jigsaw is used for cutting (the saw must have fine teeth) or a grinder. Both tools cut perfectly, but working with a jigsaw is much more convenient and safer.
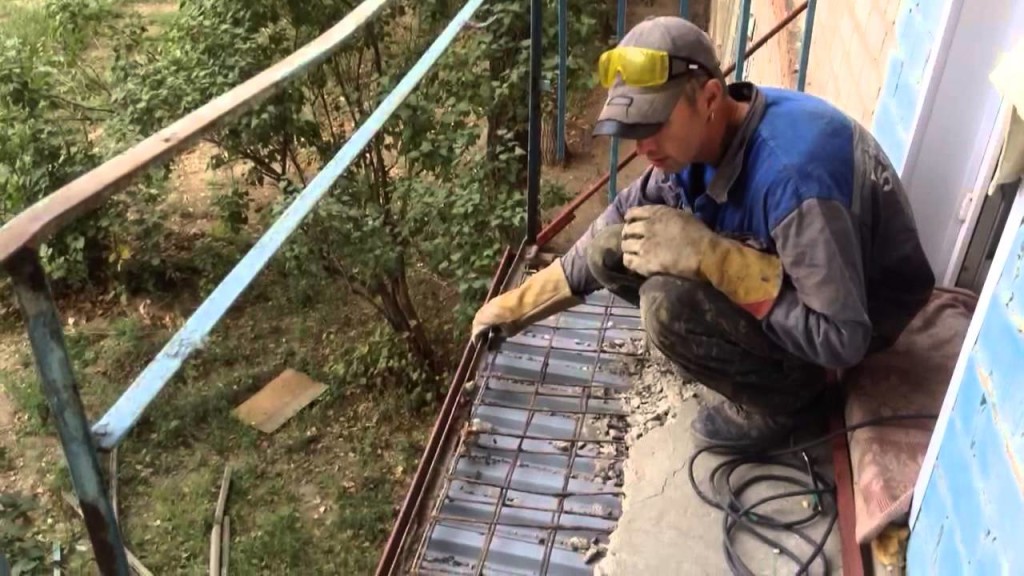
Features of sheathing the external walls of the loggia with plastic panels
For sheathing with plastic panels of the external walls of the loggia, only those materials that are resistant to hard ultraviolet rays should be used. The connection of the panels is quite tight and does not allow water to pass through, but for a guarantee, you can make waterproofing with plastic wrap. As for heaters, it is better to use foam, it does not absorb moisture, does not get wet and does not change its original heat-saving characteristics for the entire period of operation. The film will serve as additional waterproofing during mechanical damage to plastic sheets.
Finishing the external walls of the loggias has several advantages:
- the useful internal area of the loggia does not decrease. The thickness of the insulation is regulated only by the climatic conditions of residence, if desired, it can be increased to ten centimeters. Due to this, heat losses are significantly reduced, staying in the loggia becomes more comfortable;
- external walls are protected from destruction, architectural structures are strengthened. It is possible to improve the quality of floor insulation;
- getting better appearance facade walls. Sheathing materials are selected taking into account the general style of the building;
- there are no restrictions on the environmental safety of the materials used.
To finish the external walls of the loggia, it is better to prepare the supporting frame from galvanized metal thin-walled profiles. But professional builders allow the use of ordinary wooden slats. To increase stability, it is recommended to impregnate them with any antiseptics. There are no such at hand - you can proliferate the surface several times or cover it with ordinary, cheapest vegetable oil.
If gaps are found in the walls that do not affect the bearing characteristics of the structure, then there is no need to repair them with cement-sand mixtures. It is enough to moisten the fracture surface and seal it with mounting foam. After it dries, the protruding remnants are cut off along the plane of the wall.
And the last important point - very carefully make the upper part of the skin, it is through it that moisture can enter.
Video - Algorithm to separate the loggias with plastic panels
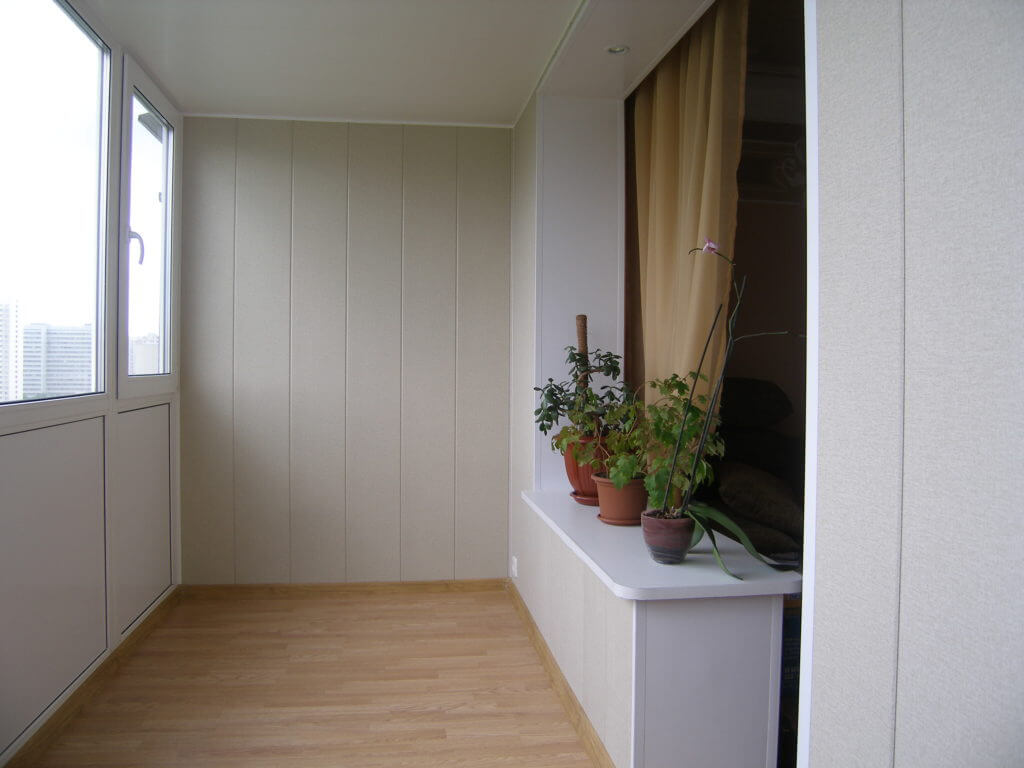
To create a quality interior on the balcony, you should take interior decoration seriously. It should not only be well insulated and insulated, but also have enough space.
Do-it-yourself interior decoration of a balcony is a laborious process that even a non-specialist can do. The main thing is to choose the right material for sheathing and the right installation technology. Among the finishing materials, plastic (PVC) panels are the most popular.
The main advantages of PVC panels
The interior decoration of the balcony with panels has the following advantages:
- resistance to cold, heat, moisture and other weather conditions;
- qualitative effect of thermal insulation;
- ease of care eliminates the use of special cleaning products;
- combined with a beautiful appearance;
- an extensive range of colors will allow you to perform even the most unusual design solution.
Do-it-yourself interior decoration of the balcony - step by step instructions
Before starting work, you need to purchase the necessary tools. For sheathing, you will need the following set: a hammer, a level, a tape measure and mounting material.
Preparatory work
This is the first stage, which includes the following steps.
- Wall alignment. In order to avoid further deformation of the panels, on the surface to which they will be glued, all irregularities must be removed. The walls are measured by the level, if there are deviations of 2 - 3 cm, they must be leveled. For this, it is used, which is applied in two layers (base and finish).
- Calculation of the amount of material. To do this, measurements of the ceiling, floor and walls are carried out using a tape measure.
- Purchase of plastic panels and fittings. It is better to purchase them with a 10% margin.
It is better to start this stage from the ceiling, moving to the walls and finishing with the floor. Both metal structures and wooden slats are suitable for crates. The starting profile is fixed in the corners with self-tapping screws. Then, plumb lines are installed on the ceiling in increments of approximately 40 - 50 cm, on which a guide profile is attached.
Similarly, the lathing of the walls is done. Based on the width of the walls, profile structures of different lengths are installed. do the same at this stage. For the resulting cells of the crate, you can put polystyrene foam or mineral wool.
Do-it-yourself installation of PVC panels
This technology is used for sheathing solid walls. If there are openings, you need to take into account some of the nuances. First of all, sheathing is done above and below the opening, using a special profile (L or F).
- Panels must be at room temperature before installation.
- The notches on the cuts can not be cut off, they will still close with a corner or go into the groove of another panel.
- It is better to cut off the panels with a margin. If suddenly the incision turns out to be sloppy, it can be done again.
- If you purchase a saw for plastic, you can achieve an absolutely even cut.
A photo. Interesting interior design ideas. Some balconies