Wall template. Stencils for walls for painting: original and fashionable design
Why are stencils so popular? Their types and features
A quick, economical way to update an interior or give a special charm to a room is to use different models of stencils for painting on the wall. Creative people with an artistic gift paint surfaces with original ornaments, create an original canvas. You can use ingenuity: do not use stencils, but reproduce spectacular blots, gradation, multi-colored "mold". But, if the decor involves repetitive elements or special combinations, then it is wiser to use templates. This technique will allow you to perform an unusual design of the walls in a matter of hours.
Using a stencil set, you can really combine the elements and get a real picture or a separate image, which will become the main focus of the design project. In this case, it is wiser to purchase quick-drying paints.
Today, several types of templates are in demand:
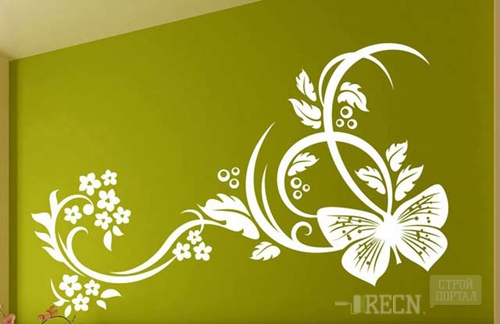
- A simple template without additional details is a single drawing or a fragment of a simple pattern. On the surface of the walls, you can draw different pictures in random order - a cup, floral elements, a butterfly. And the repeating pattern - to arrange according to the plan of the master over the entire plane of the floors or place on selected areas. Such options are good for working with one color.
- The combined type assumes the presence of a separate sheet for each image layer. This more painstaking work will allow you to create a multi-color image or something like a mural without effort.
- Stencils for creating a relief decor are filled with putty, which is then stained with acrylic paint and varnished.
- The reverse option is rarely used. The paint is applied not in the slot, but around the sample on the plane of the walls.
Ready-made templates in the assortment are presented in building markets, online stores, specialized outlets. If an exclusive is required, then it is better to contact printing companies that will help not only develop a picture, but also make all the blanks from high-quality materials. And if desired, any stencils for the walls can be made independently.
Handmade - how to make stencils
The Internet will come to the aid of craftsmen who do not have outstanding artistic abilities. Anyone can download any picture, turning it into a template. In addition, today there are many creative sites offering ready-made life-size stencil samples.

But you can go in a more interesting way: turn any object into a model. Found an expressive shape of a large maple leaf? Take it as a base, circle the contours - and the template is almost ready!
An amazing flower is easy to get from plates attached to the sheet and circled with intricate outlines. Modern clothing labels often have attractive contours: animals, special stylized elements can become part of any ornament.
To make stencils for walls, you will need a special material: a sheet of thin plastic, vinyl or aracal film is quite suitable. For small templates, simple stationery materials are used - for example, a thick plastic folder is expanded to the required format.
Some craftsmen advise making a stencil out of thick cardboard. The stability of the structure will provide a simple adhesive tape: it is pasted over a cut of the edge. It is easy to fix the template with glue or electrical tape, but this should be done as carefully as possible so as not to damage the finishing layer of putty or paint.
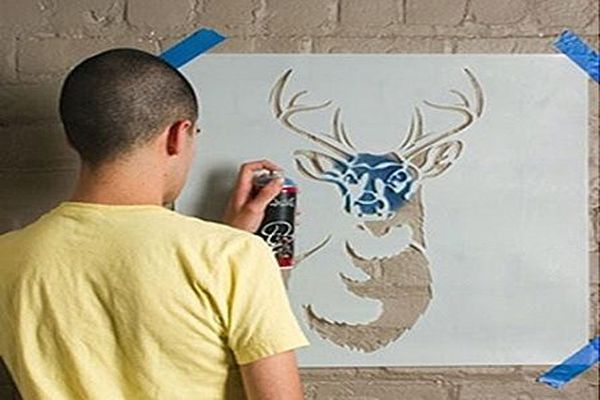
The contours of the drawing on any material can be applied with a marker, felt-tip pen, pencil. A cut is made with scissors or a clerical knife. For dense plastic, cutting tools are used.
If the stencil is disposable, then you can take the usual self-adhesive. The base on the reverse side is removed only along the perimeter of the sheet and the contour of the drawing itself. This is enough to keep the structure on the wall surface for the time required for painting.
Stenciling is a real art
Any form must be drawn with special care. Preliminary marking is done with chalk. Is it supposed to be a linear ornament? Then you should use the building level and put marks along the entire line of the proposed drawing. Single images scattered in a chaotic manner will require less attention, and images located in the center or being a continuation of any objects, applications, need additional measurements and a precisely traced border to which stencils are applied.
If it is supposed to work with a brush, then the contours are first displayed. The roller is well wrung out, the color is produced almost dry. Small details can be "colored" with an ordinary sponge. Failure to follow these rules will lead to "blurring" outlines. When applying images to a painted wall, materials of the same row should be used - another shade on the same basis will perfectly fall on the acrylic layer.
A stencil pattern is considered a fashionable decoration for any home, and a special version based on your own sketches will impress visitors and create comfort for the household.
Modern masters have adopted not only standard techniques:
- The use of paint cans has become popular. Since the tint spray should be sprayed from a distance of about 30 cm, it is worth closing the adjacent wall as much as possible.
- A translucent watercolor water-based emulsion will help create beautiful compositions - white clouds on a blue tint of the walls will be very realistic.
- Juicy colorful pastes, which are used to fill embossed stencils, are resistant to high humidity and are aesthetically pleasing.
Before starting work, you need to draw a template version on any rough surface: this step will help you gain experience and choose the right shade.
Mastery Secrets
Disposable stencils are designed to create one or two images, so they are made from plain thick paper.
For large-scale ornaments, illustrations or wallpaper imitation, high-quality forms from more durable materials that are resistant to moisture will be required.
When implementing global design projects, a large composition is divided into convenient parts, they are combined when transferred to a plane.
Stencils during operation should be tightly pressed against the wall. Otherwise, blurry contours cannot be avoided.
The template must be removed from the walls 20-30 seconds after applying the paint and immediately wiped thoroughly. Acrylic is considered ideal, since materials based on it dry very quickly. But when using pastes or putty, the form must be left until the composition has completely hardened.
Stencils for three-dimensional drawing involve the use of many close shades. Therefore, in order not to be mistaken in the process of work, it is better for non-professionals to mark them in advance.
Examples of patterns from different series for the walls of any room are easy to find on special sites, and the execution technique can be studied in detail using video tutorials.
Since ancient times, people have painted the walls of their houses to make their home more original and stylish. Today there is a large number of ways to decorate vertical surfaces. This is very convenient, because not many people have the talent of an artist to make a beautiful painting with their own hands.
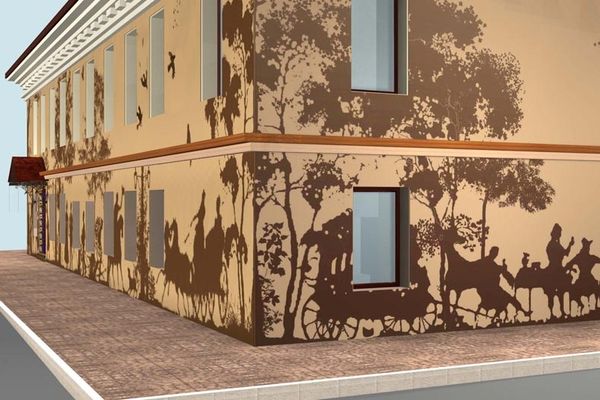
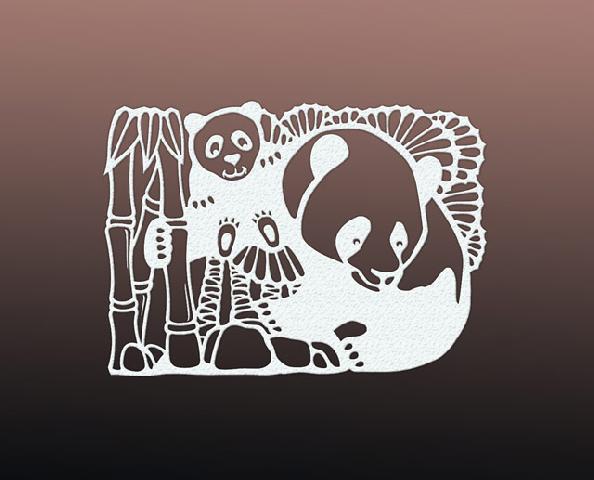
The modern variety of stencils is amazing. There are special templates with silhouettes of people, animals, cities, floral and geometric ornaments depicted on them. The use of stencils with repeating images is very popular, designed to apply a pattern specifically around the entire perimeter of the room.
- Simple, performed in one paint.
- Combined - using several shades of paint and a set of stencils, a complex pattern is made.
- The stencil is voluminous, performed by putty.
- The so-called "anti-stencil" stencil, when the paint is sprayed around a closed stencil area. Such images create a halo effect, a glow around a clearly depicted contour.
- Disposable stencils are usually intended to be used one or more times. Its price is quite reasonable.
- Reusable stencils can be used repeatedly. They are suitable for volumetric design and plaster. The price for them is two to three times higher than for disposable ones.
The best part is that using paintable wall stencils allows you to get the job done in minutes or hours. These materials can be bought at all major hardware stores or ordered online.
We make a stencil with our own hands
- A regular stencil is attached with a special glue. Then paint is applied to it. To create a distinct image, an even layer of dye is applied. Very little is needed to create a vintage paint effect.
- To create a gradient effect, two shades of the same paint are used. To this end, we add a little white to one portion, and black to the other. Gradients are created by going from the darkest to the lightest. You only need to work with a sponge. In the final, we collect clean White color on the sponge and enhance the effect by walking a little along the edge of the light. Similarly, you can decorate the image with a palette and a few sponges. So that the pattern does not look alien, you must adhere to colors inherent in this room.
One secret: to create a color drawing, it is enough to have five primary colors: crimson, yellow, blue, black and white. By mixing them, you can achieve any shade.
- For a three-dimensional stencil, you need to purchase acrylic wall putty, packed in a bucket. Its consistency should resemble thick sour cream or soft ice cream. Putty is applied with a spatula, covering the entire film surface layer by layer until the desired thickness is reached. Too convex pattern will not look good. It is enough to achieve a thickness of 1 - 3 millimeters. If you want to create a larger volume, then you need to apply modeling. Then we wait one minute, which is enough for the putty to grab. Next, remove the film with a careful movement.
- An image made using the anti-stencil technique is obtained very beautiful and mysterious. This results in a glow that forms around the picture of the same color as the wall. To do this, a reverse is glued to a vertical surface. That is, the part that is ejected from a conventional stencil. It is necessary to use glue and paint - spray. How wide of a halo of glow you want to get is how far the paint protrudes from the film. Be sure to complete trial work on paper of the same color as the wall to achieve the desired effect.
- Multicolor and multilayer stencil. For this purpose, several films are created from one drawing. Each one has its own color. We work with each drawing in turn, waiting for the paint of the previous layer to dry completely. We combine stencils according to production marks.
Applying a stencil to the wall
Stencil painting can be done anywhere, depending on your own sense of taste and concept of beauty. If you want to decorate a small wall area, you can apply small drawings near sockets, switches.
The drawing looks very impressive above the bed, table or near the door, window. In these places, the image fits very harmoniously into the space.
There are the following rules for using stencils for painting walls:
Paint selection
The process of staining does not tolerate fuss. A quality result largely depends on the choice of a good paint. All designers recommend using acrylic paint for stencils.
It dries quickly and stays strong. Suitable for any type of surface: painted walls, wallpaper, panels, wood, glass, fabric. The coloring composition is applied with a sponge, brush or roller.
When working with a stencil, it is important that there is a minimum amount of paint so that there are no smudges.
When using a brush, it must be held perpendicular to the wall. The ink is applied by padding to prevent lint from entering or leaving the ink outside the stencil.
When painting with a sponge, it is necessary to remove excess paint on another paper sheet.
When working with a roller, it is necessary to monitor the uniform distribution of the pigment, especially in small details and corners.
To spray paint from an aerosol can, it must be held at a distance of about 30 centimeters from the wall. In this case, the surface may have to be protected from paint getting outside the stencil.
Color saturation is achieved gradually in several passes. If the borders of the drawing are not too clear, then after removing the stencil they are drawn with a thin brush.
Video "Stencils for walls"
A video about how well you can use various stencils to give your apartment a unique style, to the envy of all your friends.
Are you thinking of renovating? How to decorate walls unusually? Boring wallpaper with a repeating pattern is already tired and out of fashion!I present to you the option of decorating the wall - with a pattern. Graceful butterflies, luxurious trees, animals, color paintings in the entire wall or around the perimeter of the room are available. Even without the skills of an artist, you can create a picture using a stencil.
For drawing, use acrylic paints for thin lines. For a large drawing, use any canned waterproof paint or spray paint. Apply paint with brushes, sponge or roller.Make markings for large paintings, straight lines with a plumb line and level.
Types of stencils:
Single color. The simplest type of stencil, made with only one color of paint.
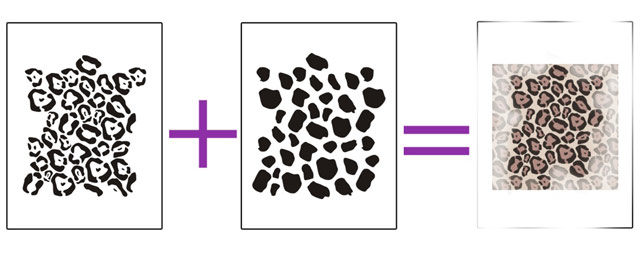
Multicolor. When painting, several colors of paint are used. The result is a colored “appliqué” with a clear distinction between colors. The number of stencils used is equal to the number of colors.

Volumetric. The drawing is done with putty. The picture will "protrude". 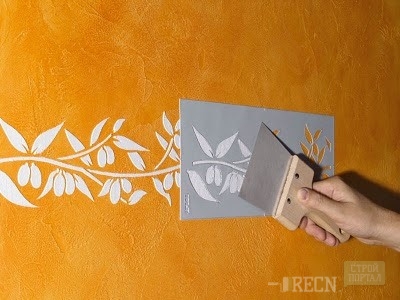
After drying, such a pattern can be painted, thereby highlighting it even more.
Anti-stencil. Only the border behind the stencil is processed with paint. As a result, we get the silhouette of the picture.

How to make a stencil for walls with your own hands?
- Find a finished picture - a stencil on the Internet, print it on a printer. Prepare a dense transparent base, for example, take a plastic folder for papers and cut off a rectangle. Next, attach the picture to the blank and cut it out.
- We take a picture in eps format, send it for cutting on a plotter. Oracal film or thin plastic is suitable for cutting. It remains only to remove unnecessary cut out elements and the stencil is ready.
- Take a piece of paper, fold it in half, draw a picture and cut it out. In this case, thick paper or cardboard is needed. The paint should not soak the edges of the stencil. If the edges of the paper stencil are even, use adhesive tape or electrical tape to strengthen and protect them.
We fix "home-made" stencils with special glue, adhesive tape or electrical tape. The main thing is that the sticky substance does not damage the wall (when removing the mount, you did not remove it along with the wallpaper or primer).
After applying each pattern, wipe the stencil so as not to “draw” extra stripes by moving the stencil to another place.
How to make a stencil with your own hands
The market is replete with a huge number of ready-made stencils for wall decor, for every taste and budget. Almost every hardware store, especially large retail chains building materials, offer a wide range of ornaments and patterns. But the more valuable will be a drawing created by oneself.
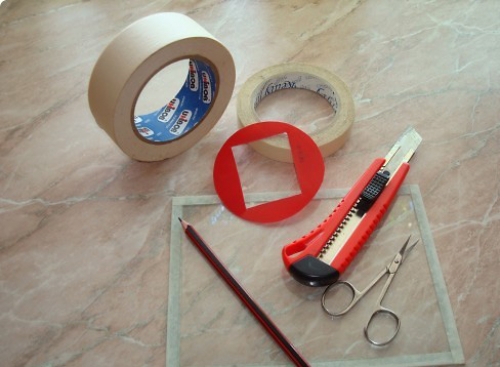
To make your own stencil, you will need the following tools:
- original drawing;
- stencil material (film, plastic, cardboard);
- stationery knife;
- marker, pencil;
- scotch;
- a glass (or other) surface on which it is convenient to cut a stencil.
First of all, it is necessary to decide on the pattern according to which the stencil will be made. Those who have artistic abilities can design and draw it themselves. Those who are not lucky enough to have a talent for drawing, having figured out in what style they would like to decorate the walls or ceiling, can search for a suitable image on the Internet and print it out on a printer. If the pattern is large, divide it into parts, and then fasten the parts together with adhesive tape.
The next step is to choose the material for the stencil. It can be plain paper or cardboard, self-adhesive film or thin plastic, depending on the type and size of the ornament. To simplify the task, you can contact any advertising agency, where they will help you create a stencil from the image and print it.
To transfer the ornament to the material, you need to use carbon paper, or, if transparent plastic is used for the stencil, simply circle it around the contour with a marker. To prevent the drawing from “leaving”, it is attached to the stencil with tape or paper clips.
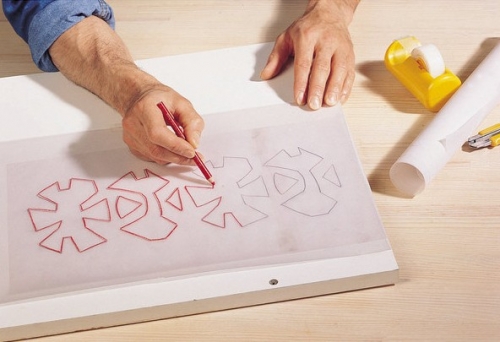
When the drawing is transferred, in some cases it is required to complete it by drawing the lines and jumpers along which it is cut. If the stencil is depicted on paper or cardboard, then it is better to paste over it with adhesive tape on both sides or laminate it so that the paint does not absorb and the jumpers do not twist. This will extend the life of the stencil.
![]()
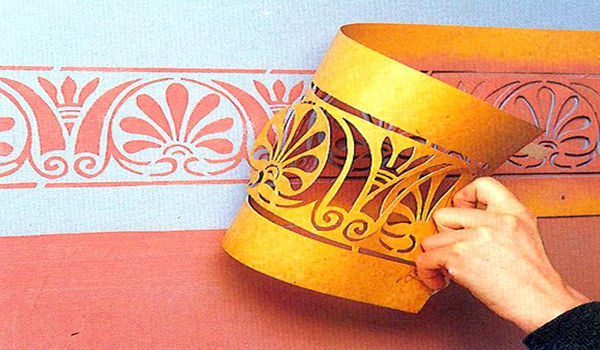
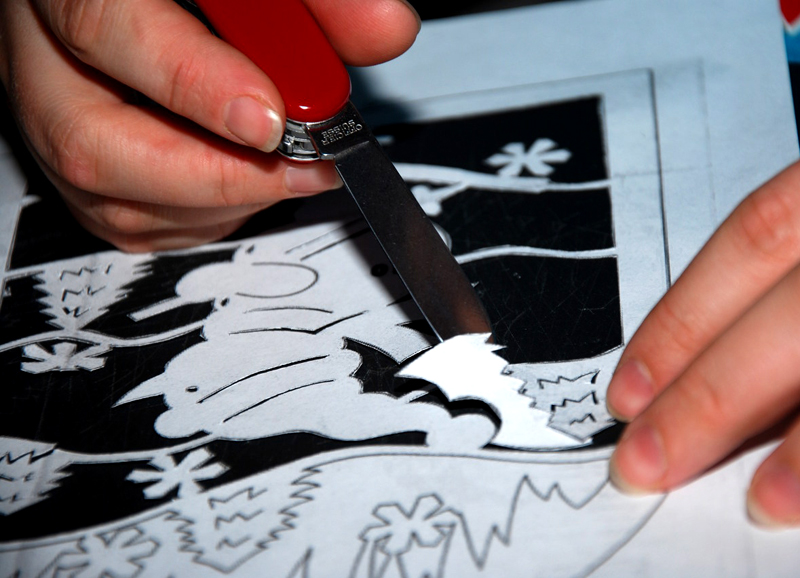
It is important to cut the stencil in such a way that cuts and burrs do not form, otherwise the final drawing will look untidy. Another subtlety - all small details must be attached to larger ones, otherwise they will disappear when cut. Only the areas to be painted are cut out. For this, a clerical knife or blade is used, and glass (or any other hard material that is not a pity to cut) is placed under the stencil, then the cut lines will be more clear and even.
Working with a stencil
Required tools:
- stencil;
- screen glue;
- brush, roller or sponge for applying paint;
- acrylic or spray paint.
First of all, it is necessary to prepare the surface on which the stencil will be applied. Clean it from dust and dirt, if you can wash it, if not, wipe it with a clean dry cloth or vacuum it.
The second step is marking. If possible, it is better to use a level, with it there will be confidence that the drawing will not be skewed or crooked. The extreme points for the stencil are marked with a pencil in order to attach it evenly in the future.
It is recommended that you first practice before responsible drawing a picture on the wall. This can be done on a piece of wallpaper or a large drawing paper. A preliminary sample will allow you to practice the application technique and choose the color of the ornament. It is advisable to make several options for different shades, and try on how each of them will look in the future, attaching the resulting pattern to the wall.
Also, ready-made reusable stencils for wall decor are on sale. They are made of a polymer film that is easy to clean and does not tear, allowing you to train on paper. required amount once.
Aerosol adhesive
In order to fix the stencil on the wall, it is best to use a special spray adhesive. It leaves absolutely no traces, and when using it, you can not be afraid that wallpaper or paint will come off the wall along with the stencil. The glue is sprayed in an even layer onto the stencil, which is then carefully pressed against the surface, especially in places of thin bridges.
What is important to know about working with glue:
- on different surfaces, it holds the stencil in different ways, the smoother the surface, the better the adhesive properties of the adhesive;
- after removing the stencil, the glue does not remain on the wall;
- glue is applied to the stencil, and provides maximum adhesion with it;
- after washing the stencil, the glue can retain adhesive properties, so if you plan to reuse, then the glue can not be completely washed off;
- the larger and heavier the stencil, the more difficult it is to hold it only on glue, in such cases you may need a “safety net” in the form of masking tape;
- it does not prevent paint from flowing under the stencil.
Coloring
Coloring is an activity that does not tolerate fuss.
For stencils, it is recommended to use acrylic paint, it dries quickly and is suitable for all types of surfaces. The paint is applied with a brush, sponge or roller. It is important that when working with a stencil, there should be a minimum amount of paint to eliminate the possibility of leakage.
When working with a brush, it is held directly perpendicular to the wall, the paint is applied by stuffing, to prevent lint or paint from getting behind the stencil.
If staining is done with a sponge, then the first prints are best done on another sheet of paper, this will allow you to remove excess paint.
When working with a roller, it is necessary to ensure that the paint is distributed evenly, especially in the corners and small details of the stencil. It is more convenient for them to work with large stencils.

To spray aerosol paint, the can should be held at a distance of about 30 cm from the wall. It is possible that the surface will have to be additionally protected from accidentally getting paint outside the stencil.
Saturation of the picture with color occurs gradually, in several passes. If its boundaries are not clear enough, they are drawn with a thin brush after removing the stencil.
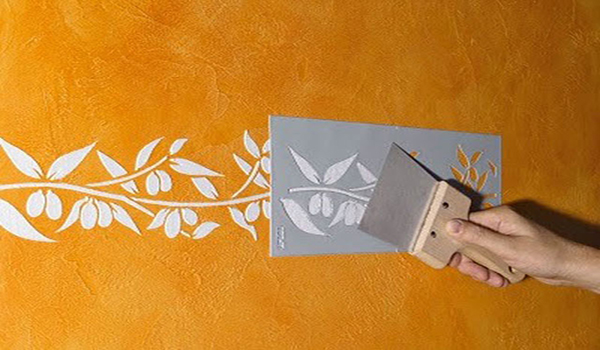
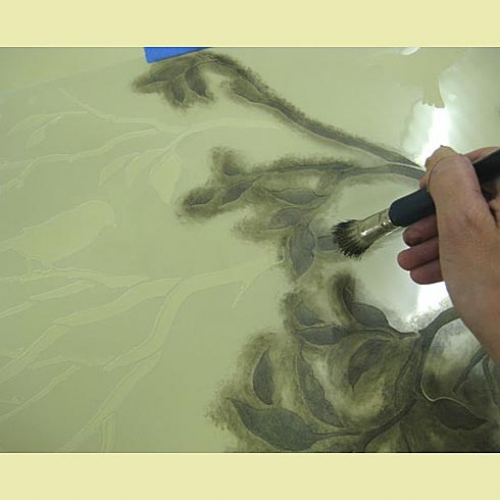
Creating a three-dimensional drawing
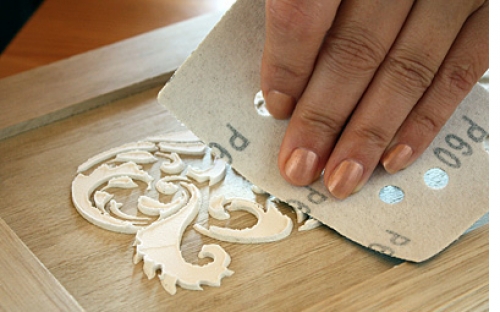
To apply a three-dimensional pattern, you will need a special acrylic putty. It is applied with a spatula, gently layer by layer, until it reaches the desired thickness. Volumetric drawing is usually achieved with a thickness of 1-3 mm. A couple of minutes after application, when the putty has already set, but has not completely hardened yet, the stencil must be carefully removed so as not to damage the ornament. If the layer turned out to be not very even - it's okay, after the putty has completely dried, it is easy to level it with a fine sandpaper. Then the drawing can be colored or toned.
When the work is completed, the stencil must be washed and dried, if possible, for reuse.
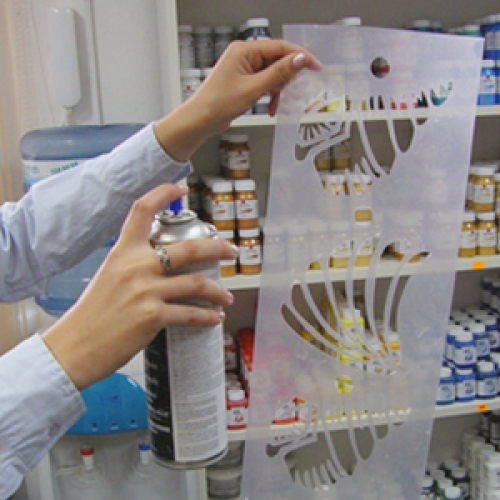
We buy acrylic putty for walls in a bucket. Its consistency should be like that of soft ice cream or thick sour cream. However, that's usually how it is. And we apply putty layer by layer with a spatula, covering the entire surface of the film until we reach the desired thickness. Too protruding drawing will not look beautiful, it is enough to achieve 1-3 mm of thickness. (If you want a more voluminous effect, you should resort to sculpting.
![]()
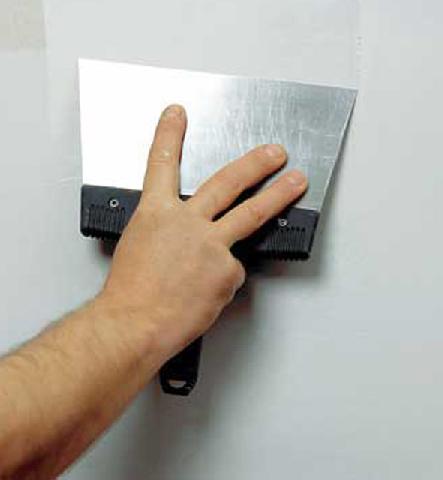
Then we wait exactly one minute. This is enough for the putty to seize, and with a careful movement we remove the film!
4. Anti-stencil
The result is a very beautiful image, with a glow effect around the main picture in the same color as the wall. This is a stencil in reverse. A backing is glued to the wall, that is, what is thrown away from a regular stencil. Be sure to use glue and spray paint. Extend the ink layer as far away from the film as you want the halo to be. Be sure to do a test job on paper of the same color as the wall to achieve the desired effect.
5. Multi-color layered stencil
For him, several films are created from one drawing, each for its own color. We work with each one in turn, waiting for the paint in the previous layer to dry completely. We combine stencils according to the marks made at the factory. Therefore, the work is easy.
Avoidable Mistakes
The most common mistakes that happen when working with a stencil are:
- stencil offset;
- paint leakage.
To avoid such troubles, you need to securely fasten the stencil, spray glue is the perfect assistant here. And also to collect the minimum amount of paint. Accuracy and patience will undoubtedly help to achieve the perfect result.
Practice shows that those who have studied the stencil manufacturing technology and carefully read the instructions for use and coloring are always satisfied with the result.
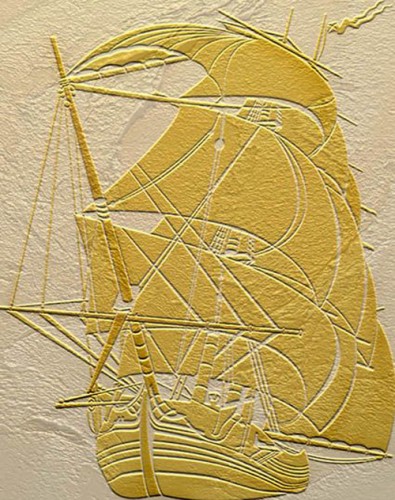
Stencils for wall decor photo

Stencils for decorating kitchen walls

If you do not have time to make a stencil by hand, go to a specialized store or on the Internet, where you can buy decor. You can buy a ready-made cut out pattern, or order yours for cutting. Along with a large stencil, you get a small test one, instructions.
How to work with him? Mark a place for gluing, remove the protective film from the back and attach it to the wall. Carefully smooth the stencil during the gluing process so that no air bubbles remain. At the end, remove the protective film from the front side and you can start painting.
On the wall, you can draw not only pictures, but also numbers. It is enough to take a beautiful digital stencil and “write” the house or apartment number in an unusual way.
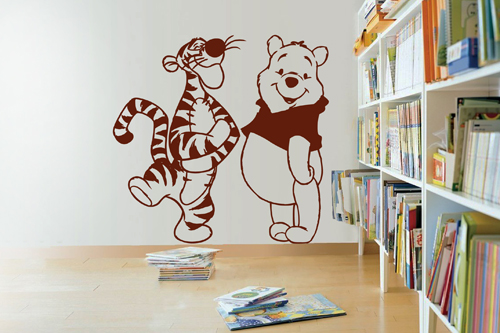
Let your imagination run wild when decorating a child's room. Decorate the walls, ceiling or wardrobe with characters from a fairy tale, your favorite cartoons. The child can do the “painting” of the walls under your supervision. Be sure he will love his room, because he did the decor in it himself!
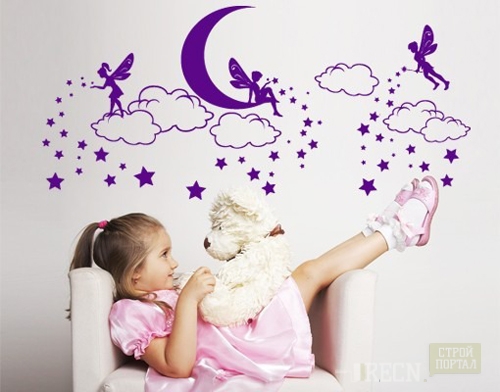
Everything magical attracts children. Create a starry sky on the ceiling. To do this, you need a stencil with stars of different sizes, constellations, the moon, planets, comets. Color them with phosphor paints. During the day, the drawing will “collect” light, at night it will scatter, creating the impression of a glow.
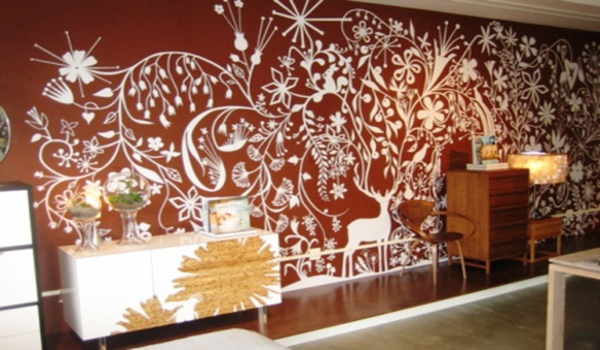
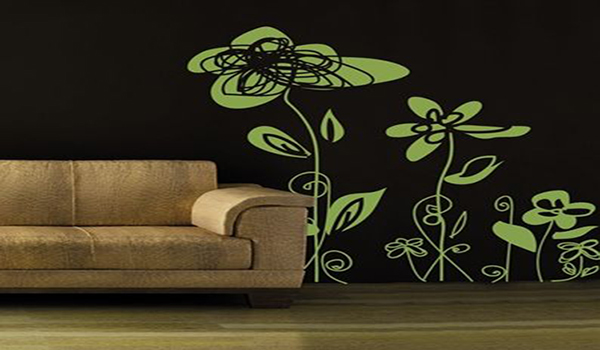
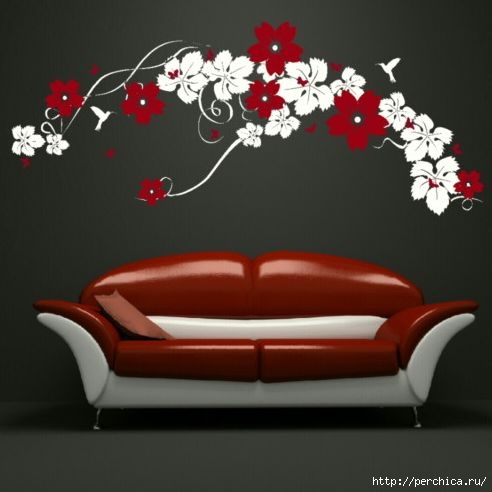
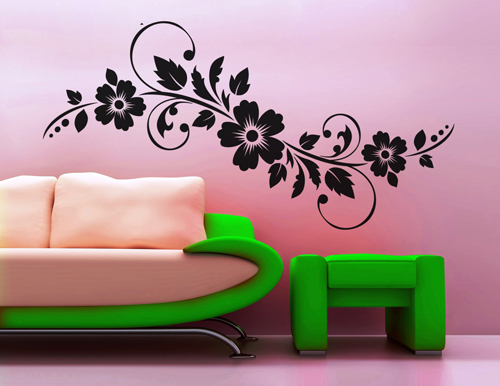
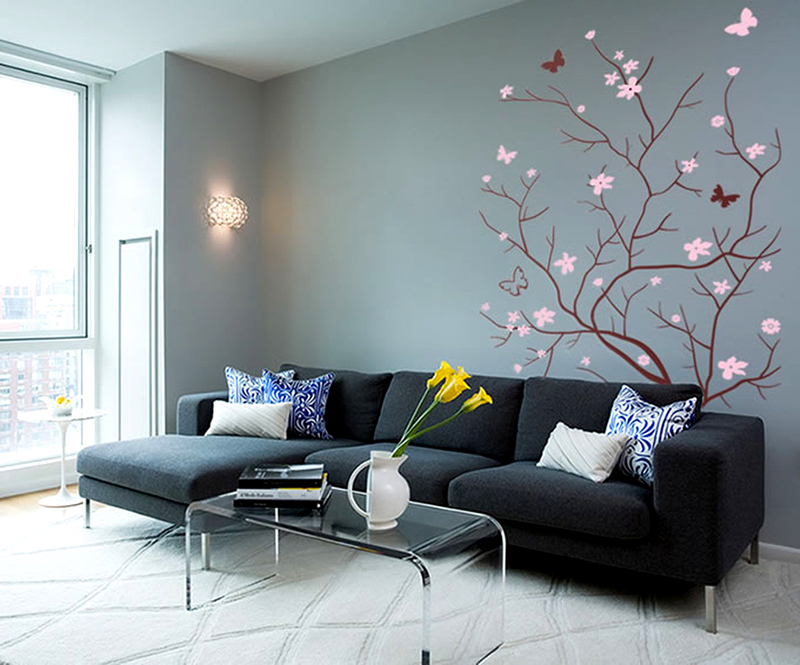
The living room will be decorated with birds, flowers, animals, trees ... The choice depends on the basic style of the room. The drawing must comply with it and complement, necessarily a combination of colors used in the interior.
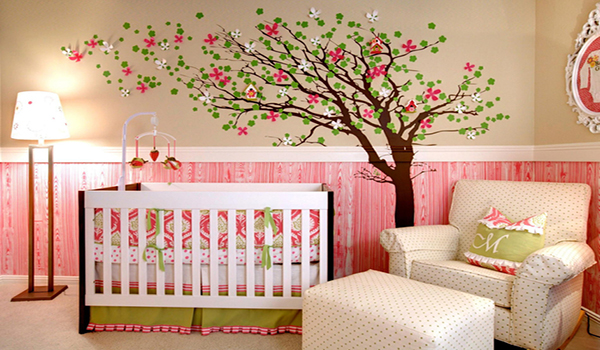
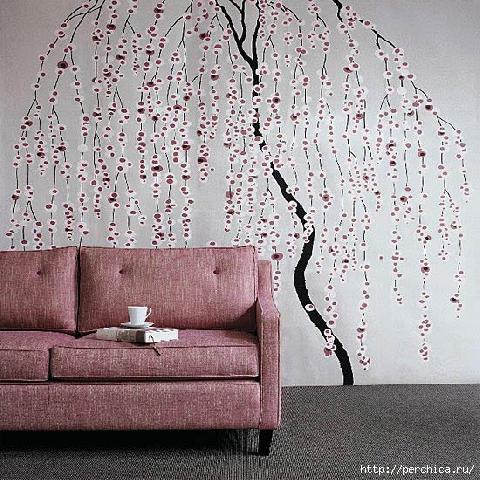
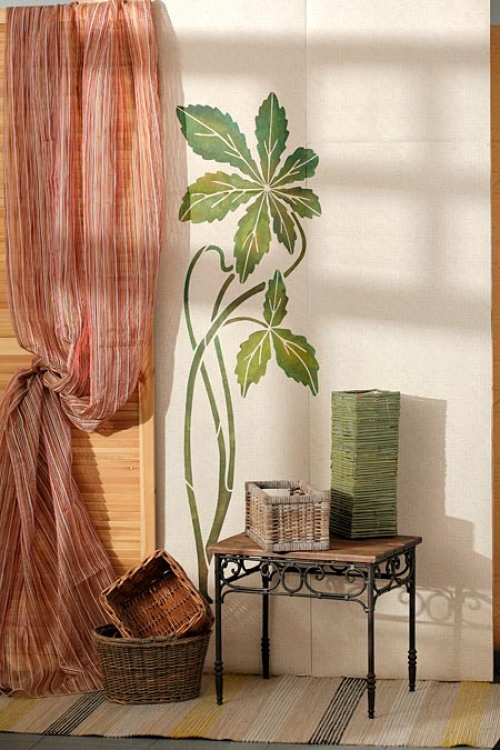
The stenciled drawing of a tree on the wall looks advantageous, smoothly flowing onto an embroidered similar drawing on sofa cushions. Corner drawings will highlight the ceiling and make it voluminous, and framing the chandelier socket will add chic.
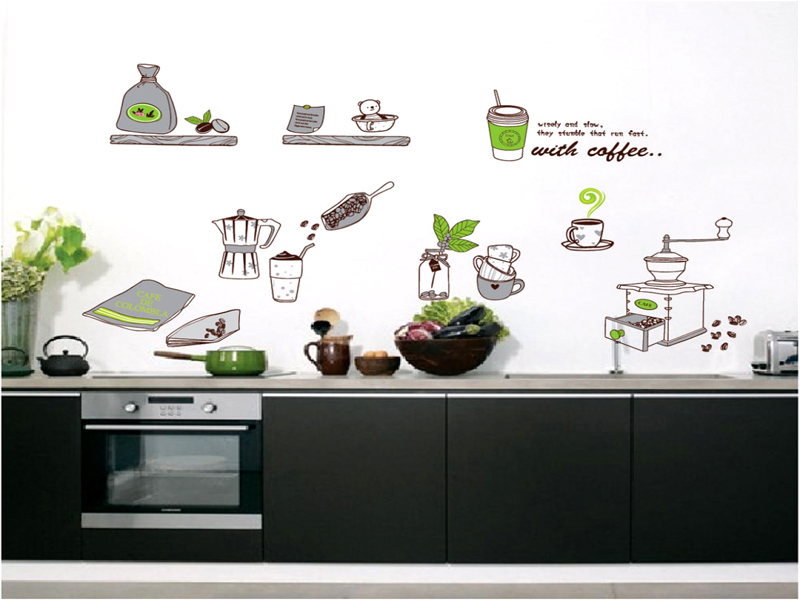
Braids of flowers “embossed” on the walls, modest bouquets are kitchen decorations. Keep minimalism. The kitchen is always full of appliances, utensils, different cabinets, shelves, so colorful repeating patterns are unnecessary.
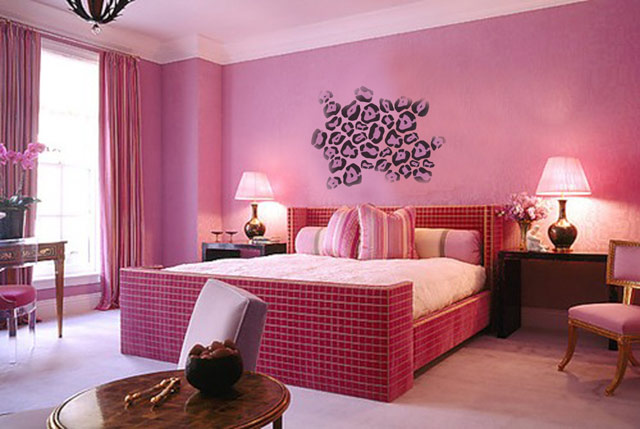
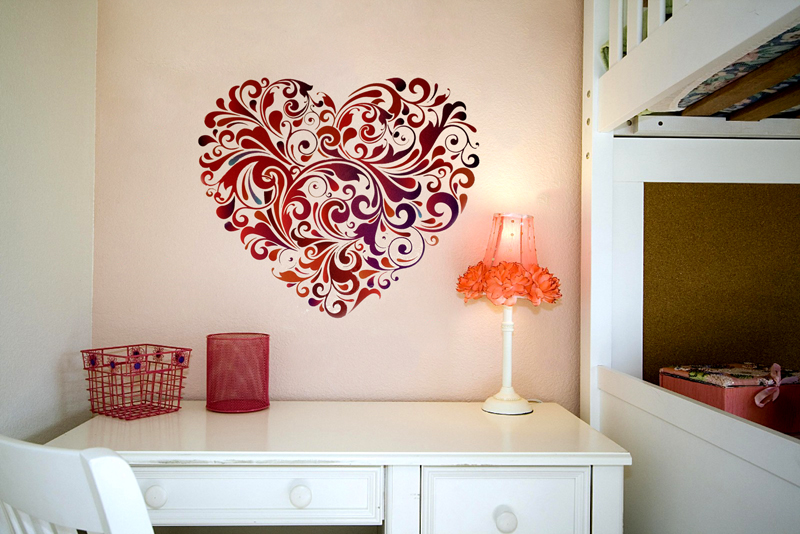
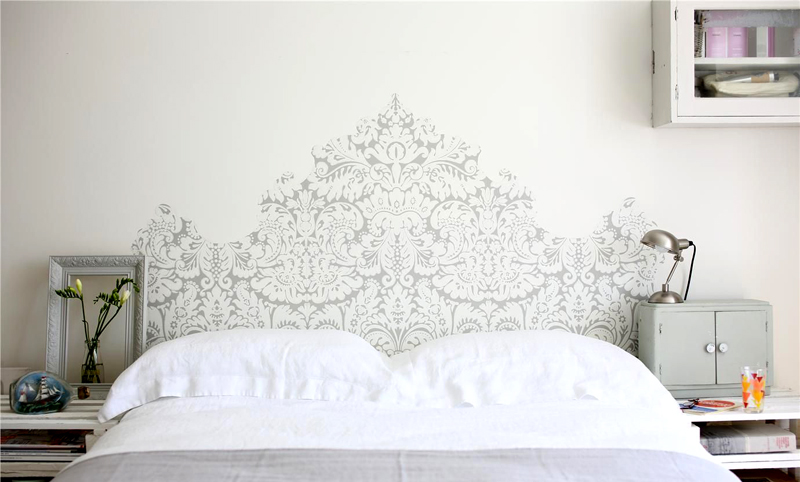
In the bedroom, soft monochrome drawings of animals, angels, flowers, trees, fairies are appropriate. Place a wood pattern at the head of the bed, preferably in the same color. It will give the impression that the bed is in the branches. The angels will "carry" you into the clouds.
When designing bathrooms, they prefer drawings of marine animals (dolphins, fish), swans. Drawings-paintings in the entire wall are appropriate. Paint all the walls and ceiling, so when you enter the bathroom, you will find yourself in a fabulous fantasy world where you will relax after a hard day's work.
Why not use letter stencils in Russian? Write a beautiful phrase, the name of the baby, an excerpt from your favorite fairy tale ... this will make the interior unusual. A letter stencil can be used to decorate the facade (writing the name of the street).
To date, hieroglyphs, inscriptions on foreign languages placed around the perimeter of the room near the ceiling. The letters are designed in such a way that it gives the impression of a pattern, not an inscription. You can only see letters and words if you look closely.
From the first letters of the surname and name, carved intricate stamps are created, which can also be transferred to the wall using a stencil and make the interior truly exclusive, only yours.
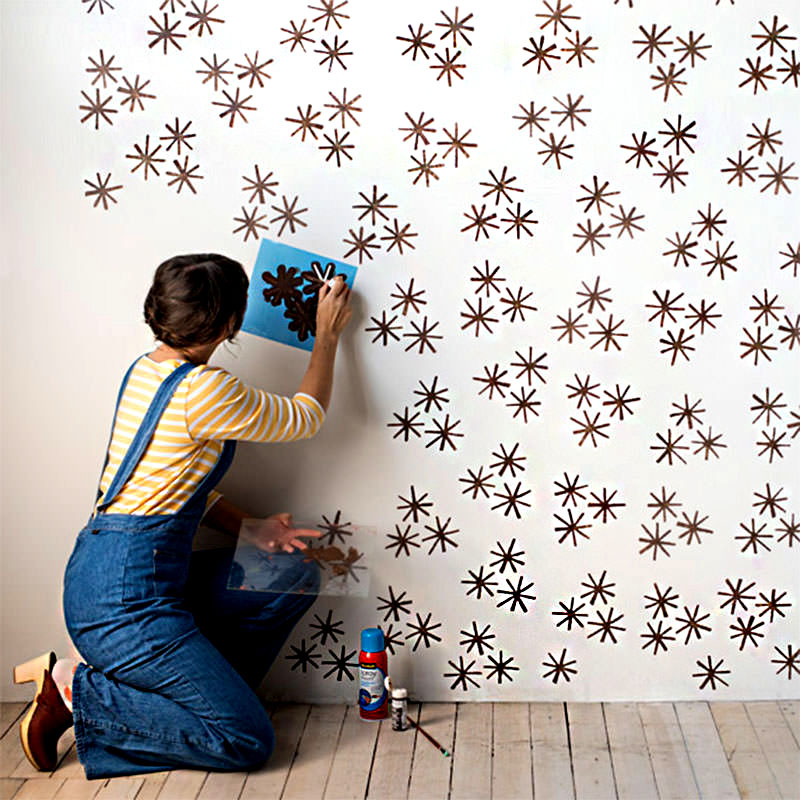
Highlight one wall in the apartment for a flight of fancy. First, draw a simple pattern on it. Then, over time, it can be improved by adding some elements. Thus, you will change appearance rooms without changing anything. Draw the branches of the tree, then the leaves, flowers, birds. Add lanterns, sky, people, bridge, etc.
You see, fantasy is limitless, and on your wall is no longer just a tree, but a picture created by your own hands!
Exclusive drawings on the walls are a stylish element of decor. are gradually being replaced by modern design with the use of advanced painting technologies and the use of modern materials. for walls for painting will help to create a unique design in a room for any purpose. How to choose the right template, where to place the picture? About this and much more - in our material.
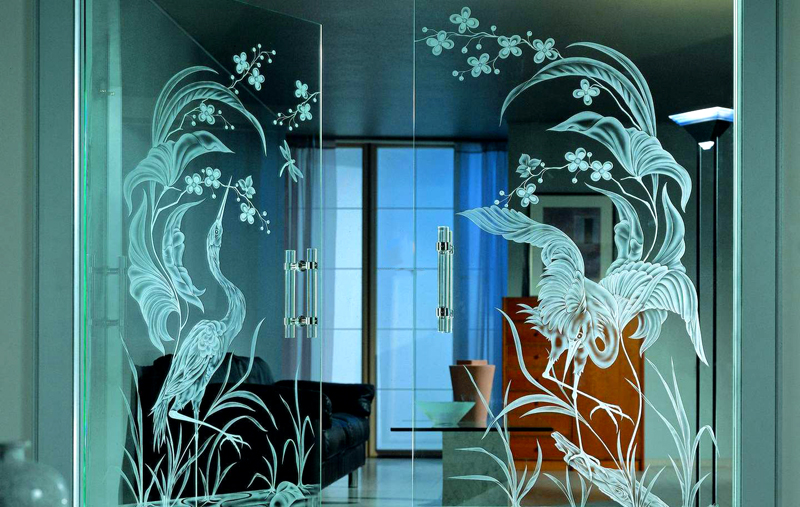
Stencils or templates are a pattern cut out on plastic or cardboard. They can be used repeatedly, shifting to a new plane. Walls, mirror surfaces, furniture, floors, doors are decorated with a template.
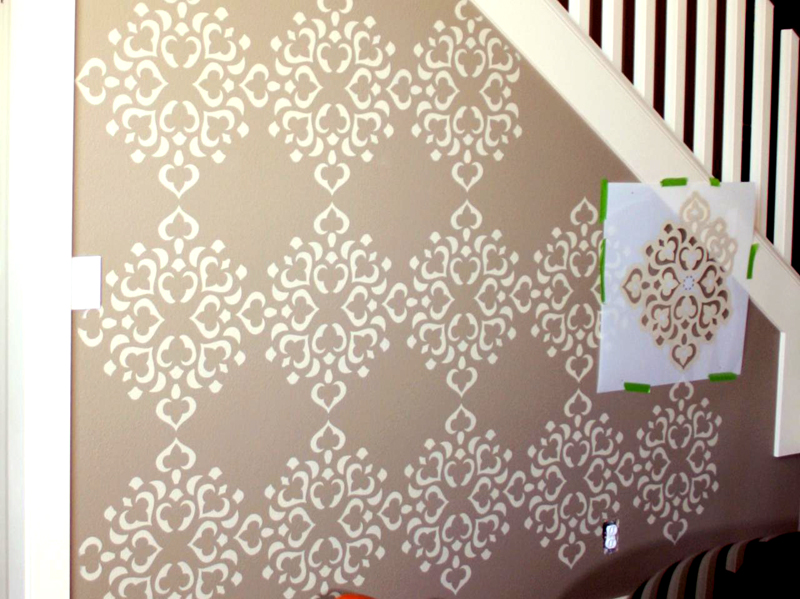
With the help of large stencils, you can decorate a room from ceiling to floor. To be convenient in work, they are made of several elements.
For use, the drawing is fixed on a plane and paint is applied over the template with a brush, roller or sponge.
Important! The stencil paint should be thick enough so that it does not run down the wall.
Types of stencils:
- In one color - the image is made in one color on a contrasting wall. This is an easy and quick way to decorate.

- Image from . For such a drawing, several interconnected templates will be required, each for its own paint.
- Shadow image. This option is called anti-stencil. The image is obtained by applying paint outside the template.
- Volumetric drawing is created through the use of putty. Stencils for such an image are made of thick material.
Related article:
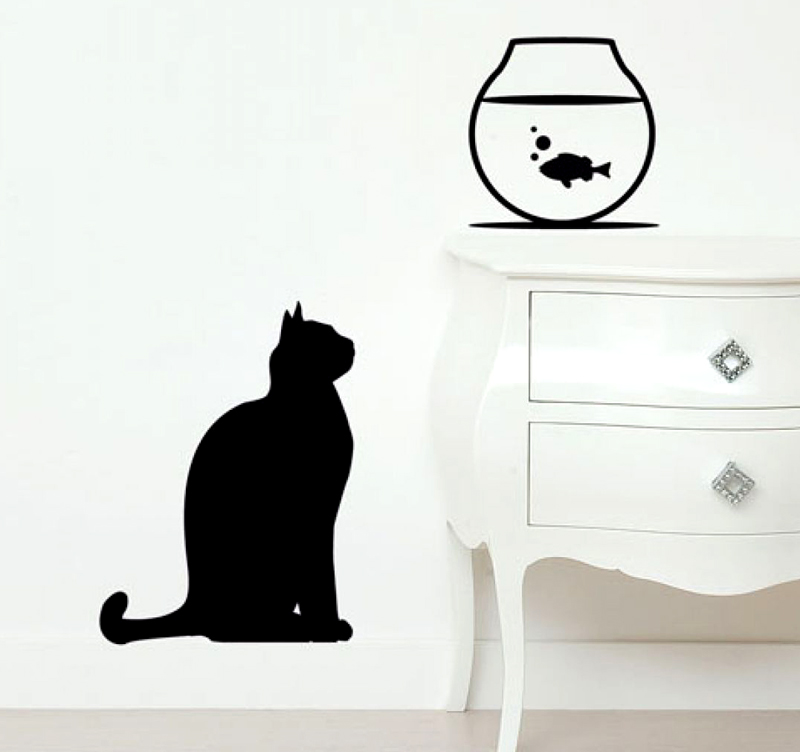
What are stencil drawings, how to make and apply them correctly, stencil templates (, cats, butterflies) and helpful tips- read the material.
Where to begin
You should start by choosing a picture. The image must match the style of the interior. Geometric and abstract patterns are suitable for hi-tech, rococo and classics are exquisite monograms. In the children's room, images of animals and fairy-tale characters will be appropriate, and in the kitchen - fruits. However, there are no strict rules.
You can buy stencils for wall decor at a decorating store, but it’s much more interesting to make them yourself, according to your own sketch.
If you lack artistic skills, you can choose and download for free on the Internet. Yandex presents many options for the most demanding taste. A drawing of a suitable size is printed on the printer in whole or in parts.
Advice! Do not get carried away with small details on the template. They will be hard to see from afar. In addition, small elements are difficult to paint over, they will merge into one whole and spoil the whole impression.
If you are thinking about putting the image on the wall, then you already have some idea of \u200b\u200bhow it will look. There are some tips from designers that will help you decide on the pattern.
| Advice | Image | Description |
 | The image can visually increase or decrease the area of the room. Geometric lines placed in a certain order can even create the effect of a figure bulging or recessed into the wall. Drawings depicting a landscape or a space that goes into perspective can “break” a blank wall. It is important to ensure that the furniture also participates in the overall design. | |
 | Overthinking the details and number of characters will cause any good idea to fail. If we are talking about a children's room, it is worth limiting the number of cartoon characters drawn on one wall to three and carefully consider the space surrounding them. | |
 | Before choosing the tone and shape of the picture, evaluate the level of illumination of the wall. With a lack of light, saturated dark colors will look gloomy and dull, and an abundance of light will give light tones a cheap primitive look. |
Selection of a pattern for a room depending on its purpose
Bedroom
This room is hidden from prying eyes and is the personal space of the owners of the apartment. A calm, peaceful atmosphere should reign here. You can achieve this result by using a soft pattern made with pastel colors.
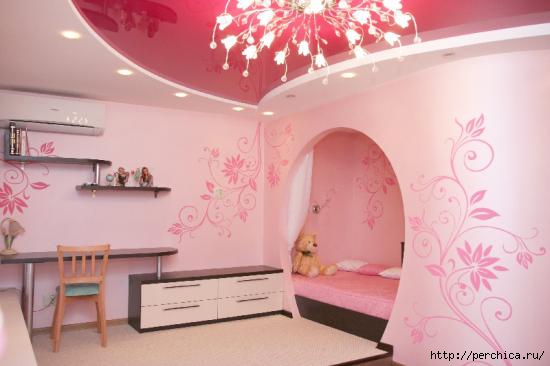
Children's
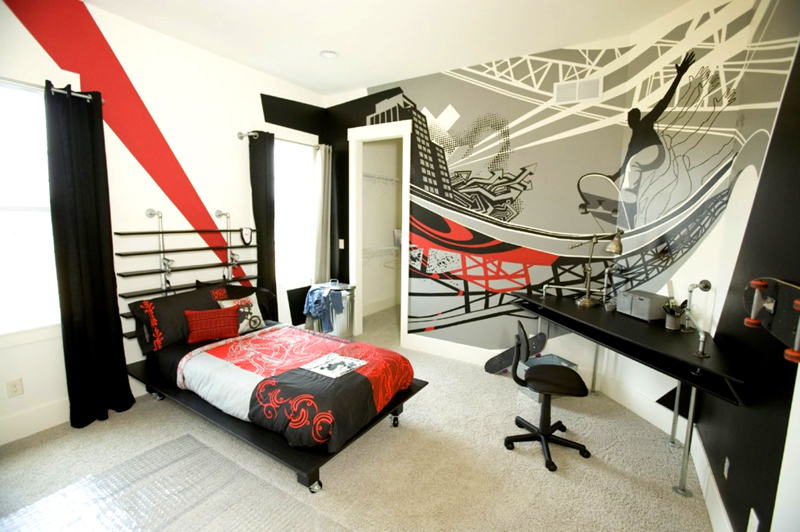
Stencils for walls for painting should be selected based on the age, gender and interests of the child. Cartoon characters will be happy to settle in the baby's room. For a little girl, a floral ornament is suitable, for a boy - a sports theme. In a teenager's room, you can draw anime characters or computer games.
Kitchen
For the kitchen, everything is simple - any images on the topic of food and its preparation will fit the interior. Juicy fruits, dishes and floral motifs are written in any interior.
Living room
The selection of drawings for the living room should be approached with a special predilection. Keep in mind that this image will be seen by guests, so it must be flawless. For decoration, an image of a tree, exquisite and silhouettes of birds is suitable.
Hallway
There is always a large mirror in this room, the stencil can be applied directly to the edges of the mirror surface. You can beat the pattern by extending it to the wall, mirror and furniture.
Do-it-yourself drawings on the wall in the apartment
Stage 1 - preparation
To create a template, use cardboard or soft plastic. Sticky backed vinyl will do. It sticks securely to the wall while you work. But such a stencil can only be used once. The advantages of all these materials are that they do not deform under the influence of paint, which cannot be said about ordinary paper.
If paper is the only option, then try laminate it with film. This service is easy to get at any photo studio or copy center. It is best to pre-print stencils with ornaments and patterns on paper and transfer them through carbon paper to cardboard.
Stage 2 - choosing a place
Template images look good on a large, furniture-free wall. good decision will use the stencil in the switch area. This place gets dirty the most, the drawing will help hide the traces. The transition of the image from the wall to the furniture or floor looks original.
Stage 3 - preparing the wall and tools
Before applying the image, the wall should be cleaned of layers of the old coating and carefully leveled. The easiest way to apply the image on a flat dry plaster. painted in the main color. The base should dry well. The stencil image can be applied to the wallpaper.
To apply stencils for painting for walls, you can use a roller, brush, sponge, aerosol can, airbrush. Paints can be acrylic, gouache or tempera. It is better to use dyes that are resistant to moisture.
Advice! If there is no experience in drawing, take an image with one paint or a combination of no more than three shades.
Stage 4 - drawing a picture
If the drawing is large and consists of several multi-colored elements, first the image must be transferred to the wall with a pencil and check the correct location of all parts. Consider yourself a master - draw right away, but if this is the first experience, it is better to measure once and check seven times.
Advice! To mark up a large drawing, it makes sense to line the wall into squares and fit elements into each so as not to lose proportions.
Now let's start coloring. Paints should not be too liquid, otherwise smudges will appear. Each element of the pattern should dry well. You can use a hair dryer to speed up the process. Keep it at a distance so that the drawings do not spread to the sides under the pressure of the fan.
Stage 5 - fixing
After the image on the wall dries, you need to fix it with acrylic varnish. It should be applied in a thin layer and very quickly so as not to spoil the image. Use a hair dryer to speed up drying.
We offer to print stencils of ornaments and patterns
On the net you can find many drawings suitable for decorating a room. As an idea for printing, not only images of flowers are used, but also drawings for children's coloring books, sketches of tattoos.
To print a stencil on a wall for painting, you should select a black and white sketch and enlarge it onto a sheet. For large images, you will need a special program that divides the image into several parts for printing.
Ideas for work
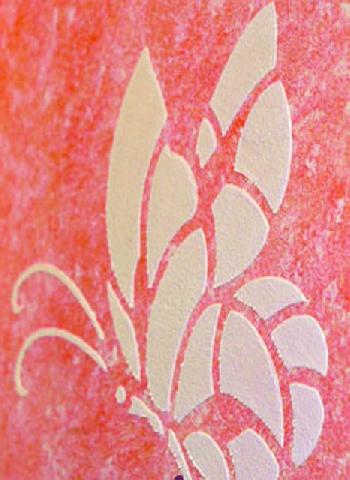
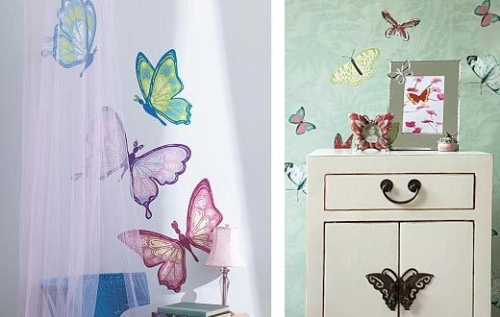
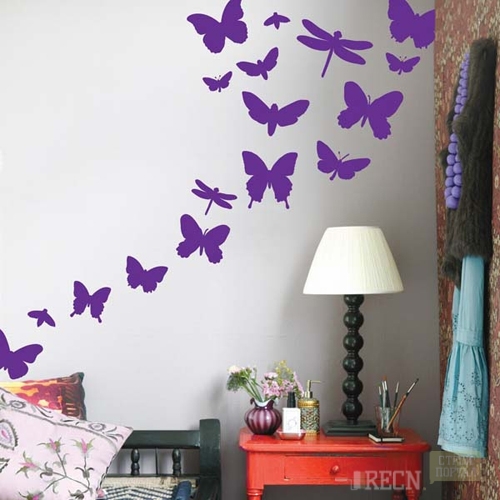
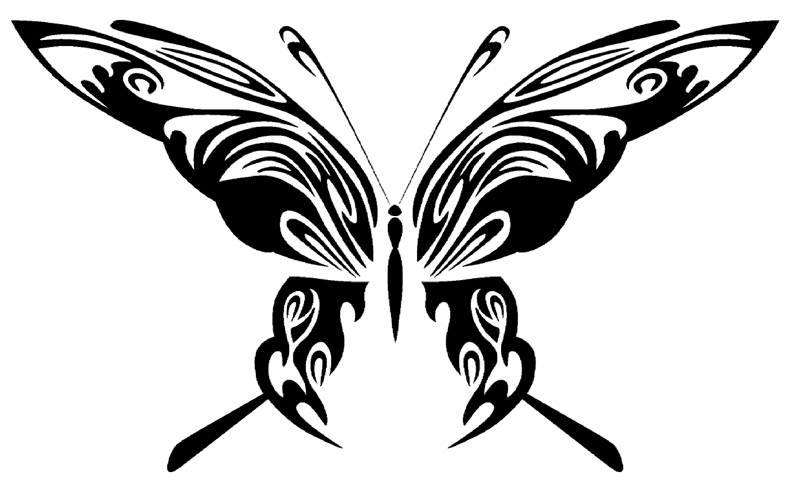
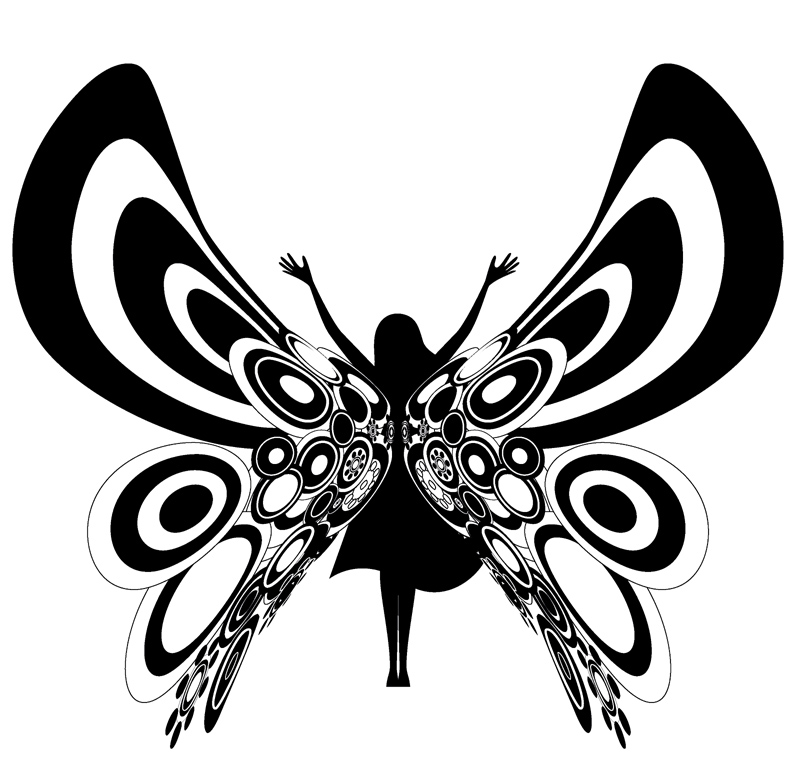
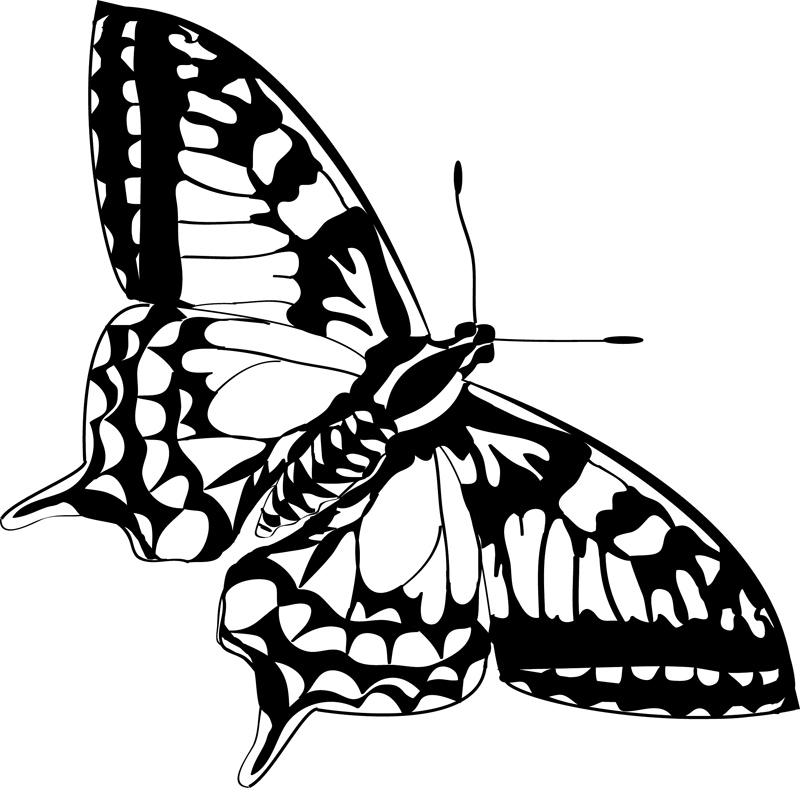
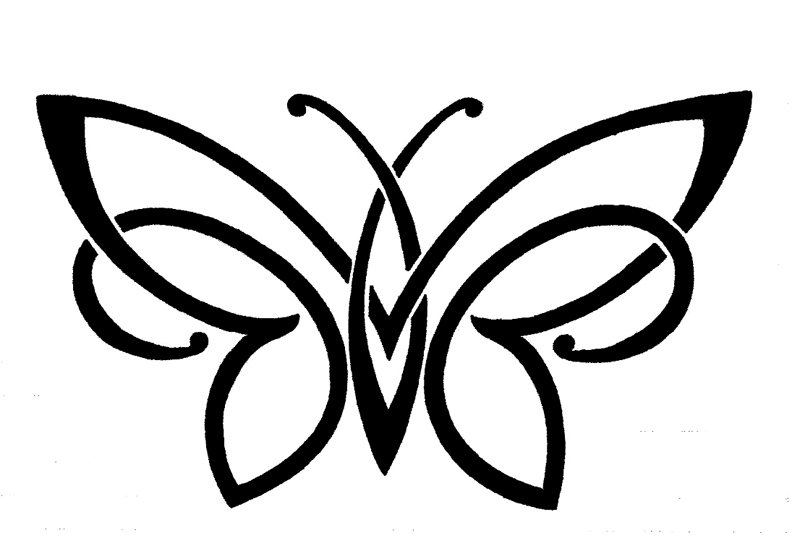
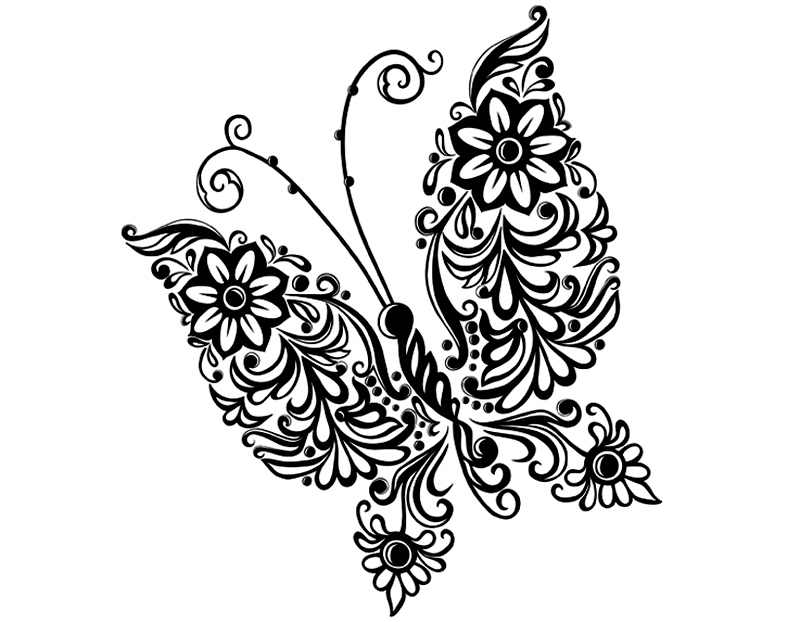
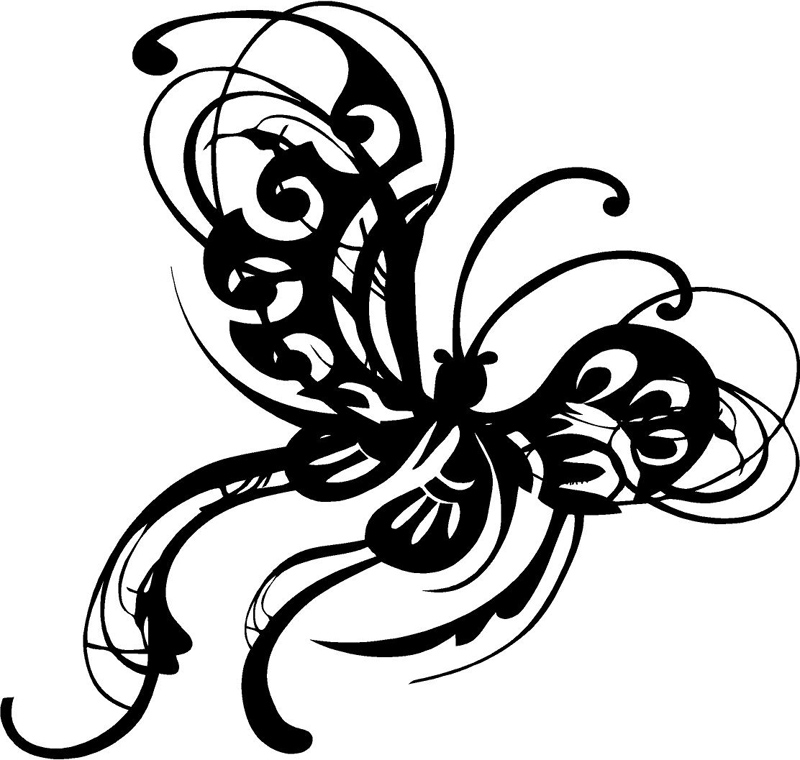
Butterfly stencils on the wall for cutting, 10 options
1 out of 10

![]()

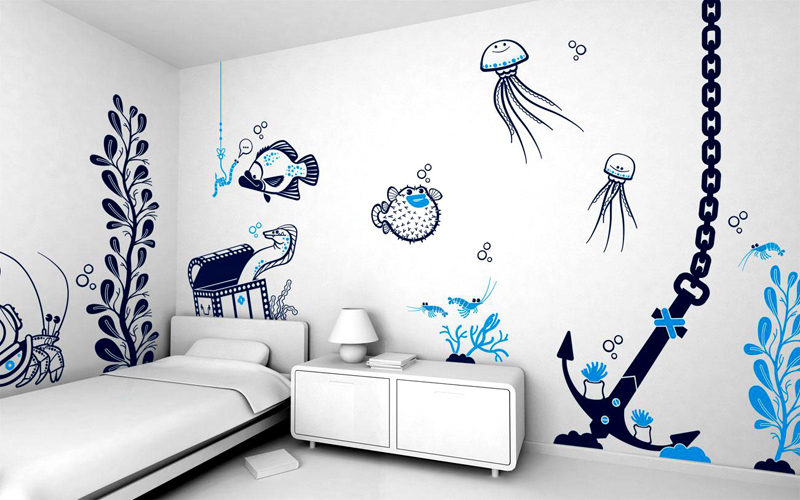
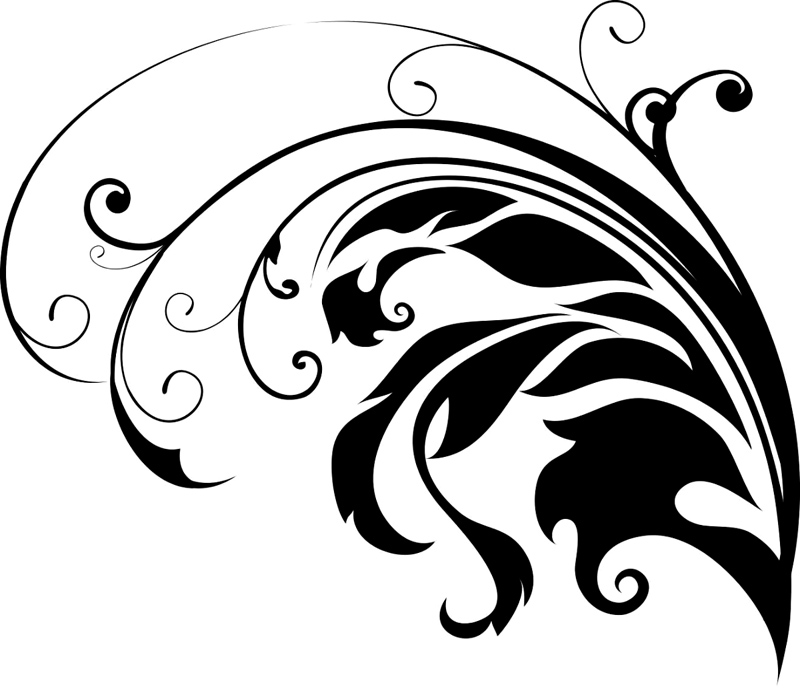
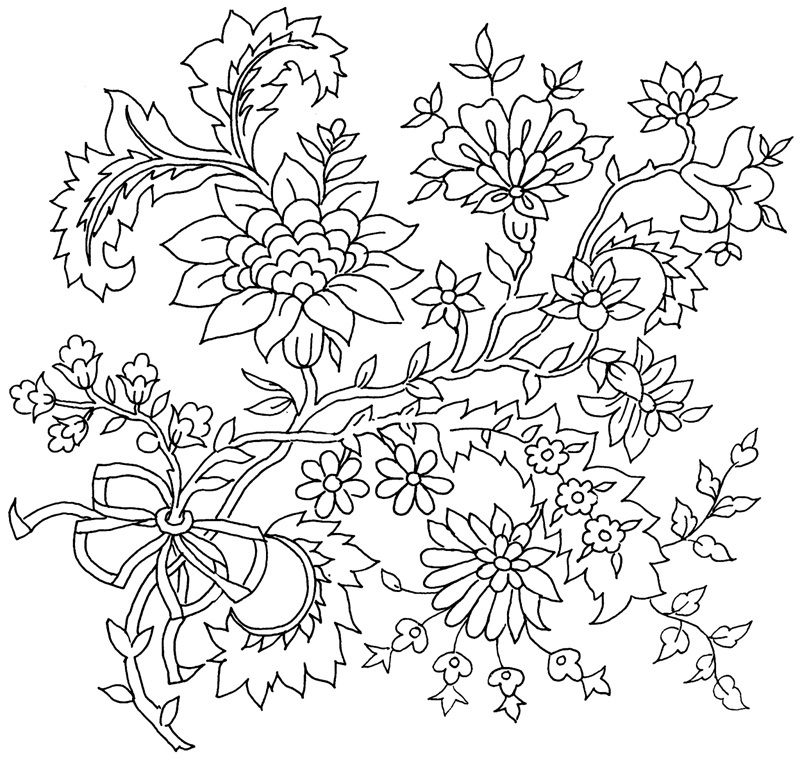
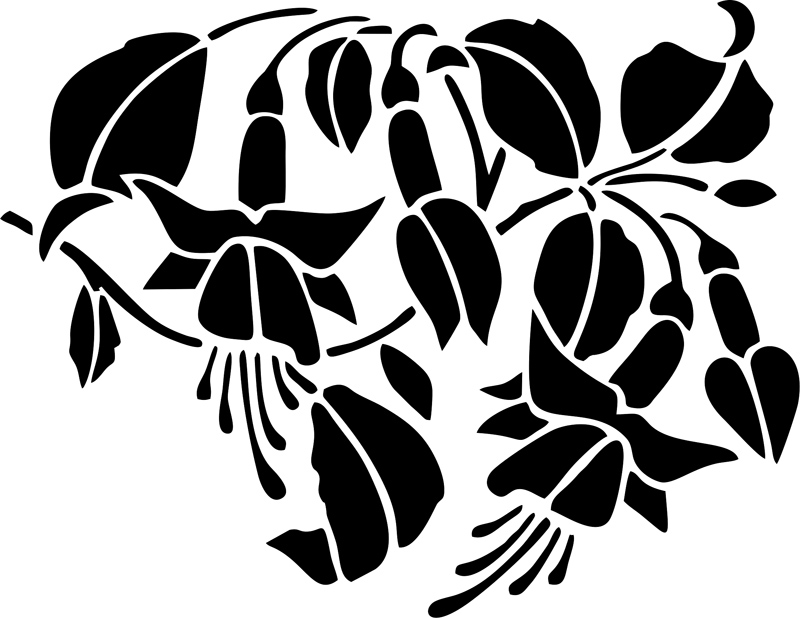
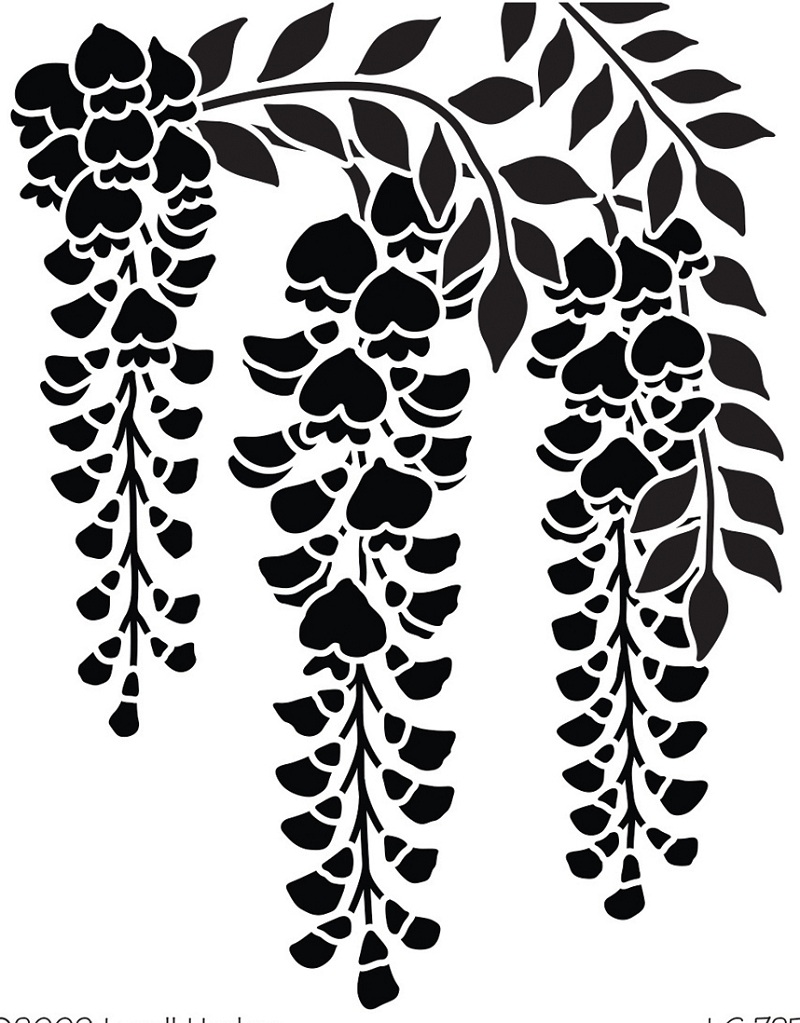
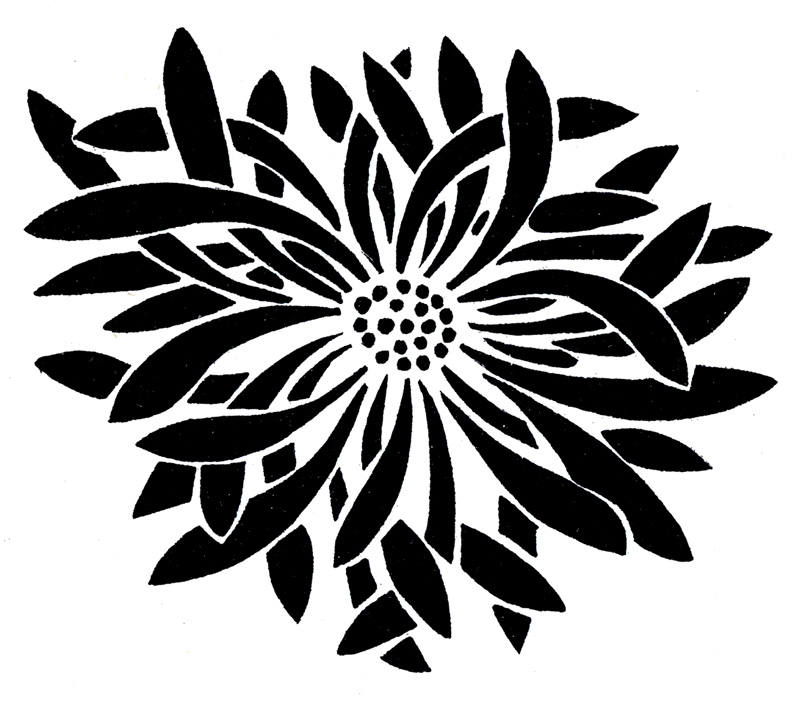
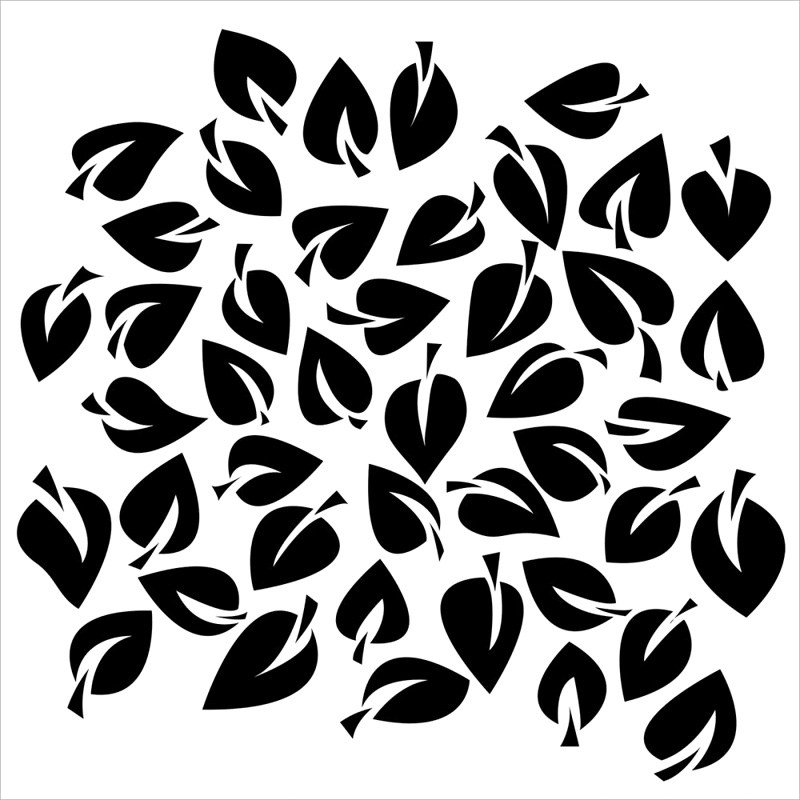
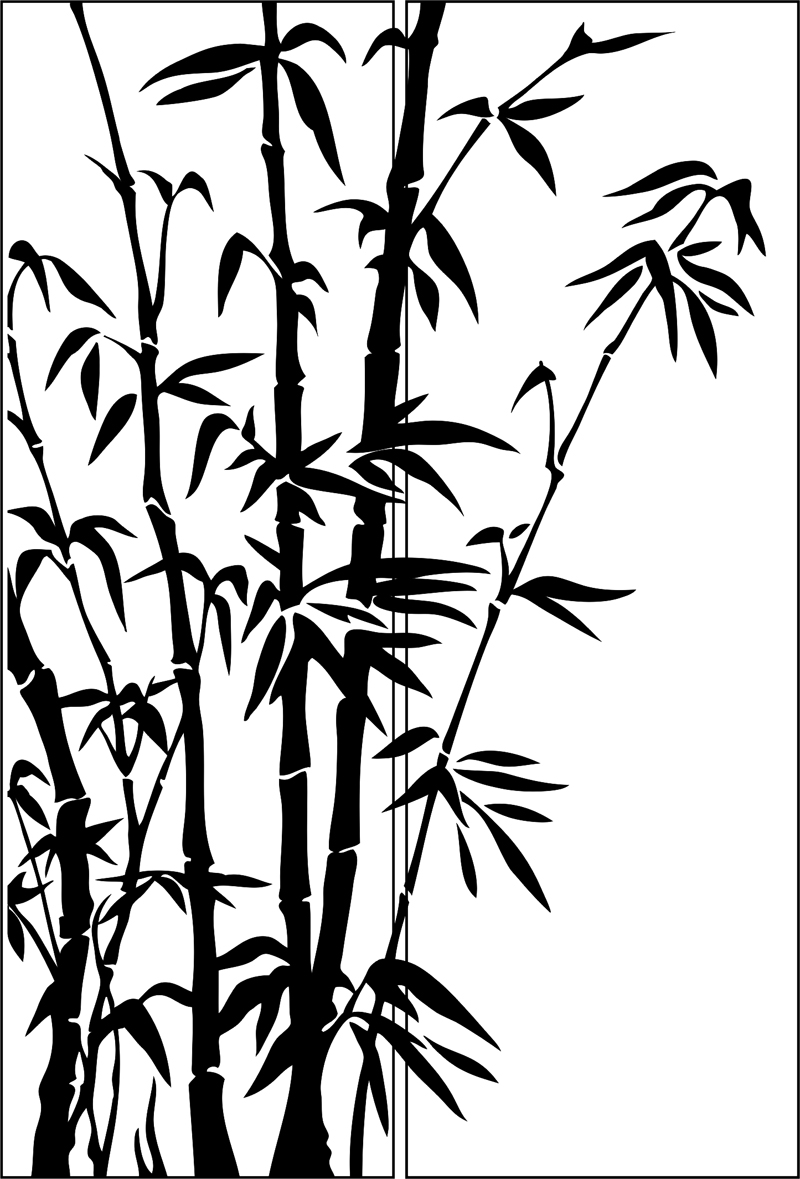
Stencils of trees and plants, 10 options
1 out of 10

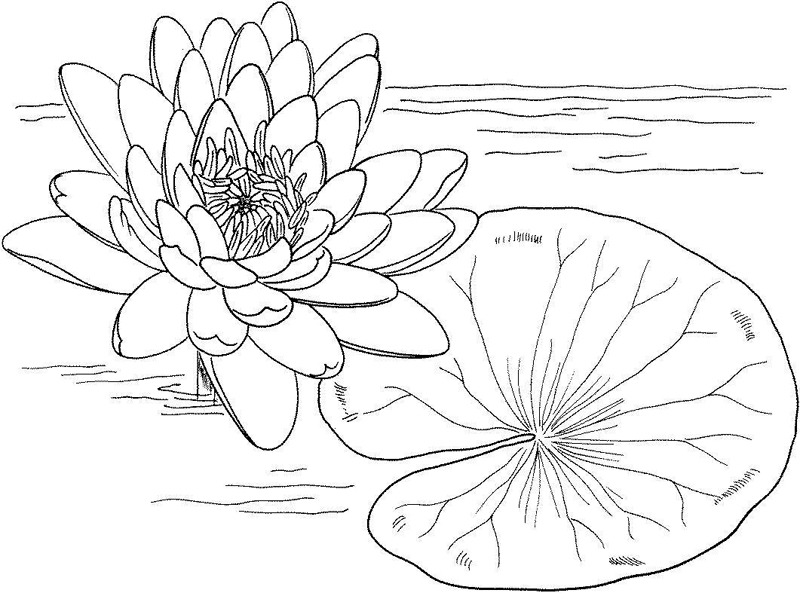

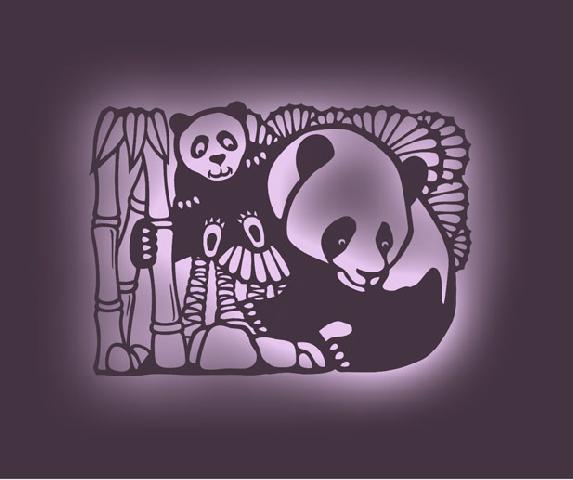
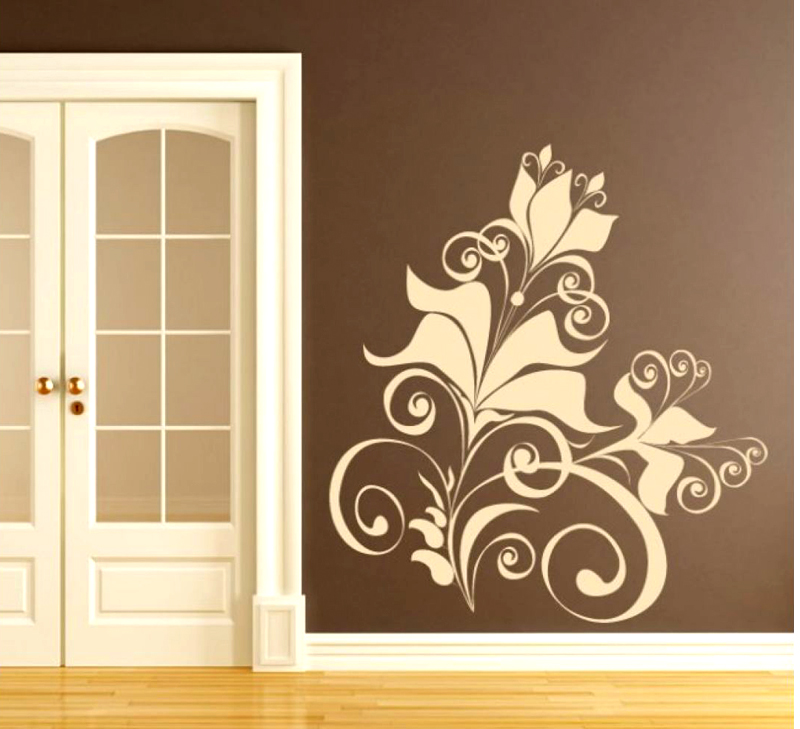
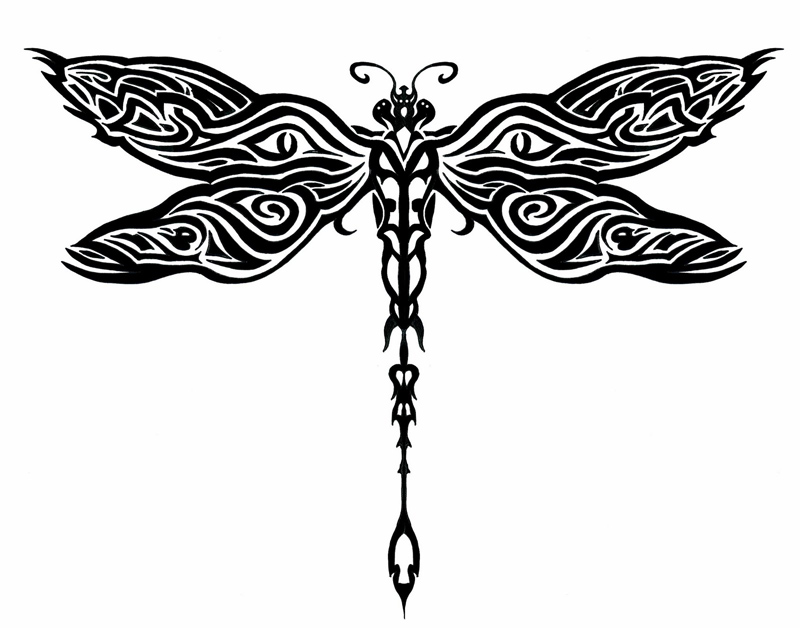
Original drawings for templates, 10 ideas


