Various crafts for decorating personal plots. DIY crafts for home and garden: original ideas
Ideas for a summer residence and a garden with your own hands from improvised materials today the focus of our article, let's take a closer look at this issue. We hope that with our selection you will be inspired and make something original and simple for your dacha from improvised materials, because ideas are born while contemplating other already completed works. Decorating the cottage at your own discretion, you form a living space in which you will feel as comfortable as possible. Now many people resort to the help of designers and spend a lot of money on landscaping, but if you are financially constrained and you don’t have money not only for a designer, but also for expensive materials, then our article is what you need.
Photo selection of ideas for a summer residence and a garden from improvised materials made by one's own hands
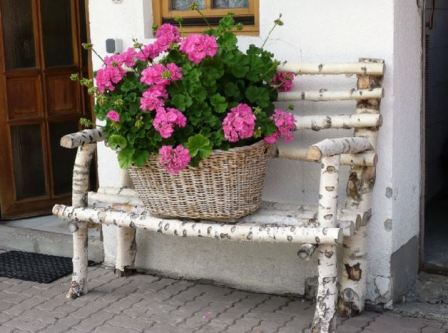
In the country, as a rule, there are no problems with improvised materials, the main idea is to turn in the right direction, and make such a shop with your own hands as you see in the photo. It is made of ordinary birch, but it looks very unusual and besides, it is practical. You can’t sit on such a bench, but as a stand for a flowerpot, it will fit perfectly.
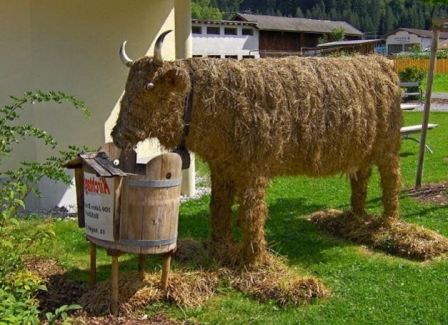
Even hay can be put to good use
If you want to make a miniature cascade of waterfalls, then for this you can use the usual glass bottles, and stones.

Old furniture is perfect for its use as a decor for a summer cottage. You can even use old chairs as decorations for your yard or home.

Wooden chairs can be used as flower stands and flowerpots.
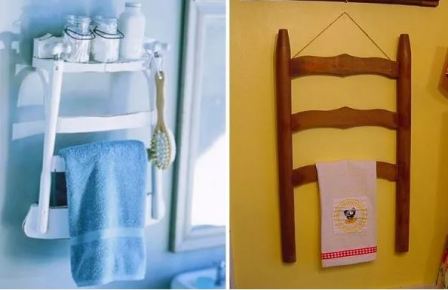
The back of a chair can come in handy in your bathroom, make a towel or clothes hanger out of it.
Interesting ideas for summer cottages and gardens are still relevant despite the fact that the summer season is ending. On a free day off, when all the autumn work at the dacha is already completed, you can do crafts, if, of course, the weather allows, because in spring and summer there is usually not enough time for them.
Good afternoon, dear readers!
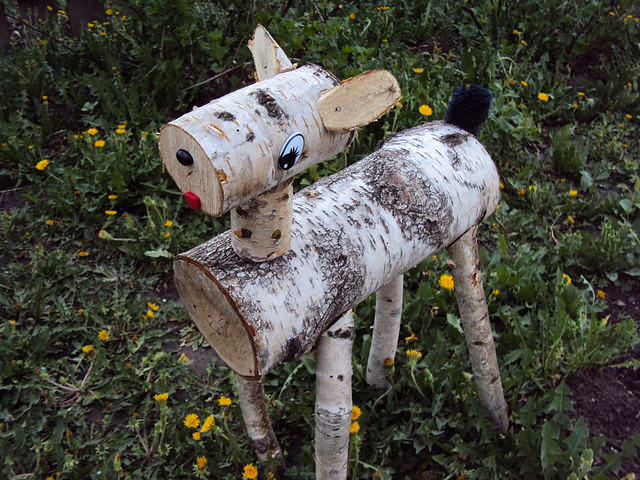
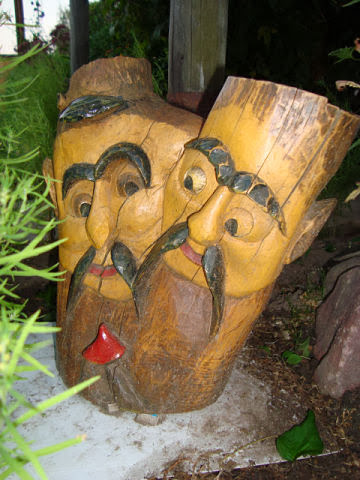
In autumn, sometimes you have to cut down old, dried up and unnecessary trees. But do not rush to destroy them completely. From wood, you can make very beautiful and even useful crafts for summer cottages and gardens, as well as from.
Here are some photos interesting ideas for giving. And when you read to the end, you will see absolutely amazing work.
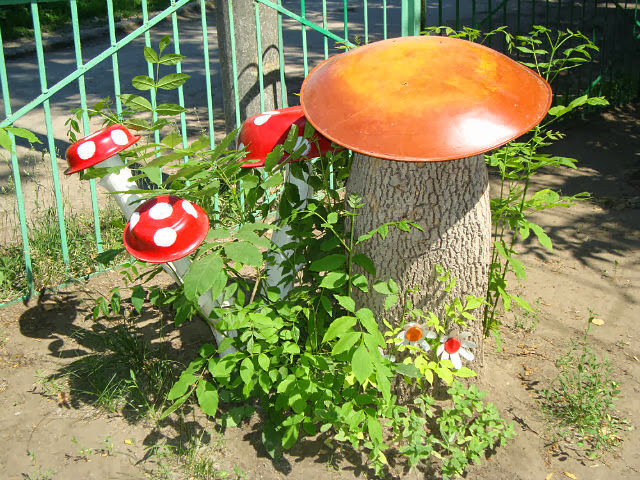
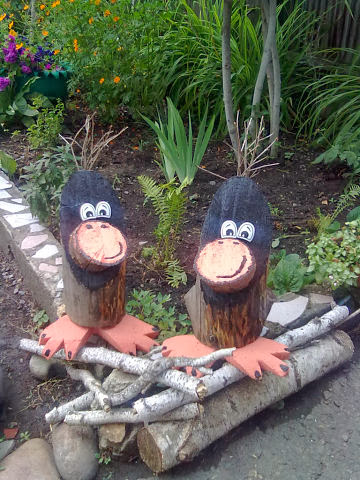
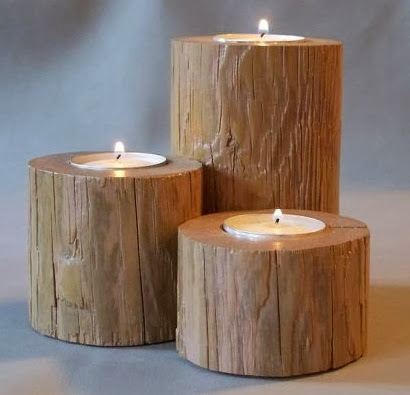
From the remaining small stumps you can make cute mushrooms. Although this idea is not at all new, and if you show your imagination, you can make wonderful animals, house and other interesting creatures, you can even make original candlesticks.

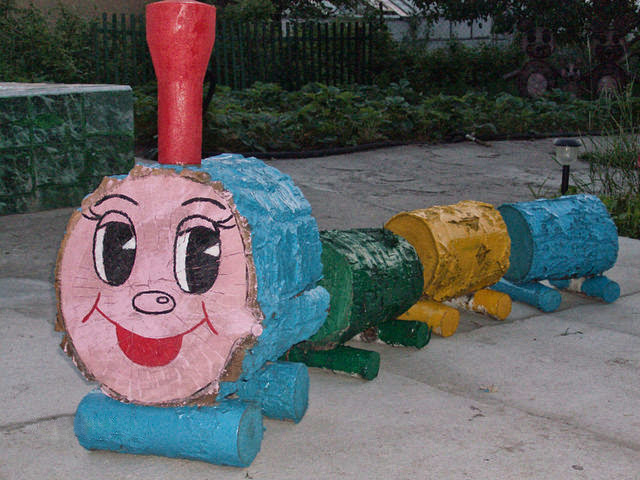
You can build trains, make tables and chairs.

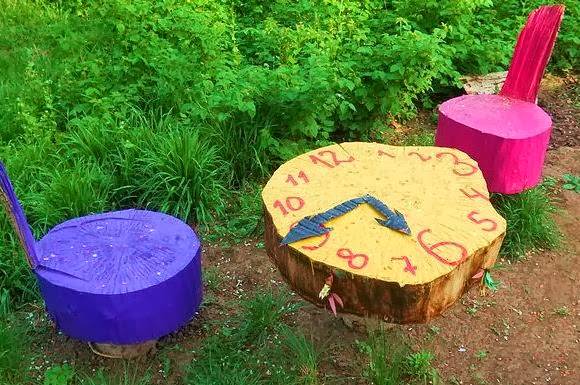
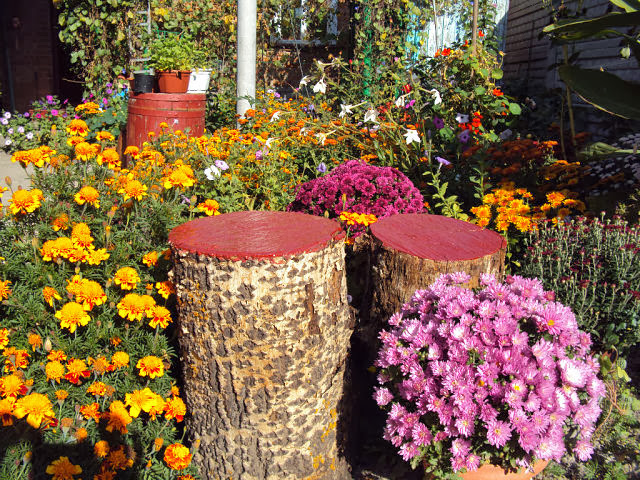
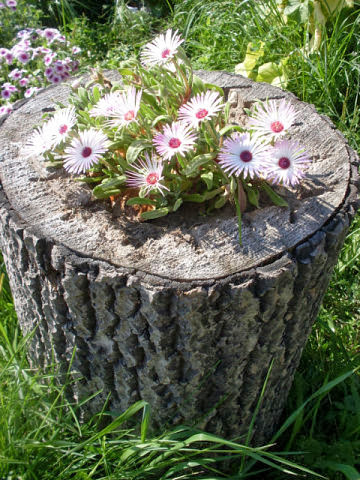
I really like the mini flower beds on the stump.

 Read also:
If you saw a tree into thin circles, you can lay paths out of them in the garden.

What else original ideas have you already applied in practice?
Talented craftsmen are able to make such an unusual beauty!
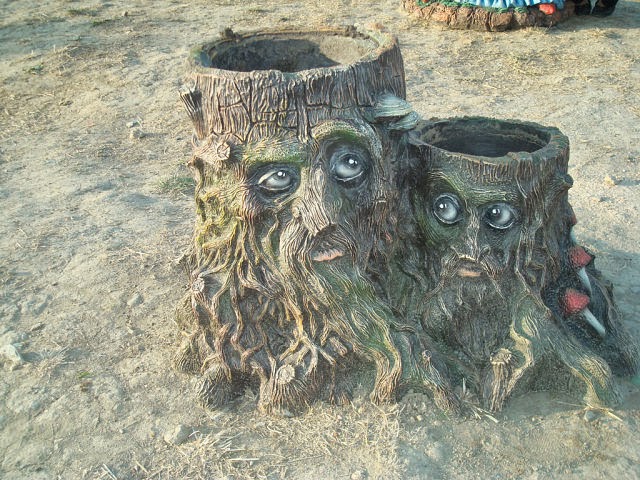
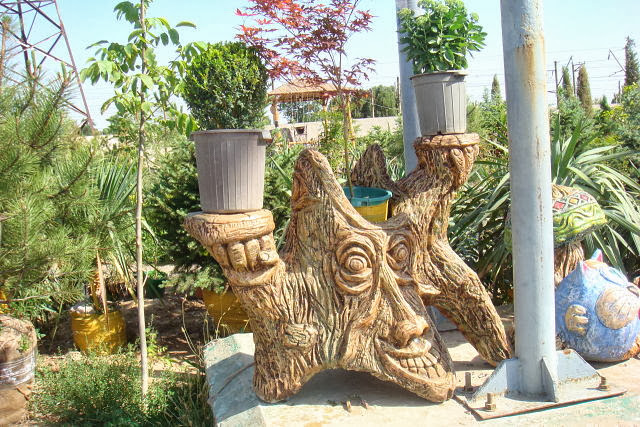

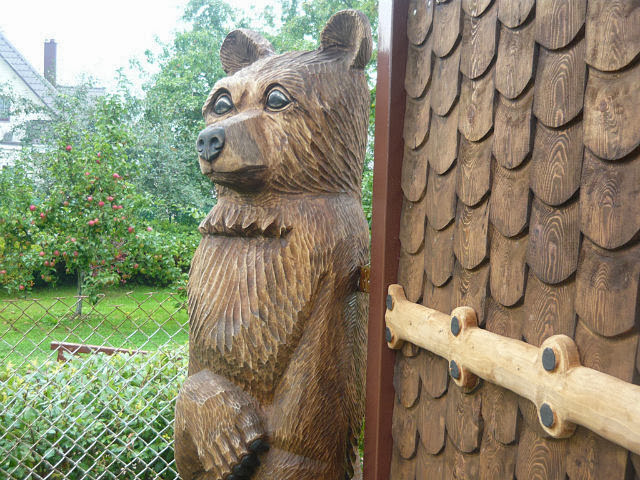
Amazing sculptures are made with a chainsaw by English craftsmen Thomas Craig and Andy O'Neill. I could not even imagine such an art of owning this instrument. Look at their work. 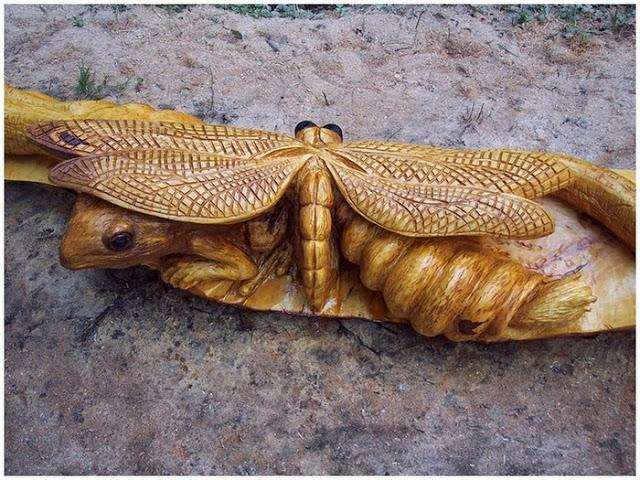
Each owner of his own land allotment is a potentially happy person. At the dacha, you can not only enjoy outdoor work, have a barbecue party, but also give free rein to your own imagination. Here, handmade crafts for the garden will certainly come in handy. All new, best examples And practical advice according to their implementation - in this material.
The best garden and garden design ideas with your own hands: photos of flower beds and their main types
Few owners of country estates leave the land without work. It is a pleasure for a city dweller to poke around in the black earth and enjoy every flower and sprout. Even a kind of competition arises between neighbors in the plots: who will grow the most luxurious tomatoes or break the most colorful flower bed.
Just in the organization of flower beds there are several secrets, thanks to which you can "score points" in the dacha competition.
The main types of flower beds
"Strict" flowerbed of regular flowering. Its main features are clear geometric shapes, the frequency of planting and the simultaneous flowering of all plants. Such flower beds are not often used in private areas, because they fade quickly and require a complete replacement of the contents. On city streets this work is carried out by municipal services. They grow flowers in a greenhouse and plant them in a flowering state to decorate streets and squares.

All-season flower bed. This flower garden is arranged in such a way as to accommodate plants with different period flowering. It can be anything, including irregular shapes. Groups of frost-resistant plants can settle here, which will delight the eye until the snow falls, meadows of primroses, perennials with a summer and autumn flowering period. If you choose plants wisely, such a flower garden will not require annual planting. All care will be reduced to watering and replanting plants that have died for some reason.

About form and content
The second stage of planning a flower garden is to determine its shape:
- Multi-level flower garden. The surface, consisting of several different levels, will immediately attract attention. You should not immediately take on a large pyramid - just try your hand at a small version. This design is not difficult to water and take care of it - a pleasure.
 Flower garden - pyramid
 Advice! Before you start creating a flower garden, do not be lazy: read the information about the features of the selected plants and the rules for caring for them. It is better for forgetful summer residents to sketch for themselves a small memo for each flower with important information.
- Blooming carpet. A very attractive flower garden. It consists of many low plants planted in a certain order. The alternation of shades of green and colorful buds form intricate patterns. This beauty has only one drawback - time-consuming care. Planting such a flower bed is a long and painstaking task. Watering can only be from a hose, otherwise there is a risk of trampling tender sprouts.

For your information! Plants of different heights can come into conflict in the flower bed. Too high will hide the low ones from the sun and will not allow them to develop.
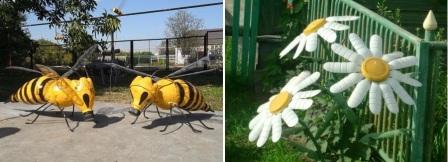
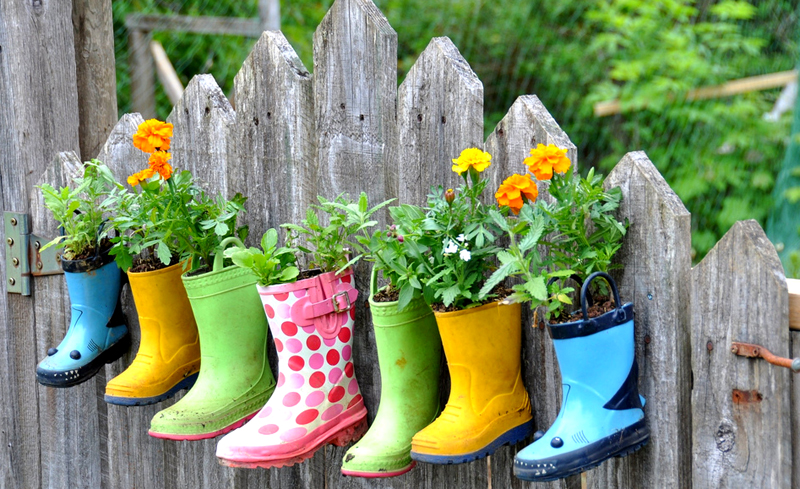
- Flowerbed on the wall and other vertical options. Do not immediately aim at creating a complex vertical composition. Try experimenting on the fence first. As pots, you can use plastic bottles, pipe trimmings, old shoes. All this is fixed on a vertical surface and filled with earth. Flowering fence will no doubt be the highlight of the garden
Idea! It is not necessary to plant only flowers in a flower bed. Try placing bright kohlrabi, juicy lettuce and delicate green carrots there. It will be not only beautiful, but also a useful decoration of the garden.
- Flowerbed-solo. In such a flower garden, plants of only one species. Roses, dahlias, chrysanthemums, gladioli are planted in mono-flowers. The more plants, the more attractive the flower garden.

And a few more examples of decorating a garden and a garden with flower beds with your own hands in the photo:

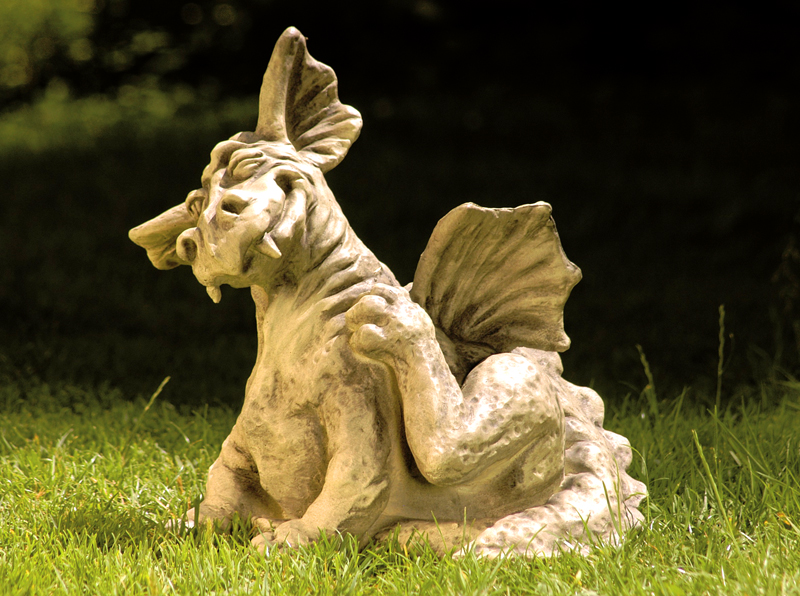
Trying our hand at sculpture
For a summer cottage, it is absolutely not necessary to build statues in full growth, unless it scared them from feathered predators. Small funny figurines of animals or fantasy characters will add a cute charm to garden paths. You can make them from any material: from the remains of building materials to old pots and lemonade bottles.
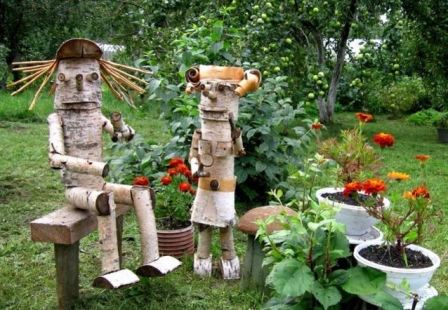
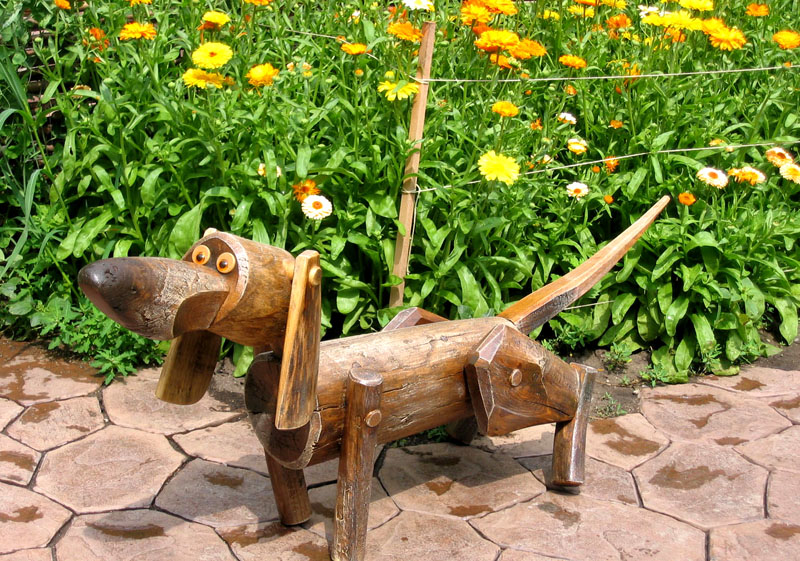
Admire the photo: do-it-yourself wooden figurine
Most often, gnomes can be found on garden paths; in different cultures, they are considered the patrons of all plants. You can cut a little man out of a stump and paint it with bright acrylic or sculpt it out of clay and plaster.

The second option requires the manufacture of a reinforcing structure so that the sculpture does not fall apart from an accidental touch.
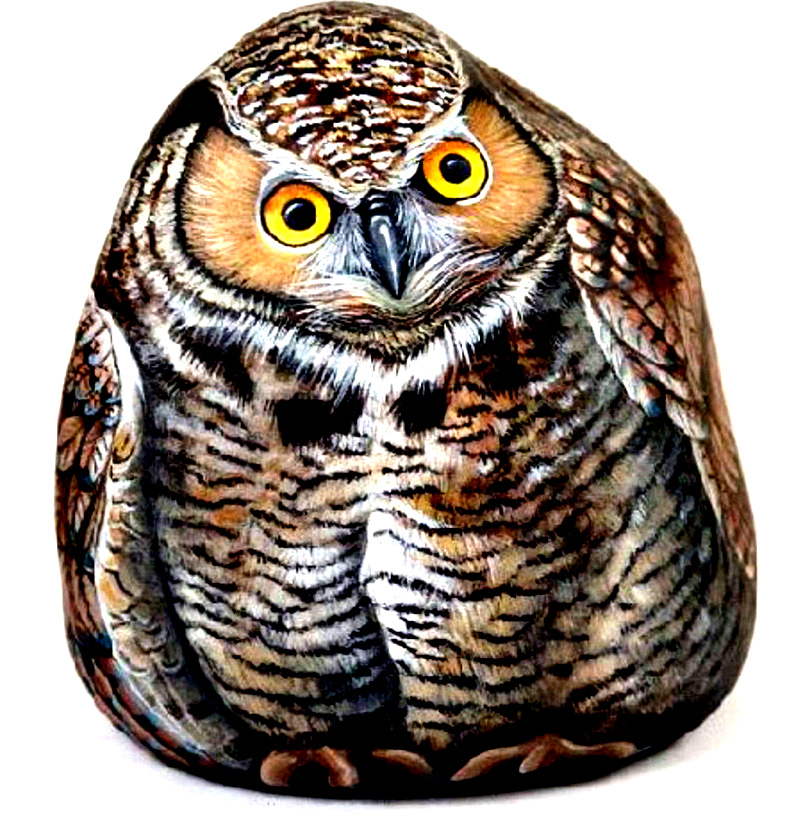
The base for a small sculpture can be cut out of styrofoam or a cured piece of building foam. and then coat it with putty. After the layer dries, it needs to be sanded and painted. On this basis, animals are especially good - squirrels, hedgehogs, birds - storks, herons, ducks, owls.
Important! Such sculptures must be properly placed in the garden. Frogs, snails and ducks have a place near a pond or fountain, owls and squirrels - on a tree, and a curious gnome can look out from a rose bush.
Such original ideas of sculptural decoration for the garden, made by oneself, will delight the eye for more than one year.

The magic of painted stones: photos and practical tips
No offense will be said, but crafts made from household waste cannot be compared with the natural charm of wood and stone. These materials fit into any garden design in a natural and noble way.
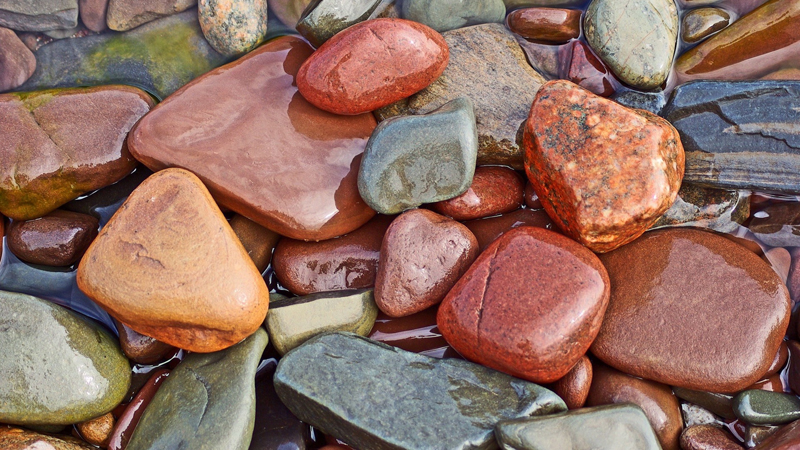
Stones suitable for painting must be collected in advance. The best place for this - the bank of the river or the sea. Large smooth pebbles are a great option. You should not stop only at perfectly even specimens. The original shape can be a great stimulus for fantasy coloring.
Idea! Porous boulders can also become an art object if painted yellow, I put a plaster mouse next to it.
If you can’t find a suitable stone, it doesn’t matter. You can simply make it from cement or plaster. You do not even need to invent a form for pouring. It is enough just to make a recess in the ground or sand, cover it with polyethylene - and you're done. Cement or gypsum can be tinted with tinting paste. To save on mortar, stones can be made hollow.

Advice! It is better to cast a large artificial stone without moving far from the place of future installation.
For stone painting, it is better to use acrylic paints for the following reasons:
- dry quickly;
- perfectly applied to the surface of the stone;
- safe at work;
- not afraid of moisture;
- do not fade from the sun.
Before starting work, the pebbles must be washed from sand and dirt and dried thoroughly.
The first layer is PVA glue. He act as a primer. You can paint only after the soil is completely dry. The second layer is the background paint. It is evenly applied to the entire surface and also allowed to dry completely.
The third layer is the drawing itself. You can first sketch a sketch of the future picture on paper and transfer the diagram to the stone with a pencil.

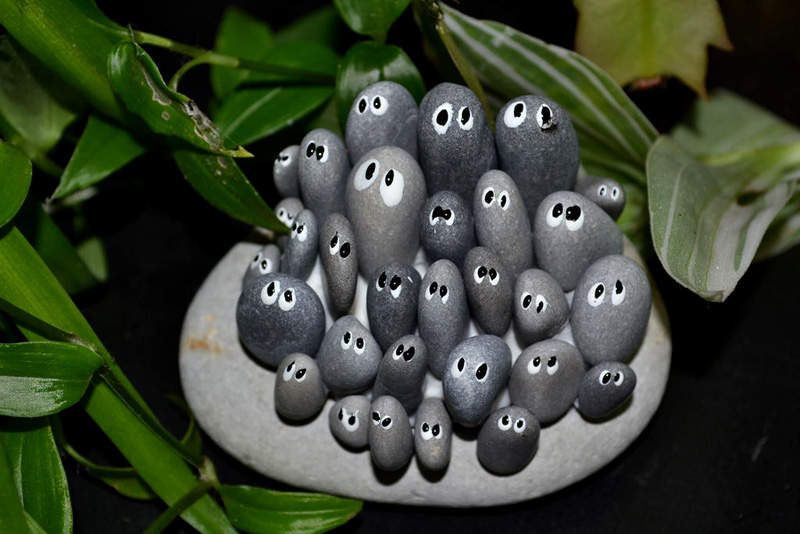
Idea! If complex ornaments or landscapes are not yet obtained, try painting pebbles with emoticons. Another option is ladybugs. They are very easy to complete.
This is how stone crafts for the garden are made with their own hands. All novelties can be used to design flower beds, garden fountains and paths.
For example, pebbles with the image of frogs and fish will be harmoniously located near the pond, the edges of the paths will be emphasized by products with ornaments.
For example, we offer a photo of original DIY decor ideas from pebbles:

 Ladybugs and frogs on pebbles - water lilies
Idea! If you draw crosses and tac-toes on the pebbles, the children will have something to do on the lined playground.
Crafts for the garden with your own hands: all the novelties and crazy ideas
In addition to those listed, you can build an incredible number of other country tricks with your own hands. Photo examples and numerous master classes will help in mastering this exciting activity. Here are some original ideas, perhaps some of them will come in handy on your site:
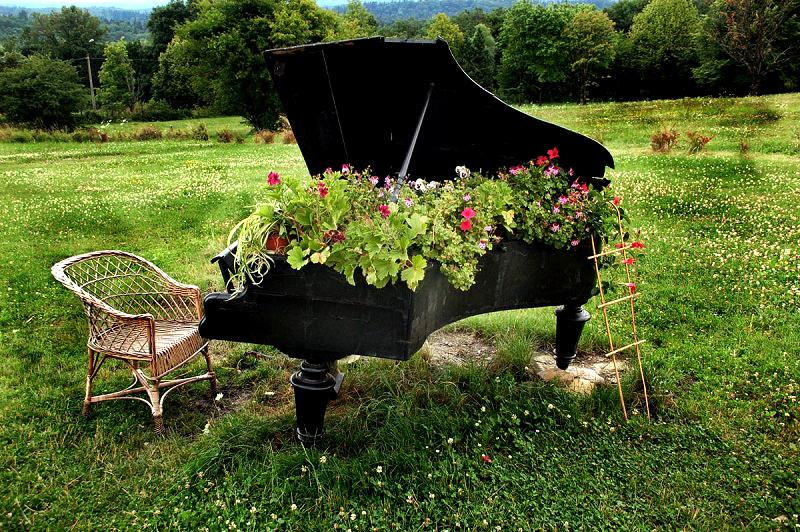
For the manufacture of flower beds, a case from an old grand piano or upright piano is suitable. Small musical instruments, fastened together, can become a support for loaches.
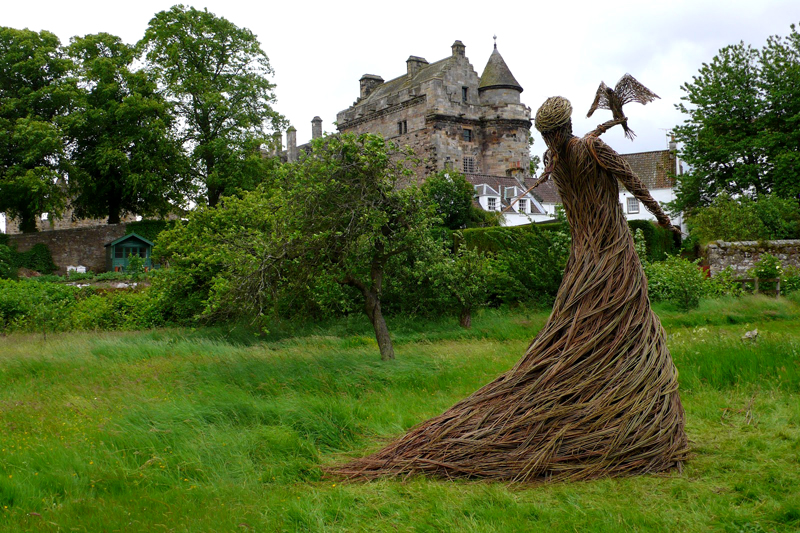
Designs woven from cut branches can become an original decoration of the garden. It can be both abstract figures and something concrete, like baskets or wattle instead of a fence.
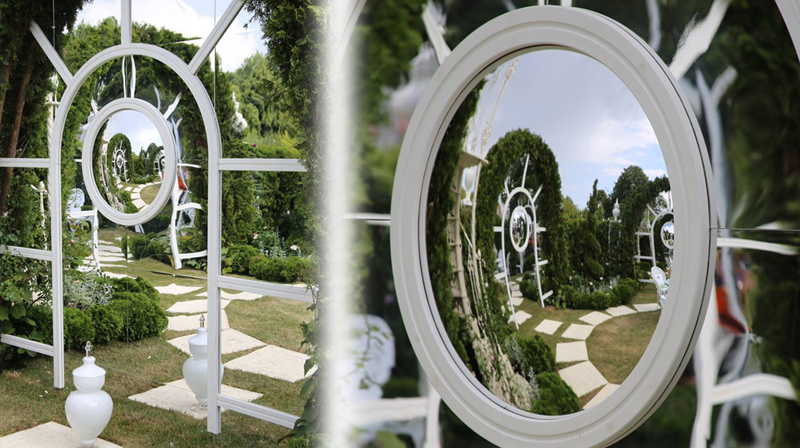
The old large mirror can no longer find a place in the house? No problem. Do not throw it away, especially since it is a bad omen. If you hang it on a fence in a dark corner of the garden, it will add light to the plants and visually enlarge the territory.

Antiques and antiques are great decoration for the site. Everything can be used - from a spinning wheel to vintage irons.
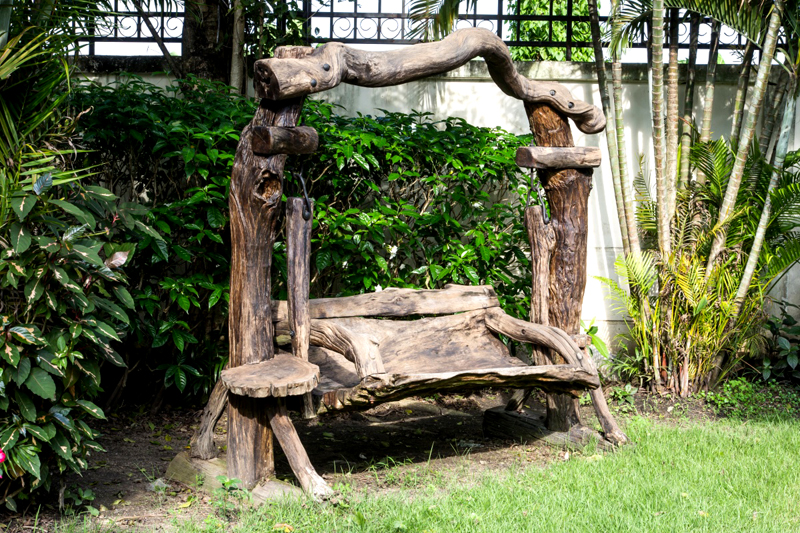 Wonder - benches
 This necessary element of the garden can be made from the most different materials and decorate with flowers or carvings. If you install solar-powered lanterns next to such a bench, in the evening it will be unusually pleasant to listen to the trills of cicadas here.
Above the path at the entrance to the site, you can make an arch for climbing plants. This will require some thin fittings. For this purpose, you can use a willow rod.
 Fence as an art object
 The fence is a great platform to place your own garden decor. Bright gloves and mittens, flower pots, or even lace doilies. There are a lot of tips for decorating the fence.

A body of water or a fountain can change the climate of a site. Plants will like the constant humidity in the air. It is easier to breathe near the fountain, and goldfish can be settled in a small home pond. There are different options for designing a garden pond.
Article
Crafts can look organic not only at home, but also in the garden. They will serve as spectacular decorations of the summer cottage and bring unusual notes into it.
Gardeners often prefer purchased figurines and other similar paraphernalia, believing that all methods of creating accessories are old. Designers and craftsmen are constantly coming up with something new, so there are many ideas for decorating a summer house that cannot be called banal.
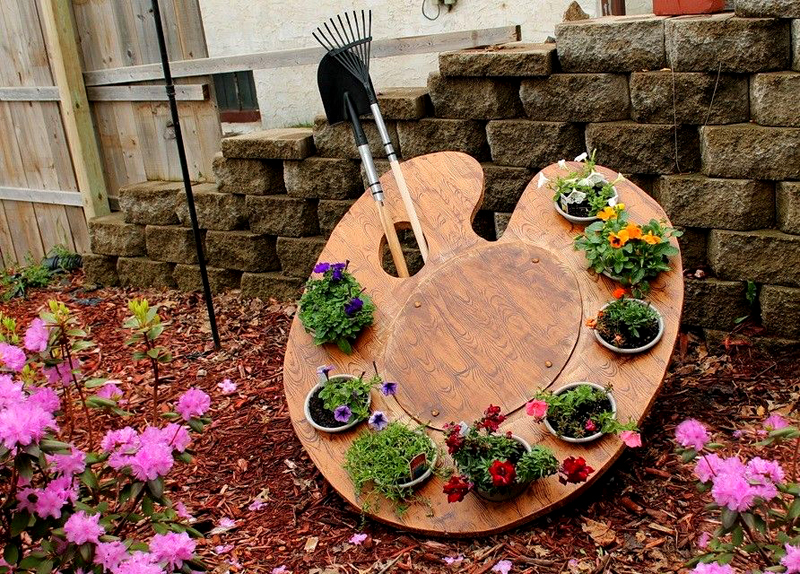
Creating a flower bed may involve not only the arrangement of flowers, but also the manufacture of a spectacular frame. Check out this simple flower arrangement.
To make it, you only need an old garden wheelbarrow, as well as seedlings or seeds of selected undersized flowers. Install the object on the selected site, fill the container with earth and plant flowers - that's the whole instruction!
A stone flower bed-basket is something that seems difficult to perform, but is done simply. Instructions for you:
- Find boulders of different colors and sizes.
- Decide on a location for the flower bed. Mark the borders of the round flower bed.
- Prepare concrete mix. Mix cement with building sand in a ratio of 1:4 and add a little water to make the mixture thick.
- Lay out the first row of stones.
- Lay out the next rows of stones, fastening them with concrete mixture, until the base of the flower bed is ready.
- Remove excess cement.
- Measure the base diameter.
- Lay out an arc on the ground from stones. The distance between its ends should be equal to the diameter of the base of the flower bed. Stones must be connected with concrete.
- When the arc is strong, attach it to the top of the base with concrete and stones.
After all the concrete has hardened, you can fill the earth inside the "basket" and plant the seeds. Here is a photo of the finished flower beds.
A flower bed made of twigs looks natural and spectacular. It fits very harmoniously into any garden. You can do it this way:
- Draw a circle on the ground to form the outline of the flower bed.
- Place several rods on its borders. They need to be inserted into the ground at a distance from each other.
- Take a thin twig and weave it between the vertical rods. Wrap the tip and glue it to the back of the flower bed with wood glue.
- Weave the rest of the rods. Once you notice that the basket is tall enough, cut off the tops of the vertical bases.
- Pour soil inside the flower bed and plant flowers.
- Take a few rods and form an arc out of them. Insert their edges between the bars of the top of the basket.
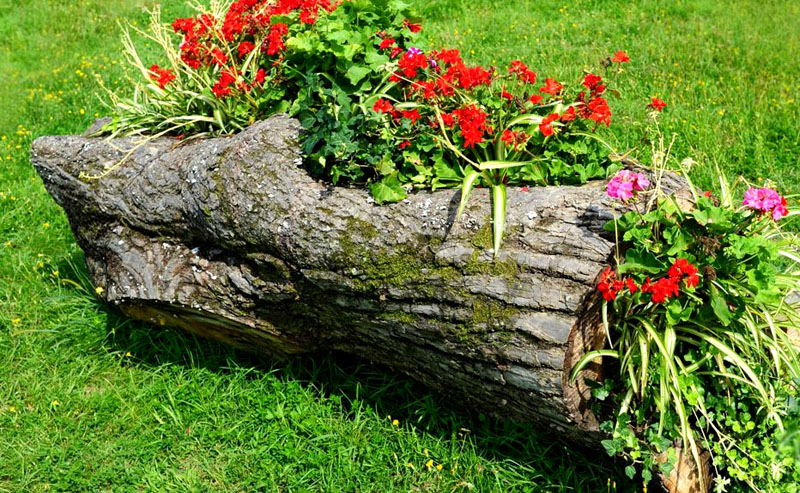
Looking for the most natural and simple option? Take a closer look at the flowering stump! You just need to find a part of the tree trunk, make a cylindrical hole inside it, install it on the site, pour earth into the sawn hole and, of course, plant flowers in it.
Is there an old iron unnecessary bed? Turn it into a huge flower bed! Using five pieces of plywood (one base and four sides) and nails, make a box, put it on the bed and plant flowers in it.
Do-it-yourself figurines of representatives of the fauna
Unfortunately, many animals are extremely difficult to keep in the country. There is a good alternative - do-it-yourself figurines of representatives of the fauna.
Perhaps one of the simplest options is large ladybugs. To make them, you will need stones and paint, which can be purchased at any store with goods for construction.
To prevent the drawing from being smudged, first paint the entire boulder with red paint, and then dry it. Next, you need to apply black dye, and after it dries, you should place accents in white and yellow.
With the help of the canvas (bottom) of a shovel and a few other similar items, you can decorate the garden with a cute black bird.
To make one bird, you will need black paint, a shovel cloth, glue, thick wire and modeling dough. The last ingredient can be purchased at craft stores. Instructions for you:
- We cover the canvas of the shovel with black paint and wait for it to dry.
- We attach two pieces of thick wire to the surface where the "birds" will sit.
- We put yellow dough for modeling on pieces of wire so that we get bird legs. We make a thickening in the upper part. The top should be flat.
- Glue the shovel cloth to the tops.
- We paint thickenings on the upper part of the “legs” with black paint.
- We make eyes from white dough for modeling, and a beak from yellow. Try to sculpt so that the bases of the beak and eyes are flat.
- We attach the parts with glue to the top of the shovel blade.
- On the "eyes" we make black dots with black paint.
Are there many flowers in the garden? Then it is worth decorating the site with large decorative butterflies!
Bottle, varnish and glue are the main materials required. Everything else depends on your imagination. The manufacturing technique is not complicated:
- On plastic bottle draw a butterfly.
- We cut it out and bend the middle so that the figure looks natural.
- We color the butterfly.
- We protect the image with varnish.
- In the middle of the figure we glue sequins or rhinestones, imitating the body of a butterfly.
- We glue the resulting product to the surface.
If you find it difficult to call yourself a good artist, use the attached stencil.
You can paint the wings of a decorative butterfly in a variety of ways. The table shows the possible effects and required materials.
DIY decorative items
It is pleasant to spend time in the garden not only in the daytime. The aroma of flowers that did not have time to close, night butterflies, the starry sky - all this creates a special atmosphere. In order to make it more magical, you will need unusual flashlights.
To make an original decorative lantern, you need a garland, threads, construction glue and a balloon. The manufacturing technique consists of several points:
- We inflate the ball. It must be round.
- We smear the ball with glue and immediately wrap it with threads. Try to leave a hole at the bottom.
- After the glue is completely dry, deflate the balloon. Coat it with varnish.
- Place a garland in the hole of the ball of thread.
This is how the finished product will look like, which can be placed on a table in the gazebo.
First you need to paint an inverted plate. To make a fly agaric, apply scarlet paint, wait for it to dry, and then make white dots. After the dyes have set, glue the plate to the upside down bucket.
Original crafts from unusual materials
Do you have a lot of damaged or unnecessary green hoses in your summer cottage? They are easy to turn into a spectacular cactus! In addition to hoses, you should stock up on silver metal wire. And also instead of wire, you can use fixing plastic clamps.
The technology of creation does not imply difficulties. First, fold the hoses so that they form a circle. The joints must be fastened with pieces of wire and left outside the ponytails imitating thorns. Between the topmost row and the previous one, you need to insert pieces of hoses with multi-colored taps. They will look like flowers.
It was once fashionable to make swans out of tires for wheels, but this idea is already considered banal. If you are looking for an unusual, but simple option, try making a snail. You only need two tires. One just needs to be painted, and the body of a snail should be cut out of the other. Here is an example of a product.
Video - Royal pigeon from plastic bottles
Each owner country house or suburban area sooner or later thinks about decorating landscape design. To do this, you can buy ready-made garden crafts or do it yourself. Modern craftsmen and needlewomen actively use improvised materials in order to embody various ideas for giving. See photos and implement everything in your own country house.
What can be done from improvised materials for a summer residence
IN Lately Increasingly, gardeners began to use car tires, with which it is easy to make an original flower bed in the country. In order to cut tires, you will have to use a jigsaw and a grinder, and it is easy to decorate the product with ordinary spray paint.

If you just dig in whole tires, you get a fairly beautiful fence.
Although many consider the stone ordinary material, with its help it is easy to convert country cottage area. Large and small stones can be used in combination with plants, then you get the original alpine slide.
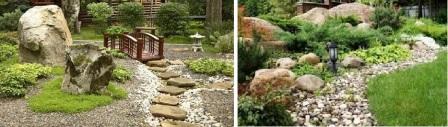
Stones are widely used for arranging garden paths or sawing out exclusive figures. A peculiar use of stones will be their decoration. By decorating a smooth stone with ordinary paints and varnishing, you will turn it into a real work of art.