How to make a craft on any topic. DIY crafts
Of great interest to the novice needlewoman are crafts from different materials , however, there are so many ideas that at first, eyes can simply scatter. If you do not know where to start learning new techniques, then we offer you several master classes. We will start with the execution of flowers that are liked by all women without exception, which are an integral element of the decor of living rooms and kitchens. In addition, any materials for their implementation can be taken, from those that can be collected in the park, for example, leaves, to materials that must be carefully selected based on their quality, for example, beads.
Design as art and ritual value of a small object. You can add "program posters" of timely ideas for which the communication component was an indispensable choice from the very beginning. At the same time, if these objects, as Mathi still means, are art before they are intended for any function, then it is logical that they have always been presented according to the proper mechanisms of art through specially created exhibitions and accompanied by texts properly written by art historians, designers or often by the Munari themselves for their projects.
To do craft flowers from different materials, paper, wire, plastic, wood, beads and even stones are suitable. You can make bizarre, amazing, unique buds with your own hands using fabric, ribbons, and it’s not difficult at all, thanks to step-by-step master classes, you will quickly figure out all the intricacies.
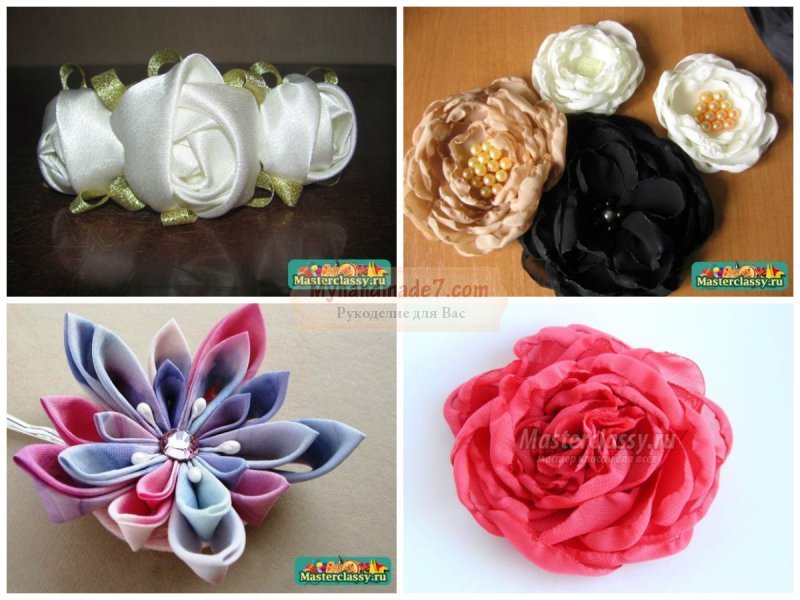
Making crafts from different materials- an exciting activity, but you also need to pick up the necessary tools to work with them. Fabric flowers can be used in many ways, and a tiny bouquet can be pinned to a dress to make it a bright and personal outfit. With neat buds you can embroider a dress for a little princess, with their help you can decorate a handbag or a hat.
In any case, they were difficult to understand. They looked at the deeper meaning of the object and emphasized the richness of the intended nuances, tearing it out of its remaining merely decorative bibelote fate. Reflection, theirs, which had in mind the course of history and the deep meaning of relationships with a person, since in relation to an object on a larger scale, a more intimate connection is established with the “co-prammobile”. Unlike furniture, Bruno Danese was convinced that the object more easily relates to the domestic context as a style of taste, helping to create the atmosphere of the room and engaging in communication between people.
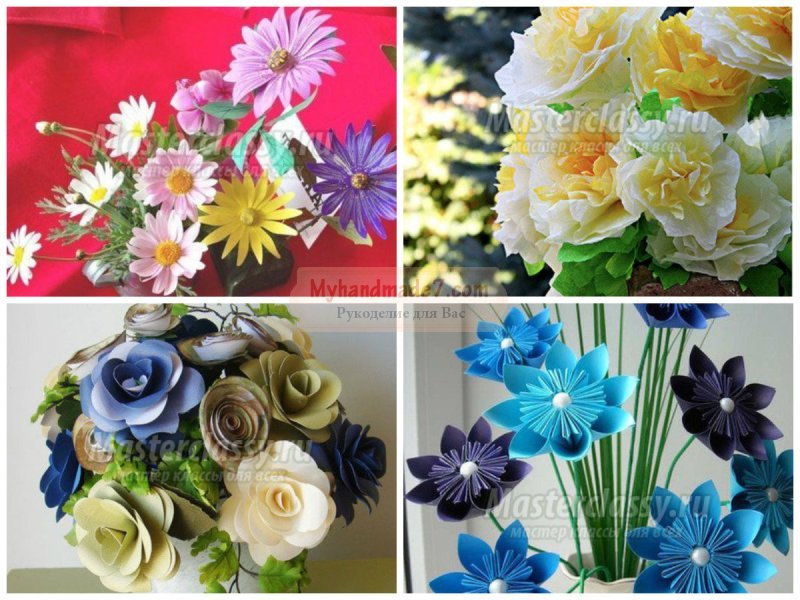
Making crafts from different materials
Flower bouquets can decorate your home, make rooms brighter, more comfortable. They will delight your eyes. all year round. If you did, we offered you, then such a craft can also be a wonderful present for your close friend for the holiday. We advise you to pay special attention to this idea to men who like to give sweets for minor celebrations to their loved ones. If you make such a bouquet with your own hands, and it is not difficult to do it, because it’s enough just to be able to cut out the details from paper with scissors, then thanks to this decoration, even an elementary gift will look like a manifestation of sincere love and care.
This freedom from market conditions, a product-oriented business philosophy, was dictated by the peculiar way of being that characterized them: nothing happened by chance. Control over what happened was always complete. It works to sow certainty, consistency, and focus. For Danish and Vodoz, it was an irresolvable intertwining between the existential and the professional. appearance, an absolute match between "to be" and "to do".
Such an identification is so prominent that the way they lived is a repurposing of an existential model embodied by the artistic avant-garde; the model is certainly less stocky, but equally determined and consistent. An empty that stands out for the many awards and interest shown to it in the culture of the project abroad, compared to the numerous invitations to participate in individual and group exhibitions, which were equal to the requirements of production units to be included in the permanent collections of museums, by countries that have followed developments with interest since its inception.
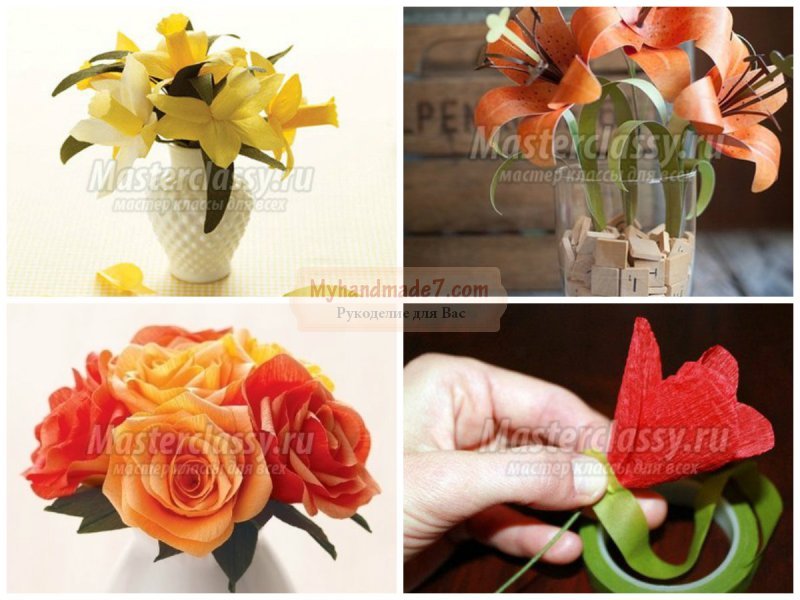
Looking closely at professional crafts from different materials photo, you can see that the flowers are made with the transfer of all shades and accurate detailing. Linen, silk, crepe de chine, cambric, satin, voile, chiffon, crepe satin, velvet, panne velvet are best suited to make stylish accessories with your own hands. If you choose natural shades, then the buds will look very natural. Be sure to starch the selected fabrics before work. For example, for natural silk it is better to take gelatin, and for cotton - potato starch. Dry material should be lowered into a hot solution, squeezed out and left to dry, then smoothed with an iron.
Especially with the Netherlands and especially with France - traditionally attentive to the decorative and applied arts - Danes had a strong correspondence. The absence of the most authoritative Italian recognition, however, does not in any way detract from the legacy left by the Danish, with the result that today - in front of the many objects and products that currently characterize our lives - even more solid. We thank the Jacqueline Vodoz Foundation and Bruno Danese for providing archival documents and images accompanying the text.
Arts Council UK. 3 to ∞: new multiple art. London: Arts Council UK. From craft serialism to multiples. Applied Arts and Design: Dialogue and Difference. Dragon, New Antique. Lines between Milan and Brianca.
Pictures of crafts from different materials must be bright, so you can use dyes, for example, photo paints, gouache, aniline paints, food coloring, ink. Glue is used as a fixative, since you will be working with fabrics, the glue must be high-strength, it must dry quickly and leave no residue after drying. You can choose gelatin glue, flour paste.
Milan: With the name of the golden fish. Exhibition catalog, January 21 - March 26. Panser, the soul of industry. Centenary of industrial design in Milan. Milan: Jacqueline Vodoz and Bruno Danese Association. But Thade, 78. Finally, there is peace between design and craftsmanship.
Exhibition catalogue. Traveling exhibition catalogue, Bordeaux, Lyon, Midi-Pyrenees, Nimes, Marseille. Italian lighting is light years ahead. Home furnishing daily. Bordeaux: musical scenery. Italian turn. Architecture Plus, 3-4. Danish and others and others. Paradigmatic decorative art. Objects from collections of Danish conduits.
For buds, you need a stem, which is made using wire, copper or aluminum. And for wrapping the stem, you need to take crepe or tissue paper of various colors (green and brown).
To make a closed bud, cotton wool is needed. You can’t do without the threads that are needed to stitch the details, use strong nylon threads, floss, iris, cotton. And to make the craft natural, you can sprinkle the middle with yellow pollen, it can be tinted semolina.
Artisans of Our Lady through the Church. Holy Cross in the Catholic center of Lomza, st. For information about the activities of the masters of Our Lady, plants and the rosary, please refer to the enamel addresses. No role, gender or age. Rosaries can do everything, from a child to a young person, as well as a completely mature person. Only that which is necessary and necessary is the real, genuine heart's thirst. Ask the Mother of the Rosary to strengthen this thirst and perseverance. It's just a matter of time and practice.
To make a rosary, we must prepare its components. Beads, Cross, Trimmer, Single switches, Tools: pliers and wire. Working set of the master of Our Lady of the Rosary. The tears of the Mother of God have prepared nature for us. No need to drill holes in them. Just drag the wire through the center. Beads come in different shapes, colors and sizes. To be beautiful in rose gardens, they must be separated in shape and size. You can also choose a color, although multi-colored ones are also nice. Once we have chosen 59 beads, we place them on the table like a rosary, keeping the intervals between tens.
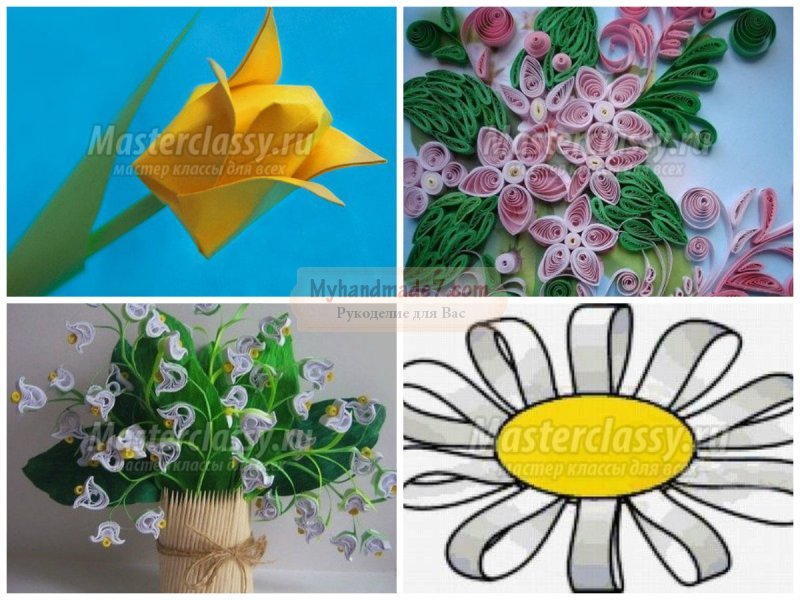
Crafts: flowers from different materials
Original look can consist of large elements, such should be done by novice craftsmen, and those who have already filled their hands can make bouquets with many small details. In this case, you must first prepare the patterns of leaves and petals. The blanks must be drawn on thick paper, cut out, and then applied to the fabric in order to cut out as many details as necessary. In a similar way, the crafts of numbers from different materials For early development child. Each petal must be given the desired shape, bent or twisted in the right direction, and then the bud must be collected. You need to start from the stem, to which the stamens are attached, made from threads or cereals. Next, the petals are attached.
The beads connecting the next tens should be slightly larger than the others. This will make it easier to recite the Rosary, especially for the elderly. Immediately after the cross, the first and fifth beads should be larger. We have been organizing beads since the middle of the fifth decade. We create two parallel parts of the rosary, left and right. In this place of the contract, technical division, the beads are turned back. They look like "nose" in the opposite direction. They run down both sides parallel to the triangular connector and down the bow to the cross.
Beads are selected and arranged in shape and size, prepared for. When we put all the roses in place, we will pre-roll it all over the wire. But it's alright reverse order. We start from the bottom, i.e. the first five beads behind the cross, and the entire left half rises from the bottom up to the first inverted bead. This inverted bead is the last one pulled out of this wire, but later it will be the first one we start the rosary from. On the other side of the wire, we scroll the right side of the rose garden, starting from the bottom, that is, the first washer behind the three-handed connector to the last one, which was turned upside down.
The first bouquets may turn out with some flaws, but if you practice, then soon your crafts will be perfect. You can also try, tell you about all the intricacies of this complex technique.

This bead is the last wire pulled from this end of the wires, but it will be the first one as we start to join the fifth of the fifth. Beads strung on wire, prepared for joining in rose gardens. With such prepared tears, we are calm. We connect them into a rosary, removing them separately from the wire. We are not worried that someone hits us or we unwittingly scatter them. At any time we can postpone the rosary or return to it. It is very easy.
Wire that we buy in a metal store. The connection is enough for a dozen or so rose gardens. We choose a wire in which the individual wires are easily bent and retain their curved shape. We buy pliers from a metal shop or from a shop that specializes in manufacturing. The pliers should be fairly small, fit in the palm of your hand.
If you're into sewing, chances are you have a lot of fabric scraps left over that you probably throw away, but you can use them for crafts. From natural fabrics that have a small floral print, very delicate roses are obtained, they are simple to make, and the design of a nursery with such elements cannot be compared with anything. Scraps can also be used to make patchwork toys, which make great educational toys.
The tip of the pliers should be round, as thin as possible, and always close together. Well-chosen pliers are half the job. If we get one, it's better to buy two pairs at once. Various types pliers with round and semicircular tips.
Any type of wire can be used. However, the rosary must be strong and powerful. The best and most durable is a semi-rigid wire. After unpacking, we cut one wire with pliers to shorter lengths. We catch the wire with pliers about 2mm from the end and we lean back slightly. Then we move the pliers, grabbing the wire at the bend point and twisting forward. We complete it by creating a mesh with two ends - one short, the other the whole wire. We need 59 pieces of finished wire.
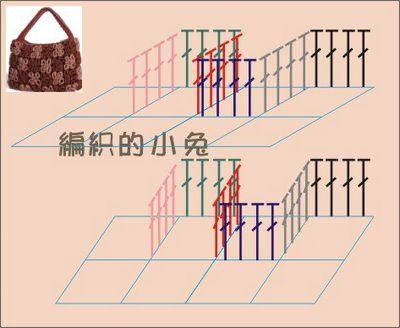
Knitting these rugs is very easy despite their rich and intricate look! I found them on some foreign blog. At first I was fascinated by their brightness and cheerful appearance. All the same, in our Soviet homes, carpets have always been gloomy, I don’t even know why they are - freaks symbolized prosperity in the house, probably because of their price ... But now it’s not about them ... but about beautiful knitted rugs!
It's better to do more because we're doing some fixes and we need to change the wires. Hand wires for connecting individual balls. Separate connectors unite dozens of rosaries and become a continuation of the shoulders of individual balls between them. The same role is achieved by maintaining the correct distance between the balls between the cross and the triangular connector. Single anchors must be of the same length so that the distance between the joints is not only visible, but also tangible. This makes it easier to say the Rosary, especially for the elderly.
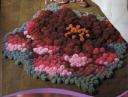
Carefully looking at the photos of these fun rugs, I immediately realized how they fit. Once upon a time, about 15 years ago, I attended a crochet club and there we knitted potholders. I must say that the same potholder still hangs in my mother’s kitchen to this day, she never used it, she says that she is too beautiful to grab hot
Exist different types and forms of single anchors. You can buy ready-made ones, but you can also make your own. Separate connectors are purchased so-called. swivels. Handmade perpendicular straighteners. We clamp, on one side, the tip of the wire and turn it forward, we complete it by creating a mesh with one long tip that we hold in our hand. At eye contact height, we grab the wire with pliers and fold them back slightly to form the eye correctly.
We grab the left hand from the eye, and with the right paws we grab the end of the wire and turn it forward, wrapping it into the second eye. The grid is formed perpendicular to each other and should be. These connectors require 14 pieces per rosary. Let's try to keep the length of these connectors the same.
Well, we knitted these potholders in the same way that these rugs are knitted! Very simple! All you need to know is to knit air loops, double crochets and ... that's it! The basis of such a rug is knitted on the basis sirloin knitting . You don’t even need to make sure that the arches turn out neat, because you will then close these arches with crochet stitches. See this photo for how to do it. The only thing worth noting is that the density of your rug will depend on how many double crochets you knit in each arch, i.e. the more, the denser your rug will be. And yet, when you knit a mesh-base, it is not necessary to knit 2 air loops, you can also one
Cross and three-armed link
This is important when concatenating tens. The rose garden looks good at the moment. Exist different forms, colors and sizes. We buy them from a wholesaler or a dedicated store. own confession. Various types of crosses, trilogy connectors and individual fasteners.
Cross with one perpendicular connector and three-way connector: top with single parallel connectors, bottom with perpendicular connector. Once we have prepared all the components of the Rosary, we join them. We begin to join in the tears of the Mother of God. We remove the first ball and insert a wire with an eyelet from the dorsal side so that they are at two ends. Please note that this will be too long to cut because the inside of the bead pierces the outer shell of the bead.
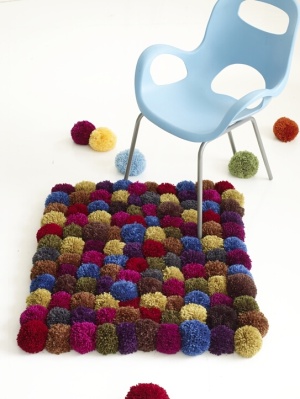 Now, what is not at all difficult to do is pom-pom rugs. In some models, you don’t even need to knit anything. Make yourself balls, and connect them into a rug.
We pinch the protruding wire and twist it forward to fold it in to enter the nose. There is a loop that turns into a second eye when facing sideways. The eyes should be perpendicular to each other. Then we tighten the second wire from the side of the nose, apply the ball and continue as in the first.
Mixing individual granules in dozens. Thus, we connect five more beads. Up to five, we attach one connector, then a large ball, then one connector again and ten more beads. Continue using one connector, large bead, one connector, and the next ten beads. Thus, we have formed the left side of the rosary. Similarly, we prepare the right side, then join them together.
Under the model of a rug with a sheep, you must first tie the lining in the form of this very sheep, and only then sew pompoms on it. Likewise with a mouse. I liked the bear the most. This can be knitted for a child. My baby loves to sit on the floor both in winter and in summer, and so, I think to tie him this :).
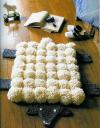
 The pompoms themselves are made by in a simple way. Cut out two circles from cardboard, cut holes in each in the form of small circles. And then take the yarn and wind it around these same circles. The figures show the main steps.
By the way, you can avoid fiddling with cardboard and use special device for pompoms. One of the options is shown in the photo. I myself never resorted to these accessories, because I never had to make a lot of pompoms, for example, a couple of pieces for children's hats. But to make such a pom-pom rug, I think you should purchase this accessory, because you will have to make a lot of pom-poms, and the cardboard will constantly fray and you will need to cut out new ones. It is not expensive. Around 50-60 rubles.


