Tiles for parking a car in the country. Parking under the car from paving slabs
Quite often, when arranging a backyard area, owners are not limited to paving pedestrian and garden paths alone. They decide to pave the way for the car to and provide for the possibility of parking it in the yard in the open air. However, the laying technology paving slabs under the car is somewhat different from the arrangement of footpaths - both in the choice of materials and in the method of preparing the base for coating.
Requirements for road surfaces for the passage of a car
Features of laying paving slabs for possible passage and parking of the car are associated with a large weight effect on the paved surface. In this regard, they are subject to the following requirements, the observance of which is mandatory:
- the coating must be stable and not move under high weight pressure;
- the surface should be even and dense, without loose seams between the tiles;
- the base of the pavement must be made very dense, without air voids between the components;
- the obligatory presence of a drainage drainage layer, since water can affect the strength of the base;
- the use of paving slabs of increased strength and frost resistance;
- installation of a curb fence made of stone.
In order to prevent subsidence and destruction of the coating, it is necessary to apply the technology of a reinforced base and use materials of increased strength.
Selection of necessary materials
Manufacturers building materials offer paving slabs on the market. The first type of materials is distinguished by bright saturated colors and a variety of shapes. Tiles made by vibrocompression are more modest in appearance, but they have increased strength and frost resistance.
If the weight of the car does not exceed 1 ton, then clinker paving slabs can also be used for laying. In the case when the weight of the machine is over 1000 kg, then it is better for you to opt for pressed products. The thickness of the tiles must be at least 60 mm.
When buying a tile, ask the seller to show a cut sample from the batch being sold. He is obliged to do this, and if he refuses, then simply do not buy such a product. The incision should have a uniform density and should not contain any foreign inclusions. Their presence indicates the low quality of the material.
About meaning appearance We will not talk, but checking the tiles for abrasion is easy. Take 2 stones and rub them right side together. Look at the result: if the surfaces remain the same, then the material is good, otherwise it is better not to take such a tile.
In addition to paving slabs, to perform work, you must purchase:
- sand, preferably river sand, for the primary substrate and backing pad for paving slabs;
- crushed stone with a fraction of 20-40 mm to create a drainage layer under the base of the coating;
- gravel with a fraction of not more than 25 mm for a denser overlap of the drainage layer;
- cement brand M300-M500 for the preparation of concrete and the formation of a cement-sand mixture;
- insulating with one-sided direction of moisture passage.
In addition, it is necessary to resolve the issue of choosing and acquiring a curb stone, which will protect the passage and parking space. You can make it yourself from concrete or buy it.
Marking and earthworks
Preparation and marking with pegs and cord.Laying paving slabs under the car begins with the marking of the area intended for paving. The width of the road should be at least 2.2 meters, and the parking area - at your discretion. The car entrance to the house can be arranged close to the footpath. For marking and measurement, pegs, a strong cord and a tape measure are used. The distance between the pegs should provide a good cord tension.
After that, in accordance with the marked contours, the top layer of soil is removed to a depth of 30-35 cm. If the area is large, then it makes sense to hire a backhoe loader to perform this work. He will be able to carefully remove the fertile layer and transport it to the place of storage or scatter it in the right place.
 Schematic options for the bases for laying paving slabs.
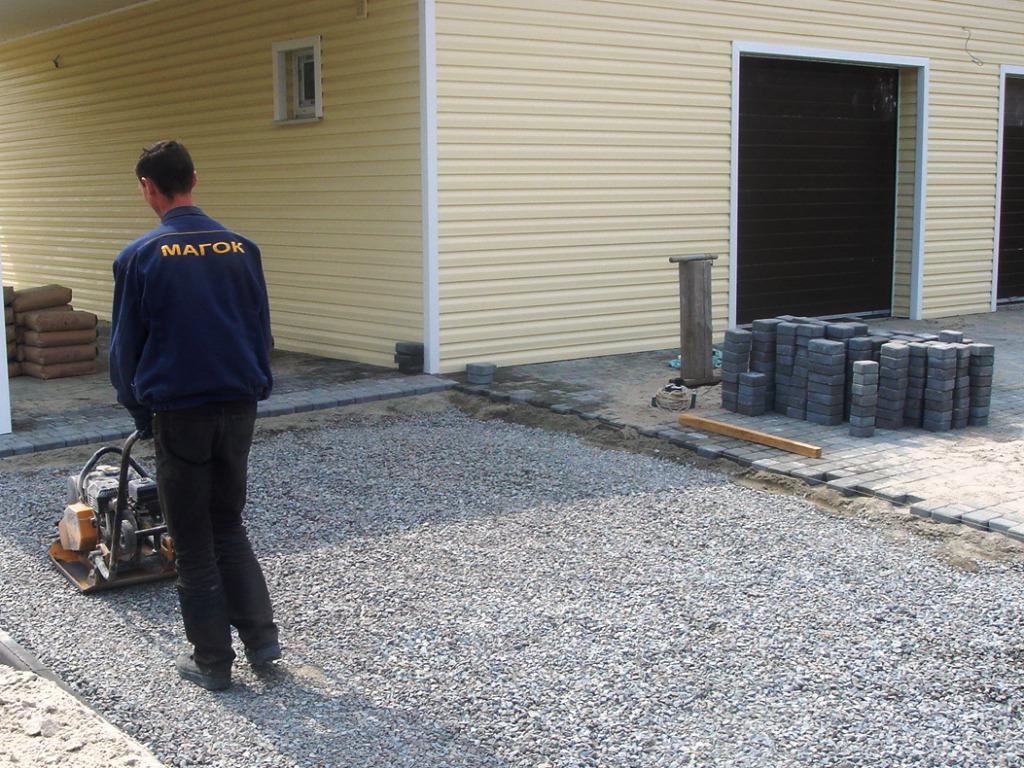
 The bottom of the resulting trench should be sprinkled with sand with a layer of 2-3 cm and compacted well using a construction tamping machine or a vibrating plate. Geotextiles should be spread over the compacted sand in such a way that adjacent canvases overlap by 8-10 cm, and the sidewalls are wrapped up by 20-25 cm.
This layer will prevent weeds from growing through the base and keep the surface looking beautiful for a long time. In addition, it will stop the possible rise of groundwater in the spring.
Backfilling of the drainage layer
 Tamping of a drainage layer from crushed stone and gravel.
 A curb stone is installed along the edges of the passage and the platform. The installation height is adjusted by adding sand mixed with gravel. The vertical fastening of the curb from the inside is carried out by driving in persistent pegs, and from the outside - by adding crushed stone, gravel or sand.
Now a layer of crushed stone 12-15 cm thick is poured onto the textile coating and rammed. A layer of gravel mixed with sand in a ratio of 2: 1 should be laid on top of the crushed stone to level the surface. After that, you need to tamp the surface and cover the drainage layer with geotextile.
Sand cushion foundation
A pillow of pure river sand 5-7 cm thick is poured over the drainage layer, spilled with water and well rammed. For the next layer, it is necessary to prepare a dry cement-sand mixture in a ratio of 1: 4 and pour the base on the sand with a layer of 6-7 cm.
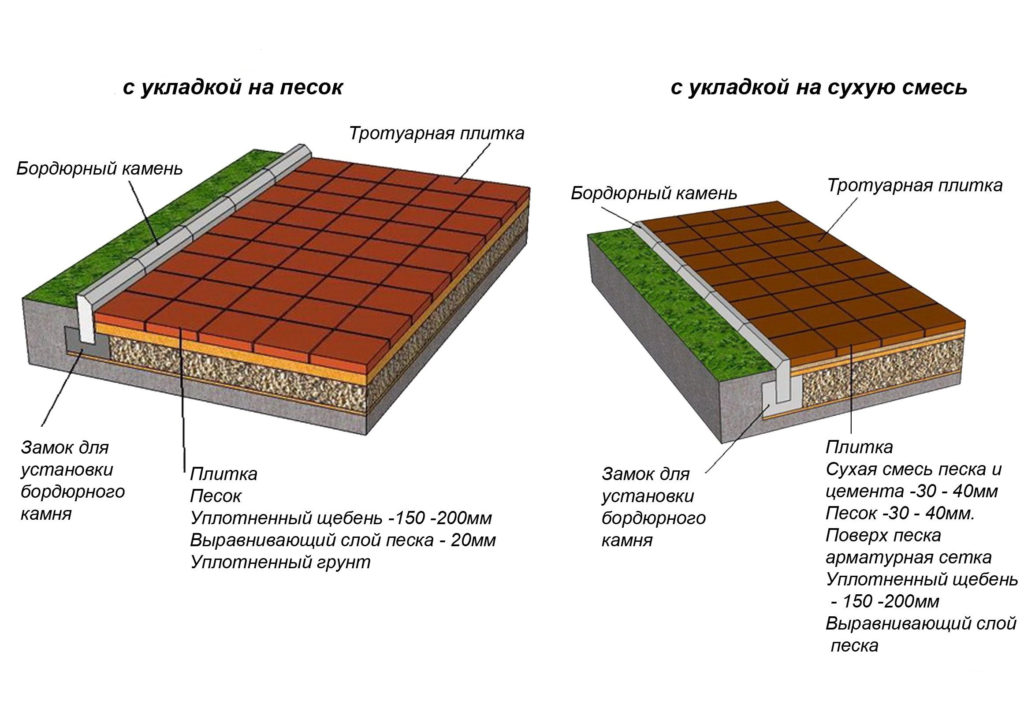 Schematic representations of options for laying on sand or dry mix.
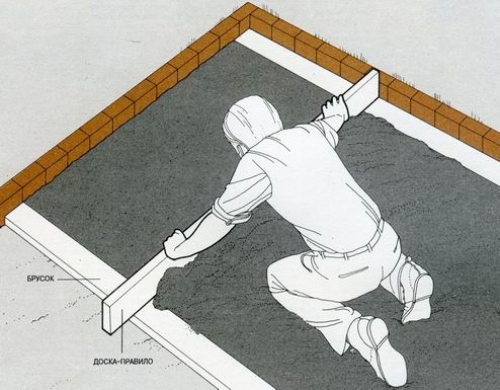
 It also needs to be tamped down and leveled with a plaster rule according to the level. For more accurate alignment, you can install metal longitudinal beacons, fixing them on bulk slides from the mixture.
Paving slabs
After preparing and leveling the cement-sand base, paving slabs are laid under the car. It is very important that precipitation does not fall between the installation of the top layer and the laying of the tiles. The surface on which the paving stones will be laid must be dry.
For the edge row of paving slabs, pull the cord at the appropriate masonry height. Lay 1 row along the curb and 1 row across the driveway. Now start filling in the required area by laying tiles in 1 m 2 segments, moving from one area to another across the driveway.
Constantly check the location of the tiles in height using the building level. Tiles must be laid as close as possible to one another. Tiles are leveled with a rubber mallet.
 After finishing the masonry, sprinkle a little dry cement mixture on the surface and use a brush to fill the seams between the tiles with it.
 Final work
The final work includes cleaning the paved surface and leveling the level of the adjacent territory. Water the surface 2-3 days after laying. After it dries, repeat filling the joints with a dry cement mixture. This will ensure complete sealing of the joints and exclude the penetration of water under the coating.
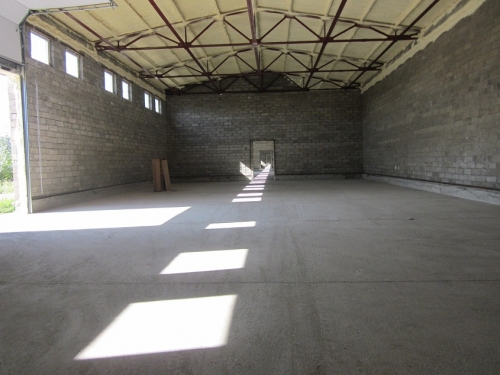
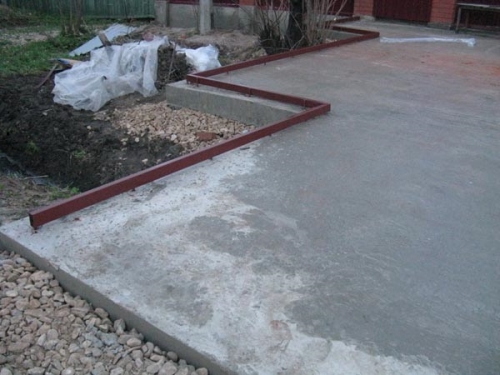
The entrance group, the main elements of which are the road to the garage, the area directly in front of the entrance and the concrete area for the car, located on the territory of the site, are integral elements of any site, whether it is suburban ownership or the adjoining territory of urban private housing. The arrangement of each of these elements is characterized by its own characteristics, which every owner of a private territory should be aware of. Nobody doubts the durability of concrete sites, and if you use imagination and minimal design skills in the process of arranging them, they can be a successful addition to your garden and a worthy alternative to brick patios, which are one of the most sought-after elements of creative landscape design site. How to equip a concrete site with your own hands and what are the main technological points of pouring concrete - you will receive answers to these and other questions by reading an article prepared by our experts.
Elements of the entry group: a brief description
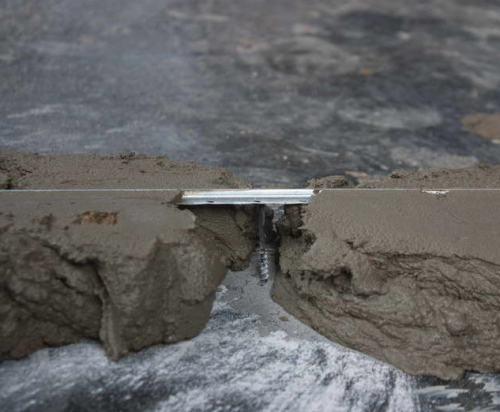
Concrete platform located in front of the entrance, is often a ramp designed not only for more convenient entry into the site, but also to prevent excessive moisture from entering neighboring areas. From the point of view of the device, the ramp is presented in the form of a monolithic concrete slab, previously reinforced, the thickness of which is determined by several factors: the size of the proposed ramp and the dynamic load that the ramp experiences during the entry of the car. In most cases, it is optimal to use monolithic slab, reinforced with a metal mesh, while the thickness of the plate does not exceed 15 cm. To prevent possible deformations, when arranging the ramp, it is necessary to take into account a number of physical constants, among which the main place is given to the direction of the load when the car is moving, which is associated with the slope of the ramp. In this regard, during the construction of the ramp, an expansion joint is arranged, located between the horizontal slab on the site and the slab of the ramp. The final arrangement for the arrangement expansion joint is its sealing material for waterproofing - hydrostekloizol.
Concrete pad under the car, located on the territory of the site, is a platform made of monolithic concrete. If the design of your site implies the presence of concrete paths or paths made of paving stones, in the process of arranging a concrete site, it is important to take into account the height of its base, which should be on the same level as the base of the tracks. You can combine a concrete platform for a car and footpaths using a curb stone or a drain element.
What are the main advantages of a concrete pad?
Despite the fact that the easiest way to organize a site or a parking area for a car is to equip a site covered with rubble, in most cases experienced developers prefer more reliable concrete sites. And all this is connected not with a biased attitude towards rubble, but with the peculiarities of weather conditions in the spring. In the spring, during rain or snowmelt, the soil gradually softens under a layer of rubble, which will lead to its subsidence under the weight of the car. In this connection, in this case, the most optimal is the pouring of a concrete site, the organization of which must be carried out before leaving the garage. It is necessary to say a few words about the advantages of a concrete platform:
- Versatility and long service life;
- Ease of installation, which makes it possible to manufacture it independently;
- One of the most important advantages of a concrete platform is the democratic cost of materials for its manufacture, as well as the ease and unhindered delivery of them.
Depending on the purpose, a concrete site is characterized by certain design features which must be taken into account when designing it. If you plan to use the site as a kind of patio, on which a deck chair or gazebo will be installed, consisting of a small table and a canopy, its operation will be carried out under light loads. The thickness of the concrete pouring in this case may not exceed 5 cm. In this case, used, unnecessary pieces of iron are suitable as a material for reinforcement. But in the event that the concrete pad will be used as car parking or areas for installing a pool, the operating loads will increase significantly, which is the defining moment of its design. The thickness of the concrete layer is at least 10 cm, and steel reinforcement should be used as the reinforcement material.
Arrangement of a concrete site: preparatory measures
Measures for the arrangement of a concrete site are characterized by a number of specific features. First of all, it must be borne in mind that in most cases you are limited in the choice of territory, due to the location of the garage on the site. And in this case, one has to face certain difficulties associated with the fact that the most even and dense enough territory should be allocated for the arrangement of the site, which will allow rational use of the concrete solution. In this regard, before proceeding with the arrangement of a concrete site, it is necessary to carry out a number of preparatory measures, the essence of which is the alignment and tamping of the site.
The first stage of preparatory measures involves the removal and removal of fertile soil, in which vegetation is found. If this is not done, the plants remaining after the arrangement of the site will rot with the formation of cavities, which will significantly reduce the performance of the concrete site. To do this, it is necessary to dig the soil to a depth of half the bayonet of a shovel, which will be quite enough to remove the fertile soil. Having dug up the necessary territory, the fertile soil is moved to another area, and, having removed the soil that has fallen on the blind area, mark the territory using stakes and twine.
Important! When choosing a territory for the arrangement of a concrete site, make sure that there are no communication networks on the territory of the selected site. If it is impossible to comply with this condition, communications must be protected by “clothing” them in a protective case or box.
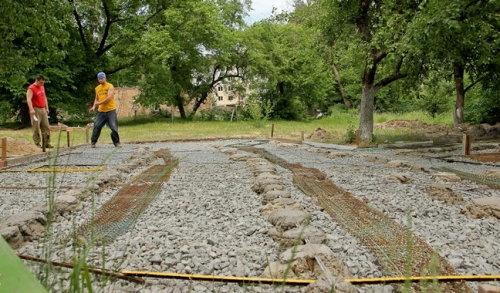
To prevent subsequent shrinkage of the territory, which, if the rules of arrangement are not observed, is observed during the operation of the site, the territory must be carefully leveled and compacted, while checking it for the presence of hidden holes. Further, on a leveled basis, a sand and gravel pad is equipped, the presence of which will avoid the appearance of cracks during operation. The thickness of the protective cushion is determined by the expected load on the concrete pad. First of all, a layer of sand is laid, moistened and carefully compacted, on average equal to 10 cm. After that, crushed stone or gravel is laid in the same way. The thickness of the gravel layer must be at least 5 cm, which is due to the depth of soil freezing under the concrete layer.
![]()
Important! If you neglect our advice and refuse to lay a sand and gravel pad, you will soon notice that cyclic freezing and thawing contributes to the gradual destruction of concrete from the inside, which will lead to the fact that monolithic concrete slab will soon cease to be.
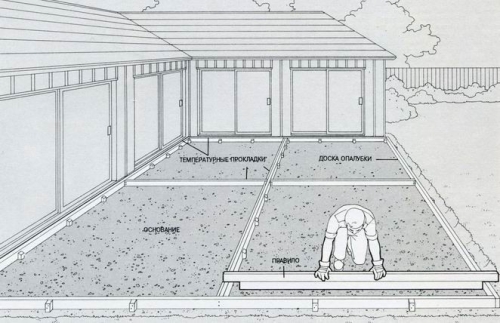
Formwork organization: highlights
Despite the fact that concrete can be poured either into the formwork or directly into the ground, we consider it necessary to consider in detail the arrangement of the formwork. Before discussing the procedure for organizing it, let us clarify that in the case of pouring concrete directly into the ground, the role of the formwork is played by the soil itself or the walls of the building.
But if you still prefer pouring concrete into the formwork, we advise you to approach its arrangement with maximum thoroughness. The formwork is designed to hold the concrete in its original state until it is completely hardened (depending on the initial consistency of the mortar, its hardening time can vary up to 10 hours). For the manufacture of formwork, almost any material can be used, depending on the thickness of the concrete layer. If the thickness of the concrete layer does not exceed 5 cm, then plywood 6 mm thick can be used as formwork. In our case, a large-scale operation of a concrete site is planned, and therefore, we recommend using boards for formwork.
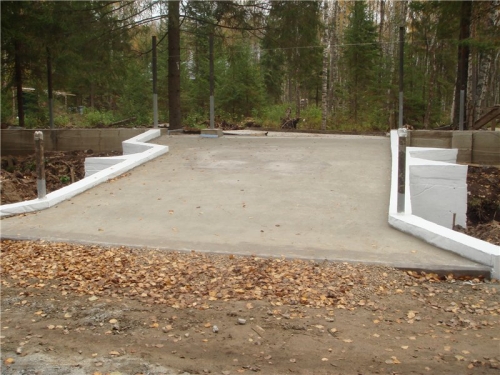
Formwork production begins with the installation of wooden pegs, which are driven into the ground at the four corners of the site. Next, boards are nailed to them. Then three of the four sides must be reinforced with additional pegs, which are installed from the side of the garage door and on both sides adjacent to the side of the formwork installed near the garage door. Considering the arrangement of the formwork, it is necessary to discuss one more nuance related to the concrete pouring area. Distinguish between full and partial pouring of concrete. When it comes to erecting a concrete platform that does not function as a foundation, it is permissible to bet on a partial pour of concrete, which is much easier to do, especially if you work alone. In this regard, the size of the casting sectors is determined at the stage of formwork erection.
Arrangement of guides for pouring concrete: manufacturing options
In this case, it is possible to use two ways to install guides.
Method number 1
The manufacture of guides is carried out from a profile pipe, characterized by a rectangular cross-sectional shape. In the process of work, it is necessary to resort to the use of welding. If you are not a professional in this field, do not rush to abandon the arrangement of a concrete site, since the welding work in this case is so simple that anyone with minimal practical skills in this field can handle it. In this case, to profile pipe reinforcing bars are welded, observing a step equal to one meter. As for the length of the welded reinforcement, it is determined as follows: after driving the reinforcement into the base, located above the crushed stone layer, there should be free space equal to the height of the concrete layer. In most cases, the optimal length of reinforcement is 25 cm. Before proceeding with concreting the site, reinforcement is laid on a layer of crushed stone, on top of which guides are installed. To protect the reinforcing structure, experts recommend raising it a couple of centimeters above the rubble layer.
Important! It is also possible to raise the reinforcement directly in the process of pouring concrete.
After the guides are installed, and their angle of inclination is checked using the building level, it is necessary to strengthen the entire structure. For this, it is necessary to prepare a large number of concrete mortar, which is subsequently laid in the form of pyramids between the reinforcement bars. The implementation of this action will prevent subsidence of the structure and will help strengthen the integral structure.
Method number 2
The second option for arranging the formwork involves arranging concrete structure. First of all, it is necessary to stretch the marking line so that its level coincides with the level of the future concrete platform. On both sides of the fishing line, formwork is organized from pipes or boards. In the process of arranging the formwork, it is necessary to observe the distance between its individual elements, which should be from 8 to 12 cm. Directly at the construction site, a small amount of concrete mortar is prepared, which must be placed in the formwork to the level that is limited by the stretched fishing line. After the initial setting of the concrete mixture has occurred, it is necessary to dismantle the formwork and move it to the next place where another guide is planned to be erected. The minimum distance between the guides should be 2.7 meters.
In its simplest version, the arrangement of a concrete site can be carried out without the manufacture of guides. In this case, they recommend making a reinforcing wire frame with a diameter of at least 2.5 mm. In this case, the grid is placed in such a way that it is located at a distance of 5-8 cm from the formwork.
An additional layer of gravel 5 cm thick is arranged on top, which also needs to be leveled.
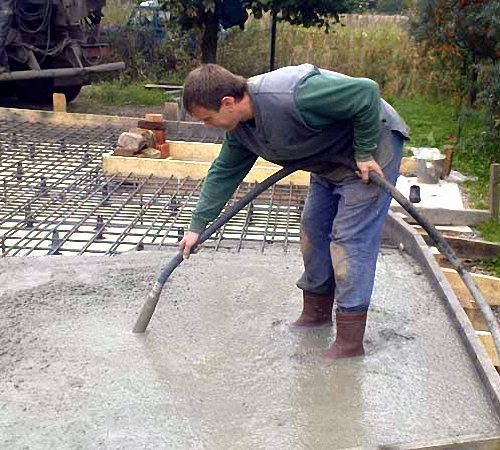
Site concreting: technological stages
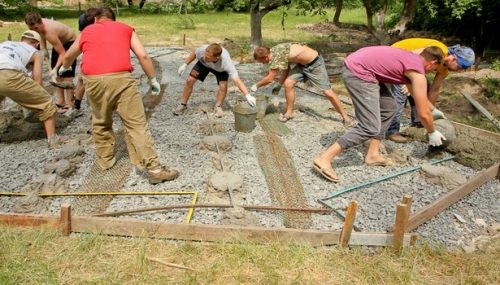
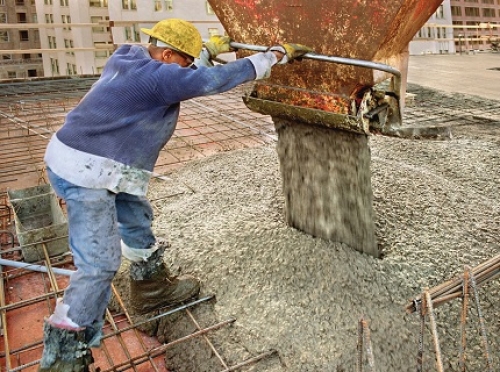
Having carried out all the above stages of arranging the territory, which to some extent can be considered preparatory, we pour the concrete platform. When choosing materials for pouring a site under a car, bet on concrete of the M400 brand, since it is it that is considered optimal in this case and is able to withstand the load transferred to the site car. In the process of preparing a concrete solution, it is necessary to observe a 1: 1 ratio, where there is one bucket of sand per bucket of cement, which should be as clean and free of clay impurities as possible. In addition, to prepare the solution, you will need crushed stone and water. The solution is prepared as follows:
Water is poured into the container of the concrete mixer and, turning on the mixer, they fall asleep in the pear required amount cement, after which crushed stone is used, which prevents the formation of cement lumps, acting as another, additional concrete mixer blade. In conclusion, the required amount of sand is added and, under the control of the density of the solution, it is kneaded for 10-15 minutes. This solution can be considered a standard concrete solution, prepared in accordance with all the advice of professionals in this field, the essence of which is that the solution should be thick enough.
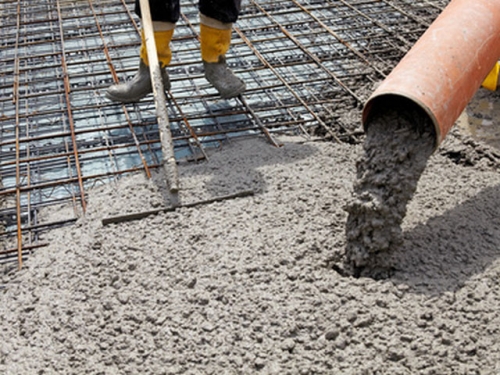
Our solution is a classic concrete, which is poured into the formwork. And this is one of the most time-consuming, but at the same time reliable methods of preparing cement mortar. To make your task easier, you can go the other way and exclude crushed stone from the ingredients for the solution. In this case, the preparation of the solution is carried out according to a similar technique, but in the end, the solution should be uniform in its consistency and resemble a fairly thick jelly. A uniform consistency will contribute to the most favorable seepage between the crushed stone, which will allow cementing the concrete pad as a single monolithic slab.
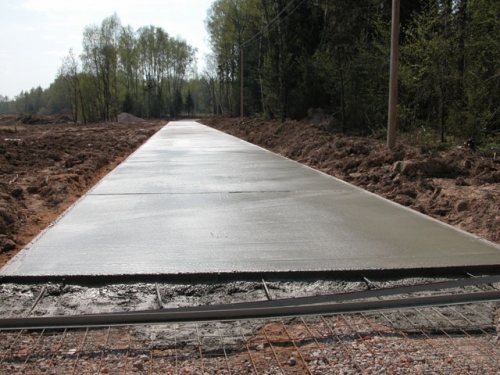
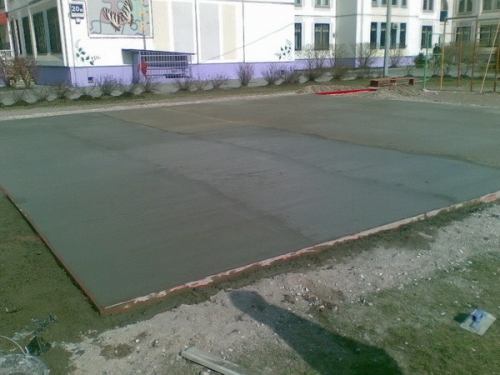
The device of concrete platforms involves pouring concrete mortar, starting from the farthest corner relative to the location of the concrete mixer. During the pouring process, it is necessary to observe the specified slope. Important to remember Golden Rule concreting, the essence of which is that the less time spent on pouring the concrete site, the stronger the subsequent screed will be. Upon completion of the pouring, the surface of the site is leveled, after which excess concrete is removed. The final touch on the arrangement of the concrete site will be the introduction of design elements, which will be especially relevant if you plan to equip the patio on this site.
To add variety to the site, it is enough to walk over the surface of the concrete that has not yet set with a brush, which will give it an additional design touch, the introduction of which will be not only aesthetic, but also practical. This is due to the fact that visual aesthetics in this case is combined with safety due to the additional roughness of the site. That's all, the work on the arrangement of the concrete platform is completed. It remains to be patient and wait for the concrete to dry completely, which is the key to a long and correct operation concrete site.
If you are not sure that a large amount of runoff will not damage your concrete pad, you need to think in advance about the arrangement of the drainage system, which must be carried out at the design stage of the site.
To ensure high-quality drying of concrete, a newly poured area must be covered with plastic or sprinkled with a large amount of sawdust. This is necessary in order for the mortar to harden in accordance with all the rules, which imply the gradual drying of concrete while maintaining the optimal level of moisture in it. Since the final hardening of the mortar can only be said after three weeks, even after removing the protective plastic, it is not recommended to operate the site with a maximum permissible load, as this can lead to deformations or a violation of its integrity.


