Floors in a brick house on wooden beams. Attachment of support bars. Video - Draft floor from OSB
Private low-rise construction in last years is becoming more and more popular.
Do-it-yourself country houses and summer cottages occupy an increasing share in the total volume of housing being put into operation.
 The most demanded material in private construction is wood, due to its affordable cost and ease of processing. But not all individual developers have sufficient experience and knowledge to independently carry out the entire range of construction work. So, the question often arises of how to properly lay the floor of the second floor in compliance with all building codes and technologies.
Wooden beams were widely used in the past at the high cost of wood. Today, in construction practice, they are involved in beam and wall formwork and large-format formwork. At present, they are mainly adhesive mass or particles with improved strength and deformation characteristics.
Their service life is up to 10 years. Their usability is increasing. A modern wooden beam has many additions that make it easier to shape. It is a renewable source material. After the operation is completed, find another application without polluting the surrounding footprint.
Construction requirements for wooden floors
In order to mount a durable and safe wooden floor between the 1st and 2nd floors with your own hands, you must strictly comply with the technical requirements for them.
Thermal insulation layer
 Thermal insulation of the floor will improve the temperature in the room on the second floor
 If the wooden floor will separate the upper and lower rooms with a temperature difference between them of more than 10 ° C, it will be necessary to build a heat-insulating layer.
Because of all this, they will be increasingly found on construction sites as a formwork element for the future. Technology modern construction. Construction technology. Educational book on construction technology for the training course. Wooden ceilings have strong traditions in our country. Wooden ceilings are a proven solution for every type of building, whether representative spaces or extensions. The material from which it is easily accessible and very durable. Wooden ceilings also correspond to the meaning of "second roof" and gave people a sense of home and security.
This is necessary, for example, when arranging ceilings between the first floor and the underground, basement or between the first / second floor and an uninsulated attic.
Beam strength
 Beams and ceilings must withstand up to 180 kg / sq.m of load
 When constructing the floor of the second floor according to wooden beams special attention should be paid to strength load-bearing structures. The safety of the operation of the building depends on how durable the wooden beams of the floors are.
Their production was the study of handicraft workshops from major domestic and foreign masters or separated from father to son. The wooden ceilings of the reopening have been modeled Scandinavian countries and America at the end of the last century. Investors and architects within the framework of new economic and environmental thought back to their biggest advantages: low floor area weight, simple production technology and the ability to provide good warmth- and soundproofing. Ceilings with wooden beams are most often the focus of the company's implementation in the renovation of floors in old buildings.
According to building codes for wooden low-rise buildings, the maximum load on the floors of the first floor should not exceed 210 kg per sq.m., the pressure on the wooden floor of the second floor should not exceed 180 kg / sq.m., and for attics and attics this figure should be less than 105 kg/sq.m.
Maximum deflection
In addition, building codes also impose requirements on the deflection of wooden floor beams. According to SNiP, this coefficient should not exceed 1 to 250. That is, the maximum deflection of wooden supporting structures during operation should be less than 4 mm per meter of beam length. 
Therefore, a system should be developed for the reconstruction of protected buildings to approve the authority of the preservation of the state heritage. This results in peeling plaster and paintings, swelling and cracking of wood elements. For cement screeds, the situation is even worse. After loading, the screed is stored for 2-3 days under a film of water and of course in a closed space to prevent rapid shrinkage and cracking. This would in any older buildings cause permanent damage caused by condensation in the structures.
According to this standard, the deflection of a beam structure 4 m long in the center should not be more than 1.6 cm (4 m: 250 = 0.016 m). If it is planned to place massive furniture and household appliances in the room, flooring as a floor covering of tiles, etc., then the requirements for structural rigidity increase to 1 to 400.
That is, the deflection should not exceed 2.5 mm per meter. For non-residential attics and attic spaces, a larger deflection coefficient is allowed - 1 to 200 (5 mm per 1 meter).
The drying process is then approximately 28 days. Unlike these processes, dry floors are walkable immediately after installation, and fully loaded up to 24 hours. Another advantage may be the transfer of construction and after construction, where dry floors require special pumping equipment and can be delivered in hard to reach places. Because dry flooring systems are lightweight, avoiding static problems. Extensive renovations in recent decades mainly on residential buildings from the end of the century to the middle of the century.
During the reconstruction, we wanted to keep the original board decks, but when we opened the board, we found that it was partially damaged. The depth probe at the very beginning of the reconstruction will help determine the current state of all layers and based on the requirements of the investor Robert Pater then he proposed new song gender. In addition, the reconstruction must be carried out in such a way as not to damage the effect of the ceiling of the neighbors.
Soundproofing
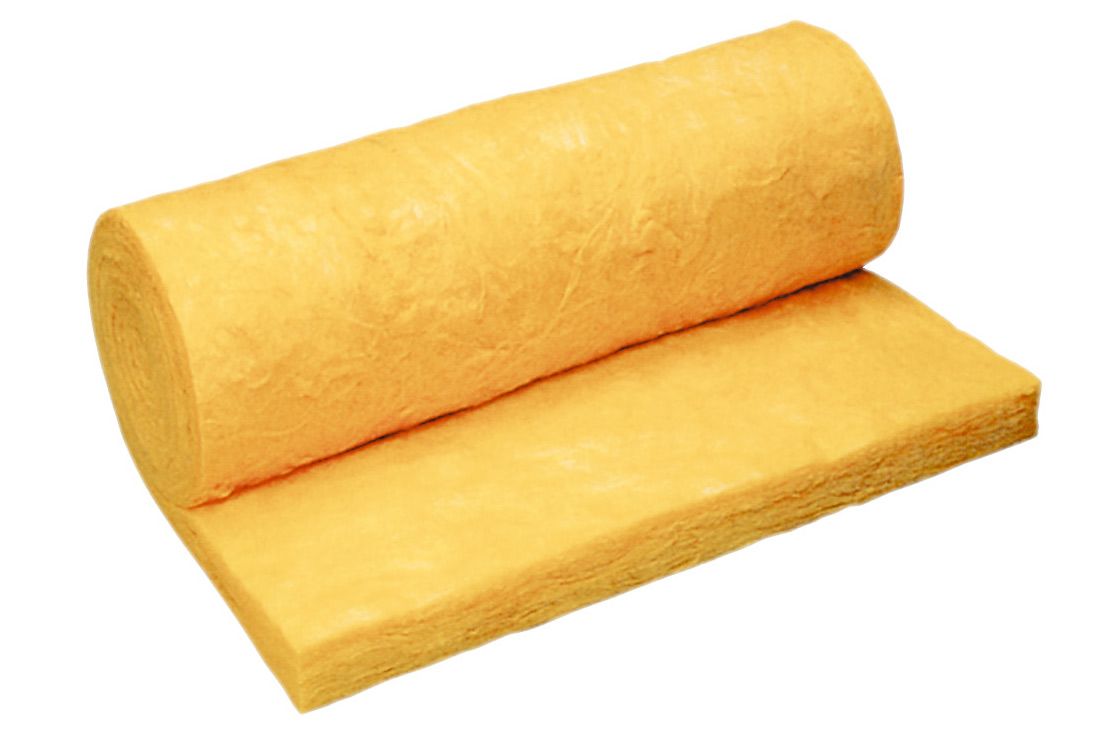
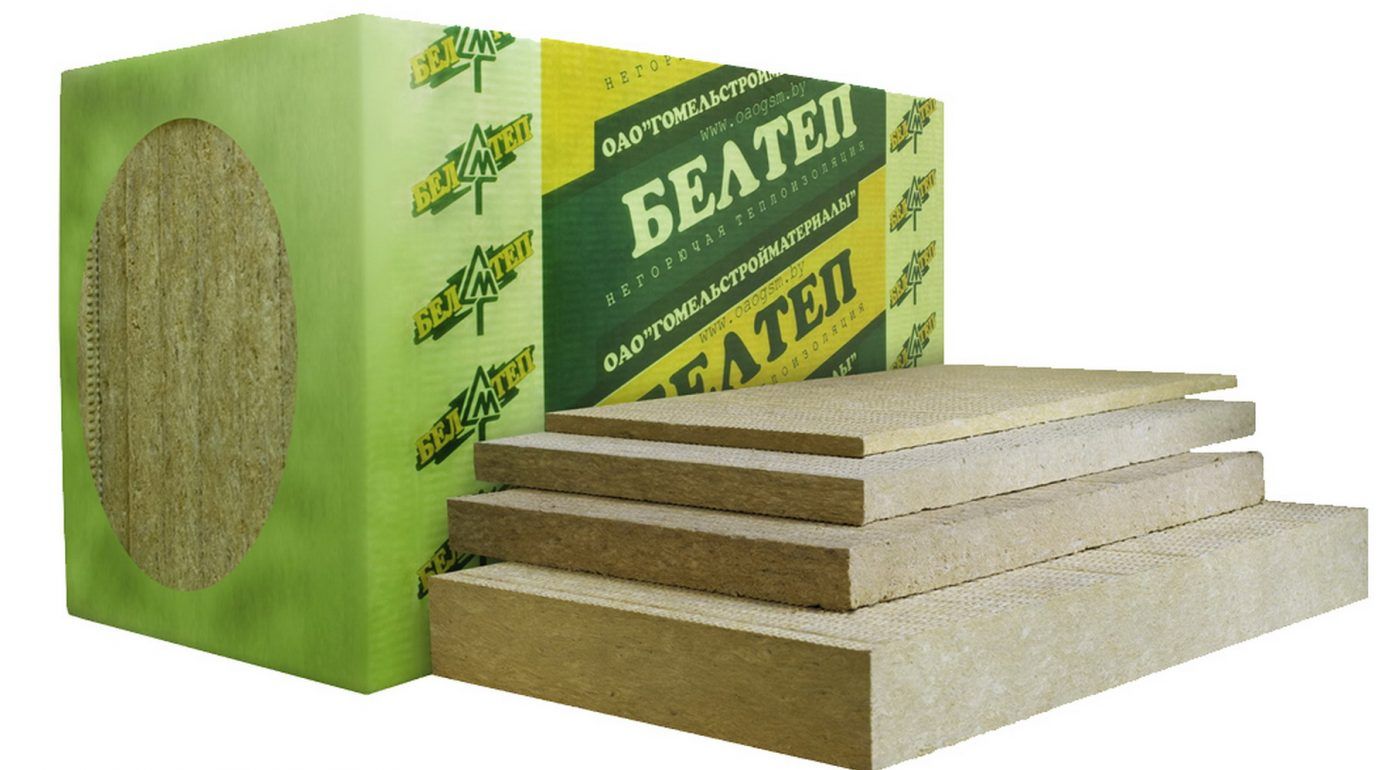 Fifty-millimeter mineral wool will not only insulate the floor, but will also become a good sound insulator
 According to building codes, the sound insulation threshold for floors residential buildings should be 50 dB.
To ensure this requirement, it will be enough to cover the floor of the second floor under the finish coat with mineral wool 50 mm thick.
The status of the floor before and after reconstruction, including progress, is shown in the attached photo report. The original ceiling beams of the ceiling, where lay the usual plank Embankment, which were kept pillows with a wooden floor. The lower surface of the beams was due to fire safety and insulation equipped with tamper boards with reed mats and plaster.
After removing the subfloor and remove the ceiling cushions to be able to check the quality of the original backfill. In this case, it is inappropriate and incoherent rubble. The wreckage was removed from the cover board. The surface is good to get rid of dust, and then check the quality of the board.
 The length of the beam should be no more than 5 m
 The maximum allowable length of the free sag of wooden beams should not exceed 5 m for interfloor and 6 m for attic floors. If the design length of the room is more than 5 m, it will be necessary to install an additional support under the bearing beam. The fact is that the optimal length of the supporting wooden structure is 4 m.
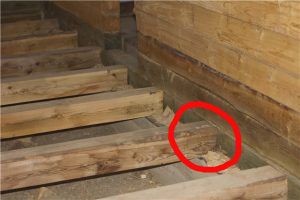
Looking into the beam cavity: dust from construction debris partially clears the space. There is also an option to check the heading beams that are stored in the tracing wall. This site is often affected by rising damp, it can be disturbed not only by decay, but also by wood-destroying fungi and insects.
Clearing the Cavity: The hollow cavity between the beams can cause a "drum" effect, in that it will resonate the sound. Therefore, it is desirable to partially fill the insulation. The decking can also be formed by chipboard. In both cases, the parameters of the deck are determined on the basis of a static analysis, which calculates with the new load of the floor composition and operation. Geotextiles are used against tumbling small parts in the ceiling construction. The edge insulation strip is laid along the edge of the room through the geotextile spot bracket to the wall.
With a further increase in its length, the rigidity and strength of the supporting structure are sharply reduced and the requirements for the thickness of the beam section increase disproportionately. So, in order for the deflection indicators for an 8 m beam to “fit” into the SNiP standards, its thickness should be about 40 cm. For example: the same deflection indicator shows a 4 m beam with a cross section of only 15 x 15 cm.
The wiring in the floor must be covered with a soft shield. Honeycombs are cut as needed so as to fill all the space around the pipes. Mounting is recommended to keep at least 200 mm from the wall of the room. The honeycomb cover is formed by mold that will spill out of the honeycomb backfill. It starts at the entrance to the room and goes to the opposite wall. The shape ensures that the entire floor area reaches the layer.
Applications must be honeycomb ceiling to floor evenly at an additional cost. They must be fully applied in a minimum thickness of 10mm. Particular attention should be paid to the edges of the room, excess bedding should be loaded onto the work table.
Wood is a material quite vulnerable to external influences, primarily dampness and fire, therefore, before proceeding with the construction of load-bearing structures, all wooden elements must be treated with antiseptic materials and flame retardants.
Construction material
Before proceeding with the installation of the floor on the second floor on wooden beams, you should make a list of all the necessary materials. This will allow during work to avoid unforeseen downtime and delays caused by the need to purchase some building materials.
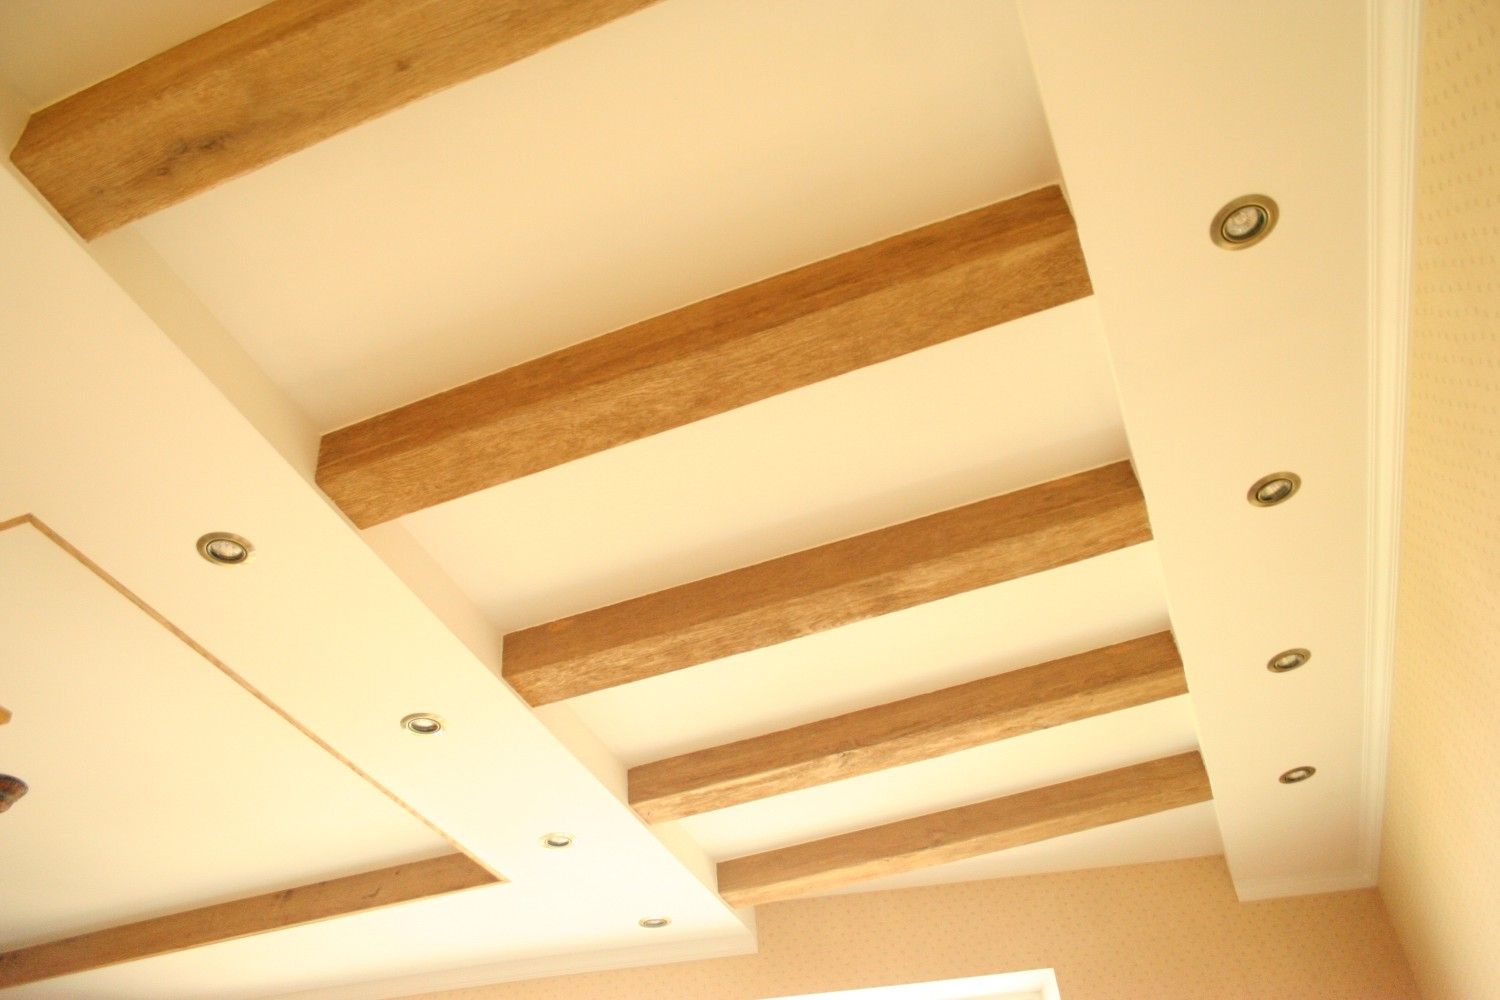
Wooden truss structure
For further movement in the room, the so-called. Following styling fibreboard in the function of soundproofing.
Material used and method of fixing wooden buildings
The sharp roof of the mourning hall rises from the base. The bases are gently built into the landscape, with two mounds separating the ceremonial, ceremonial floor from the commonplace. The screen rewrites the Wallachian cottage, the wooden formwork is constantly beaten into concrete. Amazing, casual, persistent. Janick's barn, with its simple, simple beauty, is subtly present.beams
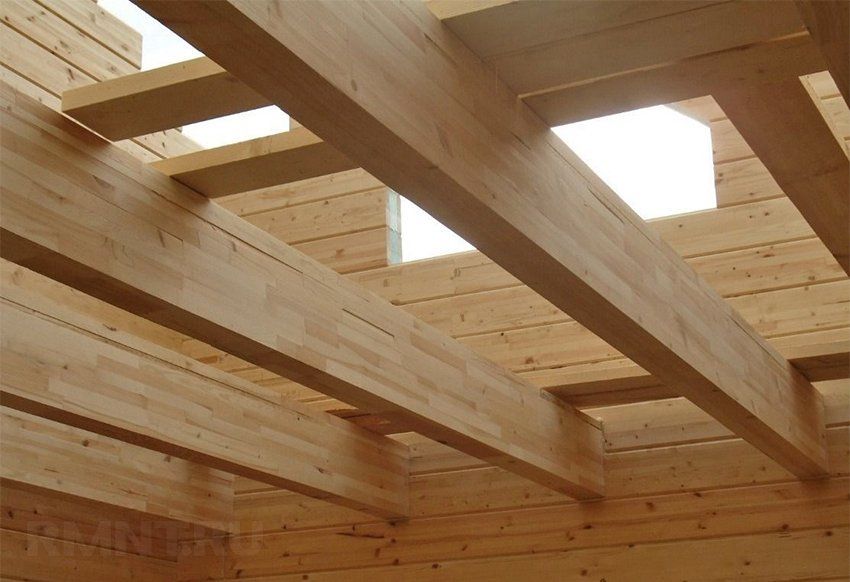
 A beam section of 15 x 15 will be enough
 The basis of the entire construction of interfloor wooden floors- beams. They play the role of load-bearing elements, and the strength of the structure depends on them. For them, a bar or gun carriage with a section of 15 x 15 cm, or 18 x 18 cm is usually taken.
The traditional archetype will support when it comes to the immediate elimination of the fragility of human life. The original main entrance to the cemetery remains, but it is completed with a new full-scale axle. It is not necessary to bypass the Transfiguration in the ceremony, nor in visiting the deceased, the new gate in the middle part of the conspiracy. An open partially covered area with benches around the perimeter provides an opportunity to gather mourners or rest for ordinary visitors.
The building of the new funeral hall is located in the lower half of the district. The purpose and intention was to create a curtain against an external environment that is too disliked by meditation. Designation of intentionally large volumes of the building is achieved by built-in free spaces. Hierarchy - public, semi-public and closed.
This section is usually enough to provide sufficient rigidity for a specific load of 400 kg per sq.m. In this case, it is necessary to observe the parameters recommended by building codes: the span is 4 m, and the step between the beams is 60 cm. Based on these parameters, you can also calculate the required amount of timber.
| № | Span length (mm) | Beam cross section (mm) |
|---|---|---|
| 1 | 2000 | 75×150 |
| 2 | 2500 | 100×150 |
| 3 | 3000 | 100×175 |
| 4 | 3500 | 125×175 |
| 5 | 4000 | 125×200 |
| 6 | 4500 | 150×200 |
| 7 | 5000 | 150×225 |
However, in the absence of a beam and small values of the expected loads on the floor, it is quite possible to use boards 50 or 40 mm thick, knocked together in pairs and placed on the edge. This option is suitable for flooring in the attic or in a small country house.
For the first floor of a residential building, this option is not suitable due to the small bearing capacity boards: to ensure the necessary rigidity, it will be necessary to significantly reduce the step between the plank beams, which will lead to unjustified waste of material.
The immediate family will be the first to go to a private farewell. Access is deliberately designed in the space of the funeral hall, this path is part of the ceremony, goodbye. They pass through the ceremonial hall, around the growing atrium trees and during the seasons of the year, gradually flowing in different colors of the lawn blooming. A view of the atrium was made possible even from the survivors' room, relying on the power of nature, perhaps to alleviate the sadness. The coffin room will be lit by a sunroof.
ceremonial hall with required power also intended for relatively large funerals. But how can we create an environment that also serves small ceremonies? The answer may be a significantly elevated central part, reduced by the more densely acting sides of the room and the variability of the transverse and longitudinal positioning of the benches. In the case of a very large participation, it is also possible to use three double doors between the corridor and the atrium and connect the spaces.
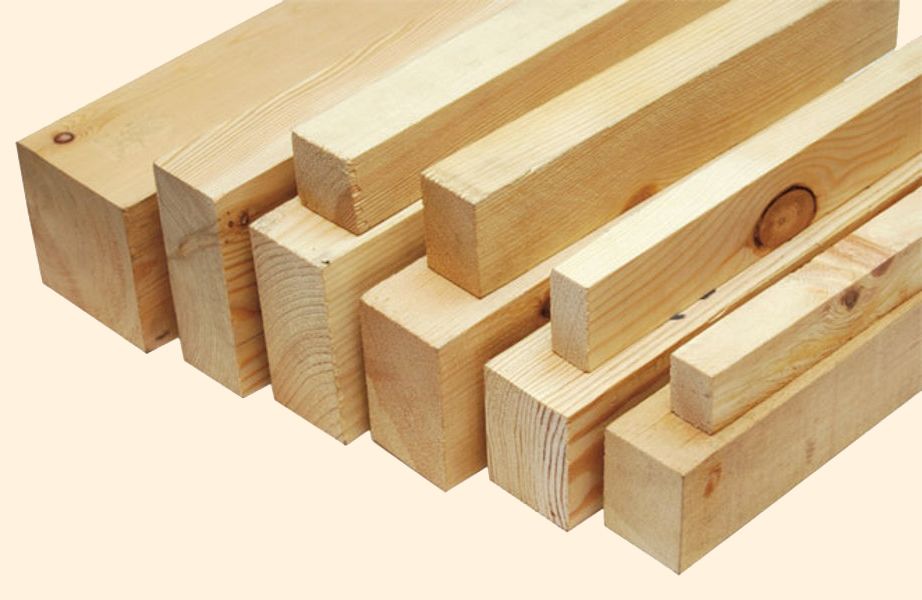
 The most commonly used material for beams is pine. it the best option according to the "price-quality" criterion: its wood is quite affordable and at the same time has good technical characteristics.
We would have preferred a projection on the wall of the vestibule, in the mourning hall itself, in addition to music, a minimum of external influences. A poem by Bohumil Greger and Josef Hirshal, placed on the wall of the shield and the adjacent green atrium, with trees strong enough and worthy meditation companions.
Natural light enters the room through the lateral glazed wall of the atrium and falls from above from a slit in the space above the coffin. The oak laminate wall paintings, referring to the local traditions of wooden buildings, contrast with the light-colored, illuminated terraced floor, broken only by the middle line - the thin connection between the world inside and outside. Inside, the tile opens into the room, emphasizing the shield wall, "taking" the coffin in his arms, allowing a hidden view of the hall's sound engineer and acoustic function.
Bars made of wood of stronger species (larch, oak) can rarely be found on free sale, and their price is incomparably higher, and pine wood after appropriate treatment with antiseptics will not be inferior in terms of durability to the same larch.
When buying a bar, you should choose a material with dry wood. Otherwise, after mounting the beams, their deformation during the drying process is possible - bending and twisting.
There is only lightly painted twisted plaster on the ceiling. The postponement of flower gifts will take place directly on the hearse or on a wooden bench against the side wall. There is sufficient capacity for a pre-ordered flower ornament in the background.
The lobby provides for the location of a tapestry of local production on the dividing line. The funeral procession during the funeral in the country, on its way, passes through the antechamber to the partially covered area in front of the entrance and will either be on a new axis directly in the places where most new tombs are built or installed on the traditional passage to the church.
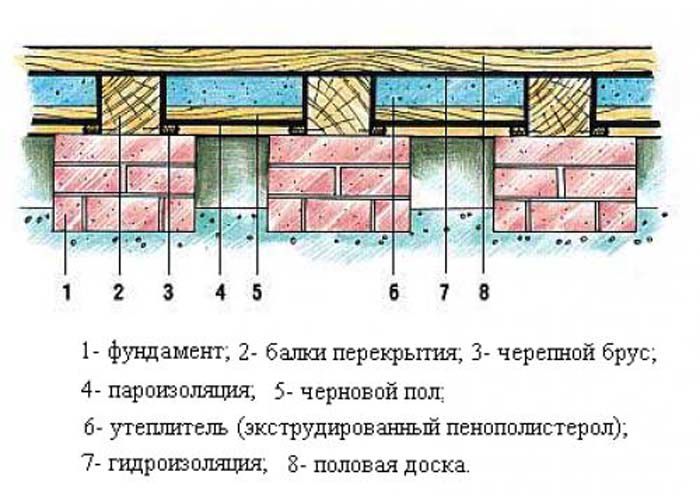
Flooring
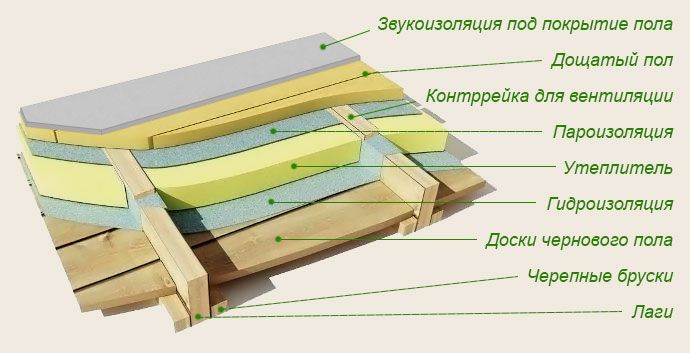
 Wooden flooring laid on beams will be a rough base under flooring
 Usually, the flooring of interfloor ceilings is made in two tiers: from below there are rough floors, on which insulation is laid, and from above - pre-finishing flooring, mounted on top of the bearing beams. A decorative floor covering is laid directly on it.
In the event of a funeral, the mourners leave the ceremonial hall, or the sheltered space in front of it, straight up the hill above the small fruit trees and pass through an opening through the wall, standing in a hidden space behind the wall where the meadow and columbarium are located. The boxes on the urns are placed directly into the wall, next to the unique single tree.
The building will be plastered with lightly colored and lightly structured plaster, and the roof shields over the funeral hall will be made of lightweight concrete with the imprint of wooden formwork. The saddle roof top is then folded, copper, with wide stripes that will catch the patina, age, and reflect time.
To determine the nature and amount of material for flooring, you should clearly consider the design of the floors.
In the device of the subfloor, either 5 x 6 cm bars stuffed onto the supporting beams or grooves made in the beams can be used as a support for the floorboards. The latter option is quite laborious, so most often 5 x 6 cm bars are used to create a support.
 To calculate the required number of bars, it is enough to count the number of beams and multiply them by the length of each of them. The resulting footage (the total length of all beams) is multiplied by two more (since the bars will be stuffed on both sides of each beam).
A wide range of materials can be used for finishing flooring. It can be boardwalk, plywood, chipboard, MDF, OSB, etc. Each of these materials has its advantages and disadvantages, after reading which you can choose one of them. To calculate required amount material, it is enough to simply calculate the area of \u200b\u200bthe room.
When purchasing building material you should always purchase it with a margin of 10 - 15%, since unforeseen material overruns are inevitable during construction.
This will save you from having to interrupt work and buy the missing part.
Impregnation
To maximize the service life of wooden structures, they must be treated with antiseptic materials.
It will also be useful to treat wood with fire retardants, which increase its fire safety.
To calculate the required amount of impregnation, you should read the instructions for its use - it always indicates the approximate consumption of the mixture per sq.m.
Waterproofing
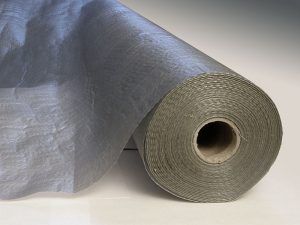
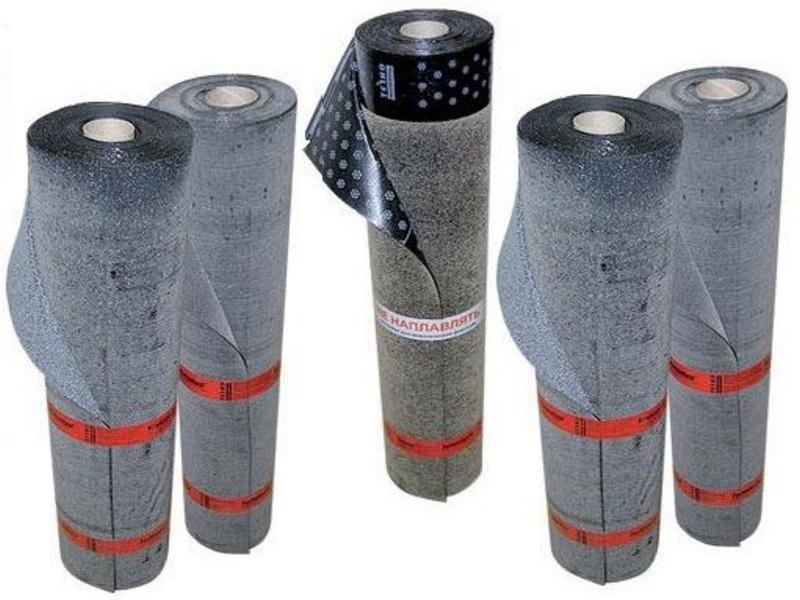 Since wood is afraid of moisture, waterproofing materials are always used in construction.
It can be rolled waterproofing used to create a water-repellent layer between wooden structures floors and topcoat, or between wood and brick (stone, cinder block, etc.).
To protect the tree from moisture, you can also apply coating waterproofing created on the basis of polymers or liquid bitumens.
Heat and sound insulation
If it is necessary to create a barrier to noise or cold, insulating materials are used in the construction of floors. Most often, for these purposes, use a minplate or foam. Their total number in area should be approximately equal to the area of \u200b\u200bthe room. For more information about floor insulation, see this video:
Expanded clay or ordinary slag mixed with sawdust can also be used as an insulating material.
Fastening materials
To fasten wooden floor elements, you should purchase self-tapping screws, nails, steel corners, anchor bolts and other consumables. When purchasing screws and nails, attention should be paid to their length.
According to the standards for a strong connection, the nail should be 2/3 longer than the thickness of the attached element (board, bar). For self-tapping screws and screws, this figure can be reduced to 50%.
Those. for reliable fastening to the beam of the “magpie” board, you will need 120 mm nails or 80 mm self-tapping screws.
After all the necessary materials have been purchased, and all preparations have been completed, you can proceed directly to the construction work. The construction of interfloor floors can be divided into several main stages. 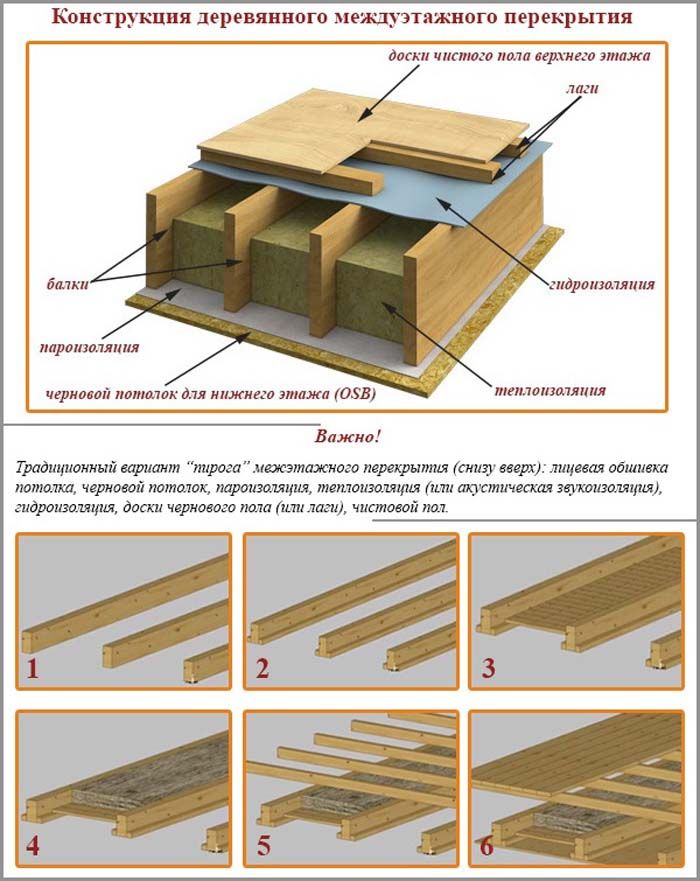
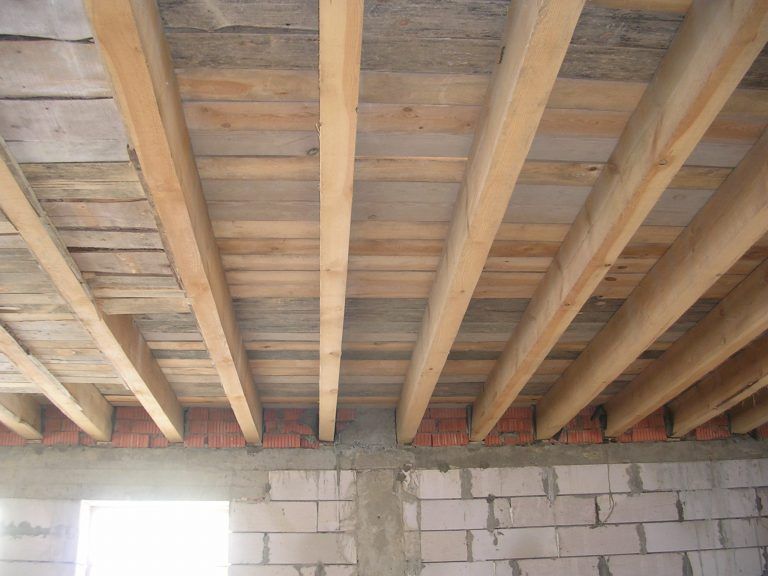
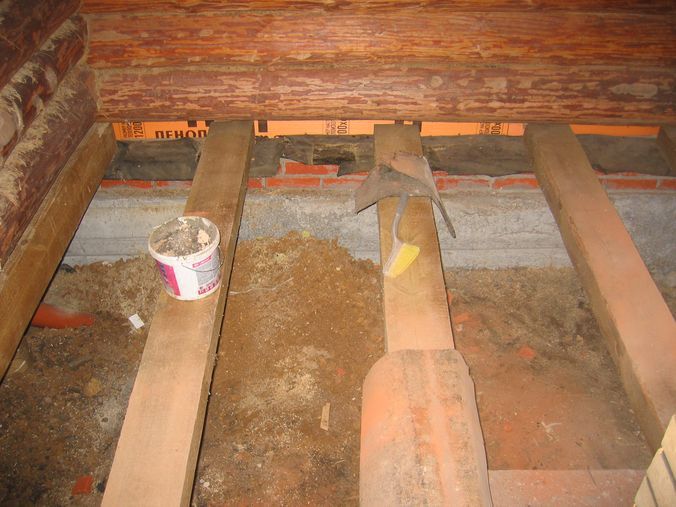
 The part of the beam inserted into the wall is wrapped with three layers of waterproofing material
 Installation bearing beams most often produced at the stage of erecting the walls of the building. Before laying the bearing bars, their surface is treated with all the necessary impregnations.
Then their ends are cut at an angle of 60 ° and that part of them that will be walled up in the wall is wrapped in 2-3 layers of rolled waterproofing.
 The ends of the beams are usually also coated with waterproofing compounds, but some experts advise leaving them open to allow the moisture contained in the wood to freely escape.
The depth of the beams to the depth of the wall should be at least 15 cm. The step of laying the beams is usually taken at 0.6 m, but depending on the expected load on the floors, as well as on the thickness of the beam section, this indicator can be reduced or increased.
The choice of the interval between the beams is also influenced by the technical indicators of the material used for the finished floor.
If the top flooring is supposed to be made of inch boards, plywood or chipboard, then the distance between the beams should not exceed half a meter, otherwise the floors will sag when walking. For more information about the installation of beams, see this video:
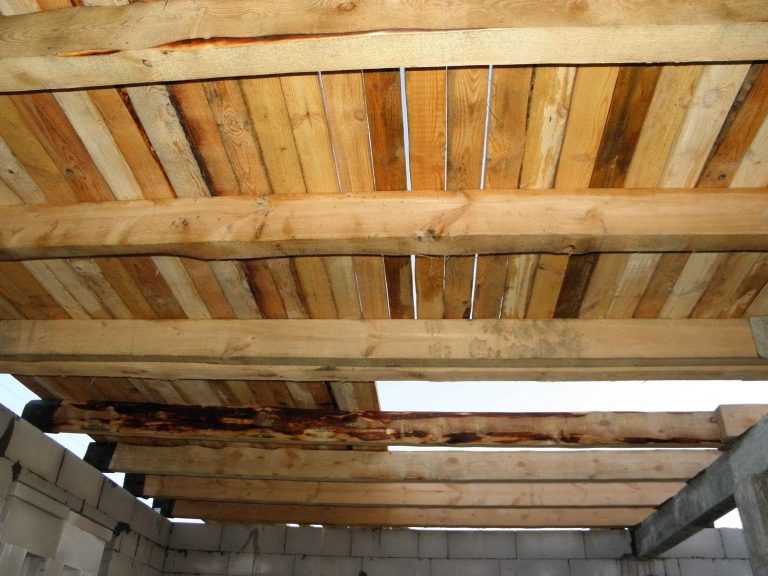
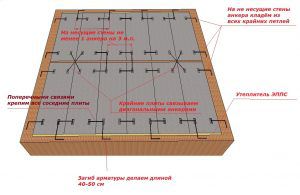
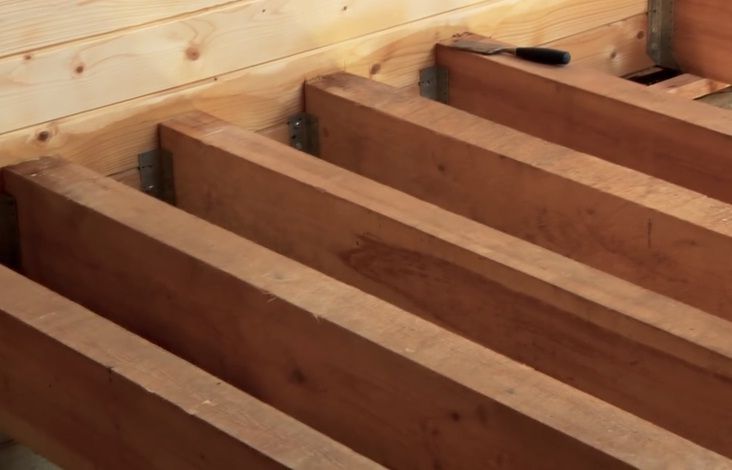
 Floor joists must lie in the same plane
 The installation of load-bearing beams starts from the two extreme walls, while the beams should be located at a distance of 5 - 10 cm. After installing the two extreme beams, we mount the rest, observing the required interval.
When laying beams, special attention should be paid to the horizontal slope: all floor beams must lie in the same plane. To do this, a cutting board is placed on the edge between the two extreme bars, or the twine is pulled tightly.
If the base on which the beams are laid is uneven, then mortgages should be installed under the ends of the beams to level the horizontal level. For mortgages, material is used that is resistant to decay and physical stress - metal plates, pieces of tiles, etc.
It is not recommended to use wooden wedges to adjust the level of the beams, as they can quickly rot, which will cause the lowering of individual floor beams and the curvature of the floor line.
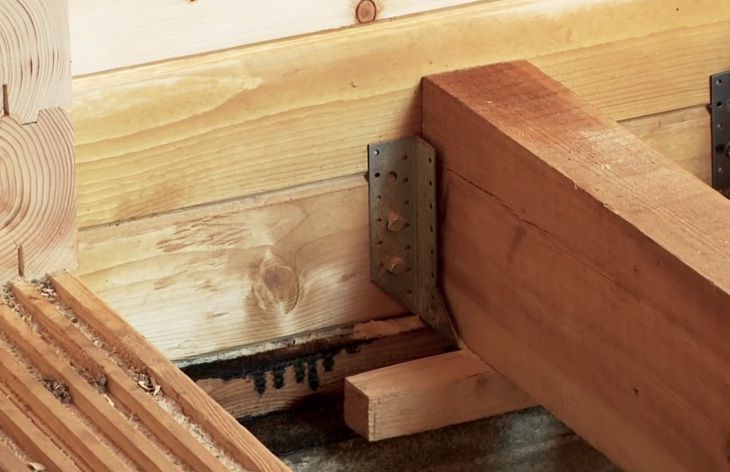
The bearing bars are attached to the wall with anchor bolts and steel corners.
Fastening of support bars
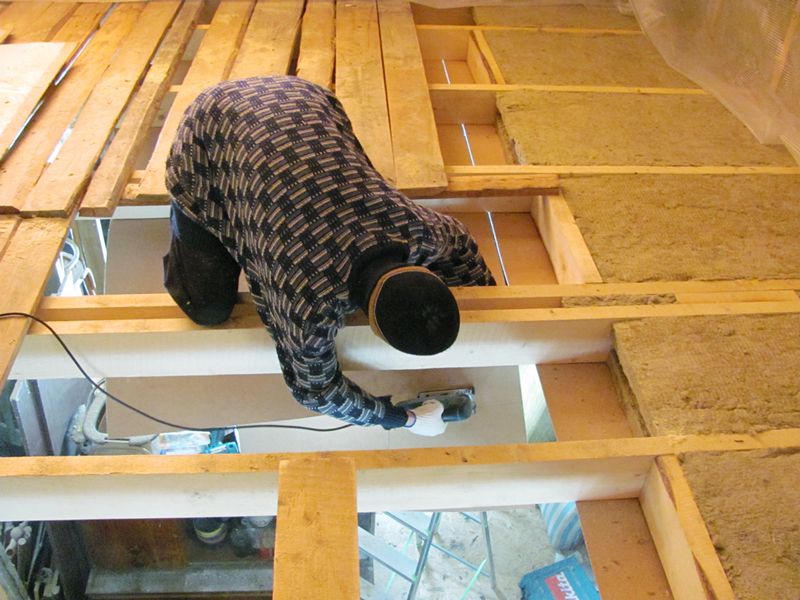
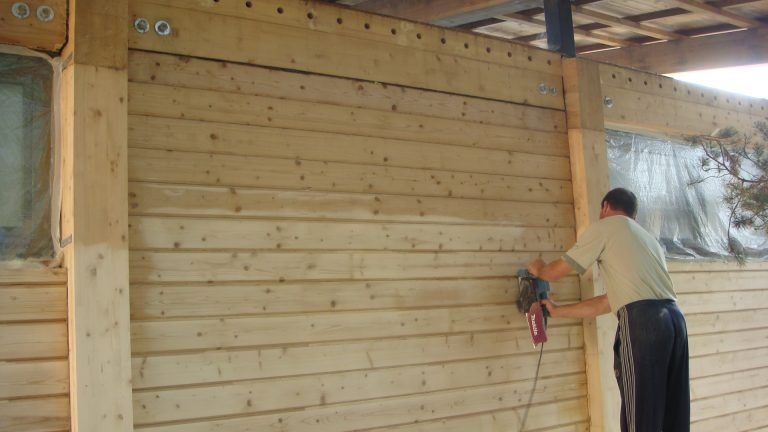
After all the floor beams are exposed, bars with a section of 5 x 6 cm are attached to them (the so-called "cranial" bars). They serve as a support for laying the subfloor and are attached along the entire length of the bearing beam, on both sides.
They should be nailed in such a way that their bottom is flush with the bottom of the beams.
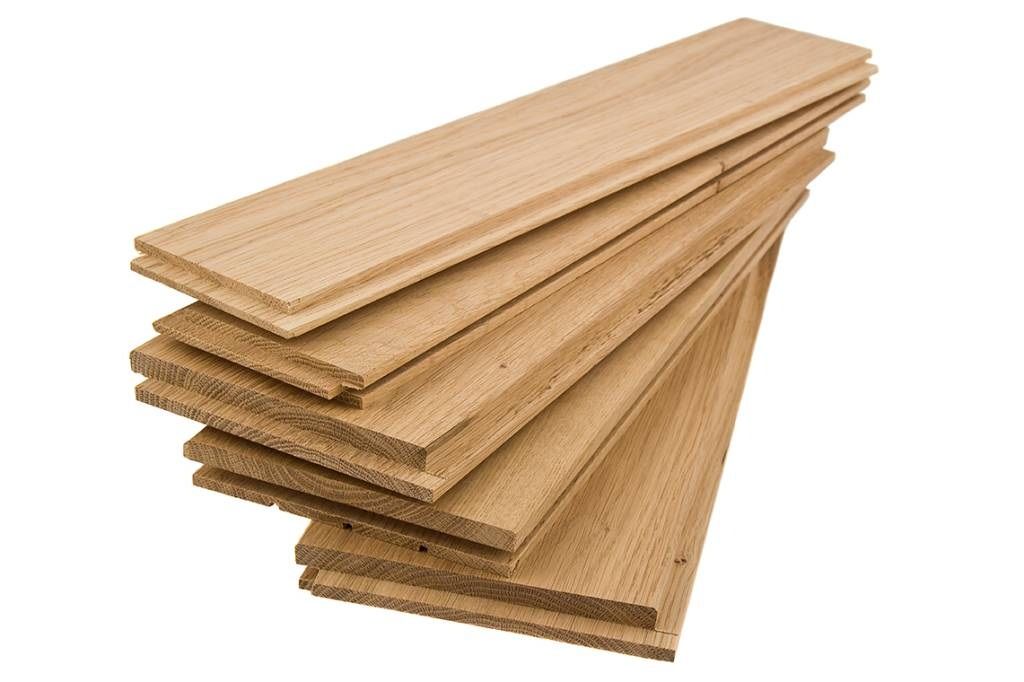
 Most often, the draft floor is made from an inch board.
 For the device of the subfloor, edged boards are taken and laid across the beams on the support bars. Since the distance between the beams usually does not exceed 0.6 - 0.8 m, then an inch or thirty board is quite suitable for subfloors: the pressure on them will be limited only by the weight of the insulation.
Also for these purposes, you can use a cut slab. You can also combine the draft floors of the second floor with the finished ceilings of the first floor or basement. In this case, edged boards are hemmed from below, from the side of the first floor to the beams. For more information about the draft field, see this video:
Thermal insulation flooring
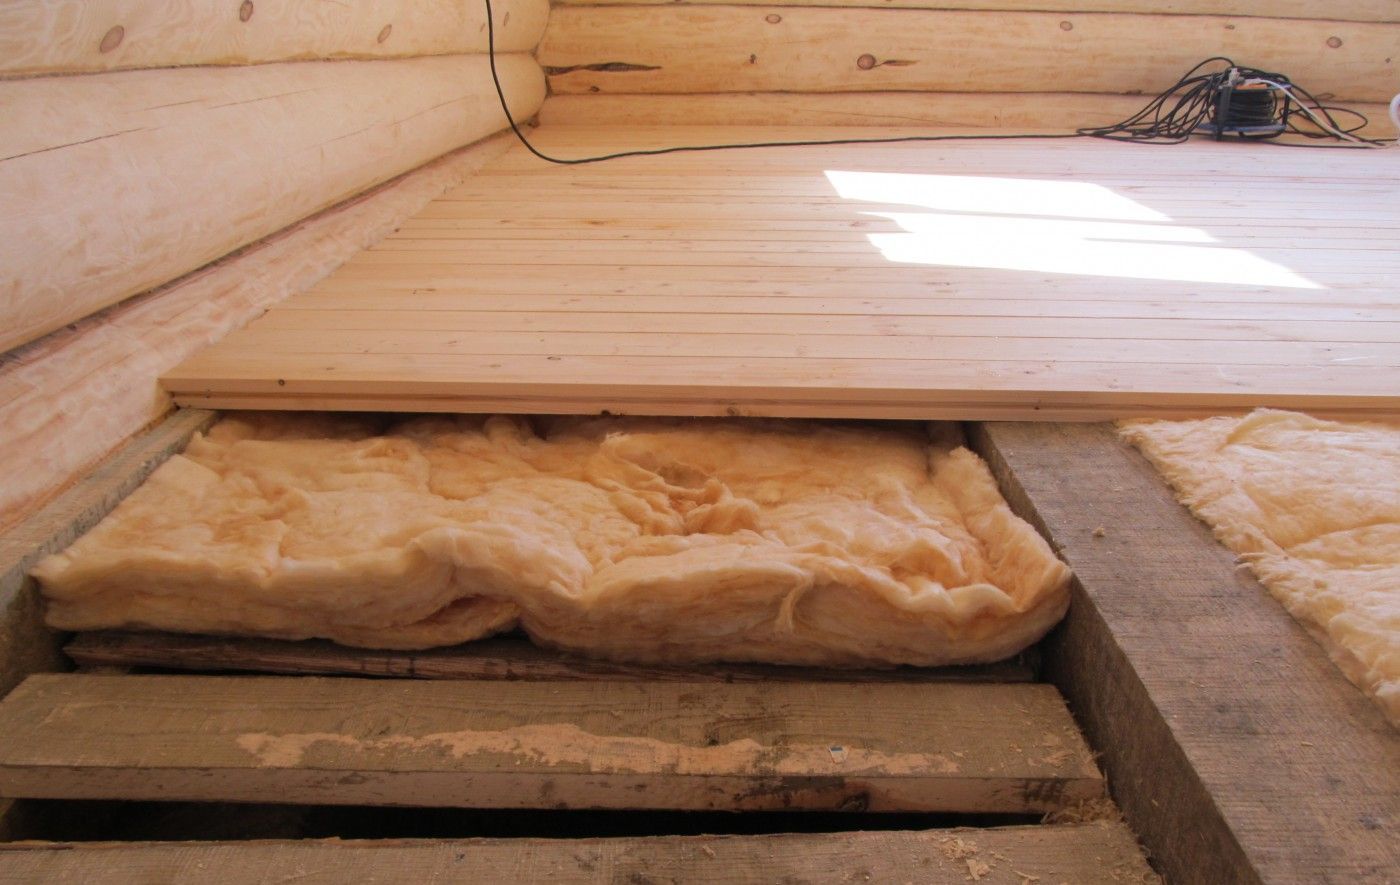
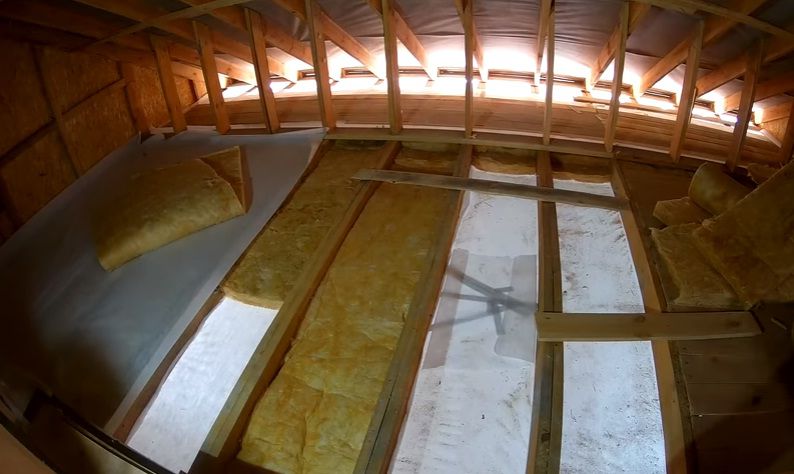
 After the installation of subfloors, compartments are formed between the beams, which, if necessary, can be filled with heat-insulating materials.
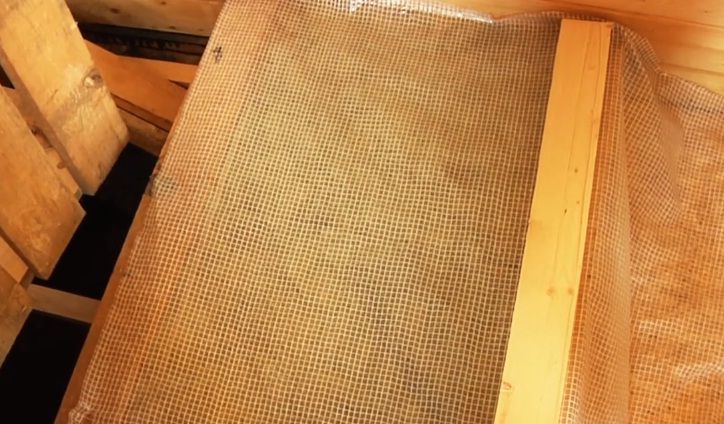
To do this, a hydro- or vapor barrier (roofing material, isospan, etc.) is laid on top of the subfloor boards, and then mineral wool, polystyrene, slag with sawdust, etc. are laid.
In this case, the entire space between the bars should be densely filled. We fill the gaps between the beams and foam sheets with sealant.
It is also desirable to lay waterproofing on top of the insulation, which will protect it from moisture leaks from above.
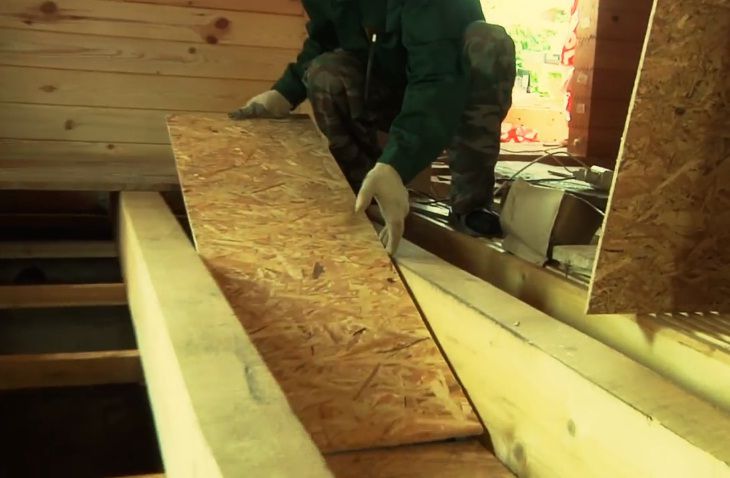
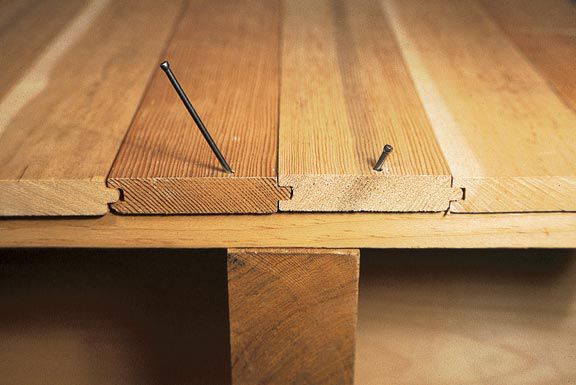
 The final stage will be the flooring of the finishing floors, which is mounted on top of the supporting beams with self-tapping screws or nails.
To do this, the material (boards, OSB, plywood) is cut in such a way that their joint falls in the middle of the timber. The finished floor is the basis for the finishing coating - laminate, linoleum, parquet.
Draft floors on wooden beams are widely used architectural elements in building construction. Depending on the specific location and features of buildings, they perform various functions and differ in the technology of arrangement.
Draft floors are used for the following purposes.

The manufacturing technology of rough floors largely depends on their specific purpose.
Design features of subfloors
Features of the manufacture of draft floors take into account the methods of fastening beams or floor logs. Beams can be installed on different structures.
Table. Structures on which beams can be installed.
| Design name | Brief characteristics |
|---|---|
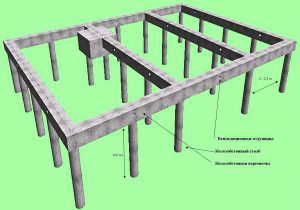
| This option is used during the construction of wooden log cabins or panel houses. On the columnar foundations load-bearing elements of the floor of the first floor are mounted. Due to the fact that the lower surface of the beams rests on the foundation, the fastening of the draft floors can only be on the cranial timber. They are fixed to the side surface of the log or beams. Except for those cases when the beams are made of round timber and do not have flat side surfaces. The second option is the installation of subfloors on top of the beams for the supporting base of the finishing floor coverings. |
| Draft floors are made on logs, fixed to the side cranial bars or upper surfaces. A waterproofing barrier is used between the slabs and beams. |
| The ends of the beams lie on the foundation strip or the lower crowns of the log house. The draft floor can be installed both on the side surfaces and above or below the beams. |
It must be borne in mind that the fastening of the draft floors on the cranial timber reduces the thickness of the insulation layer. If the width of the beams or lag is less than 15 cm, then it is undesirable to use this option. The fact is that the recommended minimum thickness of the insulation is more than 10 cm, with a decrease in this indicator, the effectiveness of insulation is significantly reduced.
Beams - supporting elements for the construction of a floor or ceiling, must withstand the maximum design loads, have a margin of safety. Depending on the purpose and operating conditions of the premises, the thickness of the beams and the distance between them are selected. As materials, bars with dimensions of 50 × 50 mm or more or boards with parameters from 50 × 150 mm can be used. On lumber with even surfaces, the subfloor can be attached from the bottom, side or top, on round beams - only from the bottom or top.
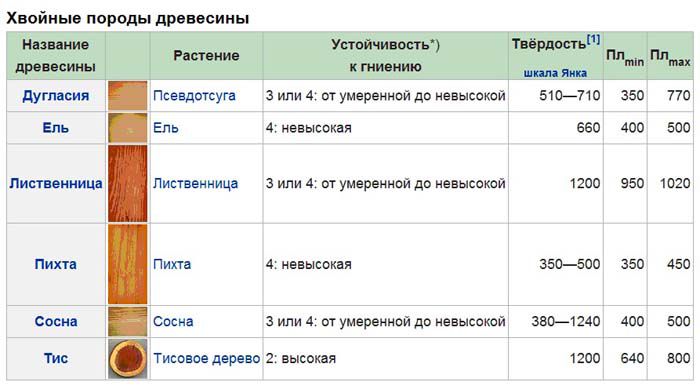
Table. What elements does a classic draft floor consist of.
| Element name | Purpose and description |
|---|---|
| The main bearing element, perceives all static and dynamic efforts. In each individual case, individual calculations are made for linear parameters and distance steps. They can be supported on posts, foundation strip, floor slab, facade walls or load-bearing interior partitions. |
| Size - approximately 20 × 30 mm, fixed to the side surfaces of the beams, used for laying subfloor boards. |
| Waterproofing is laid on the subfloor, which serves as the basis for the finishing floor. Vapor barrier is used to protect insulation from increasing relative humidity, it is used on the first floors or ceilings. |
Depending on the specific placement and purpose of the subfloors, the listed elements may be added or excluded. We will look at some of the most commonly used types of subfloors.
Draft floor in a log house on beams
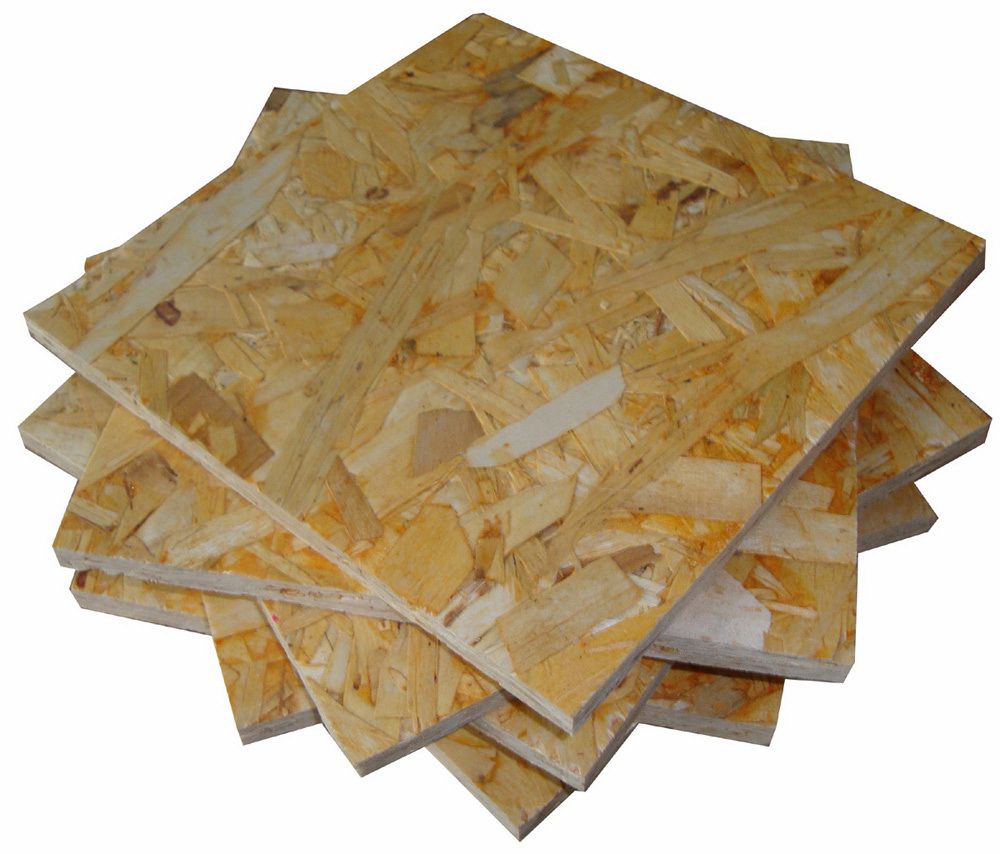
Beams should be thoroughly soaked with an antiseptic, preferably at least twice. The ends can lie on a strip foundation or beam, two layers of roofing felt waterproofing must be laid between concrete and wooden structures. The upper and lower planes of the beams were hewn with an axe, the side surfaces were sanded. The subfloor will be made from sheets of moisture-resistant OSB approximately 1 cm thick. Keep in mind that the final thickness of the slab should be selected taking into account the distance between the beams. The main selection criterion is that the sheets should not bend under their own weight. Cheaper materials can also be used: unedged sanded boards of the third grade, used lumber, pieces of plywood, etc.

Practical advice! If floor insulation is planned, it is recommended to keep the distance between the beams within 55 cm. The fact is that pressed or rolled wool has a standard width of 60 cm, due to this distance between the beams, the insulation will be pressed tightly against the side surfaces, and this greatly increases efficiency insulation. In addition, mineral wool does not have to be cut, which allows you to speed up construction works and minimize the waste of valuable material.
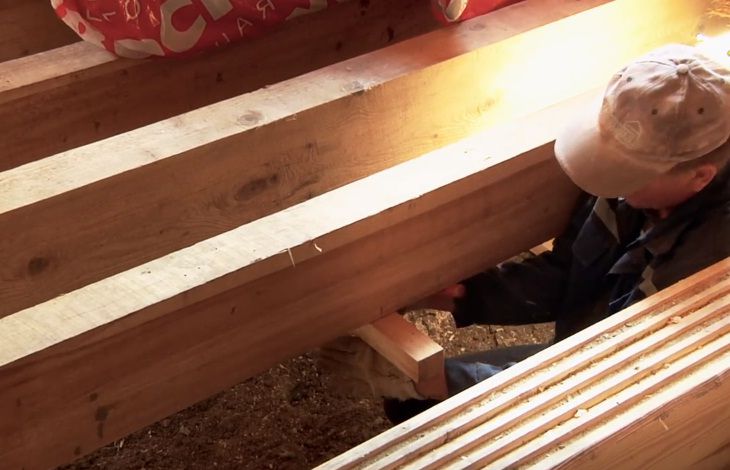
Step 1. Set the beams in place at a given distance, check the position of the top surfaces - they should all lie on the same level. To check, it is better to use a rope. Stretch it between the two extreme beams and adjust the rest to this level. To fit, it is better to cut off excess height, if this is difficult to do, then you can use linings. Professional builders do not recommend laying wooden wedges, over time they will shrink. Much better to use plastic or metal. Level check the horizontal position of the beams.
Step 2 Remove the beam, unscrew from the square. In the future, the element must be installed in the same place, otherwise the linearity of the finished floor may be disturbed, unpleasant squeaks will appear when walking. Turn it over with the bottom plane up, put it in an empty place on the foundation.
Step 3 From OSB boards, cut strips 5–6 cm wide more than the width of the bottom of the beam. The length does not matter, if necessary, the strips can be joined.
Practical advice! In order to save material, in the lower part of the timber, non-solid strips can be screwed into squares. The distance between them is 30–50 cm. The subfloor does not carry any load, the mass of heaters is negligible, there is no need to make strong shelves to install the subfloor.
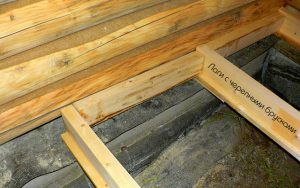
Bars are stuffed at the bottom across the beams - one of the possible options

Step 4 Using an electric drill or screwdriver, fasten the strips to the beam. Use self-tapping screws that are at least one third longer than the thickness of the OSB board. Otherwise, the fixation will be fragile. Instead of self-tapping screws, you can use ordinary nails of the appropriate size.
Step 5 Do the same with all remaining beams. Unscrew them in turn, fix the OSB strips and install them in their original place.
Step 6 Cut the OSB boards to the width of the subfloor. If you have precisely maintained the distances between the beams, then you can immediately prepare all the elements. If for some reason the distances between the beams are not the same, then each strip will have to be measured separately.

Step 7 Lay the sheets on the shelves. There is no need to achieve a complete absence of gaps; the subfloor for insulation does not require exact observance of dimensions.
Practical advice! To make work easier, cut the sheets 1-2 cm narrower than the distance between the shelves. The fact is that the beam on the sides has bulges that narrow the clearance, due to a slight decrease in the width of the sheets, it is much easier to install them in place. Another plus of reducing the width is a compensating gap. OSB boards change their linear dimensions quite significantly during changes in relative humidity. If there are no compensating gaps, then the sheets may swell. For a subfloor, this is not critical, but swelling indicates a low qualification of builders.
Step 8 To reduce heat loss, you can blow out all the cracks with mounting foam.

On this, the manufacture of the subfloor is completed, you can begin laying the insulation. How to do it?
Step 1. Put a vapor barrier on the beams and the subfloor, do not pull it too hard, fasten it to the tree with a stapler. For vapor barrier, you can use expensive modern non-woven materials or ordinary cheap polyethylene film. There is no difference in efficiency, but the price may differ by an order of magnitude. Vapor barrier is a must, do not neglect it. The fact is that mineral wool reacts extremely negatively to an increase in humidity. With an increase in the index, the thermal conductivity increases exponentially, which sharply reduces the effectiveness of thermal insulation. Another operational disadvantage is that the material dries for a long time. This means that wet wool will have a long contact with wooden structures. Such adverse conditions significantly reduce the life of lumber.
Important! Never store insulation outdoors. If you suspect high humidity, dry the material thoroughly, use only dry cotton wool.
Step 2 Lay the first layer of mineral wool 5 cm thick on the subfloor. Squeeze the edges tightly, do not allow cracks to form. Pressed mineral wool is slightly compressed and has elasticity, which allows it to occupy the most convenient place.

Step 3 Lay the second layer of insulation with offset seams. To do this, first lay the piece remaining from the last piece of pressed mineral wool. Using the same algorithm, insulate the entire area of \u200b\u200bthe subfloor. The thickness of the floor insulation for the northern regions of the country should be at least 15 cm, for the middle climatic zone 10 cm is enough.
Practical recommendation! It is not necessary to insulate the floor with one thin layer of mineral wool, a thickness of 5 cm has almost no heat-saving effect. Especially on the first floor, where there is a permanent natural ventilation and the heat from the premises is quickly removed.
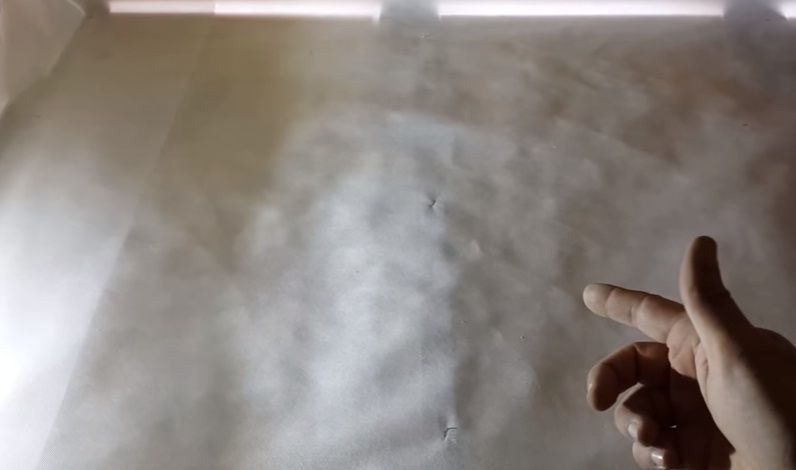
Step 4 Cover the insulation with waterproofing. To do this, you can use any special materials. The waterproofing is fixed with a stapler, the width of the overlaps is at least 10 cm, the ends of the material are hermetically sealed with adhesive tape.
![]()
Step 5 On top of the waterproofing membrane on the logs, nail 20x30 slats or the remaining strips of OSB. Reiki will provide ventilation of the finished floor and will not allow mold to appear under it.
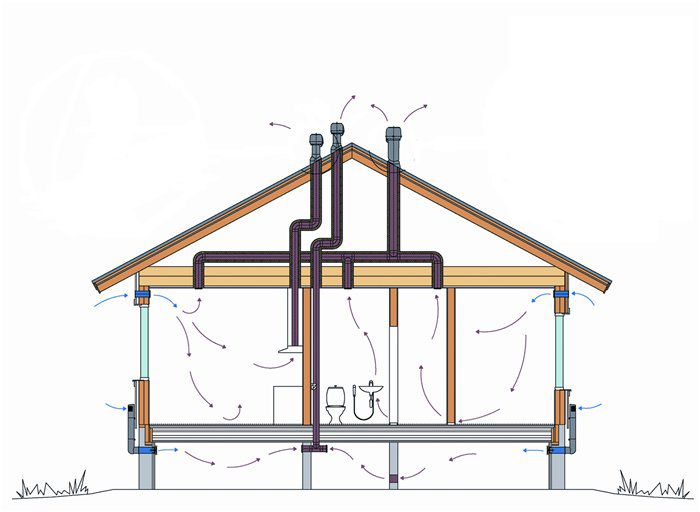
The underground must necessarily have ventilation openings that provide multiple air exchange. Do not forget to close the openings with metal bars that protect the underground from the penetration of rodents. Modern mineral wool has very thin fibers, rodents easily make passages in it and equip their nests. As a result, not only the thermal protection indicators worsen, but mice also appear in the premises.
On this, the black floor is completely ready, you can start laying the boards of the finishing floor.
Draft floor on the attic floor
It has several options, for example, we will consider the most complex of them. It is better to do the filing of the ceiling before the installation of the subfloor, but this condition is not necessary. When working with mineral wool insulation, it is recommended to use a respirator or mask to protect the respiratory organs, put on rubberized gloves on your hands.

Since there is no ceiling covering, nail a vapor barrier membrane underneath. Fasten it securely, it will hold the weight of the insulation for the first time.
Important! When performing further work in the attic for walking, make special passages, put long boards in these places. To improve security, it is recommended to temporarily fix them. The boards will somewhat complicate the process of laying the insulation, but they will minimize the risks of unpleasant situations.

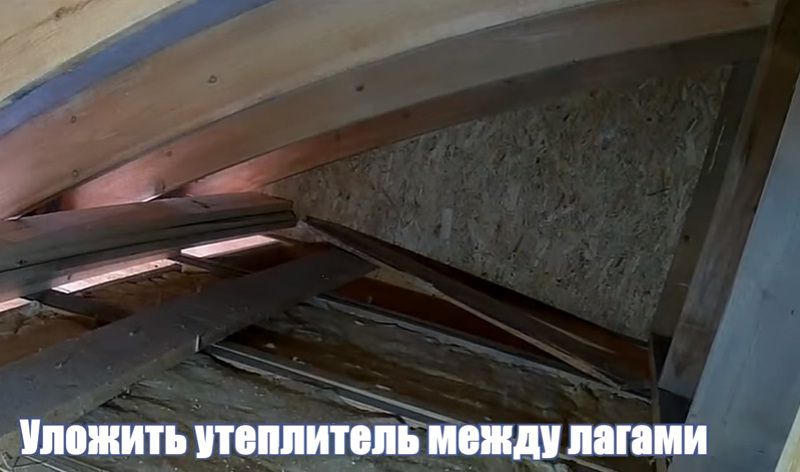
Step 1. Start laying insulation in the space between the attic floor beams. We have already mentioned that when calculating the distance between the beams, the standard width of the materials for thermal insulation must be taken into account. Lay as tightly as possible, if there are two layers, then their joints should be shifted.
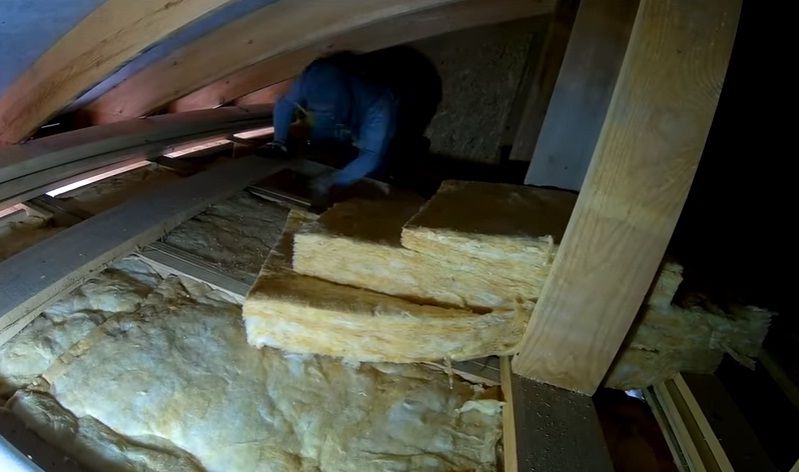
Important! When laying rolled mineral wool, do not allow sharp bends - in these places the thickness of the insulation is significantly reduced, a cold bridge is formed. And one more piece of advice. Do not press hard on the cotton, do not artificially reduce its thickness. Unlike pressed, roll does not withstand any loads.
Step 2 Install a wind and vapor barrier. Rolled mineral wool is easily blown through with drafts, and heat is removed along with the intake of fresh air. The membranes are fixed to the beams with a stapler. Professional builders do not recommend pulling the membranes strongly, it is desirable that they lie freely on top of the insulation. In the event of leaks, water will not enter the insulation through the holes made by the stapler brackets.


Step 3 Fasten the membrane along the beams with thin laths. Lay the subfloor boards on the slats. They can be screwed with screws or nailed.
![]()


Subfloor under laminate
This type of subfloor requires a more demanding attitude to the quality of the coating. If floors are made between floors, then insulation can be omitted. Warm air from the rooms on the first floor does not go outside, but heats the second floor. Due to this, the parameters of the microclimate of the rooms on the second floor are improved. Warming is done only on attic floors.
The subfloor serves as the basis for laminate flooring and must meet three requirements.
- Hardness. The thickness of the boards and the distance between the beams are selected in such a way that deformations of the planes are completely excluded under the maximum possible loads.
- Humidity. Relative Humidity lumber should not exceed 20%. Before laying the boards, it is necessary to dry them in a heated room for several days. During this time, they will acquire natural moisture and will not change linear dimensions.
- Evenness. The deviation in the height of the plane cannot exceed two millimeters per two meters of length. Otherwise, the laminate floor will start to emit very unpleasant sounds during walking, appearing due to the friction of the elements in the connecting locks. It is impossible to eliminate these sounds. You will have to completely dismantle the flooring, level the subfloor and only then lay the laminate again. The work is long and expensive, it is better to immediately pay attention to quality. For rough floors, only sawn timber passed through a double-sided thicknesser should be used. The final adjustment of the subfloor to the laminate can be done with a parquet machine or a hand planer. The choice of tool depends on total area coatings.

The evenness of the base should be checked with a long level or a rule, apply tools in various places on the subfloor and pay attention to the gaps. If deviations are found, the plane should be leveled with one of the tools. If the difference in height of the subfloor does not exceed a millimeter, then an unpleasant creak can disappear on its own after a few months of operation. During this time, the elements of the interlock will partially rub in, the abutting parts will reduce their thickness. Those that do not get used are slightly deformed, due to which the density of the locking joint decreases. These changes will not affect the quality and durability of laminate flooring.
When fixing the subfloor under the laminate, you need to slightly sink the heads of nails or self-tapping screws into the boards. The fact is that it is even theoretically impossible to achieve a perfectly even fit of the boards to the beams. Over time, in places where the boards sag, the nails may come out of the beams a little, because of this, the hat rises above the plane of the boards. This is highly undesirable for laminate floors. They are laid on a special bedding, have a sealed waterproofing. Hats of hardware with sharp edges damage the membrane layer, the tightness of the waterproofing is broken. Moisture that has entered through the holes between the laminate and the subfloor causes the appearance of fungi and rot on the wood. It is impossible to see the problem in a timely manner, it is detected after the lumber has lost its original properties. As a result, complex special measures are required for elimination, sometimes it is necessary to change the supporting structures.

On a note! Wooden beams should be able to move a little, never fix them in a stationary state. Today on sale there are special metal stops that allow the ends to move along the length.
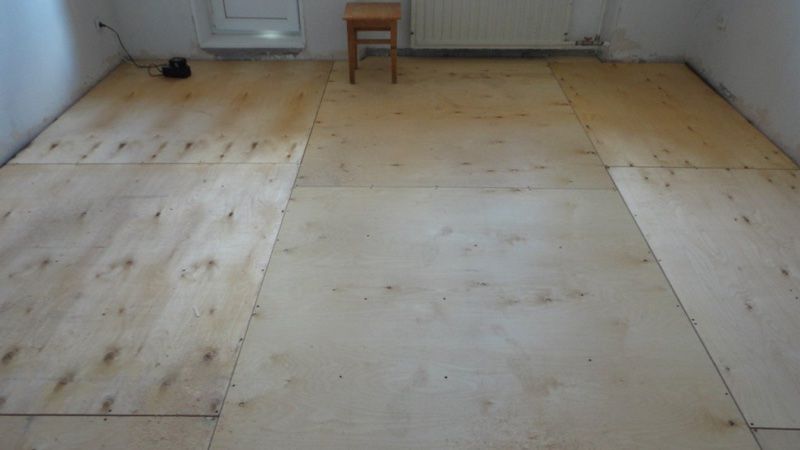
And the last. by the most the best option for laying subfloors under laminate flooring, waterproof OSB boards or plywood are considered. Sheets of large size, due to this, the number of joints is minimized, it is much easier to smooth out sharp differences in height. It is necessary to lay the slabs with damper gaps about 2–3 mm wide, which will compensate for the thermal expansion of the material. Otherwise, swelling of the laminate floor is likely, their elimination will require the complete dismantling of both the finish coating and the leveling base.
Video - Draft floor from OSB


