How to properly waterproof a basement from the inside. How to reliably waterproof the foundation.
August 29, 2016
Floor waterproofing is necessary not only in a private house. There are times when you can’t do without it in apartments. If the apartment is located on the first floor above the basement, moisture and mold from the underground space can move up the walls.
In this case, the floor will be constantly damp and cold, and over time it may even begin to crack and collapse. To avoid these troubles and the constant smell of mold in your apartment, waterproofing the floor is a must for the first floors. But there are cases, especially in old houses, when even on the upper floors the floor and walls are saturated with dampness, which penetrates through cracks from the street. In this case, you also need to take care of reliable waterproofing to avoid the appearance of mold in the apartment, which is very dangerous to health.
As for private houses, floor waterproofing is mandatory, even if it happened in accordance with all the rules and in compliance with all technologies.
Types of floor waterproofing
Materials for creating reliable waterproofing are selected taking into account what kind of room it is, how it will be operated. In any case, these measures are aimed at creating a dense and reliable waterproof layer on the floor, which also has water-repellent properties. Thanks to this, the floor will be reliably protected from rotting and destruction.
Waterproofing by area of application is:
- outdoor
- internal
Depending on the main water-repellent substance, it is divided into:
- bituminous
- polymeric
- bitumen-polymer
- based on mineral components
Waterproofing the floor in the house can be done using the following materials:
- film
- rolled
- membrane
- penetrating
- pasting
- painting
- powder
- plastering
- coating
Film waterproofing materials
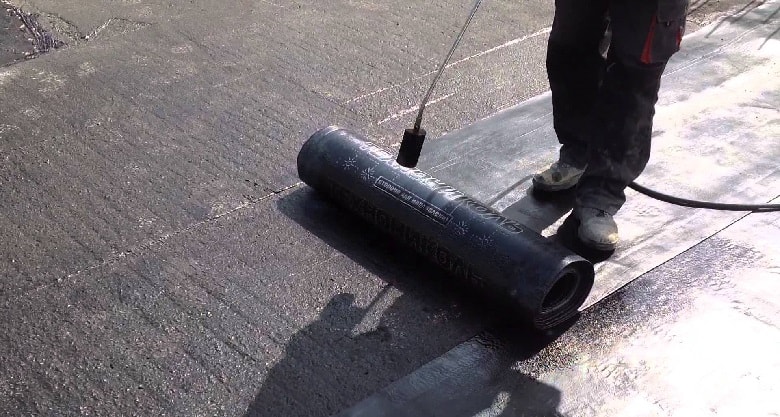
The most popular and familiar to everyone are roofing material, roofing felt and glass roofing material. In the last century almost all waterproofing works carried out with the help of these building materials. They continue to be used in modern times, using for reliable protection against moisture not only floors, but roofs and foundations. These materials are thick cardboard or fiberglass, which are impregnated during their manufacture with bitumen and basalt chips. The result is a well-known roofing material or roofing felt.
Do-it-yourself waterproofing With the help of such materials it is quite possible, because no special equipment is needed for their installation. It is very important to ensure that there is not a large distance between the joints of the roofing material. Ideally, they need to be soldered with a torch.
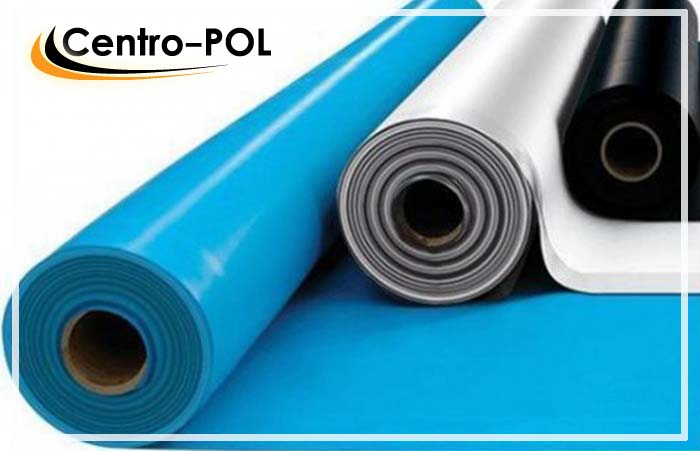
There are modern film materials that are used for waterproofing. These are multilayer polymeric membranes, which, among other things, have excellent thermal insulation properties. If waterproofing of a concrete floor is required, polypropylene, polyethylene or PVC film is most often used, all of which are produced in rolls. They are laid before starting work on creating a cement-sand or dry screed.
Mastic for waterproofing

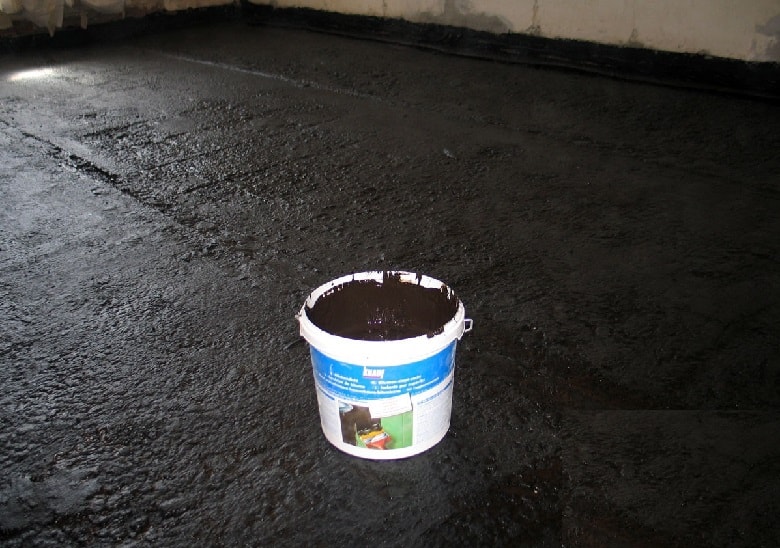
If you are looking for a way to make waterproofing inexpensively and quickly, this building material is right for you. Mastic is a plastic adhesive composition, which is based on liquid rubber, bitumen, resins, plasticizers and polymers. It is often used in residential areas to create a dense waterproof layer on the floor. It is also suitable for processing joints in bathrooms, kitchens, swimming pools, saunas.
When choosing mastic, please note that they are of hot and cold type. This material is good because, in addition to forming an elastic and dense waterproof film, it fills all the cracks and pores in the material from which the floor is made.
Materials for waterproofing liquid water-repellent

These include all kinds of paints, primers, varnishes, impregnations, injection formulations for topical use, which, after curing, create a dense water-repellent film. If "breathing" waterproofing of the floor screed is needed, there are modern impregnations that penetrate deep into the pores of the material. After drying, they form breathable crystals that do not let water through at all.
If you need waterproofing a wooden floor, you need to select liquid materials, which are designed specifically for wood. As a rule, they protect not only from moisture, but also from the development of fungal microorganisms, as well as bark beetles.
Powder waterproofing materials
These are all kinds of dry mixes, which are based on cement, glue, plasticizers and binders. They can be used to make DIY waterproofing, it is only important to carefully read the instructions and follow the application technology. To prepare such a mixture, water must be added to it immediately before starting work. It is only important to observe the indicated proportions, if you try to save money and pour more water to get more mixture, the result may disappoint you. Such waterproof mixtures are suitable for creating concrete screeds not only in residential areas, but also in basement pools, bathrooms.
How to properly waterproof
Whatever material you choose for waterproofing, there is something for everyone general rule. In all junctions of the floor with walls, as well as with other protruding structures, such as columns, the waterproofing layer must necessarily rise 30 cm above the floor level without interruption.
How to apply liquid waterproofing
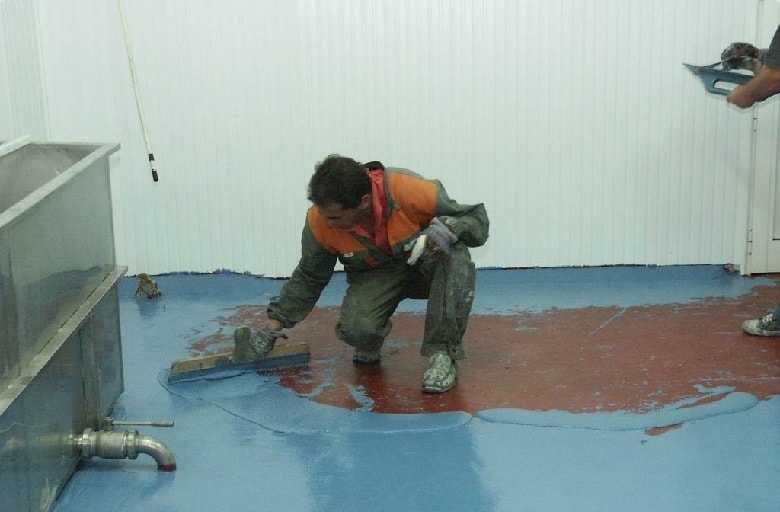
The application technology depends on which material you have chosen, namely, impregnating or cast. Floor screed waterproofing with the help of cast materials, it may well be done independently. A bitumen or polymer solution is applied to the surface in an even layer, which, after hardening, will turn into an elastic and dense waterproof film. Bituminous mastic must be preheated to + 120-140 degrees. Then it is poured onto the floor thoroughly cleaned of debris and dust. Using a spatula, it must be well leveled so that the layer is uniform.
Cast waterproofing under the floor is used in cases where it is necessary to protect a monolithic base from moisture before a sand-cement screed is laid on it. For reliability, several layers of waterproofing material will be required, if necessary, they can be reinforced with fiberglass or metal mesh. The thickness of the resulting waterproof film should be from 5 to 15 cm. Liquid waterproofing materials can be applied with a brush, but it is very convenient to do this using a sprayer.
Impregnation floor waterproofing consists in applying special impregnations to the floor surface. It is best to use a sprayer in this case to distribute the waterproofing material evenly over the entire floor. But you can also do this with a brush. Depending on the material from which the floor is made, an impregnation with the desired penetration depth is selected. After it hardens, a seamless monolithic waterproof membrane is obtained. This modern method of waterproofing is now very popular, so it is already provided for in many.
Creation of waterproofing with coating and coloring materials
The cast method of waterproofing involves working with heated materials, such as mastic. The painting or coating method differs in that cold rubber-epoxy or polymeric materials are used, as well as varnishes or paints. The composition is applied to the surface using a tool, depending on its viscosity. For this, both ordinary brushes and rollers are suitable.
Whatever material you choose to create a coating or paint waterproofing, remember that it must be applied in a thin layer of about 2-3 mm, but evenly. The result is an excellent waterproof layer, which will also serve as an antifungal and anti-corrosion protection. The only drawback is the fragility of such waterproofing, it will need to be updated every 5 years.
How to make waterproofing with gluing materials
When creating such a waterproofing, selected roll or sheet waterproof building materials are glued to the floor, which is previously well cleaned of dust and treated with a primer.
There are three ways to create waterproofing pasting:
- you can make a simple flooring of materials on the surface, this method is suitable for a dry or cement screed, you can also lay materials under a plywood floor. Waterproofing a wooden floor can also be done in this way.
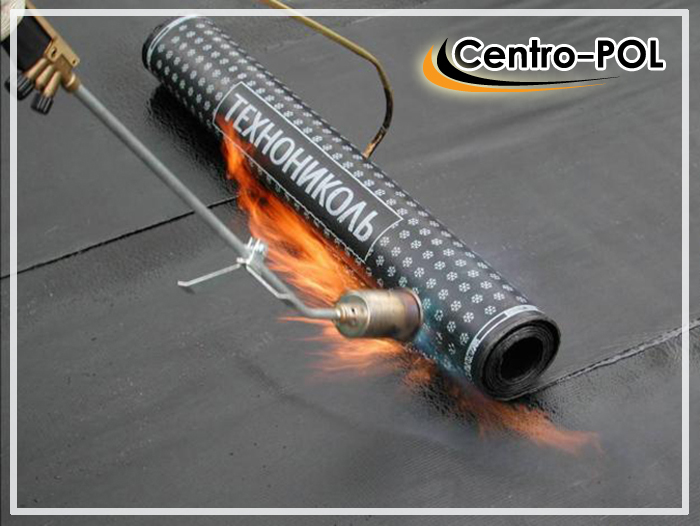
- Rolled materials can be welded to the surface using a torch. This method requires strict adherence to safety standards so that a fire does not occur. Doing it yourself is not recommended; to perform such it is better to invite specialists.
- Roll waterproofing can be glued to the floor using mastic or special glue.
Modern roll waterproofing comes with an adhesive layer, so it is very easy to lay it. If you have chosen materials without such an adhesive layer, you need to buy a polymer-bitumen-based mastic for gluing them. When choosing it, be sure to look at technical specifications melting temperature. It is necessary to select such a mastic, in which this indicator is at least 20 degrees higher than the maximum possible temperature in the room.
Remember that all types of liner waterproofing are very sensitive to tensile and shear loads. Therefore, it is most often used for concrete and brick structures.
Waterproofing with plaster
This is an old way to protect the floor from moisture, but it is still used today, as stucco mixtures have improved. Now you can choose a mixture in which there will be a high concentration of water-repellent additives, just this one is ideal for waterproofing. This method is good because with the help of a plastic solution you can quickly and reliably fill absolutely all cracks and crevices in the floor, as well as get rid of bumps. Easy to apply with a spatula or brush.
Waterproofing with plaster is suitable for wood, concrete, stone, tiles, it can even be applied over paint. There is also a filling mixture for waterproofing, which is considered a kind of plaster. It is evenly scattered on the floor, absorbing moisture, it hardens and forms a durable layer.
It takes at least 14 days for the waterproofing layer made with plaster to completely harden. It must be ensured that it does not dry out, otherwise cracks form on it. It is very important during the first days after laying the plaster layer to moisten it with water every 3 hours, it is convenient to do this with a sprayer. After that, you need to moisturize the layer at least twice a week.
Features of waterproofing underfloor heating
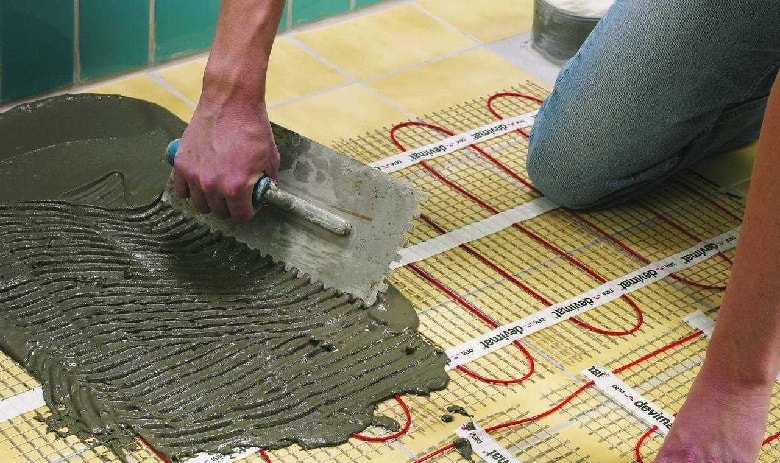
It is very important to follow the technology of creating waterproofing, as it is necessary to provide reliable protection from water to all elements of the underfloor heating. Before pouring the screed, you need to treat the base with mastic. You can also use rolled materials for this, while it is important to close all the seams with bituminous mastic, and also lay them overlapping the walls by at least 30 cm.
There is also an alternative option. You can make coating waterproofing using bitumen-polymer, cement-polymer or traditional bituminous mastic for this. After complete solidification of such a waterproofing layer, it will be necessary to fill in a cement-sand screed, on which the finishing floor covering can be laid. The result is a reliable and durable waterproofing that will perfectly protect all elements of the underfloor heating from corrosion.
Owners of country houses try to use the area allocated for construction as efficiently as possible. This is due to the high cost of land in the suburban area, and the desire to reduce the cost of the project, since it is more profitable to build housing in several tiers than to scatter several one-story buildings that have the same useful area in total. For this reason, in most cases, a basement is made, the outer walls of which are the recessed foundation of the house, made of reinforced concrete monolith or blocks.
In order for the basement to be complete comfortable room with an acceptable microclimate, it should be protected from ground moisture, for which do-it-yourself waterproofing of the foundation is done. You can hire someone for these purposes, but if there is an opportunity to save a little at this stage of construction, why not. From the article you will learn what is the essence of protecting the base of the house from moisture, and how to waterproof the foundation with high quality, inexpensively, and with your own hands. To consolidate the information received, it will be proposed to watch a video on this topic.
Why is foundation waterproofing necessary?
Why do you need to protect the foundation wall from moisture. Those who build on wetlands will not understand the question. However, in many areas The groundwater deep enough, besides, precipitation during the year cannot be called plentiful. Is it worth it in this case to do the arrangement of hydroprotection.
It's worth it, and here's why. First, no one can reliably predict how the bed of surface ground currents may change in the near future. There is no guarantee that in a year or two, water from below will not come up in a completely dry area. What awaits the owner of the building in this option? You need to forget about the basement, or deal with waterproofing with an already functioning building. And this is very laborious and expensive, besides, we are not talking about doing it yourself.
Secondly, the climate is now very changeable. Where it rained twenty years ago, now you can’t wait for it, and vice versa. It is not worth counting on always being dry. So it is much more profitable and convenient to protect underground walls at the construction stage, so as not to return to this problem later.
What does the complex of waterproofing works include?
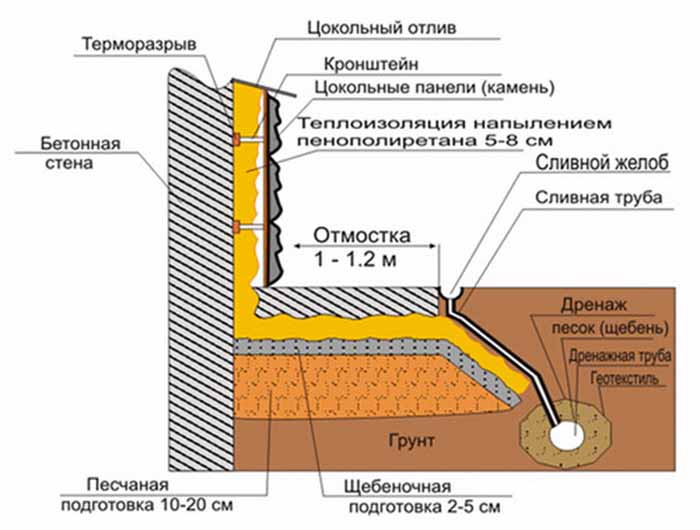
High quality moisture protection underground facility involves a complex of technological operations aimed at waterproofing all surfaces in contact with the ground. Moreover, it is necessary to provide for hydroprotection from water coming from below, as well as from atmospheric moisture. The full range of waterproofing measures consists of the following technological stages:
- horizontal moisture insulation;
- vertical protection against excess ground moisture;
- arrangement of the drainage system;
- installation of a high-quality blind area around the perimeter of the building.
Creating a reliable horizontal hydro-barrier will protect the basement from water rising from below. Sometimes groundwater exerts significant pressure on the basement floor, so the basement floor and basement must be carefully protected.
Vertical waterproofing is applied to the outer foundation surface and is intended primarily to be a barrier to excess ground moisture that accumulates due to precipitation. When groundwater rises above the base of the building, a vertical hydro-barrier created using standard technology will be ineffective in this situation. Drainage is required to drain water.
If construction is carried out in a region that is characterized by heavy rainfall, 50% of the success of vertical moisture protection depends on pouring a reliable blind area, which would divert sedimentary water away from the outer foundation surface. So this stage of construction should be given due attention if there is a desire to keep the walls of the basement dry. Now let's consider the most common and effective technological methods that can be applied to carry out work on each of the listed waterproofing measures.
Horizontal moisture protection
It is possible to create a horizontal waterproof cushion, which is the base of the basement floor, before pouring (installation from blocks) of the foundation, or after. It is better to do this before, since there will be no need to waterproof the base of the foundation wall. To work, you will need the following.
Materials and tools
As a hydrobarrier here, you can use a thick continuous polyethylene film, or a rolled waterproofing material, hydrostekloizol, for example. Bitumen or mastic based on it is applied as an auxiliary agent. In addition, you will need:
- concrete, or ingredients for its preparation (fine gravel, sand, portland cement);
- coarse gravel;
- river sand or fine screenings (for backfilling);
- reinforcement (6-8 mm) or strong reinforcing mesh for screed.
The tool should be prepared as follows:
- mechanical or manual tamper;
- concrete mixer;
- gas burner (if hydrostekloizol);
- welding machine or knitting wire (if fittings).
Sequence of work
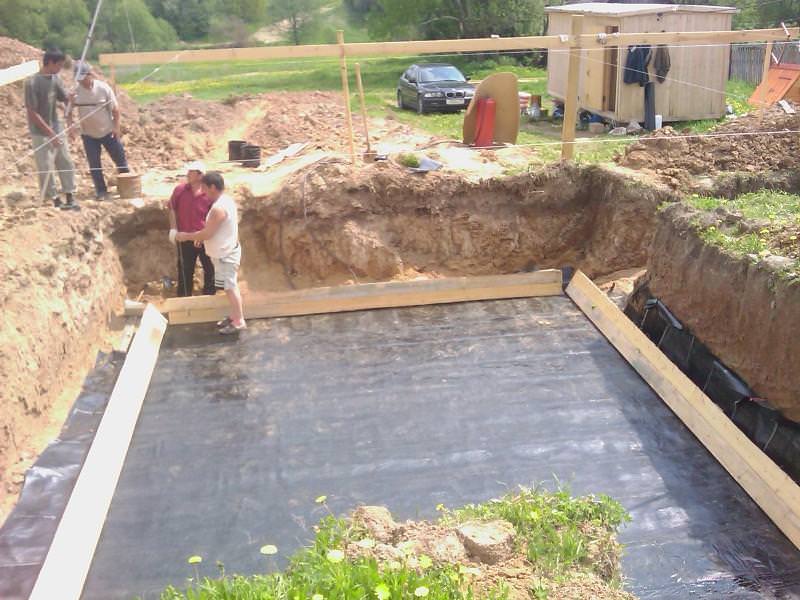
As a result of the work carried out, a horizontal reinforced slab base should be obtained, with an internal moisture-proof layer, protruding about half a meter beyond the outer perimeter of the foundation. That is, the installation of the base of the building will take place on a finished slab base, protected from water from below.
- The bottom of the pit is leveled and compacted as much as possible;
- Backfilling is carried out, first with gravel (about 10 cm), then with sand (about 5 cm), after which a rough layer of concrete is poured (up to 10 cm). For greater reliability, it is possible to reinforce the draft slab base;
Important! Before pouring concrete, be sure to abundantly saturate the bedding with water. If this is not done, the moisture from the cement mortar will quickly go down, causing the strength of the concrete to become minimal. Moreover, it will be very problematic to level the solution that has lost moisture.
- After the first layer of concrete has set, it is possible to lay the film, if it is provided as a hydro-barrier. In the event that it is planned to apply bituminous mastic in order to glue the rolled material, it is necessary to wait for the concrete to dry;
- The polyethylene sheet is laid in one or two layers, after which the reinforcing frame is mounted and a finishing screed is poured over the entire area of the slab base (preferably along the lighthouses);
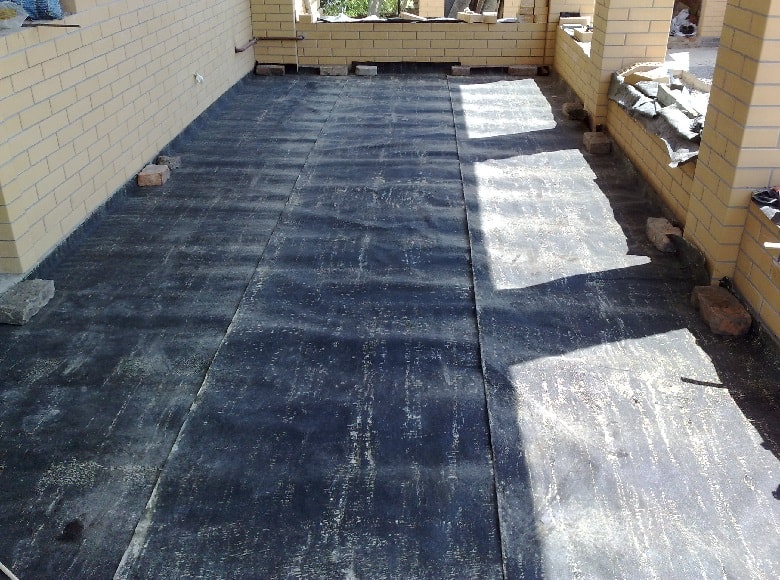
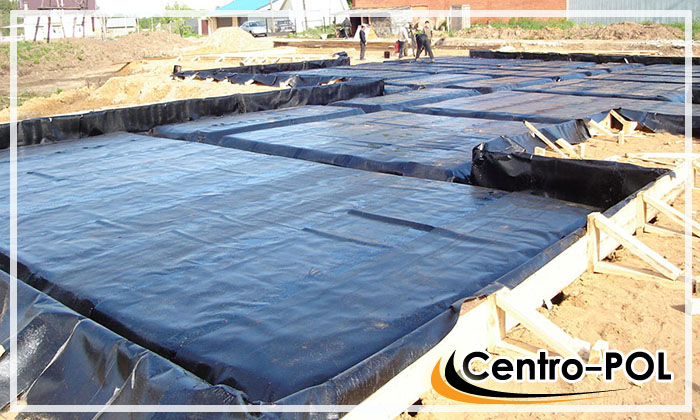
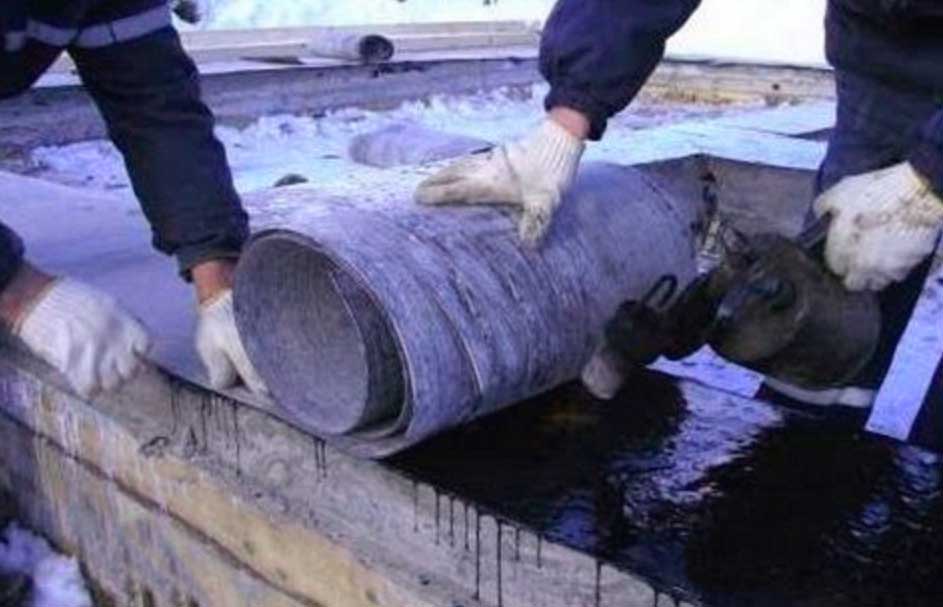
- Installation of rolled waterproofing is carried out as follows: apply molten bitumen or mastic on a dried base. Application is made with a stiff brush. After the material has set, hydrostekloizol is rolled out continuously (roofing material can be used). During laying, the material is heated with a gas burner or blowtorch and glued to the base. They overlap tightly, the joints warm up and are immediately pressed with a sliding motion. For this, a tool in the form of a poker is used.
Important! Installation of a horizontal moisture-proof base can be done after the construction of the foundation structure. The simply described method makes the whole range of work, which includes do-it-yourself waterproofing of the foundation, less costly both in terms of material costs and in terms of the laboriousness of the process.
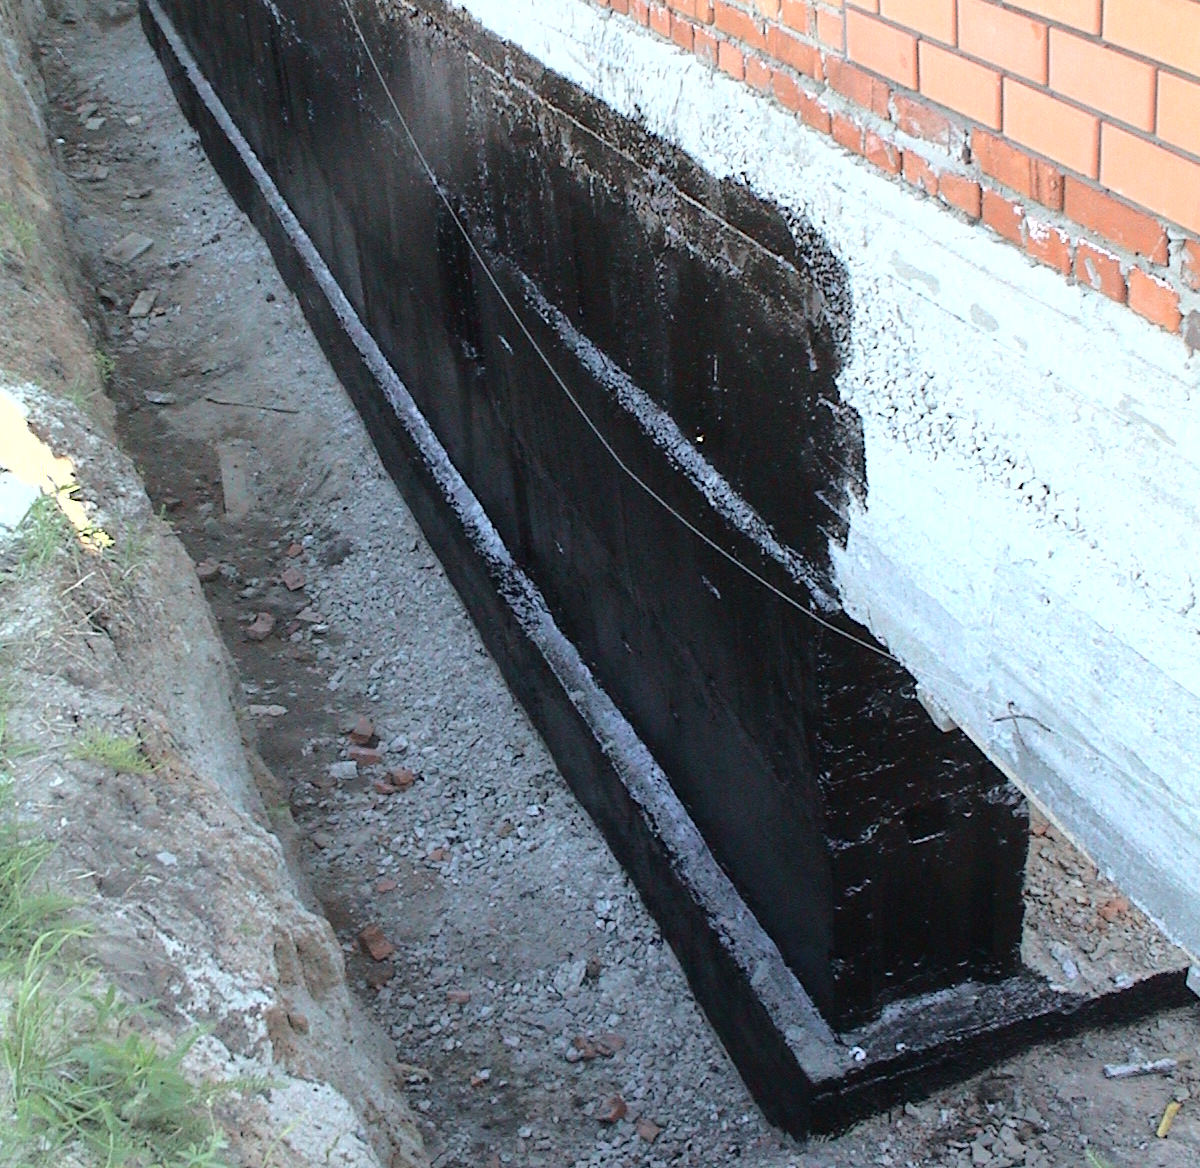
Vertical moisture protection
This type of work involves the application of a hydro-barrier layer on the outside of the foundation wall, which would protect concrete structure from excess ground moisture. The easiest in terms of self-assembly, while it is enough effective method, is the application of rolled waterproofing materials. There are several other types of products used for similar purposes, but some of them are ineffective (hydrophobic plaster, for example), or very expensive and require knowledge of technology (how to apply), as well as special equipment for this.
In order to clearly understand the rules for waterproofing the foundation, it is recommended to watch the video below, where you can not only see how to apply a hydro-barrier layer, but also hear useful advice and a description of the nuances of work from an expert builder. Also in the video, the specialist explains the purpose of the drainage system. We will further understand how drainage for drainage ground water build on your own.
How to make a drainage system?
Installation of drainage communications is usually carried out by specialized teams, although, with the necessary information and a strong desire, such work during the construction phase can be done independently. Of course, you will have to hire someone to build a drainage well, but laying the system itself is not so difficult.
Tools and materials
You will need a simple toolkit, associated with earthworks (shovels, scrap, perhaps a puncher will come in handy somewhere). To determine the slope, you can use the water level. The following materials will be needed:
- large gravel or gravel;
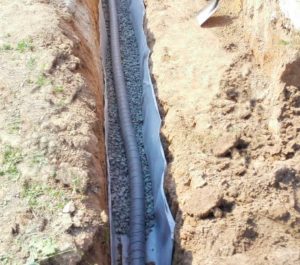
- special perforated drainage pipe;
- pipe fittings.
Work order
The underground drainage system is equipped after the creation of the slab base and the construction of the foundation wall. First you need to determine the natural slope and in the lowest place plan a place for installing a sewer well. After work, they are performed in the following sequence:
- Dig a trench about 25-30 cm along the perimeter of the foundation (with a bayonet). The width of the recess is arbitrary, within 50-80 cm.
- The trench is covered with gravel to a level that is 10 cm below the slab base (or the base of the foundation, if horizontal waterproofing was done after the foundation of the house).
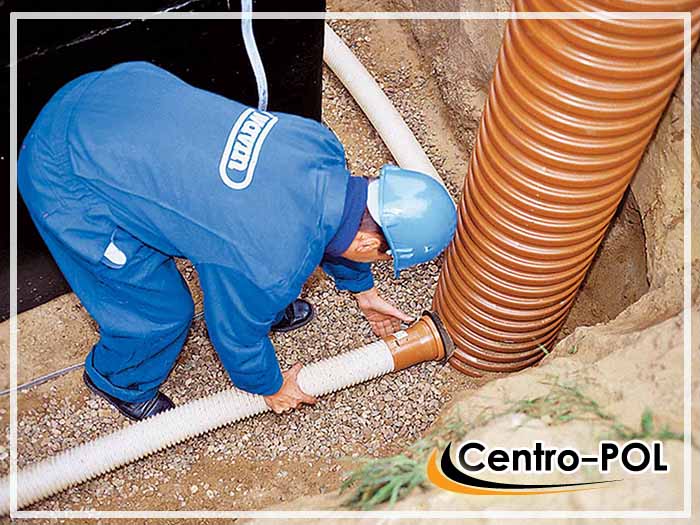
- A drainage pipe is laid in the center of the trench along the gravel bed. It is necessary to ensure that the slope from the highest point to the drainage well is constantly maintained along its course.
- After laying the pipe, another layer of large gravel is added, which will protect the drainage pipeline from the pressure of the soil layers that will be covered later.
Now, in case of approaching groundwater, they will be discharged into the constructed water intake without reaching the level of the base foot. From the drainage well, water can be pumped out at any time.
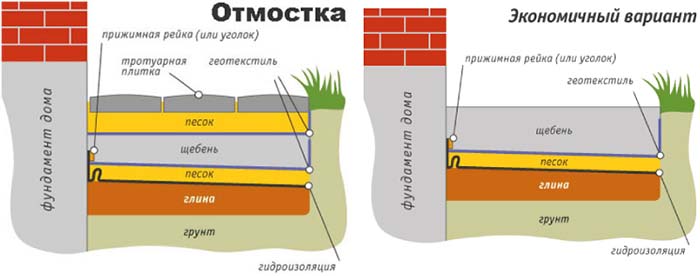
Upper waterproofing of the foundation (blind area)
The screed around the building protects the underlying foundation surface from excess moisture during heavy rains or when snow melts. An ideal option is when a clay castle is created under the blind area to the depth of the base of the building. However, clay tends to compact for a very long time, which can take 2-3 years. Therefore, now few people want to equip a clay belt.
Important! Before pouring the blind area, you should make sure that the soil covered around the base of the building is completely compacted. If this does not happen, the screed around the perimeter of the house will crack and eventually completely collapse.
How is blind area made
To create a moisture protection belt, you will need the same tools as for arranging a screed (trowel, as a rule, a plaster trowel), as well as everything you need for earthworks. The materials you will need are:
- concrete;
- gravel;
- sand;
- mesh for reinforcement;
- boards for the construction of formwork.
The order of work is this.
- A trench is formed along the perimeter of the building up to 20 cm deep and up to 1 m wide. The soil is carefully compacted;
- The recess is poured with gravel so that about 8 cm remains to the ground level. A leveling layer of sand is formed on top, slightly not reaching the upper edge of the trench;
- A vertical formwork is installed along the outer perimeter of the trench;
- Reinforcing elements are laid, the bedding is saturated with water;
- Concrete is poured into the gap between the basement of the building and the formwork and leveled. In order for the surface to be even, after partial setting, it must be rubbed with a plaster float.
Important! When arranging the blind area, it is necessary to control that there is no slope towards the building. If laying is planned after paving slabs, you need to achieve a horizontal surface. If concrete surface, - the final version, it makes sense to make a slope from the house.
Obviously, there is no unequivocal exhaustive answer to the question of how to properly waterproof the foundation, since reliable waterproofing of the foundation of a building includes a whole range of measures, each of which plays its own role. It is possible to hope that the walls in the basement will always be dry only when all the waterproofing works provided for by the technology are performed.
The design documentation being developed for the construction of a building is largely based on various building codes and regulations, the actions of which are mandatory, however, in individual construction it is often quite difficult to talk about their literal execution.
However, for any type of foundation of a house, utility room or garage, you can follow simple rules:
- The waterproofing protection system must be designed in such a way that there are no gaps.
- A layer of insulating material, regardless of the technology of its device, must be arranged over the entire area of \u200b\u200bthe base.
- Be sure to arrange a layer on the side that is subject to hydrostatic action.
- Be sure to arrange a layer of waterproofing during the construction of the building to prevent leakage of moisture by the type of capillary moisture.
Where to waterproof
In addition to protecting the structures of houses located below ground level, it is also necessary to provide a device for reliable protection of other elements of houses:
- Foundations of buildings.
- Ground floors.
- Basement floors.
- Cellar wall.
- Wall at home.
- Bulk soil floors.
- The roofs of the building.
- Doorways, window structures at the junction wooden structures to the walls.
Thus, the listed list contains all the structural elements of a modern task that require waterproofing protection.
Types of waterproofing
The techniques and methods of protection used in construction are largely traditional and act as a combination of several methods, namely, as a solution to the problem by an integrated method.
The outer protection of the foundation may contain the following elements:
- Vertical waterproofing of the base of the building.
- Drainage system around the foundation.
- Protection with bituminous compounds or bituminous mastic.
- Using the technology of applying a layer of liquid rubber.
- Plaster method of protection.
- Base screen waterproofing system.
- Creation of a clay castle around the perimeter.
- The use of rolled non-woven materials for the protection of foundations, for laying under the walls of the house.
Necessary materials
When it comes to materials for groundwater protection, the various methods used are:
- Roll materials - roofing felt, various branded roll materials, the essence of which is to fix a concrete or brick base with various mastics and subsequent heat treatment;
- Bituminous mastics - materials that are applied directly to the base, and stop the flow of moisture deep into the concrete;
- Plaster compositions that prevent the penetration of moisture;
- Synthetic compounds applied to the foundation under pressure, followed by polymerization in natural conditions;
How to do waterproofing
For various types of rear bases, special technologies for carrying out work are used, and, accordingly, materials. At the same time, the achievement of the best result is carried out by applying the right approach to the waterproofing device - from the choice of material to the technology for covering the base and the blind area.
1. Slab foundation
This type of base is characterized by the use of a powerful monolithic base, with a large reinforcing base. The base is poured onto a prepared, flat area with a prepared waterproofing pad. The pillow itself consists of several layers of natural materials that prevent the penetration of moisture into the foundation.
One of the barrier elements in this case is clay, which has excellent waterproofing properties.
Under monolithic slab before pouring, in this case, to improve the insulating properties, a roofing material or other insulating material is laid, on top of which a reinforcing cage is mounted and a foundation slab is poured.
2. Strip foundation
The tape type of the base, as the most popular among the bases of buildings, can be processed in several ways.
Mastic treatment is the simplest, fastest, and, in general, cost-effective method of waterproofing. A feature of which is the need to excavate a wider foundation pit. This applies to a strip foundation made of concrete blocks; for a monolithic type of strip base, mainly waterproofing from rolled materials is used, which is lined before pouring the monolith.
3. Column and pile foundation
A feature of these types of foundations is the complexity of the construction of the insulating layer on piles. For screw piles, a protective layer in the form of a paint coating is applied at the factory. And when pouring the cavities of the piles with concrete, it turns out that the concrete base is also protected by a layer of metal.
Columnar and pile-grillage foundations are insulated according to the type of tape. When pouring the grillage monolith, the barrier layer is placed under the reinforcement. And with the external construction of the grillage, it is possible to use both roll coating technology and other types of waterproofing.
Protection against capillary rise of moisture
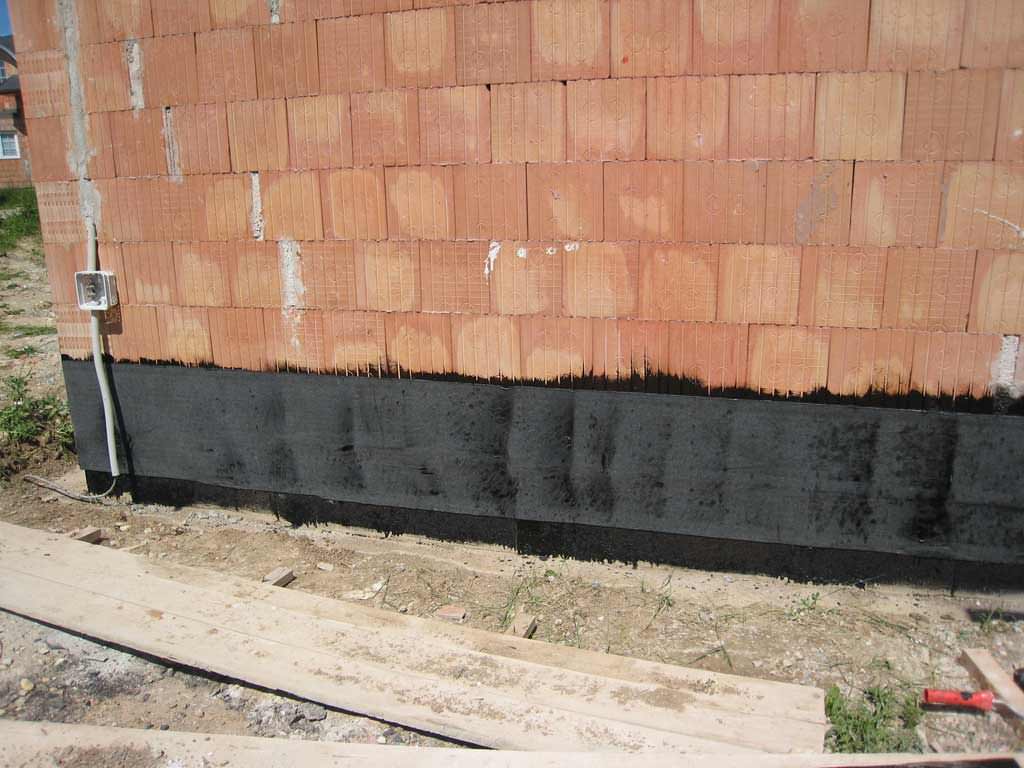
Protection of walls, doorways, window structures is carried out mainly from the penetration of moisture through microcracks, under the influence of temperature differences. The blocking of this process is achieved by applying rolled material to the concrete base.
The peculiarity here is that such a barrier should be arranged above the ground level, on top of the basement - 15-20 cm above the ground. The technology here is not very laborious - the surface is cleaned of dust and dirt, irregularities are removed.
The entire area for better bonding with the insulation material is processed with bituminous mastic, on top of which the roofing material is laid in two layers. Such a continuous laying is arranged taking into account the extension of the waterproofing layer beyond the foundation, for protection, in addition to brickwork also a layer of plaster.
Plinth waterproofing
The plinth or the outer side of the plinth is processed taking into account protection from both groundwater and surface water. Usually the basement of the building must be protected to a height of at least 50 cm. Such a waterproofing height will protect the walls of the building from rainwater penetrating 15-20 cm deep into the ground and wetting the wall surface to a height of up to 50 cm.
The penetration of moisture at such a height can adversely affect the walls of the building, and will be expressed in the form of places of formation of water seepage, mold, moss, salt deposits.
Achieving reliable protection of the basement of the building in this case is achieved:
- Lining the plinth with a reliable material.
- Treated with water-repellent mastic.
- Systematic application of water-repellent impregnations.
The best way here will be the plinth lining ceramic tiles or decorative brick, with reliable sealing of the seams between them. Water-repellent mastic is applied to the treated, prepared base, with cracks repaired.
A feature of impregnation is the need for constant and systematic processing of the base at a certain interval, as a rule, once every 1-2 years.
basement
A feature of the maintenance of a dry basement is a timely and correctly made blind area around the perimeter of the building. The outer protective layer is arranged along the foundation of the building. The blind area is planned with a slope to drain rainwater, followed by a drain into the drainage system.
Internal basement waterproofing consists of:
- The protective layer of the basement floor.
- Protective layer of walls.
The floor is usually protected by concrete base. The main material in this case is rolled materials laid on concrete using bituminous mastic in two layers. With a slight approach to the walls, as a rule, by 10-15 cm.
The walls are insulated, as a rule, with the help of plaster mixtures, on top of which either bituminous mastic or water-repellent solutions are applied. With the active use of the basement for domestic needs, it is recommended to additionally arrange a concrete screed on the floor over the protective layer.
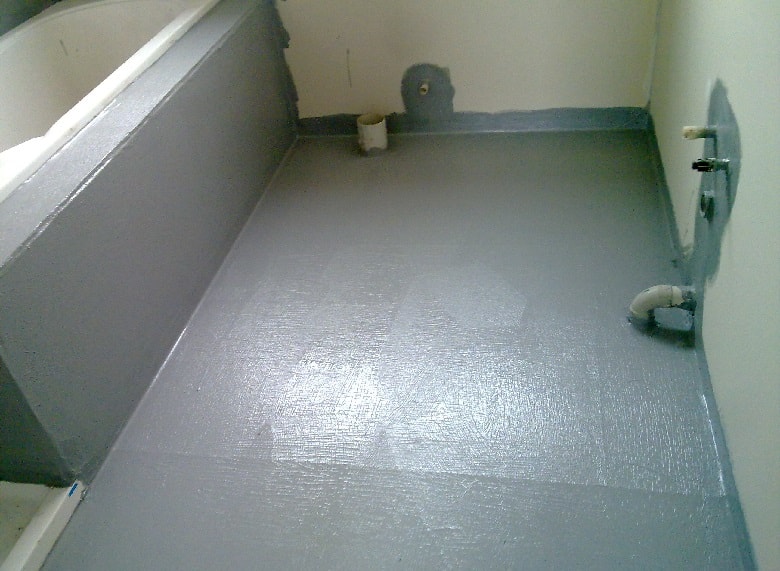
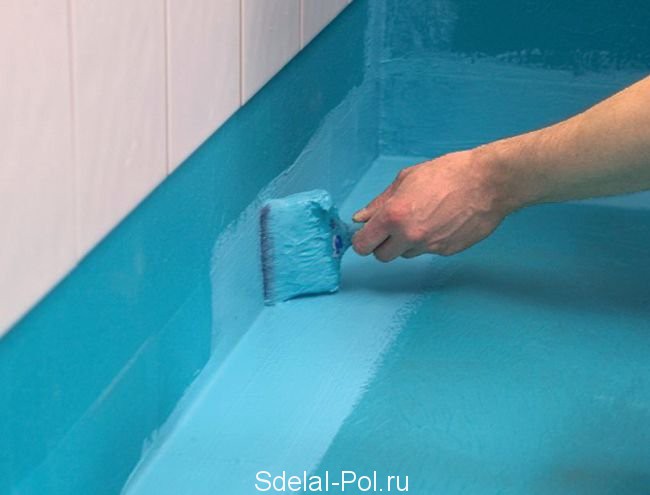
A bathroom is a room in which the moisture content exceeds several times the humidity in the entire apartment or house. In addition, very often at the time of adoption water procedures here there is a spill of water on the floor and abundant irrigation of the walls when taking a shower. In order not to flood the neighbors and not harm your home, you need a coating waterproofing of the bathroom.
Wall waterproofing devices
You need to start with the fact that in the bathroom, whether it's new construction or overhaul, it is necessary to define "wet" zones. Wet zones are called wall sections and, which are primarily exposed to direct action not of water vapor, but of water. The second question - what to do in the bathroom?
A shower cabin, a bathroom and a wall adjacent to it, a washbasin - these are the places that must first of all be carefully isolated from water and water vapor. walls are recommended to be carried out with one or two component, liquid mixtures.
They include a sand-cement mixture, chemical plasticizers and polymer fillers. The polymers bind larger sand particles and form a waterproof film. The cement included in the composition turns this substance into a monolith with high strength characteristics. The plasticizer creates the ideal conditions to keep this waterproof shell from cracking.
Preparing for waterproofing
It's important to know! The coating of bathroom walls is made with materials based on sand, cement and polymer components.
Bathroom waterproofing materials are divided into one-component mixtures and two-component waterproofing compositions. According to their characteristics, they are approximately the same, but the difference lies in the technology of their application.
One-component mixtures are mixed with tap water in the proportions indicated by the manufacturer on the package. After that, a thick mixture is applied with a brush to the walls twice.
Important to remember! Before application, they must be moistened with water. This will ensure deep penetration of the solution into the smallest pores of concrete and brick structures.
The interval between applying layers is on average 4-6 hours. The layer thickness should be at least 2-3 mm. For mixing and activation, two-component use a special polymer emulsion in place of water. This type of waterproofing of the bathroom walls will reliably protect against moisture and fungal infection.

When the walls in the bathroom are completed, you can move on to the floor. To do this, it is necessary to apply a comprehensive preparation of the base of the existing floor. First of all, it is necessary to remove the old coating and clean the floor from construction debris and dust.
After that, it is necessary to examine the concrete base and the adjoining walls for the presence of chips and deep cracks. If there are any, then they must be expanded (embroidered) with a spatula or chisel and a hammer to a depth of 3-5 mm.
We close up the cracks
Now the cracks are sealed with cement mortar and carefully smoothed out. When the solution is dry, the entire surface of the bathroom floor and adjacent walls are primed to a height of 10-15 cm. For this, a deep penetration primer is used. It will bind the grains of the surface layer and increase the adhesion of the waterproofing composition. If necessary, the primer can be applied 2-3 times.
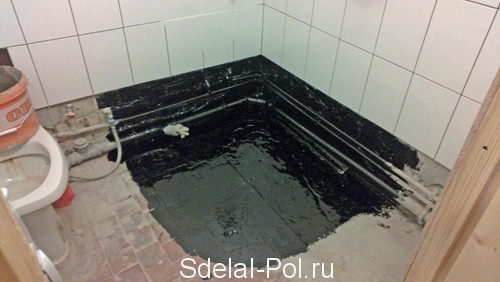
Mastic for waterproofing a bathroom made of bitumen or mastic made of polymer components is used as a coating on the concrete base of the floor. However, there are certain limitations for bituminous mastic.
Bituminous bathroom under the tiles is diluted with organic solvents or gasoline. This requires constant ventilation of the bathroom space when applying it to the surface of the concrete base floor. The emitted vapors adversely affect the human body. A sudden spark can start a fire.
Polymer mastic is not combustible, has practically no unpleasant odor and is environmentally friendly. Its consistency is thin enough to be applied to the floor surface with a brush. In this case, the mass of the waterproofing mixture will completely fill the microcracks of the cavity and the shell of the concrete base of the floor slabs and walls.
Important to remember! Waterproofing of bathrooms from mastic is applied to the entire surface of the floor and to adjacent walls to a height of at least 10 cm. Particular attention should be paid to the waterproofing of sewerage and water supply pipes.
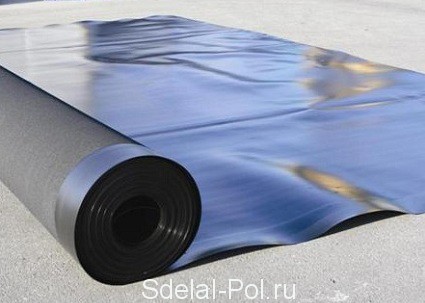
Roll materials can be used as waterproofing for the bathroom floor. In this case, the meaning of the work is to create a waterproof trough at the base of the floor.
To do this, use welded or self-adhesive materials. The former require heating with a gas burner for gluing to a concrete base. This option is the most expensive financially. Self-adhesive roll materials are enough to be laid and firmly pressed to the base. In this case, the overlap of adjacent sheets should be at least 10 cm, the overlap of the insulator strips on the walls along the perimeter is also 10 cm.
When the waterproofing device in the bathroom is completed, a sand-cement screed can be poured onto it. After the waterproofing gains strength on the floor and walls, you can safely lay the wall and floor tiles in the bathroom.
Not only the quality of construction depends, but also the durability of the house itself.
Therefore, it is very important to protect it from water, which is easily absorbed into concrete and has a detrimental effect on it.
Through the capillaries of the concrete foundation, water can penetrate into the floor of the house, where it promotes the growth of fungi and mold.
If involved in the construction of the foundation metal beams or wooden piles, these materials also need to be protected from water, since wood is susceptible to decay, and metal to corrosion.
Is foundation waterproofing necessary?
For those who forgot to waterproof the foundation during construction, it is worth knowing that when thawing in the spring, water increases in volume and destroys the foundation of the entire structure. To protect your home from expensive repairs in the future, you need to properly waterproof the foundation of the house in advance.
In order to make the waterproofing of the foundation of the house yourself, first you need to find out:
- How deep is groundwater?
- how much the earth is saturated with moisture in the spring;
- type of soil;
- type of building and conditions of its operation.
These factors determine the type of foundation waterproofing required.
At the level of groundwater per meter and deeper from the base of the foundation, it is possible to make waterproofing of the foundation and coating vertical waterproofing.
At a level less than 1 m. from the base of the foundation, horizontal insulation should be laid in two layers, smearing between the layers with mastic. 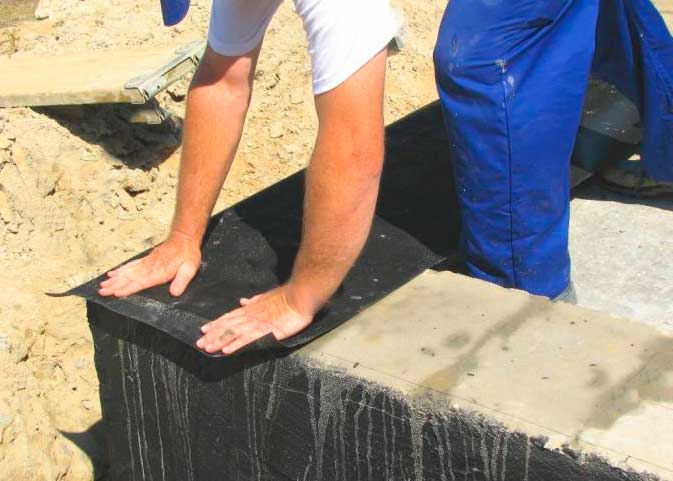 As for vertical insulation, then apply a coating and paste over roll materials. Also, in order to hinder the penetration of water through the capillaries, it is recommended to treat the basement with penetrating waterproofing.
If the construction of a house takes place in a place with a humid climate and the groundwater level is high enough, in addition to the measures described above to protect the foundation, a drainage system should be equipped to drain water into a special one.
Foundation waterproofing materials
An important question when protecting the foundation of a house is how much does it cost to waterproof the foundation?
It depends on several factors: the area of the treated surface and the quality of waterproofing materials. 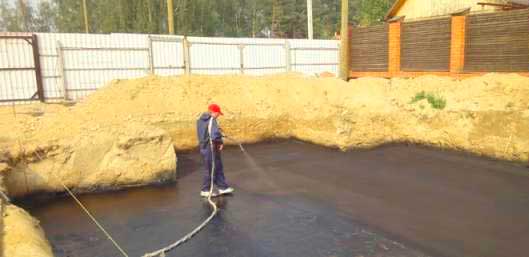 The cheapest material is ,
it retains moisture well and is very easy to use, the material itself does not decompose upon contact with water. Waterproofing the foundation with bitumen is easy to do with your own hands.
The cheapest material is ,
it retains moisture well and is very easy to use, the material itself does not decompose upon contact with water. Waterproofing the foundation with bitumen is easy to do with your own hands.
In the case of high soil moisture and the proximity of groundwater to the foundation of the house, it is necessary to additionally purchase coating, roll and penetrating materials, as well as calculate the cost of drainage construction work.
 Inexpensive materials for foundation waterproofing are waterproofing impregnation deep penetration and waterproofing plaster. These materials are not used as the main insulator.
The task of impregnation is to fill cracks in concrete, which in turn prevents water from penetrating into the foundation, provides frost resistance and prevents corrosion.
Plaster serves more to improve the qualities of the insulating material, because it contains special additives and plasticizers. Plaster is used not only as decorative coating, but also to extend the life of the main insulator.
 the most common method of waterproofing the foundation. There are insulators with an already glued layer of bitumen, which must be heated with a burner, and those that require an additional adhesive layer.
In comparison with roofing felt, rolled insulators win significantly.
They are more resistant to moisture, do not fade in the sun, are more flexible and able to take the shape of the surface they are designed to protect, as a result of which they are less susceptible to mechanical damage.
 Rubber insulation
is the most reliable, durable, but also the most expensive way to waterproof the foundation.
Rubber insulation
is the most reliable, durable, but also the most expensive way to waterproof the foundation.
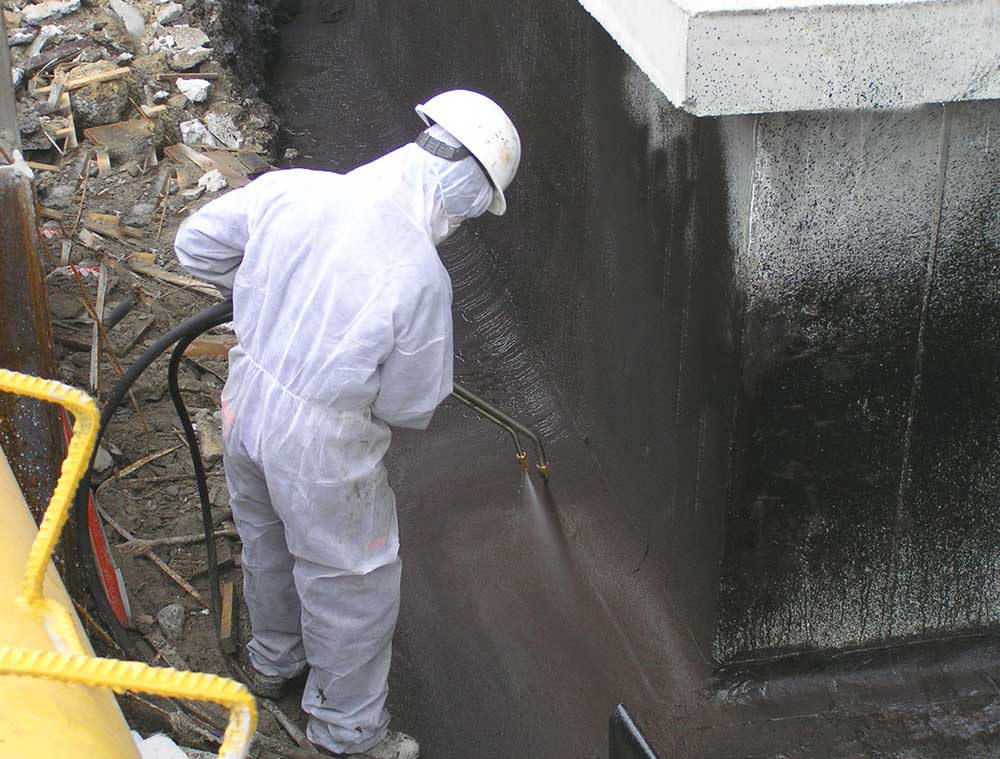
It is poured over the entire surface of the foundation and provides a reliable connection with the base.
This type of insulation usually requires special tools, but you can do it yourself. Using a roller, liquid rubber is applied to the primed surface. The number of layers and drying depends on the manufacturer of the material.
Foundation waterproofing work
Let's look at the waterproofing of the most complex foundations in terms of technology - and monolithic. Their waterproofing is carried out at two levels: below the basement level by 15-20 cm, and in the basement, at the junction of the walls with the foundation.
At the very beginning of work, a thick layer (20-30 cm) of oily clay is laid on the bottom of the pit. 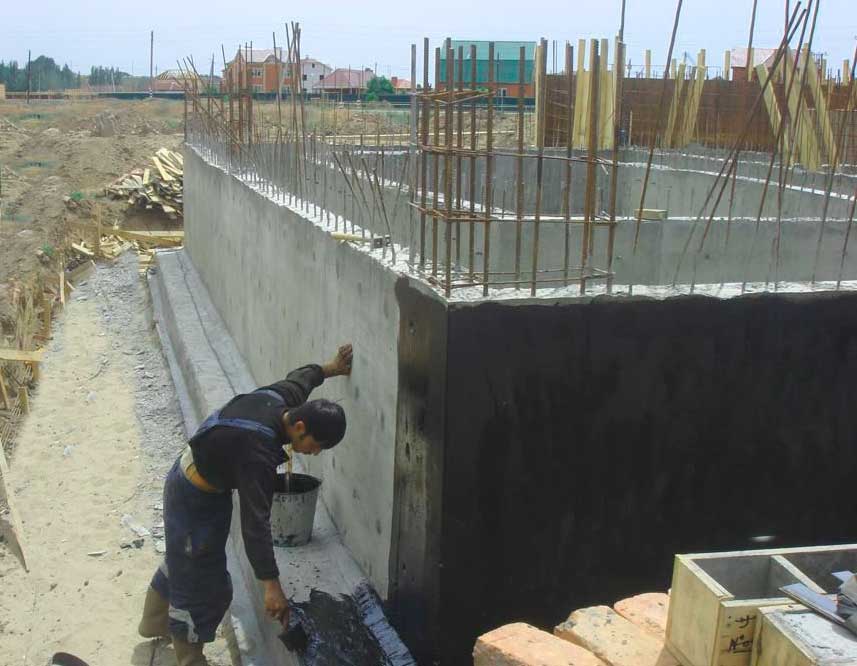 Next, the surface is poured with concrete 7 cm thick and left for a week to solidify. After the concrete hardens and settles, the entire area is abundantly coated with bituminous mastic, a roofing material ball is placed on top, after it the surface is again coated with mastic, and the second layer of roofing material is laid again.
It dries like any other concrete screed: you need to periodically moisten it with water and cover the foundation with a film. Such actions are performed once a day until it completely hardens and gains strength.
The drainage system can be arranged both during the construction of the house and upon completion of the construction.
The system is designed to drain water that collects around the house into a well or ditch.
At a distance from the house, at least 0.7 m, they dig a ditch around the entire perimeter from 30 to 40 cm wide. The depth of the trench is selected according to the level of groundwater. A ditch is directed with a slight slope in the direction of the well.
The bottom is laid with geotextile so that the edges of the material can be wrapped onto the sides of the ditch by about 80 cm. The bottom is covered with crushed stone or gravel 5 cm thick and then a perforated pipe is laid with a slope of half a centimeter per meter.
From above, the washed gravel is covered with a layer of 20-30 cm and the edges of the geotextile are wrapped. The pipe is brought to the well and the entire trench is sprinkled with soil.


