Why do you need a supply valve in the wall. Wall-mounted appliances. Which supply ventilation valve is better to choose: reviews
Everyone understands perfectly well that its microclimate depends entirely on how good ventilation is in your apartment. And in order for the ventilation to work correctly, along with the air exhaust, there must also be its inflow. Then there will be proper circulation of air masses in the room and you will not be afraid of high humidity, the growth of fungi and various molds.
To date, almost all apartments are equipped plastic windows. They do not require maintenance, it does not blow through them, and they practically hermetically clog a person’s home from exposure to various weather factors. This is great, of course, but there is, as they say, the other side of the coin. Because of this tightness, our ventilation system practically does not work, as there is no air flow.
Many reading this article will immediately ask what to do in this situation? The answer to this question suggests itself: It is necessary to make additional supply ventilation. The modern construction market, today, is saturated with various types of supply valves. They are divided into window and wall. It is the wall valve supply ventilation we will consider in our article.
What is this device?
This device is designed to create a forced ventilation system in the premises. wall supply valve provides enhanced circulation of air flows, with the ability to control their speed, while not creating a draft. Thanks to a complex labyrinth of air channels and a filter system, this mechanism cleans the supply air from mechanical impurities. In addition, the design of this valve is such that moisture does not penetrate into the room through it, as well as various street noises.
Where are wall valves used?
These valves can be used both in private houses and apartments, and in public buildings. In addition, the wall supply exhaust valve increasingly installed in hospitals, schools and preschool institutions. Also, the supply valve has proven itself perfectly when creating. According to experts, the use of this device in kindergartens is especially important, because the lack of fresh air circulation leads to the spread of mold, and this greatly affects the children's body.
Valve internals
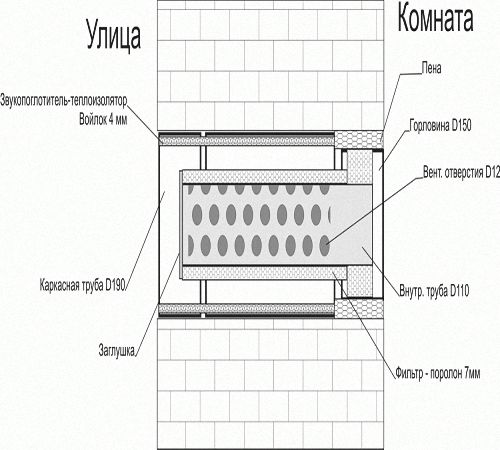
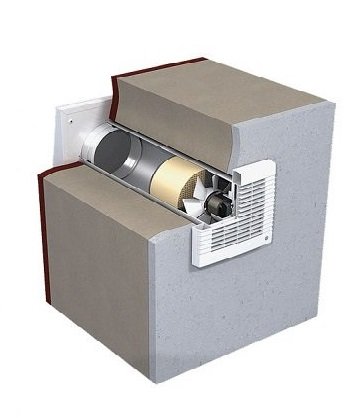
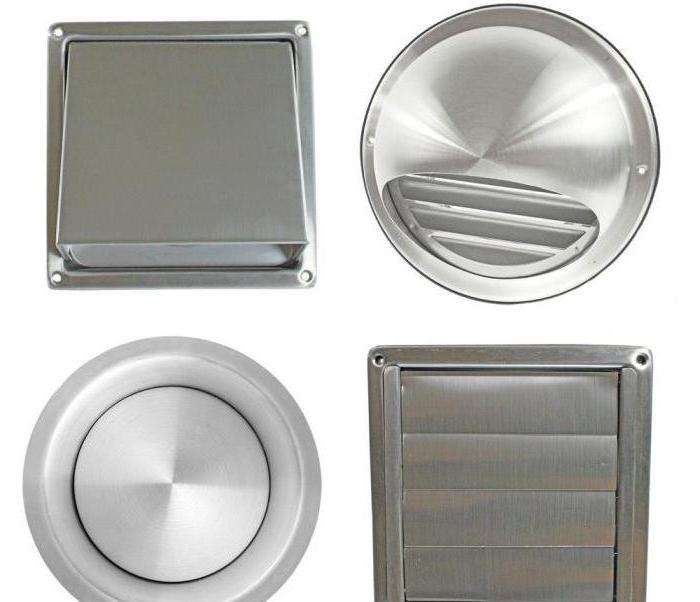
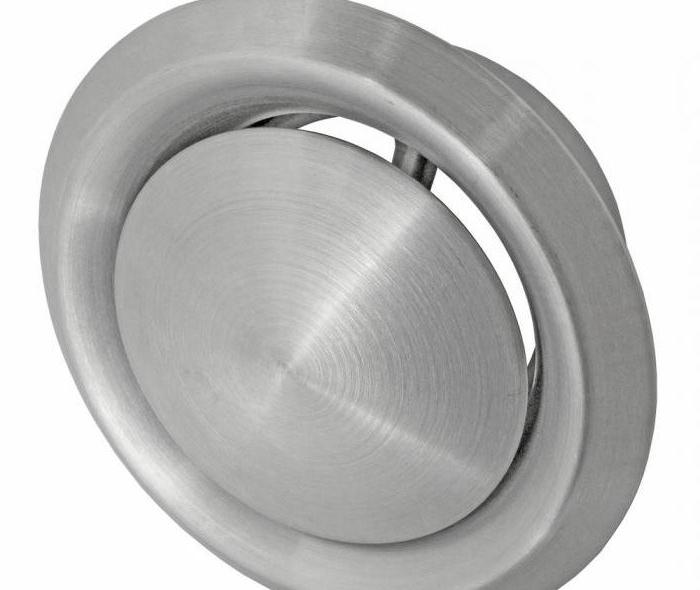
The wall valve for supply ventilation is quite simple, but despite this, it perfectly performs its function. Depending on the manufacturer, appearance These devices are different from each other, but the main details and principle of operation remain the same. It consists of:
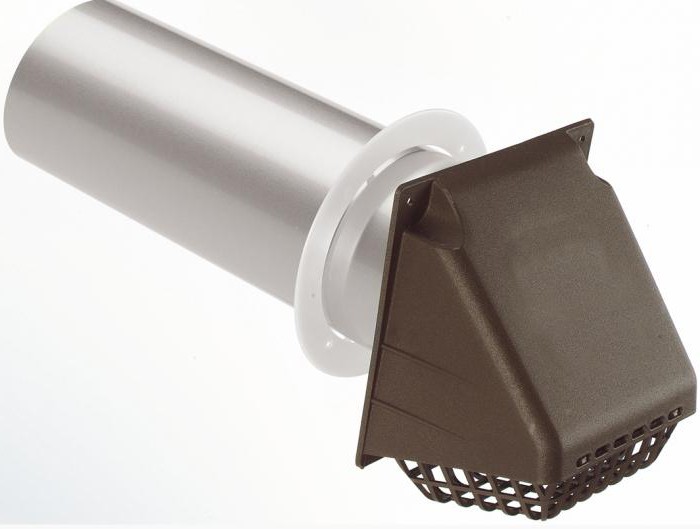
- Pipes slightly longer than the thickness of the wall.
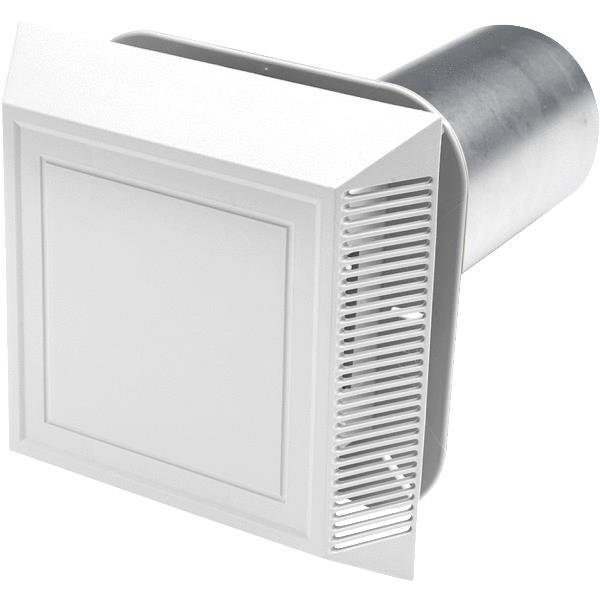
- A ventilation grill that is visible from the outside of the wall. The function of this grate is to keep large debris from entering the home.
- Special noise-insulating composition, which is filled with the main pipe of the valve.
- Sealing rings with a damper, which are located on the inside of the wall, and block the air flow during strong gusts of wind.
- Filter for fine purification of supply air.
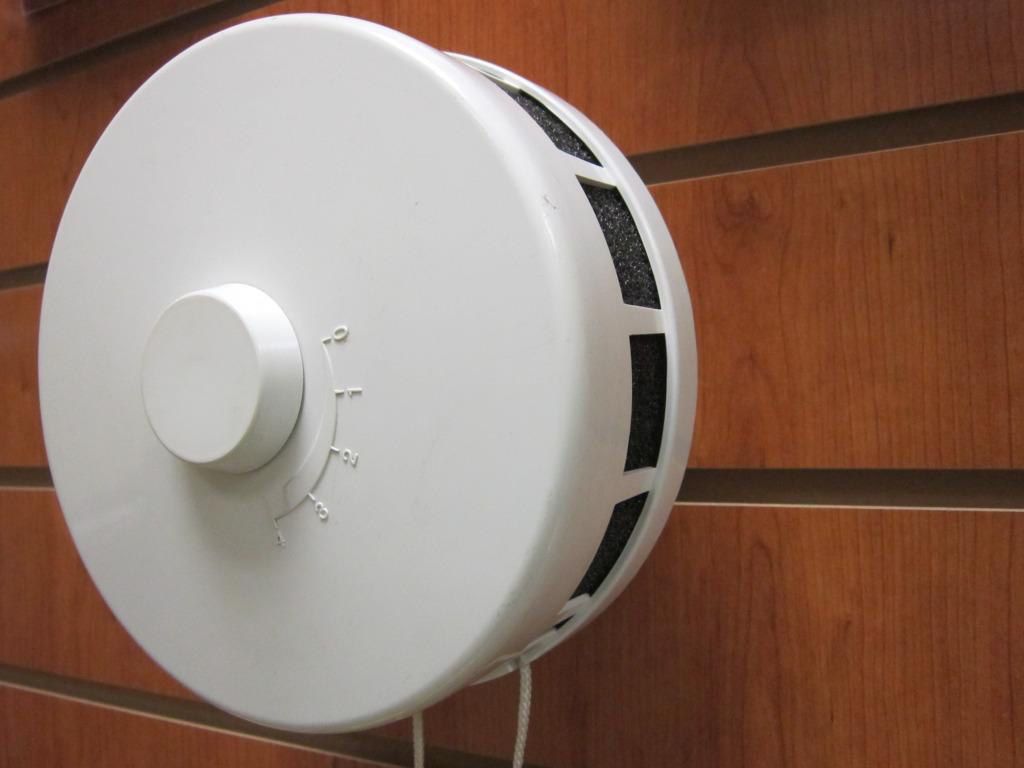
- Covers of the device with a supply valve and an adjusting knob, thanks to which the air supply is adjusted.
 Depending on the manufacturer, the appearance of the device may differ slightly from that described, but the internal structure of the valve will be identical.
Operating principle
Air entering the device through the ventilation grill passes through the pipe, where it enters the special soundproofing material of the wall damper. After its passage, the air is already cleaned of coarse mechanical impurities. This device has a special channel, known as the "maze". It is in it that the speed of the supply air decreases and its additional rough cleaning takes place. After that, the purified air enters the adjustable damper, where, through technological openings, it enters the dwelling.
How is the installation - the main stages of work
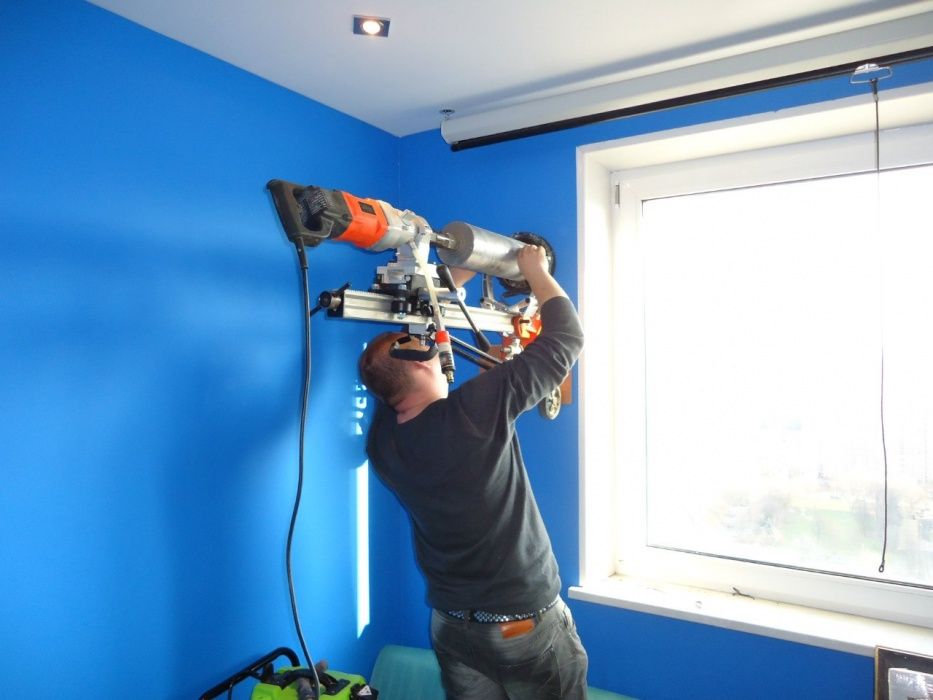
First of all, in order to install the supply ventilation valve in the wall, you need to decide on the installation location. And although it does not spoil the appearance of the room, it is recommended to install it under the windowsill. This is due to the fact that the supply air immediately enters the radiator of the battery, and heats up, spreading around the room. Experts recommend this way to mount this device, although the location does not play any role, and its choice is up to the owner.
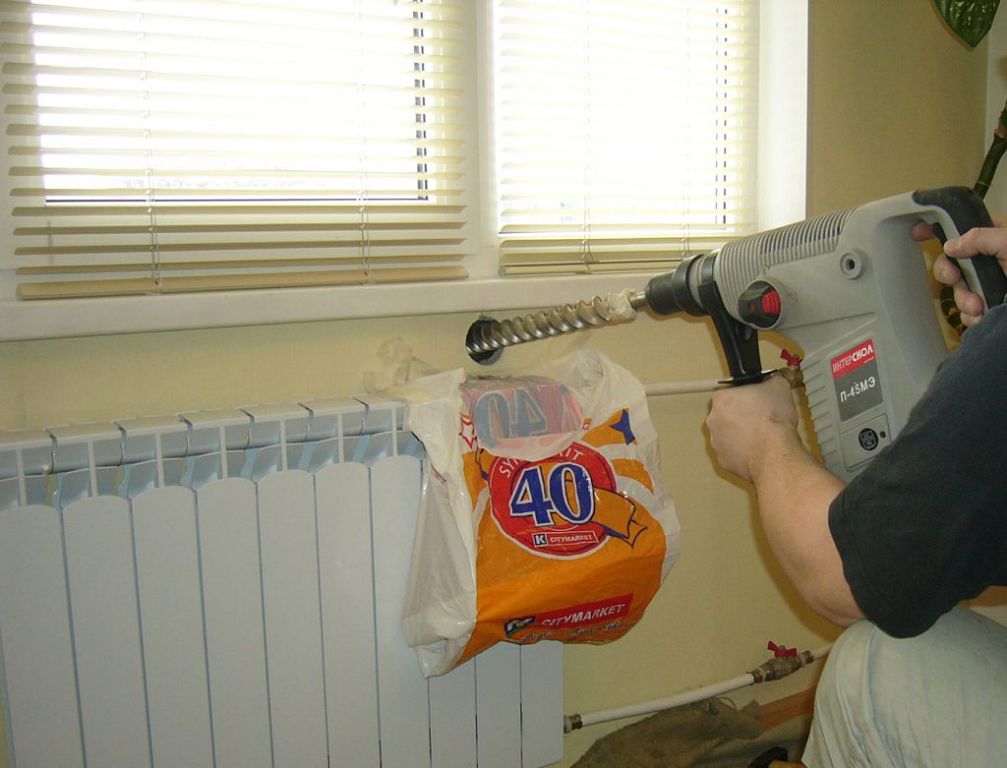
- A through hole is made in the wall under the window sill, with a diameter of 40 mm.
- After that, it is installed in it.
- Insulating material is laid around the pipe.
- The valve is assembled according to the manufacturer's scheme.
- At the end of the assembly, a cover with an adjusting knob is installed.
- Immediately after installation, your wall valve is ready for operation.
To install the inlet valve in the wall to give maximum results, there is another common way. A hole in the wall is drilled heating radiator. With this arrangement, the valve is absolutely invisible, but the air that comes out of it, bending around the radiator, rises and exits above the battery. The most important thing is that the air is distributed throughout the apartment, already at a temperature close to room temperature. Therefore, even in the most severe frosts, your room is provided with an influx of warm, fresh and dust-free air.
The assembly and installation of this type of valve is quite simple and any home master is able to install a wall inlet valve with his own hands. To do this, just read the installation instructions that come with this device, and also have some tools available. How to install this device, we wrote above.
Important!
Before drilling, make sure that there are no hidden electrical wiring and use personal protective equipment (gloves, goggles, etc.) when working. If you are unsure that there are no wires at the installation site, then it is better to entrust this work to professionals.
For self-assembly of this device, you need:
- A perforator equipped with a drill bit or a crown with victorious soldering of the desired diameter.
- A set of drill bits that can drill concrete and brick.
- Figured screwdriver.
- And, accordingly, the supply-wall valve itself.
Not without drawbacks
With all its positive qualities, supply and wall valve there are shortcomings, and they are connected, first of all, with timely care for him, although manufacturers are silent about this. It is necessary at least once a season to disassemble the valve and clean the filters. In addition, as eyewitnesses testify, some models of this device freeze through. This, first of all, happens if the valve pipe is made of metal, so its choice must be taken with all seriousness. Although, to be fair, it should be noted that recent times manufacturers have stopped using metal in these valves, so freezing and condensation in it is a thing of the past.
And the last drawback is its price. On the market building materials it varies, depending on the design and manufacturer, from 2.5 to 4 thousand rubles. But experts believe that this is an adequate price for a good, healthy microclimate in your home, as well as comfort in your apartment.
It is not uncommon to hear that the owners of an apartment in large cities do not have enough clean indoor air. Kitchen smells and fumes, condensation on windows and metal objects can make the home microclimate completely uncomfortable for permanent living. Lack of ventilation must be corrected. This can be achieved by installing a supply valve in the wall. With its help, an additional supply of fresh air into the room will be provided. Most often, installation is carried out in the kitchen space. After installation, the formation of mold or fungi of various origins becomes almost impossible, and high humidity in the room no longer entails any negative consequences.
The internal structure of the structure
You can find many models of supply valves in the modern construction market. However, they all have a device in common.
Components:
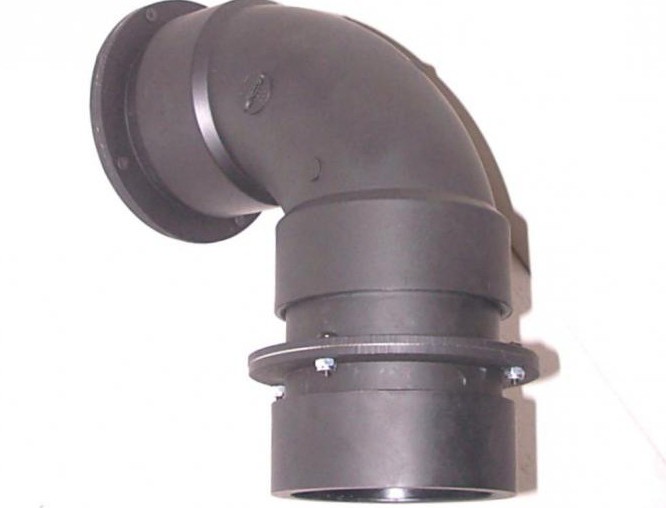
- Air duct. Air masses enter the room through this pipe from the outside. Most often there are air ducts made of plastic.
- Ventilation grate (it can be seen from the outside of the wall). It prevents the ingress of various debris into the room.
- Noise isolation compound.
- Ring and damper that perform a sealing function. They are located at the wall of the house from the inside. These parts are able to restrain strong gusts of wind.
- A filter in which the supply air is cleaned.
- The handle for adjustment of ventilation.
Installation of the supply and exhaust valve can be performed independently and at any stage of construction or repair. Connection to the electricity network is not required.
The principle of operation of the installation
With the help of such a device, it is possible to force the movement of air masses in the room.
Through the grate, air flows move along the main pipe of the structure. Next, the material for sound insulation is overcome. Already at this stage, the air is purified from heavy mechanical impurities. Further, there is a decrease in the speed of the air flow, at the same time, its rough cleaning is carried out. From here, air enters the room through special openings.
Using a special button, it is possible to control the air circulation, the flow rate can be adjusted. Drafts do not occur. Excessive moisture and street noises remain outside the apartment.
Pros and cons of wall ventilation
The installation of such a design will be useful to everyone. There are several good reasons for this:
- reducing the wear of window fittings (it is not so often necessary to open and close windows in the house);
- much less noise irritants penetrate into the apartment from the street;
- there is a possibility self adjustment exhaust ventilation capacity;
- in the cold season, sharp jumps in temperature level out;
- the design can be easily disguised, but even when open it does not spoil the overall interior at all;
- inexpensive cost.
As elsewhere, there are negative points in the installation of supply valves:
- you have to make a hole in the wall. If the structure is dismantled in the future, the through hole will not go anywhere.
- every mistake made during installation entails the onset of negative consequences. For example, freezing is possible in winter.
- in many areas of the country winter time you just won't be able to use it. Otherwise, the air in the room will become very cold.
Basic rules for choosing a design
When choosing a supply ventilation valve, it is important to pay attention to the temperature range at which it can function properly. All sizes and dimensions also need to be given due attention. The wall in the house should be less than the length of the main pipe. The size of the inner cover is selected based on the capabilities of the internal structure of the house.
In cold climates and low heating power, a large-sized installation will pass such volumes of air that they simply will not be able to warm up. If too little air is supplied, then installation of several structures may be required.
There is a high probability of provoking drafts if the supply valves are mounted in walls opposite to each other.
Possible costs
Prices for the mechanism and installation of ventilation can have significant differences between them. Domestic installation costs, as a rule, one and a half to three thousand rubles. The cost can be doubled if we are talking about an imported design. For installation work, you can invite an experienced builder with his own tool. The whole job will take him no more than an hour. But the costs will also increase.
To gain benefits and save money, many undertake to do this work on their own.
The main stages of installation of the structure
First of all, it is necessary to determine the place of installation work. Despite the fact that the internal appearance of the dwelling does not deteriorate with the installation of the structure, it is still recommended to mount it under the windowsill. The explanation for this is simple - the air from the street enters the heating pipes, and spreads around the room already in a heated state. However, the final choice still remains with the owner of the premises.
- On the selected section of the wall, it is necessary to drill a hole, which must be through.
- The main pipe is installed in this hole together with the outer grille.
- The space around the hose is filled with insulation.
- Then you need to assemble the valve. This will require a circuit provided by each manufacturer.
- The cover together with the adjustment knob are mounted at the final stage of work.
After completing all these simple steps, you can begin to use the ventilation structure.
There is another popular way. The hole is drilled behind the heating pipes. In this case, several points become advantageous at once. The supply device is securely disguised. The incoming air begins to spread around the room only after it goes around the heating radiator. That is, the movement of air room temperature. This means that you should not be afraid of even a very strong cold snap. Air masses entering the house are cleaned, refreshed and filled with warmth.
The assembly and installation of such a design is not such a difficult task. Any person can handle this. One of the most important conditions is to carefully read the attached instructions from the manufacturer.
Tools required for installation:
- perforator. Be sure to have a drill bit of the required size;
- a set of drills capable of drilling brick and concrete panels;
- screwdrivers;
- the structure itself.
The scope of such structures is diverse. They can be mounted in apartments and houses of the private sector, office buildings and large factory premises. Hospitals, schools, kindergartens are places where a large number of people, and hence the need for additional air in the room arises constantly. Such an installation will not be superfluous anywhere.
For such cases, they came up with supply valves, room air cleaners, breathers or recuperator valves.
The purpose of any supply valve, breather or recuperator valve is to provide a forced or natural inflow of fresh air, which will ensure good ventilation without opening windows.
Why is an inlet valve useful and why is it better than an open window?
- Incoming air passes through a filter system
- Noise from the street does not enter the room
- No constant draft
- The supply air is heated and supplied as comfortable as possible.
- It is possible to precisely control the volume of incoming air
- Snow and rain do not enter the room
All household compact ventilation units can be roughly divided into several types:
Wall dampers without mechanical actuation (without fan)
Such an element is perhaps the most primitive device. Its only advantage can be safely called its price, since the design of such a valve is extremely simple.
|
Pros: |
Minuses: |
|
Low price |
|
|
Mounting speed |
It is not possible to control the inflow - only open or close the hole with a damper |
|
Noiselessness |
Lack of filtration |
The main purpose of wall valves- effective ventilation of residential and non-residential premises and their provision with fresh air, purified from street dust, dirt and noise. In addition, these devices allow you to avoid heat leaks in the winter season and optimize heating costs. Due to the fact that in cold weather there is a smooth mixing of warm and cold air masses, there is an effective self-regulation of the microclimate in the room.
Structural device
In order to understand the principle of operation, first consider what components the wall inlet valve consists of.
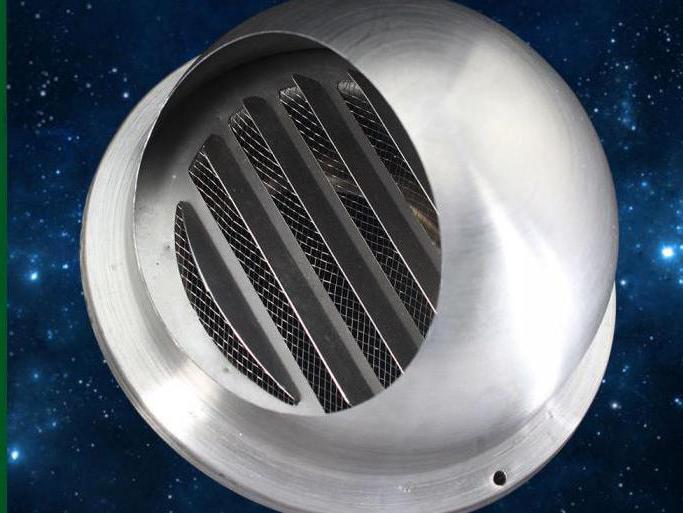
Air pipe;
ventilation grille, mounted on the front side of the wall. Its task is to prevent small litter, dust, dirt from entering the premises;
Soundproofing compound, which fills the main pipe of the inlet valve;
Sealing ring with functional shutter. Serves to block the air flow in case of strong gusts of wind;
Filter system to perform coarse and fine cleaning of incoming air;
Cover with inlet valve and a handle-controller for adjusting the supply flow rate.
Having disassembled the internal device, consider the principle of operation of the device
The supply air from the street enters through an external ventilation grill and enters a pipe filled with a special noise-insulating compound. After passing through it, the air masses are automatically cleared of large mechanical impurities. Then the air follows through the labyrinth channel, which helps to reduce the speed of movement of the incoming air. After passing through the filter system, well-purified air follows an adjustable damper, after which it enters the room through the available technological openings (grilles).
Wall supply valves of forced type (with a fan)
This method is already more advanced than the previous one, since it has the ability to regulate the volume of supply air due to several fan operation modes.
|
Pros: |
Minuses: |
|
Filtration system |
Lack of supply air heating |
|
Mounting speed |
Relative noise |
Forced-type wall supply valves demonstrate much greater efficiency in providing optimal microclimatic performance due to the operation of the fan.
Structural device. Similarly with the standard device of wall supply valves, with the exception of an additional component - a fan.
There are two types: air handling unit and recovery valve.
Air handling unit
It is a complete version of the ventilation system for one room. This unit provides both supply and exhaust. An important point is that it heats the supply air at the expense of the exhaust air, which saves energy for heating the supply air.
|
Pros: |
Minuses: |
|
Filtration system |
|
|
Supply air heating |
|
|
Quiet operation |
|
|
Economical operation due to recuperation |
|
The operation of the air handling unit is based on a simple principle: during the extraction of warm exhaust air from the room, its thermal energy is used to heat the supply air masses. In addition, some models can regulate humidity levels to an optimal level: in the warm season, the air is dried due to moisture exchange with the exhaust air, and in the cold season it is humidified before being supplied to the room.
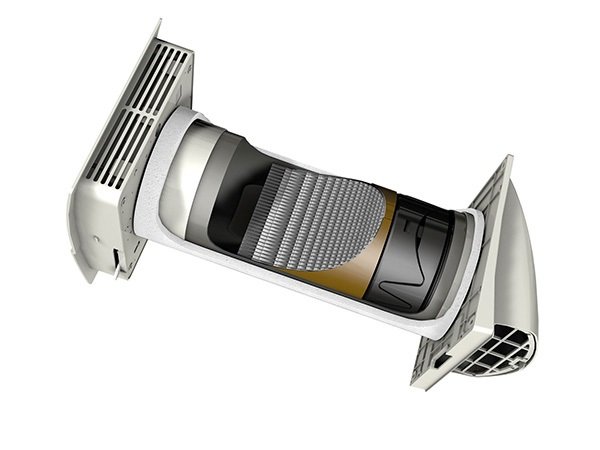
Structural device
The most standard air handling unit with a heat exchanger consists of grilles, an air duct, a heat exchanger, two fans, filters, a condensate removal system, sound insulation and an automation system. All elements are enclosed in a single housing, and the operation is regulated by a control unit.
In appearance, it is similar to a conventional supply valve, only it differs in design and principle of operation. In such a valve, there are either two fans, or one, but with the ability to spin in both directions. Thus, such a valve works for some time for inflow, and some for exhaust. As a result, it either heats or cools the copper tubes located inside the duct, thus heating the supply air.
|
Pros: |
Minuses: |
|
Filtration system |
Relatively high noise level |
|
Supply and extract air balance |
Low recovery efficiency |
The recuperation valve is designed for efficient and complete renewal of the air in the room, with a certain frequency. Thanks to the ceramic element of the heat exchanger, the problem of excessive air dryness is solved, due to which optimal microclimatic indicators are formed without loss of heat or coolness.
Structural device. The recovery valve consists of the following elements:
- outer casing with UV/dust/dirt/rainfall protection option;
- one or two fans (depending on the model);
- filters;
- insulated casing;
- ceramic element of the heat exchanger;
- internal decorative panel;
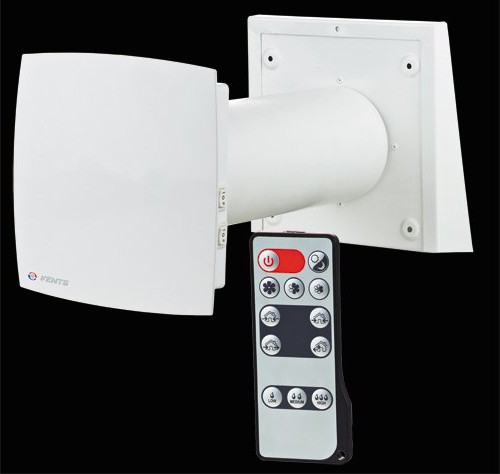
- control unit + remote control.
Such systems are completely supply. They are more high-tech and more thoughtful, which creates a number of serious advantages such as: convenient operation, the ability to configure any mode of operation (timer), the highest class of air purification, absolute noiselessness, beautiful ergonomic design, etc.
|
Pros: |
Minuses: |
|
High-tech filtration system |
Dimensions (same as a wall-mounted air conditioner) |
|
Supply air heating |
No hood |
|
Absolute noiselessness of work |
|
|
Beautiful design |
|
|
Convenient control, several modes of operation |
Breezers or compact air handling units combine 2 useful functions at once: they act as an air purifier that maintains perfectly fresh and clean air in the room and at the same time provides fresh air from outside.
The breathers are equipped with multi-stage filtration systems and automatic air heating, automatically control the level of dust in the room air and regulate the maximum allowable concentration of CO 2, have a UF lamp for disinfection and even aromatize the air (in some models).
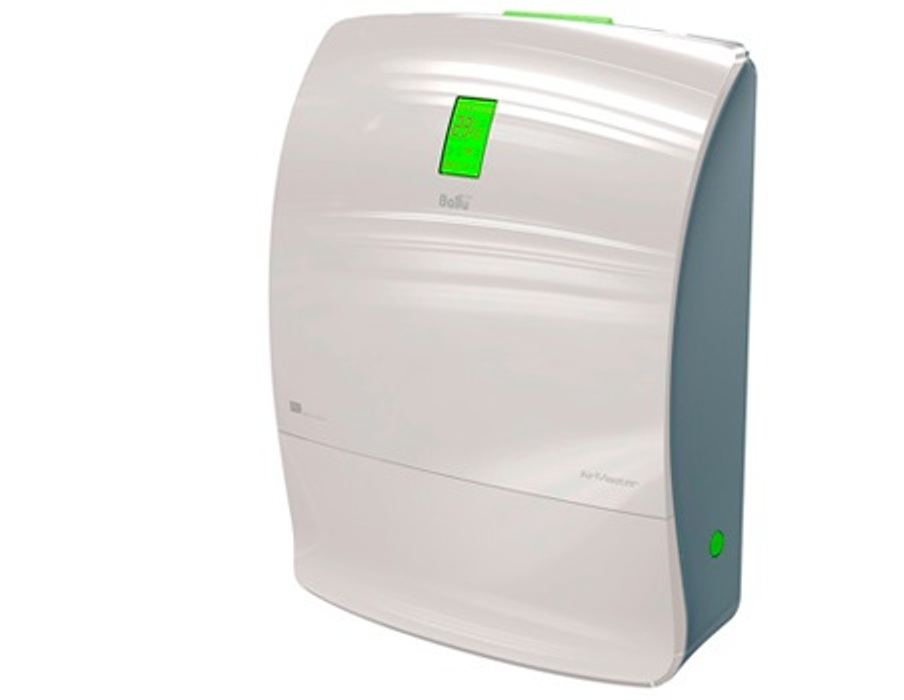
Structural device. The installation includes the following elements and accessories:
- Multi-stage filtration system of varying degrees of purification;
- High speed tangential fan;
- Ceramic heater;
- CO 2 and dust level sensors;
- UV lamp;
- Plasma generator;
- Aromacapsules (for some models);
- Control block.
- Window inlet valve
Window inlet valves are classified as simple devices allowing you to organize effective ventilation premises without much investment. They are built directly into window frame or sash.
|
Pros: |
Minuses: |
|
Maintaining an aesthetic appearance |
Small throughput |
|
Simple and fast installation |
Low degree of filtration of air coming from the street |
|
Maintain effective sound insulation |
Increase in heating costs during the cold season due to the lack of the possibility of heating the supply air |
|
No drafts |
|
|
Automatic humidity control (for models with built-in hygrometer) |
|
|
Low cost |
The device is a conventional valve equipped with a filter and an adjustment option.
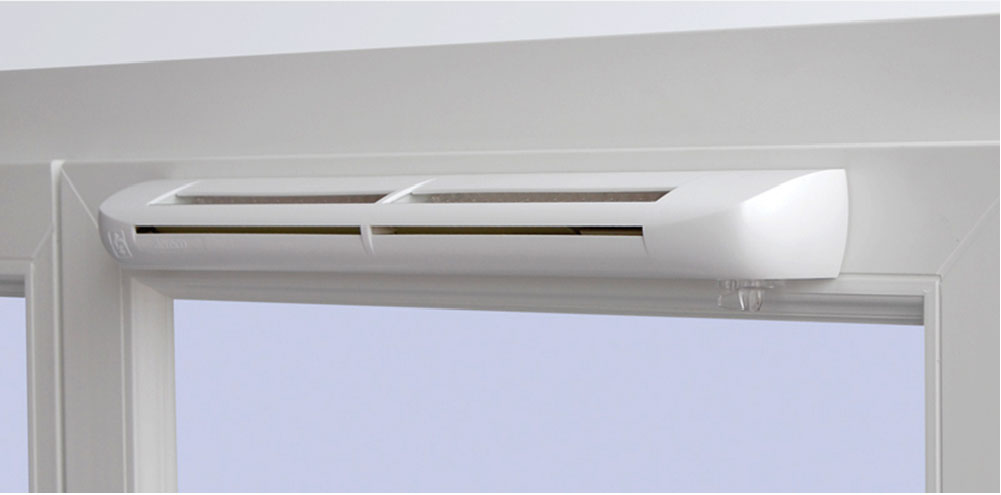
Structural device. The window inlet valve consists of several elements:
- External grid with filter to protect against litter/dust/small insects;
- Internal lattice with adjustment of intensity of giving and the direction of an air stream;
- visor on the outside to protect against rain.
Today there are several variations of window valves:
- with manual control;
- with automatic adjustment of the air flow according to the readings of the sensors.
The latter can work as a hygrometer and automatically regulate the air supply: the higher the relative humidity indoors, the wider the flaps will open, providing more air. This is very convenient and eliminates the need to constantly open or close the valve.

Summing up, it is safe to say that if you want to organize high-quality ventilation, and your budget is limited - stop your choice on one of the modifications of the supply valve. Fresh air is the key to health, so take care of yourself without damaging your wallet!
To ensure the flow of air into residential and non-residential premises, a supply valve is often used today. You can install it on the wall yourself, for this you don’t even need to purchase additional tools. This need is due to the fact that the special popularity in last years use hermetic window systems made of aluminium, wood and PVC. They have become the reason that indoors it is rather difficult to create an ideal microclimate for a person. The windows are sealed, which excludes the inflow of fresh air, which was previously present due to cracks.
Description of wall inlets
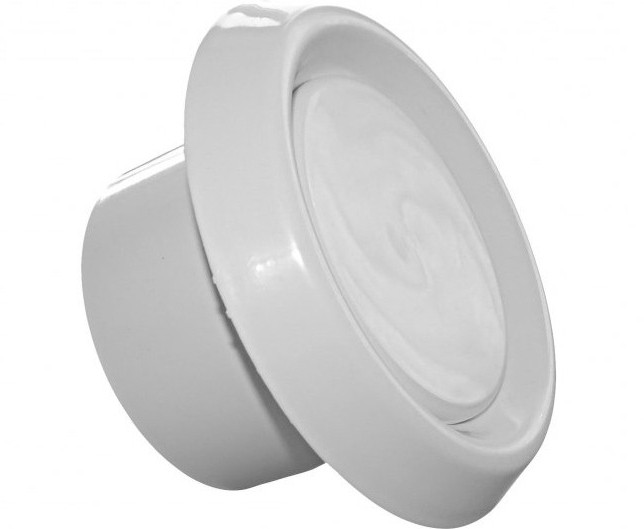
The inlet valve to the wall is offered for sale in several models, however, each of them has common features and components, among them:
- duct;
- ventilation grille;
- inner case.
As for the duct, it is necessary for the passage of air from the street to the inside. On sale you can find models, in most of which this part is made of plastic. There is also a ventilation grill in the design, which is located outside. It prevents the ingress of precipitation. It is usually made from metal or plastic.
The supply valve to the wall also has an inner body, which is represented by a head. It is made of plastic and comes loose. It contains a filter that is necessary to direct air into the room. Sometimes there is sound insulation inside the duct. It eliminates freezing of the wall around the pipe and reduces street noise. In the role of a heater of this part, polyfoam is usually used.
Additional functionality
Sometimes the wall valve has an adjustment function. The element for the implementation of this task is located inside. Some models are equipped with a hygroregulation system. It reacts to the humidity inside and opens the valve if certain indicators are increased.
On sale you can find a supply valve in the wall, which has a more complex design. It is equipped with a fan, a heat exchanger, a humidity sensor and a remote electronic control panel. The heat exchanger is responsible for heating the air, but the humidity sensor is additionally equipped with a temperature sensor, which allows you to automate the operation of the equipment. The electronic control allows you to turn off and turn on the heater and fan.
Checking the ventilation ducts before installing the supply valve
Air enters through the ventilator due to the fact that the pressure in the room is lower than outside. The pressure drop is created by the operation of ventilation, sometimes the ventilation duct is involved in this, sometimes the hood. Before you install the supply valve in the wall, you should take into account that if the hood does not work well, then the ventilator will produce less air, because the difference will not be so impressive or it will not exist at all. Therefore, before planning the installation of the valve, it is necessary to make sure that the hood is working properly.
To do this, open a window, balcony or window to provide fresh air. Bring a lighter or a lit match to the ventilation grille. If the exhaust ventilation is working properly, then the flame will be drawn in. If this did not happen or the flame deviates in the opposite direction, this indicates that there is no draft or the ventilation is broken.
Second check option
You can check the operation of the ventilation duct without using an open flame. In this case, a piece of paper is used. A small piece should be attached to the ventilation grille. If the paper is attracted, then the ventilation is working properly. In some cases, such a check turns out to be useless, which is especially true for hot weather. The air at this time is heavier, so the pressure inside the channel drops. For the same reason, even normally working ventilation may not attract paper or fire.
Things to consider before installation
Many homeowners today install ventilation in the wall of the apartment. The supply valve eliminates the need for frequent opening or closing of the window. This contributes to the preservation of fittings. Less noise comes through the valve, its operation can be adjusted. If you install a valve in the upper part of the wall or near the battery, you can eliminate temperature fluctuations in winter.
Inside the room, the product will be invisible, it can be covered with curtains. If the installation is carried out near the battery, then the air will heat up from the radiator. If the valve is installed at the top of the wall, air will flow from above, mixing with warmer masses. When choosing a supply valve into the wall, which you can install yourself, you should pay attention to more expensive models. They are usually supplemented with recuperators and fans. The latter are supply and exhaust. Such units are more efficient, but cost 10 times more than conventional ventilators.
Factors that force you to abandon the installation of a supply valve
Sometimes consumers refuse to install a supply valve due to certain circumstances. Among them, the need to make holes in the wall should be highlighted. If the supply system is dismantled, then a through hole to the street will remain. It is impossible not to pay attention to errors during installation. If they are allowed, then the wall will begin to freeze, which also applies to some part of the duct.
When supply ventilation is installed in very cold regions, where the temperature in winter is kept below -10 ° C for quite a long time, the system cannot be used, because the room will be very cold.
Before choosing a supply and exhaust valve to the wall, you should pay attention to design features devices. It is important to consider the number of people who can be in the room at the same time. By purchasing a model without a fan, you provide a normal supply of fresh air, which will create a microclimate that provides comfort for only one person. This indicates that 30 m 3 of air will enter the room in 1 hour.
If you decide to install the supply valve into the wall with your own hands, you should take into account that not all models are designed for installation in an arbitrary place on the outer wall. The most successful areas are still:
- at the level of a third of the height of the window;
- next to the radiator, under the windowsill.
In the latter case, the air entering inside will heat up. In the first, it will mix with warm air. Both options are good, because the location allows you to hide the device behind the curtains. The only rule that must be taken into account in the first case is the observance of a distance of 30 cm from the valve to the window slope. Otherwise, the site may freeze when the temperature outside the window drops.
Instrument preparation
If you decide to install a supply ventilation valve in the wall, then you must be guided by a certain technology. The process for a round duct damper will be discussed below. To carry out work, prepare:
- marking tool;
- hacksaw;
- equipment for diamond drilling;
- rags;
- respiratory and eye protection.
Installation steps
A hacksaw during work will be needed to trim the duct. Glue will allow you to install the outer grille of the duct. If fixing is carried out with bolts, then you will need a screwdriver. Rags and plastic wrap are needed in order to cover the floor during work.
Before starting the installation, you should choose a place, taking into account the above rules. At the intended point, a through hole should be drilled, which should have a slope of 3 ° towards the street. This will prevent the accumulation of moisture if it enters the duct.
Work methodology
Next, the master should drill holes for installing self-tapping screws, they will have to fasten the inner case. The next step will be fitting the duct, for this the pipe is installed in the hole, which will allow you to measure the desired length. The excess is cut off. Soundproofing should be installed inside, sometimes it is supplied. Otherwise, you should purchase a shell insulation of the required diameter.
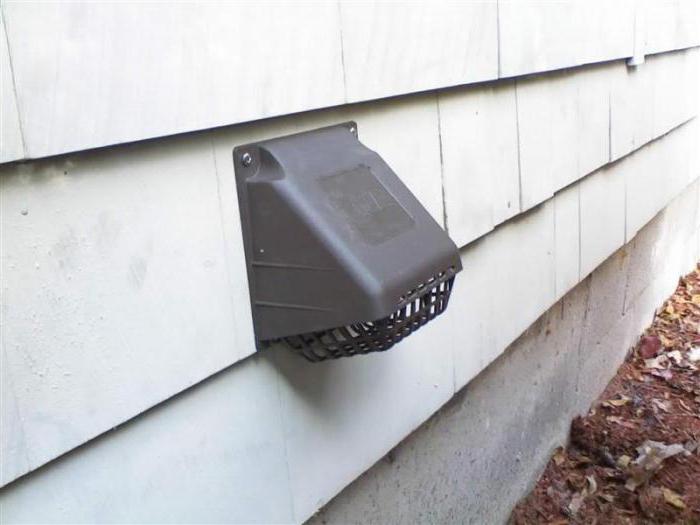
When inlet ventilation valves are installed in the wall, the next step is to install the pipe in the hole. Outside, the ventilation grill is reinforced. Blinds should be directed towards the street, placing them horizontally. The inner case is reinforced with self-tapping screws.
Characteristics and reviews of the ventilation valve brand "Domvent"
Before purchasing a supply valve to the wall, it is recommended to read reviews about it. If we are talking about the Domvent model, then you should know that you have a valve in front of you, which has in the kit:
- plastic pipe;
- thermal insulation;
- outer round grille;
- housing cover;
- noise absorber;
- valve body;
- dowel set.
As consumers mention, thermal insulation reliably protects pipes from freezing. The material should be installed in the area near the outlet. Customers also like the fact that the noise absorber comes with a mosquito net, but you have to install it yourself.
Such a supply valve to the wall, the price of which is 1500 rubles, has rather compact dimensions, which are equal to 180 x 85 x 84 mm. The pipe has a length of 650 mm, while its diameter is 40 mm. Foamed polyethylene acts as thermal insulation, it has the form of a shell with a diameter of 60 mm.

The outer grille is made of plastic, and its outer diameter and height are 60 and 3 mm, respectively. This supply valve to the wall, the characteristics of which should help you make right choice and presented above, operates at temperatures from -40 to +80 °C. An important factor is also what is the maximum possible air flow. If the pressure drop is 10 Pa, then the volume of air masses will be 13 m 3 / h. AT summer time closer to the surface of the earth, this difference will be somewhat less, while in winter it is more, which is especially true for valves installed on the upper floors.
This parameter also depends on the quality of work exhaust ventilation. But if the pressure difference is 50 Pa, then the amount of air entering inside will increase to 21.2 m³ / h, which is true if the wind speed is 5.2 m / s. With a pressure drop of 300 Pa, the amount of incoming air will increase to 49.6 m 3 /h, which is true at a wind speed of 12.2 m/s. In terms of performance, this valve is inferior to some analogues with a similar design. Comparison can be made with Systemair VTK. This model is capable of passing 50 m 3 / h at a pressure drop of 10 Pa. This indicates that the figure is 4 times higher.
Conclusion
A new valve for air flow into the wall costs about 1400 rubles. If we are talking about better models, then you will have to pay about 4000 rubles for them. Sometimes home craftsmen are engaged in the manufacture of valves on their own, for this you should purchase: a grill, a filter, a plastic pipe, a heater and a body with a valve. To create such a design, you will need about 1100 rubles. This figure is an average, you can make a wall inlet valve using cheaper elements.
Until recently, there was no need to create special channels at all. The function was provided by defects in the house in the form of cracks, large gaps and cold bridges. However, as construction technologies improved, walls and finishing coatings became more airtight, which necessitated the introduction of special systems for air exchange. To date, supply valves in the wall are the simplest means of ventilation, which is realized artificially. The efficiency of such installations depends on many factors, including installation, climatic conditions of the area and the configuration of the system location.
Types of supply valves
Inlet valves are available on the market in two main versions. These are models with constant ventilation, and options with the possibility of adjustment. In the first case, the owner receives a device that provides the same parameters and volumes of air exchange. In extreme cases, permanent ones can be completely closed at the time of departure. Usually this choice is made due to atmospheric conditions, when the pressure drops outside and inside the room are very different. Models with the ability to adjust are more technologically advanced, more functional and more profitable in terms of ergonomics. Special management of such devices is due not only to the interests of ease of use, but also more productive operation of the system. These are valves that can be adjusted - the user can adjust the intensity of the air inflow depending on the conditions.
In what rooms to install?
The selection of valves should be guided by the needs of specific premises. It is important to take into account that the air masses from living rooms are supply air in relation to the toilet, bathroom and kitchen, as they are removed using the same located in the same place. Taking into account the throughput of the supply valves, their number and installation location are determined. There are two approaches to determining the number of valves to install in a home. According to the simplified scheme, supply valves in the wall must be installed in each room. A more economical configuration involves calculating the fresh air needs of a house or apartment - further, in accordance with these indicators, the throughput for each room is determined. The kitchen causes the greatest difficulty in the planning process, as there are certain restrictions when combining valves and household appliances. For example, if there is a gas stove in the room, then a model with adjustable throughput should be used. If the kitchen is provided with a boiler or stove, then a model with a constantly working valve is recommended in order to ensure safety.
Determining installation points
It is desirable to install the valves at a level of 2 m from the floor surface. This arrangement is the most rational in terms of the comfort of residents. In addition, if the room is heated, then the air at this level will be warm enough. In winter, this approach will also get rid of drafts. The installation itself can be performed in the upper window part or in doorways. However, experts recommend mounting the supply valves in the wall, since this method will ensure that the device is securely fixed and will not cause any special problems with dismantling. For comparison, if you install the valve in a door or window frame, you will inevitably have to revise the design of the system carrier, and this will entail additional costs.
Mounting technique
During installation, a special hole is made for the valve, after which free niches are sealed, and a protective visor is introduced. Also, the installation of a supply valve in the wall can be carried out in combination with a special profile. In this case, the device will be integrated into a protective case, which will facilitate the fixation process. But there is a downside to such solutions - they will take up more space in the wall and require the creation of a hole of a larger diameter.
In general, it is recommended to install wall valves even at the construction stage, since in a finished house this event will cause much more trouble. As an alternative solution, it is also possible to provide for installation through special openings, but in this case, you can lose the guarantee. In addition, the installation of a supply valve in the wall can be carried out either in a living room or in a kitchen. Due to humidity, this installation is not allowed in the bathroom.
Valve control methods
It has already been noted that some types of valves allow you to adjust the parameters of their work. In particular, there are systems with automatic and manual regulation of the volume of air supplied, the degree of filtration and even the level of humidity. Models with manual adjustment are usually equipped with a special sash, in which the position changes and, accordingly, the throughput is adjusted. If you plan to install a supply ventilation valve in the wall without the possibility of user intervention in its adjustment, then automatic models should be purchased. Such devices independently control the throughput depending on the pressure, humidity level and outside temperature.
A question of price
In the simplest versions, ventilation valves are inexpensive. For only 500-700 rubles. you can buy a good model from a well-known manufacturer. However, if several devices are required with installation for a long time, then it is better not to save money and purchase more technologically advanced and reliable inlet valves into the wall, the price of which will be about 2-3 thousand rubles. These can be hygro-controlled devices that respond to changes in humidity and independently change operating parameters. The most expensive models have a sensor made of polyamide tape that controls the flaps, increasing or decreasing the air flow. You should also take into account the installation costs, which can be quite impressive when installing the valve into the wall. As a rule, specialists mount devices purchased from their own companies at significant discounts, but all the same, the cost of this part can amount to 1-2 thousand rubles.


