How to build a chicken coop, fence and more out of wooden pallets! We make furniture from pallets for summer cottages, an outdoor stove from a cylinder
Small platforms for moving and storing goods are gaining popularity and how construction material. Thanks to the boundless ingenuity of Russian summer residents, solid structures from pallets grow on the plots. Some ideas of construction from "auxiliary" structures deserve attention and implementation.
Pallet fence
In fact, vertically installed pallets are nothing more than a ready-made picket fence. Moreover, it is quite suitable for a country fence with a height of 120 cm. Although a higher fence can be made.
Rice. 1. Fence from vertically arranged pallets
Between themselves, the pallets are connected with brackets, bolts or self-tapping screws and attached to metal poles dug into the ground. Under the supports, pits up to half a meter deep are prepared, drainage from sand or stones is filled up and poured installed pipe concrete. The recommended distance between the posts is about 250 cm.
It is possible to fix pallets and horizontally. Stacked in this way in two rows, they create a fence 160 cm high. To make it look more attractive, the boards are cleaned of dirt, primed and coated with moisture-resistant paint.
The thickness of the pallets allows you to use the top edge to install flower boxes - they will greatly decorate the fence. Such a structure will last at least 10 years.
Rice. 2. Fencing from horizontally oriented pallets
Decorative screens
Another type of fencing is screens that distinguish zones on a large suburban area. In the gaps between the planks, boxes with plants are fixed. In early summer, plantings will grow rapidly and hide the wooden boards. As a result, when looking at a flowering wall, no one will guess that the base is the most ordinary pallets. They are also used for landscaping country houses.

Rice. 3.Using the pallet for landscaping the wall of the house
Barn
This is a more complex structure. Start its construction from the foundation. A capital foundation is not needed, but many craftsmen use for this purpose car tires. They must be the same diameter and width. A dug 20-40-cm deepening is leveled and two layers of tires filled with sand, gravel or clay are laid. They are covered with roofing felt, formwork is installed around the perimeter of the boards, metal reinforcement is laid and poured with concrete. The surface must be absolutely flat. A week later, you can start building a barn.
But remember, the "rubber" foundation has a significant limitation: due to the harmful substances released by tires in the heat, they are not recommended for use in regions with hot summers. There it is better to consider the possibility of arranging column foundation. Whatever the choice, the size of the foundation should be a multiple of the pallet parameters (usually 80 x 120 cm).
Racks made of timber with a section of 10 x 10 cm are installed at the corners of the foundation, it is also used for the upper and lower strapping. The walls are made from pallets. On the inside they are fixed with boards, on the outside they are mounted sheets of moisture-resistant plywood. To protect against precipitation, the facade is covered with paint suitable for this purpose or finished with siding.
The ceiling is made of boards and covered chipboard sheets. A barn is usually built for long-term operation. Therefore, you need to take care of roof waterproofing and practical roofing materials.
It remains to install the door and the building necessary for the economy is ready. By analogy, a gazebo is erected from pallets. The difference is only in the height of the walls, the presence of a spacious entrance in the recreation building and the laying of a moisture-resistant floor covering.
chicken coop
Pallets will come in handy for those who want to do poultry farming. Taking into account the seasonality of the country chicken coop, wooden structures suitable for its construction better than any other material. The walls "grow" quickly, the foundation is not needed. Plywood sheathing is useless, let fresh air enter inside. Yes, and additional lighting will not be superfluous. There are only pluses. Well, if you decide to build something more capital for the bird, you can use the recommendations for building a barn. Make a columnar foundation so that rubber tires do not negatively affect living creatures.
An all-season shelter for a four-legged guard, completely assembled from pallets, will turn out great. Inside and outside, the pallets are sheathed with moisture-resistant plywood, while at the same time laying insulation in the thickness of vertical and horizontal surfaces. The roof is treated with a waterproofing compound. The dog will love this kennel.
Miscellaneous
Pallets are useful as a platform in low-lying areas, from where water slowly drains after rain. As a floor, they are used in the construction of a temporary summer shower. Furniture designs from pallets, including summer ones, have already been considered by the ECTP Blog.

Rice. 5. Cute homemade furniture
On reflection, you can come up with many more ways to use pallets in the country. But they have one "minus" - wooden structures are flammable. Fortunately, this disadvantage is eliminated by the treatment with flame retardants.
The most important thing remains - the low cost of pallets, the availability of construction on their own, the high speed of construction of summer cottages and environmental friendliness.
It so happened that I had a lot of pallets at my disposal different size and I decided to build a little chicken coop. All I needed was hammer and hacksaw skills, as well as time, patience and some muscle.
Pallets were used huge size(127 cm * 254 cm), during the disassembly, I received planks and bars 5 * 10 cm (see photo below). Also, among the building materials, I had scratched corrugated board, cheap vinyl flooring and a few pieces of siding.
The width of the pallet chicken coop being built was completely dependent on the pallet and was 127 cm. I decided to make the length 121 cm, since I needed a size that could easily be placed in a pickup truck. Plus, it was an experiment using found materials and other scraps, and I also wanted to test my building skills.
A lot of time was invested in removing pallet boards and removing nails. I'm quite frail (I'm only 50kg) so I'm sure someone a little bit lighter can get the job done in less time.
We collect the floor of the chicken coop from pallets
I cut the pallet in half and got the dimensions 121 cm * 127 cm, turned the cut part over and added 45 cm high legs from a 10 by 10 cm thick timber (the legs were slightly curved, but this is not so important, since they are short). The result is the so-called "table".
At the resulting base, we hammer pallet boards into the gaps, and cover the floor with scraps of vinyl flooring (I made such a flooring to make it easier to clean it of bird droppings). The legs must be treated with protective equipment - protection from moisture and decay.
Walls and roof
The next step was to build the walls, again I used a sawn-off section of the pallet. For each side, I removed all but two of the pallet boards to hold our frame. Along each wall, at the top and bottom, I did not use boards from the crate, but wooden trimmings with sides of 5 by 10 cm. In addition, I used such trimmings on other walls to form windows.
In the first photo I was still experimenting with the walls. The frame of the wall is not nailed, only slightly baited. The roof frame did the best I could - I looked for information on other sites and mainly relied on the experience of other poultry farmers.
Until the last moment, I was not sure what size I want to make the door, and most importantly on which side, so I saved the boards from the 121 cm long pallet.
A few more words about walls and roofs
In the walls, I decided to make the frame for the door wider than usual, I just like easy access to things, plus it will help when cleaning the chicken coop. On the rafters I fixed two boards from pallets, for further screwing in the profiled sheet.


Sheathing a chicken coop from a pallet with siding
I have to admit, even though I build my chicken coop from pallets and scraps, I like it when the building looks as attractive as possible, so, already at the planning stage, I knew that I would use regular siding. Luckily we had a few pieces of siding left over from another chicken coop. However, I still had to buy one sheet, it did not match the size of the available parts, and was used from the sides, as well as on the gable.
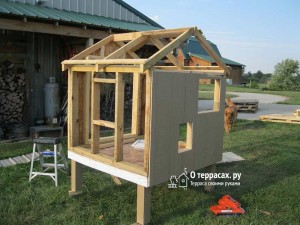

P.S. Since I needed this chicken coop unexpectedly quickly, I had to finish it without photographing. So I'll just describe the end result.
Roof of a chicken coop from a professional sheet (or a metal roof)
Using metal scissors, I cut off a sheet of profiled sheet that I had at hand. For me, it was as difficult as removing the boards from the pallet. Having a grinder, it was possible to do the job much faster, but I had to suffer.
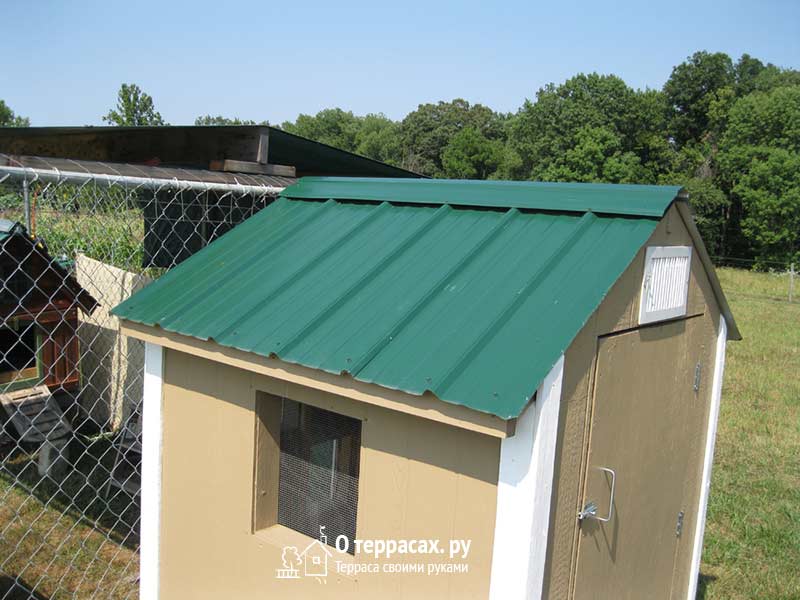
Not so long ago we made a canopy, which you can see in the background, and after work we had a piece of profiled sheet - we will use it.
I screwed the profiled sheet to the girders, and fixed a ridge cover or corner on the top of the roof.
Since I used up all the siding, I decided to use a piece of old plywood. The door frame was made from scraps of 5 by 10 cm. Additional hinges and a latch were bought.
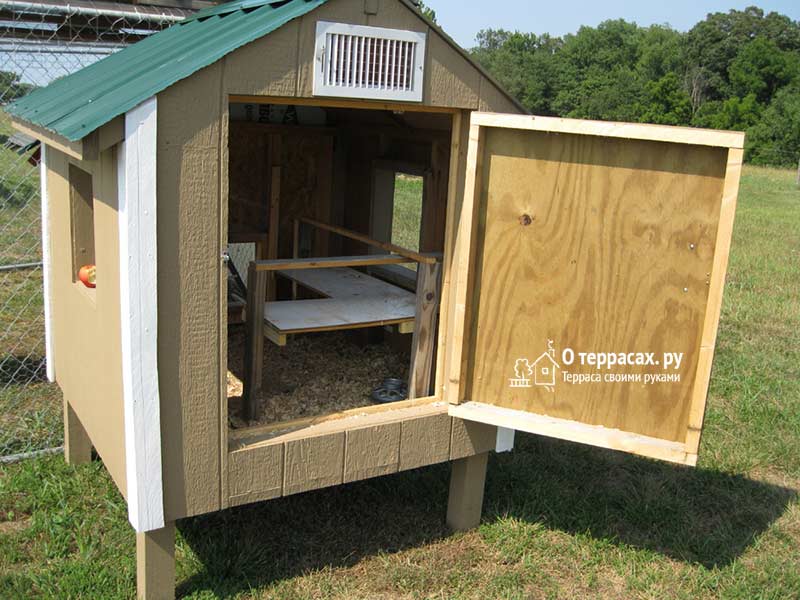
Finishing touches
Pallet boards were used as interior decoration. A metal stack was attached to all window openings. Metal roofing gets hot in the summer, so I insulated the ceiling with some scrap metal I had on hand. The chicken lift door was also made from scraps, it opens and closes from the outside - you just need to pull the cord to do this.
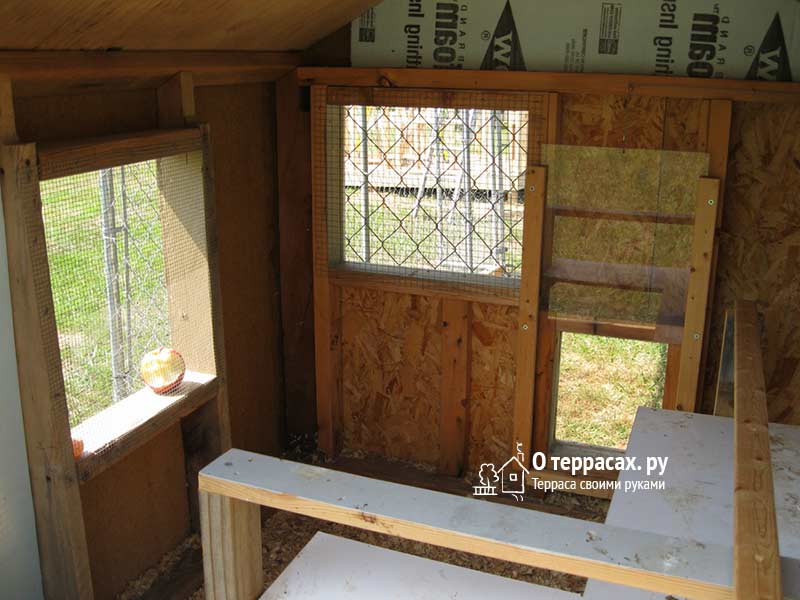
In general, I was pleased with the built chicken coop, considering that I almost did not spend money on it. Pallet boards are heavy, so the chicken coop is solid.
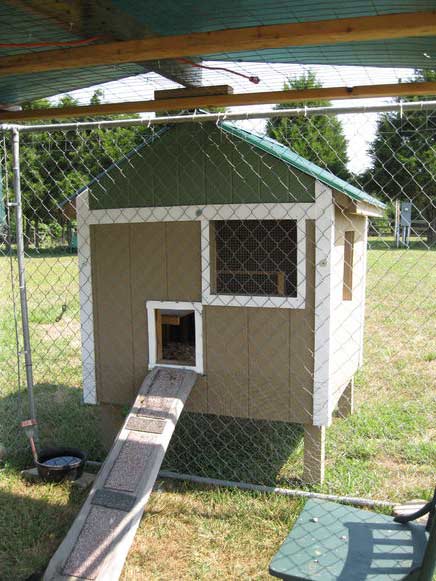
Read articles on related topics
Small platforms for moving and storing goods are also gaining popularity as a building material. Thanks to the boundless ingenuity of Russian summer residents, solid structures from pallets grow on the plots. Some ideas of construction from "auxiliary" structures deserve attention and implementation.
Pallet fence
In fact, vertically installed pallets are nothing more than a ready-made picket fence. Moreover, it is quite suitable for a country fence with a height of 120 cm. Although a higher fence can be made.
Rice. 1. Fence from vertically arranged pallets
Between themselves, the pallets are connected with brackets, bolts or self-tapping screws and attached to metal poles dug into the ground. Under the supports, pits up to half a meter deep are prepared, drainage from sand or stones is filled up and the installed pipe is poured with concrete. The recommended distance between the posts is about 250 cm.
It is possible to fix pallets and horizontally. Stacked in this way in two rows, they create a fence 160 cm high. To make it look more attractive, the boards are cleaned of dirt, primed and coated with moisture-resistant paint.
The thickness of the pallets allows you to use the top edge to install flower boxes - they will greatly decorate the fence. Such a structure will last at least 10 years.
Rice. 2. Fencing from horizontally oriented pallets
Decorative screens
Another type of fencing is screens that distinguish zones in a large summer cottage. In the gaps between the planks, boxes with plants are fixed. In early summer, plantings will grow rapidly and hide the wooden boards. As a result, when looking at a flowering wall, no one will guess that the base is the most ordinary pallets. They are also used for landscaping country houses.
Rice. 3.Using the pallet for landscaping the wall of the house
Barn
This is a more complex structure. Start its construction from the foundation. A capital foundation is not needed, but many craftsmen use car tires for this purpose. They must be the same diameter and width. A dug 20-40-cm deepening is leveled and two layers of tires filled with sand, gravel or clay are laid. They are covered with roofing felt, formwork is installed around the perimeter of the boards, metal reinforcement is laid and poured with concrete. The surface must be absolutely flat. A week later, you can start building a barn.
But remember, the "rubber" foundation has a significant limitation: due to the harmful substances released by tires in the heat, they are not recommended for use in regions with hot summers. There it is better to consider the possibility of arranging a columnar foundation. Whatever the choice, the size of the foundation should be a multiple of the pallet parameters (usually 80 x 120 cm).
Racks made of timber with a section of 10 x 10 cm are installed at the corners of the foundation, it is also used for the upper and lower strapping. The walls are made from pallets. On the inside they are fixed with boards, on the outside they are mounted sheets of moisture-resistant plywood. To protect against precipitation, the facade is covered with paint suitable for this purpose or finished with siding.
The ceiling is made of boards and covered with chipboard sheets. A barn is usually built for long-term operation. Therefore, you need to take care of roof waterproofing and practical roofing materials.
It remains to install the door and the building necessary for the economy is ready. By analogy, a gazebo is erected from pallets. The difference is only in the height of the walls, the presence of a spacious entrance in the recreation building and the laying of a moisture-resistant floor covering.
chicken coop
Pallets will come in handy for those who want to do poultry farming. Given the seasonality of the country chicken coop, wooden structures are better suited for its construction than any other material. The walls "grow" quickly, the foundation is not needed. Plywood sheathing is useless, let fresh air enter inside. Yes, and additional lighting will not be superfluous. There are only pluses. Well, if you decide to build something more capital for the bird, you can use the recommendations for building a barn. Make a columnar foundation so that rubber tires do not negatively affect living creatures.

Lightweight lattice construction, similar to a summer chicken coop, is also suitable for storing firewood.
Rice. 4. Stages of building a woodcutter from pallets
dog house
An all-season shelter for a four-legged guard, completely assembled from pallets, will turn out great. Inside and outside, the pallets are sheathed with moisture-resistant plywood, while at the same time laying insulation in the thickness of vertical and horizontal surfaces. The roof is treated with a waterproofing compound. The dog will love this kennel.
Miscellaneous
Pallets are useful as a platform in low-lying areas, from where water slowly drains after rain. As a floor, they are used in the construction of a temporary summer shower. Furniture designs from pallets, including summer ones, have already been considered by the ECTP Blog.
Rice. 5. Cute homemade furniture
On reflection, you can come up with many more ways to use pallets in the country. But they have one "minus" - wooden structures are flammable. Fortunately, this disadvantage is eliminated by the treatment with flame retardants.
The most important thing remains - the low cost of pallets, the availability of construction on their own, the high speed of construction of summer cottages and environmental friendliness. published
Join us at
Many owners of suburban real estate breed poultry. Most the best option are chickens. They are undemanding to the conditions of detention, but it is necessary to build a good chicken coop. For small family enough to have 10 laying hens. To do this, you need to make a chicken coop with your own hands for 10 chickens. Drawings and detailed instructions will help to build a quality building.
You can make a beautiful and roomy chicken coop yourself
To get started construction work, you should familiarize yourself with the basic requirements for such a structure:
- building placement. A rectangular chicken coop should be placed from east to west. Chickens lay better if enough daylight, so the windows should face south;
- when creating a warm chicken coop with your own hands, it is worth remembering that it should not be hot in the room, since at a temperature value above 25 degrees, chickens will not rush. But also in winter time you need to create heat. In frosts, thermal insulation and the construction of a heating structure will be needed. The temperature must be at least 12 degrees;
- the building is better located away from noisy places;
- high humidity can provoke bird diseases, so ventilation is necessary;
- The dimensions of the room are selected taking into account the fact that the square meter there are two hens. In cramped conditions, chickens rush worse.
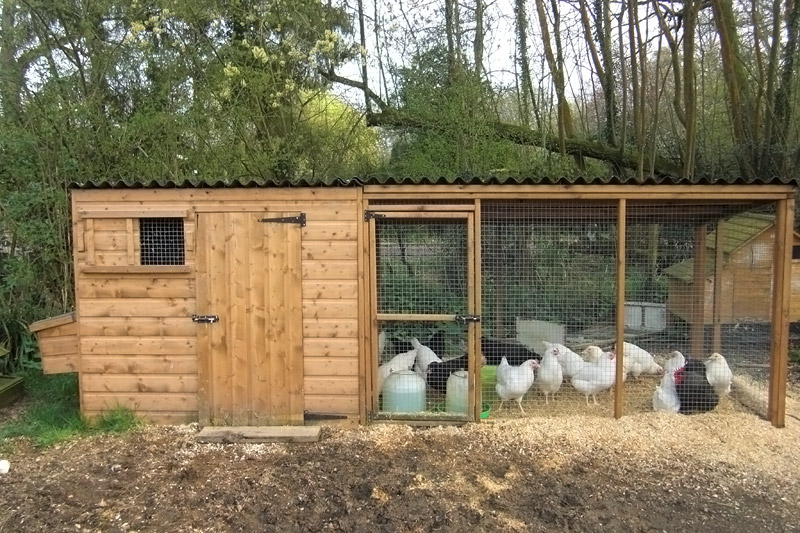
When arranging the premises, it is worth equipping windows with plywood shutters, and for walking, provide for a site under a tree or under a canopy.
Helpful advice! When designing a poultry house, it must be taken into account that over time the number of individuals may increase and more space will be required.
Features of designing a chicken coop
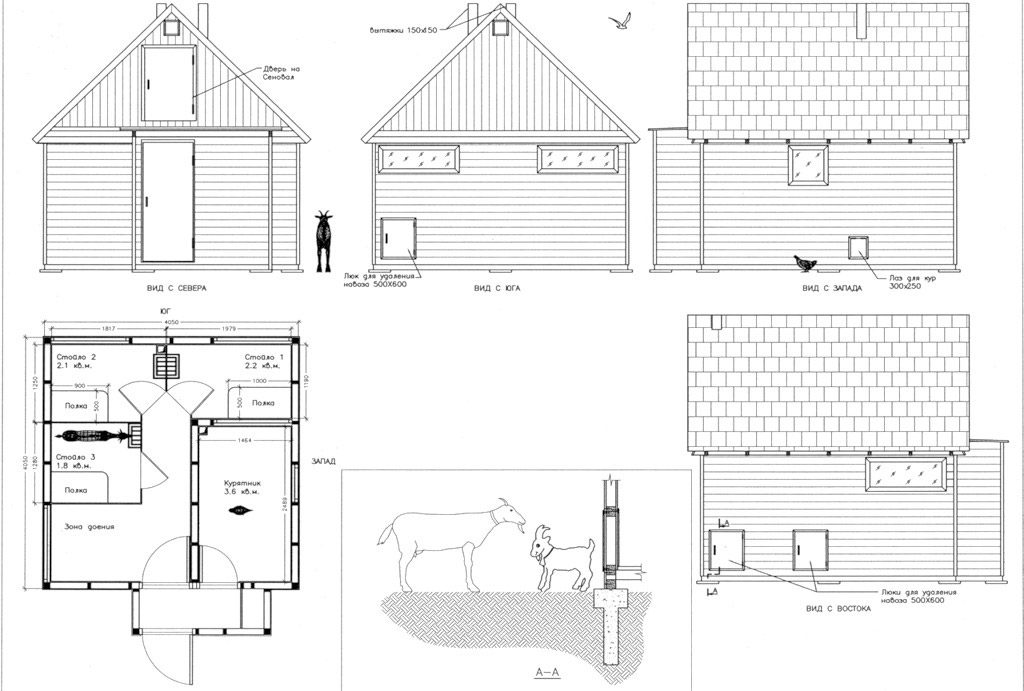
Drawings and photos will help to draw up a competent project for a chicken coop with your own hands. It is important to choose the right size of the building, which depends on the planned number of birds. The type of construction depends on how many birds will live in it and on the types of materials.

When designing, it is worth planning to open the door inward, and the floor is arranged with a slope towards the entrance. This will make the cleaning process easier. It is worth considering the interior design of the room. There should be a sufficient number of feeders, drinkers and perches. For such a structure, it is worth considering heating, lighting and a ventilation system.
Features of installing the simplest chicken coop in the country with your own hands: stages of construction and photos
When deciding how to make a chicken coop with your own hands, you should familiarize yourself with the main stages of installation.
The table shows the main steps in the construction of a simple poultry house.
| Image | Stages |
 |
Foundation erection (large livestock structures only) |
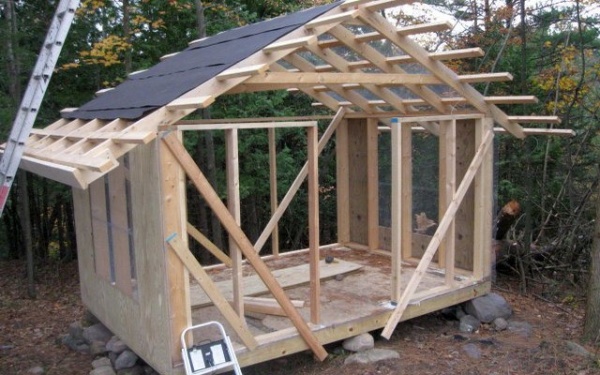 |
|
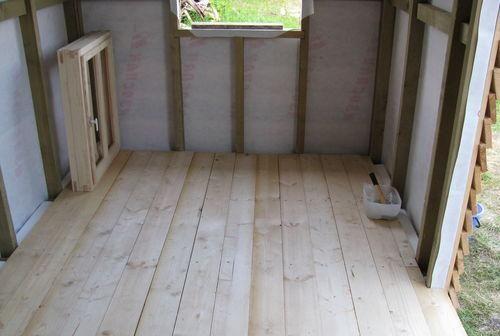 |
Selection and installation of flooring |
 |
|
 |
You can build a chicken coop from improvised materials. In order to save money, you can use the room without building a foundation or use a base on posts, for which brick remains or cobblestones will do. The floor can be made of adobe or earth, and the roof is made of durable plastic, tin or slate residues.

The nuances of creating a foundation
For a do-it-yourself chicken coop for 20 chickens, the photo of which can be seen in this review, you will need a stronger foundation. Depending on its type: tape or columnar - you will need a concrete mixture, a cement composition or a brick.

The foundation is built in accordance with certain rules:
- the site is cleared and the top layer of the earth is removed, about 25-55 cm;
- sand and gravel are used as a pillow;
- the formwork is made of boards, its width is 25 cm;
- rods are used for reinforcement;
- concrete grade M300 is used.
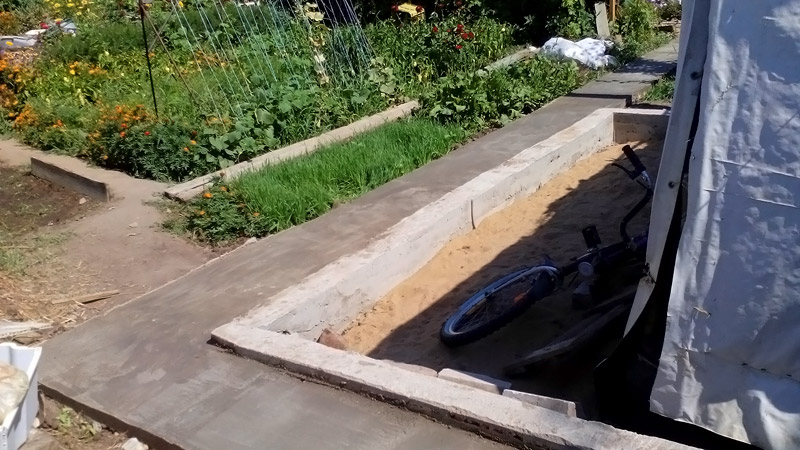
The construction of the building can begin after the concrete mass has solidified. It should be borne in mind that the size of the site should be equal to the dimensions of the future chicken coop.
To create a columnar base, markings are required, which is done using metal rods and rope. Then, cabinets are mounted around the perimeter, which are placed at a distance of a meter. In this case, the supports should protrude from the ground by 25-30 cm. They are reinforced with cement mortar bricks.
chicken coop walls
When building a chicken coop with your own hands for 10 chickens, you need to prepare drawings of the walls. Wood is in demand as a raw material for walls. Boards are used for wall cladding. In this case, the joints must be thermally insulated. In addition to boards, you can use plywood or lining. A good material is adobe brick. The combination of straw and clay allows you to keep warm.
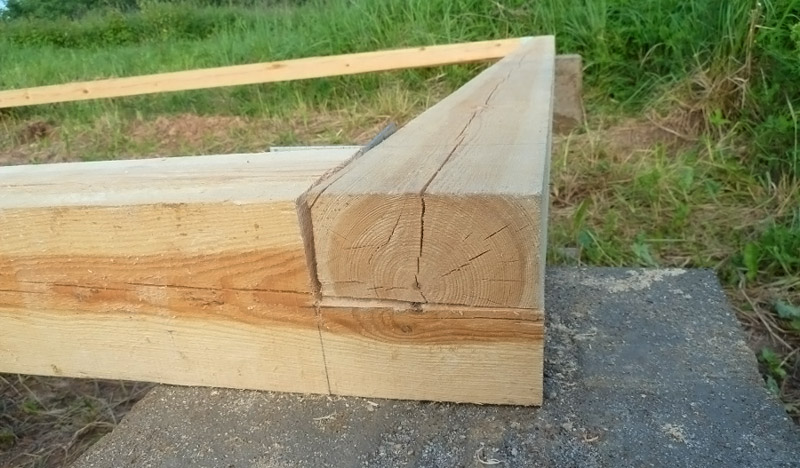
The beam is laid according to the standard scheme. As insulation for separating the foundation and beams, roofing material is used, which is laid in two layers. Logs for the floor are also made of timber, which is placed edgewise. At the same time, voids and cracks are sealed with the remains of the timber and flax jute fiber.
Roof, ceiling and floor of the building
To create a do-it-yourself winter chicken coop for 10-20 chickens, high-quality floors and roofing are of great importance.
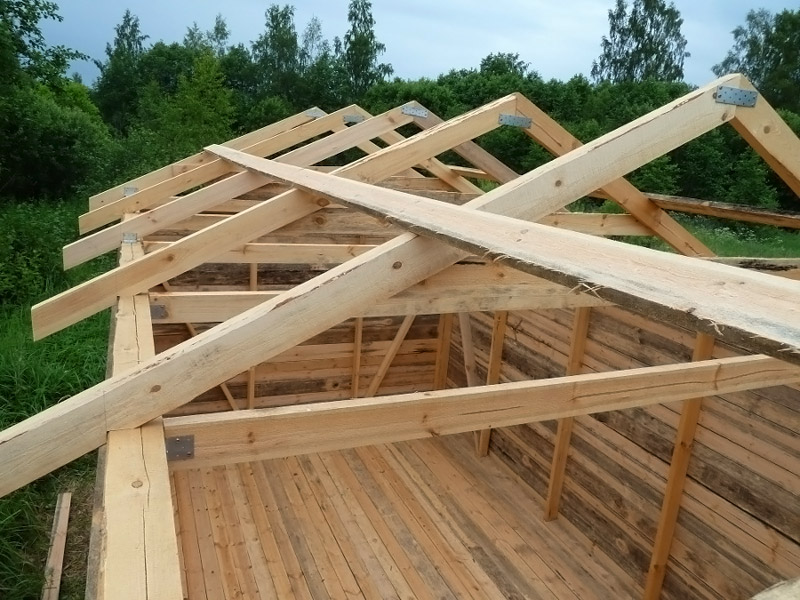
The arrangement of the roof has some features:
- it is better to use a gable type roof, which will protect against the accumulation of moisture and snow;
- coating material: tile, roofing material or slate;
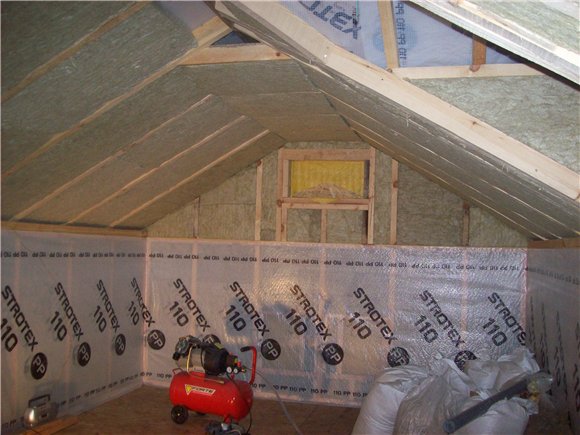
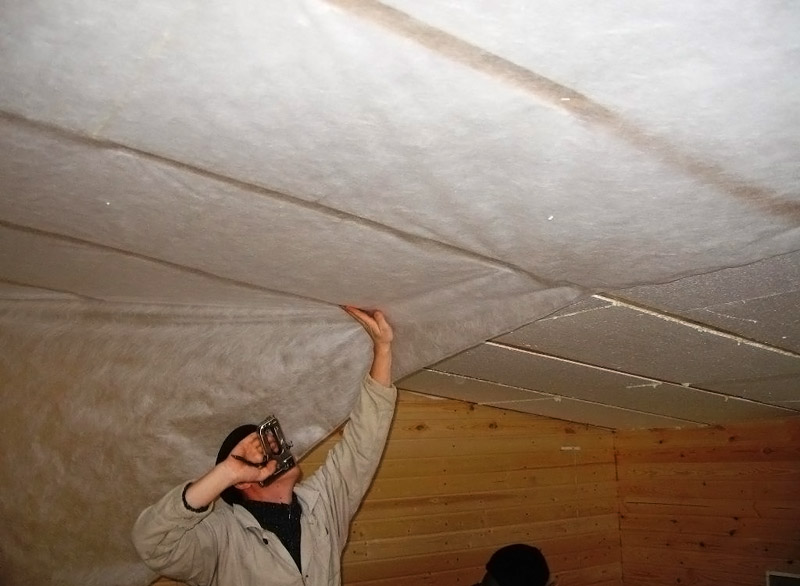
- thermal insulation is carried out using mineral wool or chipboard.
In a gable roof, you can build a small attic where you can put chicken bedding and food. After installing the ceiling beams, the ceiling covering is covered. In this case, boards are used, and expanded clay and coal slag are used for insulation.
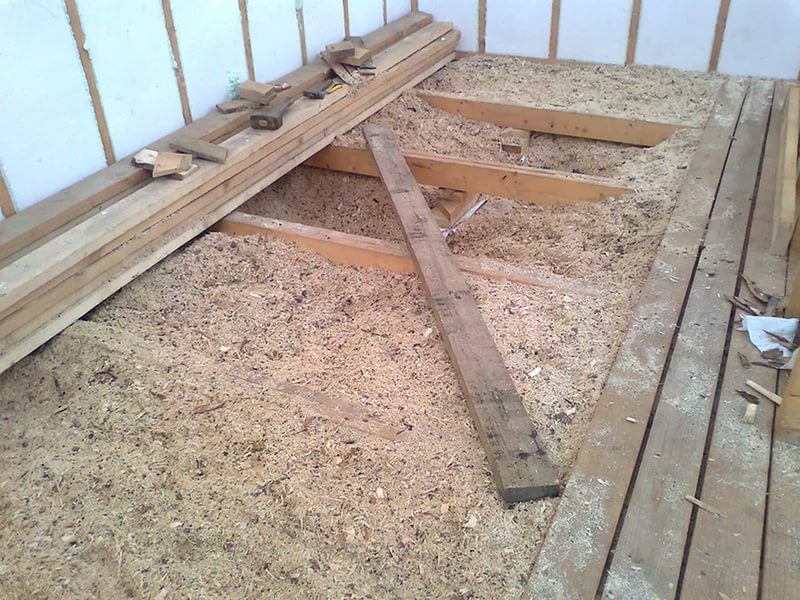
When building a chicken coop, you need to insulate the floors well. If they freeze, the room will be cold. It is recommended to use thick boards for the floor. First, the raw boards are laid, then a layer of vapor barrier material, and the processed boards are placed on top.
Note! When arranging pitched roof, it is necessary to provide that the slope does not look towards the area for walking the birds.
How to make chicken coop ventilation for 20 chickens with your own hands: drawings
Particular attention should be paid to ventilation in the chicken coop with your own hands. The ventilation device is responsible for supplying fresh air. This is especially important during the cold season, as the birds are rarely outdoors. Budget and easy option natural ventilation, which consists in airing the building. In this case, the exhaust window should be small and located on the ceiling or above the door. Such a scheme has many disadvantages, since heat will also leave the room along with the air masses. In this case, heating will require a large number of resources.

A more reliable option is exhaust system. It makes sense to install it if more than 20 chickens live in the chicken coop. This design can be built with your own hands:
- two holes are made in the roof for pipes, the entrance for the passage of air should be placed away from the perches;
- instead of a pipe, special wooden boxes can be made, but they need to be painted and puttied;
- fresh air pipes are located at a distance of 35-40 cm from the roof, and the exhaust pipe rises 1.5 meters above the roof;
- to protect against precipitation, the upper ends of the pipes are equipped with small umbrellas.

For uniform circulation, it is better to place the pipes on opposite sides of the room. In this case, a fan is used, which is mounted in the window. You need to turn on such a system manually. There are also special sensors that allow you to control the humidity in the room.
How to equip a chicken coop inside?
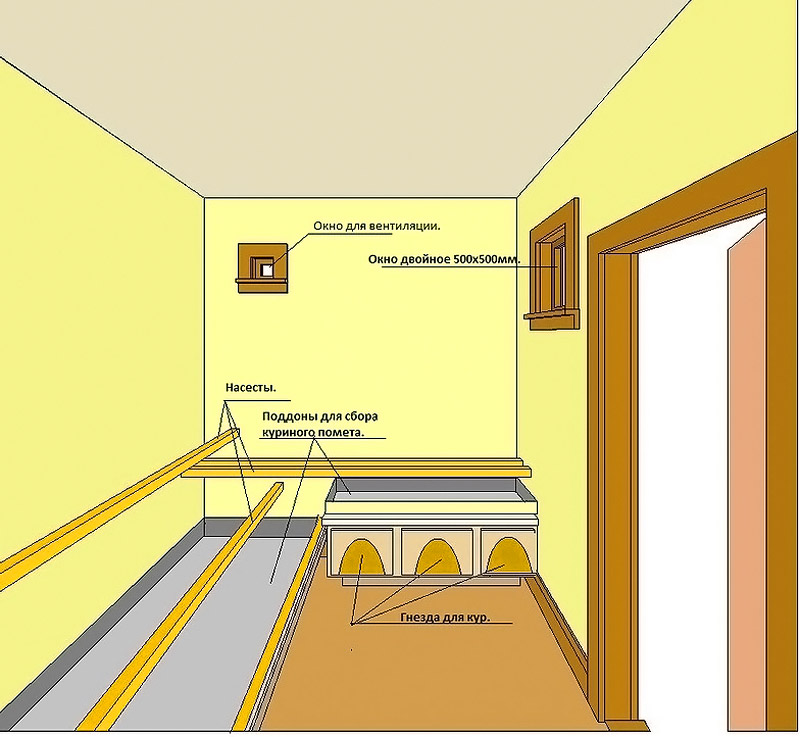
After the completion of the main work, the arrangement of the interior of the premises is carried out. Great importance has a device of comfortable perches. In this case, the length of perches and their number are calculated. These elements are best made of wood. The perches are turned to a rounded shape so that the chickens do not get injured. Perches should be installed at a height of 65-75 cm, and 55-65 cm should remain between the perches. It is recommended to place special pallets or trays under the perches. This will make the cleaning process easier. It is better to make perches removable so that it is convenient to perform sanitization.
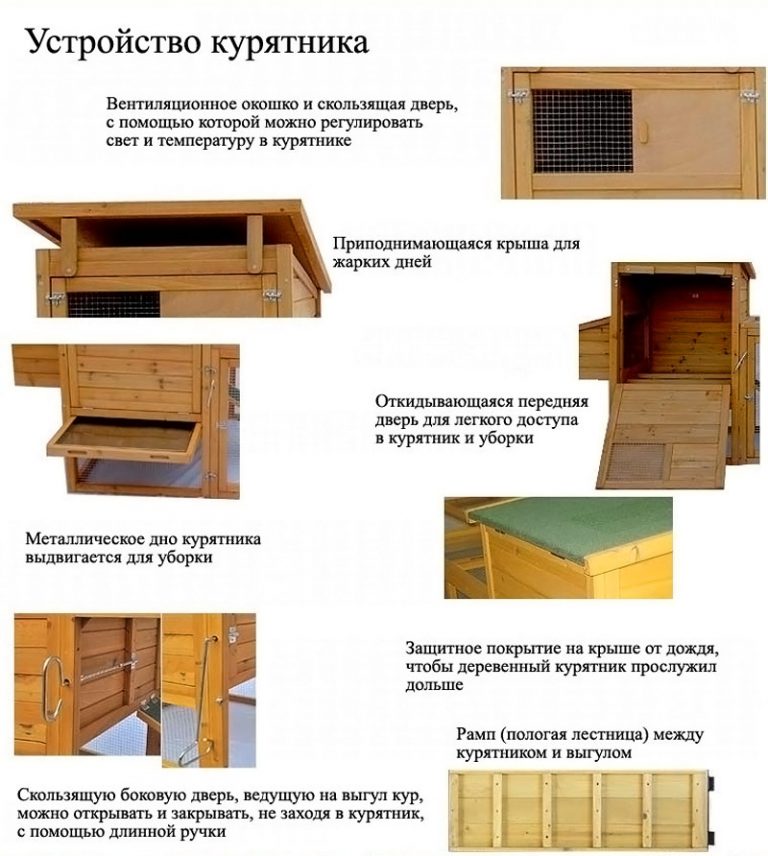
In the form of boxes, it is worth equipping nests that should be darkened. They are installed in a separate place, and the boxes are covered from above. It is recommended to equip nests with a separate entrance for changing bedding and collecting eggs.
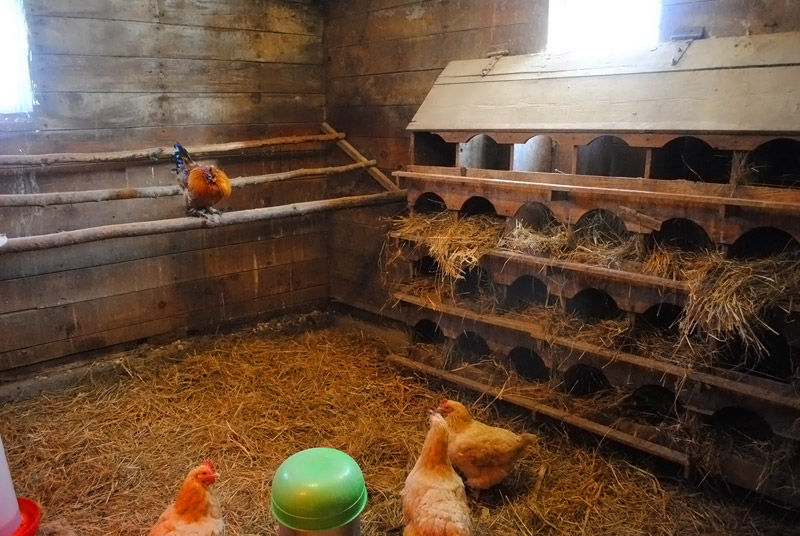
Other important element feeders are considered. They can be made of wood and installed on a small hill. Bedding is made of peat, straw or sawdust. They are of different depths. Deeper litter is dug up when contaminated. In addition, the litter is an additional insulation for the chicken coop in the winter.
Lighting features
Good lighting allows for the growth and physiological development of birds. You can create a well-equipped and illuminated chicken coop with your own hands for 10 chickens: drawings, detailed diagrams and photos will help you do this. High-quality lighting affects the following parameters:
- number, size, density and weight of eggs;
- chick development;
- digestibility of the consumed feed;
- periods of laying eggs and their duration.
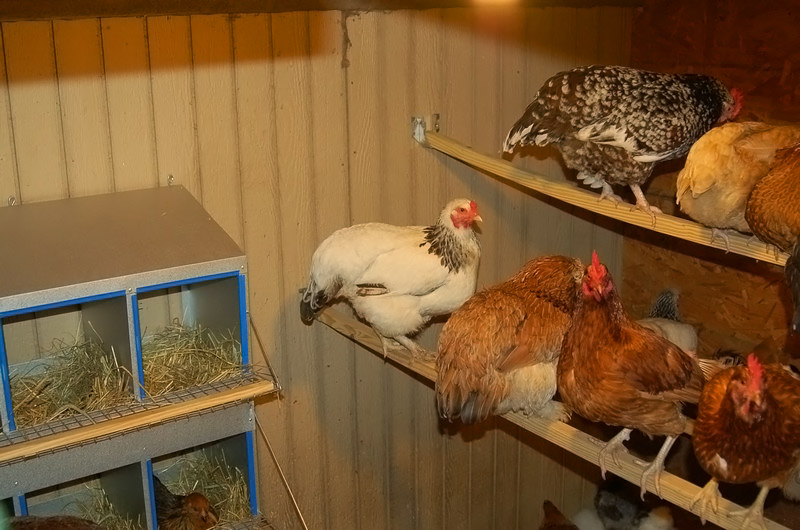
When planning a lighting system, you need to know some features. Chickens do not see well in the dark, so in the evening, you should not turn off all the lamps at once. When all the birds are settled on perches, you need to turn off the remaining lamps.
For hatched chicks, lighting with a brightness of 35-45 lux is required. Then, as the bird grows, the light intensity gradually decreases to 6-8 lux. An adult bird will need a light of 10 lux.
A device for soft turning on the light is recommended, as if the light is suddenly turned off, the bird may be frightened. This is especially true for breeds that are bred to produce eggs. Chickens should also be taught to darkness from the third day of life, so that in the event of a power outage, the birds do not trample each other.
Helpful advice! If the birds behave aggressively and pluck each other's feathers, then reduced light intensity can solve this problem.

Heating
Before choosing a heating option, you need to take care of the insulation of the fences. There should be no drafts in the house, so if the walls and roof are blown, then the heaters will not help.
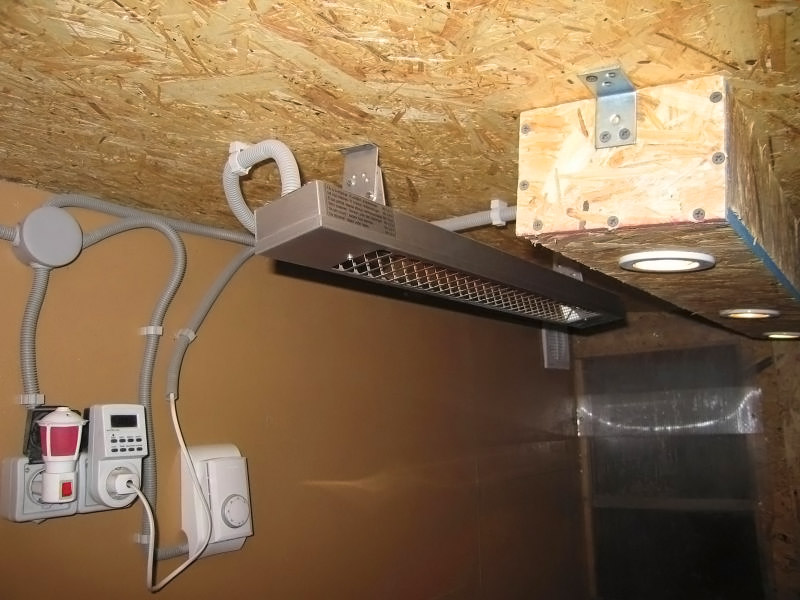
It is worth insulating doors and windows, since most of the heat escapes through these openings. It is also worth building a deep litter. This design consists of a layer of slaked lime and 10 cm of shavings, sawdust and straw. Natural heat-insulating materials are also used: peat, foliage and even manure. Natural composting allows heat to be released.
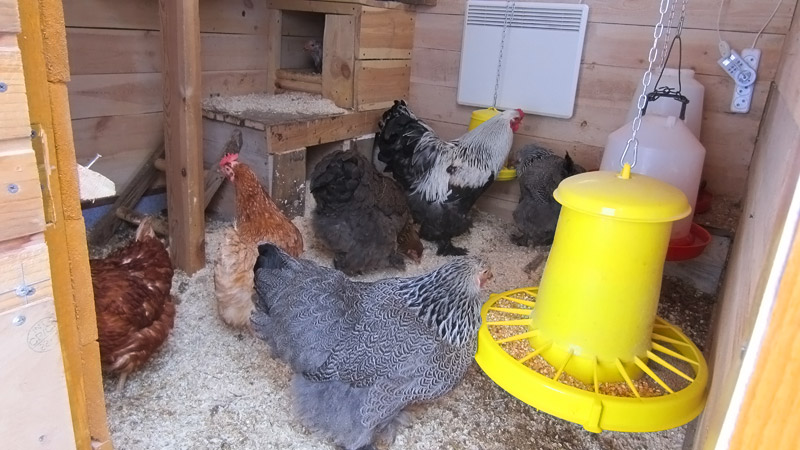
If you approach the construction of the chicken coop responsibly, then this building can be made cozy and reliable. Using inexpensive materials, you can create a high-quality and well-equipped bird house.
How to make litter trays, what bedding to choose for a chicken coop, how to keep chickens in winter- we often follow other people's advice, rarely thinking about what will be convenient for ourselves.
So it happened with us. Having moved to live in the village from the city, we, of course, did not have any knowledge in poultry farming, so we blindly followed the advice of experienced people.
They said to make straw bedding in the chicken coop - they did it. We read about the shavings - we tried it. We learned about the innovation - sand bedding - oh, interesting! The sand has arrived! :)
Now winter is coming to an end and you can draw your own conclusions on the use of different chicken coop bedding in winter.
Bedding in the coop and in the dropping trays
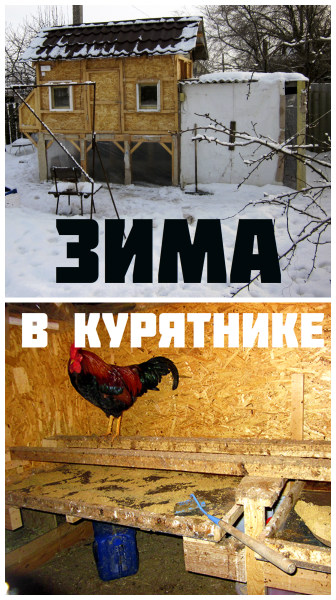
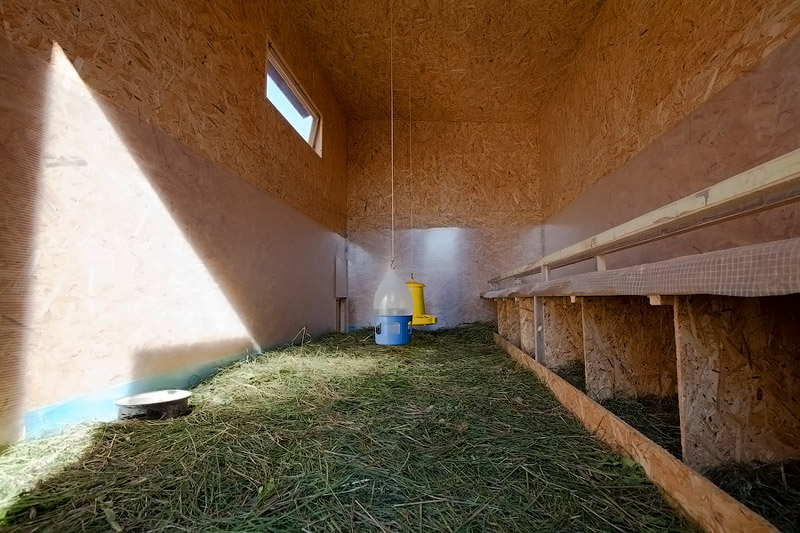
In ours, the floor is made of OSB sheet and, as an experiment, was covered with a layer of 5-7 cm. In the same way, the pallets for collecting litter were covered, I wrote about them in a post .
Sand in the chicken coop - we didn't like it!
Firstly, the chickens spilled the water immediately. The sand got very wet and had to be replaced with dry sand. In the conditions of autumn (winter), he himself will dry for a very long time, the floor will become sour.
Secondly, pallets collect just 95% of all litter and very little remains on the floor, and it was not profitable to clean, and in our case, to sift ALL the litter for a couple of poop.
Third, the wooden floor is still warmer than the sand. Our chicken coop is cold, and we turn on the heater only when the temperature drops below -10C.
Therefore, we removed all the sand from the chicken coop. We “add” the floors and pallets a little with sand so that the litter does not stick so much. Although, in fact, it does not stick anyway :)
After trying in the end all types of bedding, I came to the conclusion that we
DO NOT NEED A LITTER IN THE CHICKEN COOP!!!
A clean wooden floor, in my opinion, is no worse than a floor littered with straw or sawdust, I don’t think that they warm the legs of chickens very much. But dampness and the stench of litter in them is provided.
Without bedding, in the presence of pallets, in our chicken coop it is always dry, clean and there is no high humidity.
The feet may not be as warm as in the sawdust, but the floor is dry and the feet, respectively, are dry.
There is practically no chicken manure on the floor. Whole litter collected in pallets, which are fixed under the perches.
Litter trays
It so happened that we didn’t clean the chicken coop at all for exactly a month (usually cleaning once a week, but here it’s business, frost, laziness :)) Now there are 13 chickens left in this chicken coop. The roosters were gradually cut into the soup.

Both pallets for collecting chicken manure are full to the brim, and on the floor ...
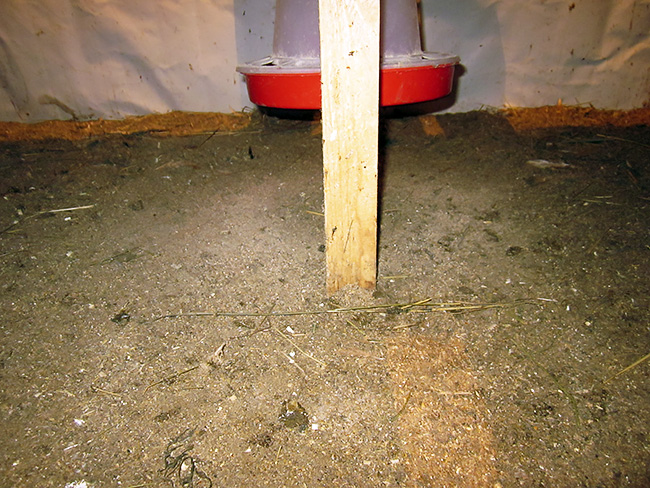
For the month that has passed between cleanings, on the floor there are only a dozen obvious piles of litter, hay, sawdust, broken shells and a lot of scattered feed. The floor is still dry.
After a complete cleaning of the floor and pallets, we sprinkle them again with a small amount of sand.
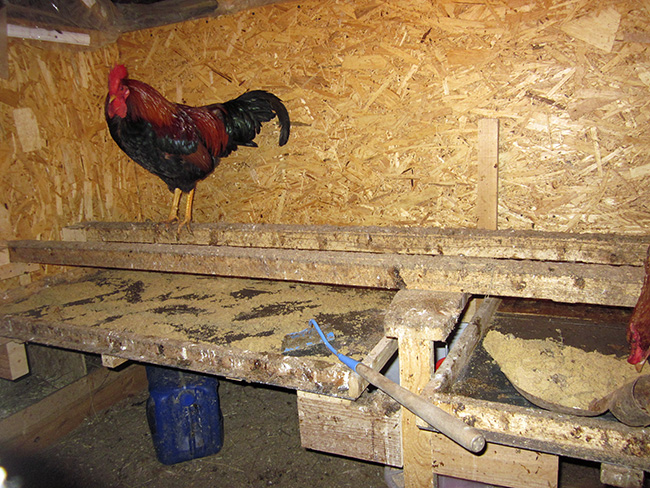
And as a result, two days after cleaning, we see a still clean floor and litter, which lies calmly in pallets. It does not trample underfoot and is not pulled apart around the chicken coop.

Keep the chicken coop clean much easier if you clean every 7-10 days, and not run, as we did this time, for a month. Then you don’t have to clean everything completely, but you just need to clean out the chicken litter from pallets and on a spatula to collect random heaps from the floor.

Humidity in the chicken coop
Get rid of the smell of manure and excess moisture in the chicken coop extractor fan helps. From the inside, it is covered with a small radiator grille. In order not to blow out outside, the husband made wooden blinds that themselves open from the air flow. The fan works in both directions: pulling air out of the room and, conversely, sucking it in.
We turn on the fan almost every day, immediately when we go out to feed the animals, and turn it off when we come back.
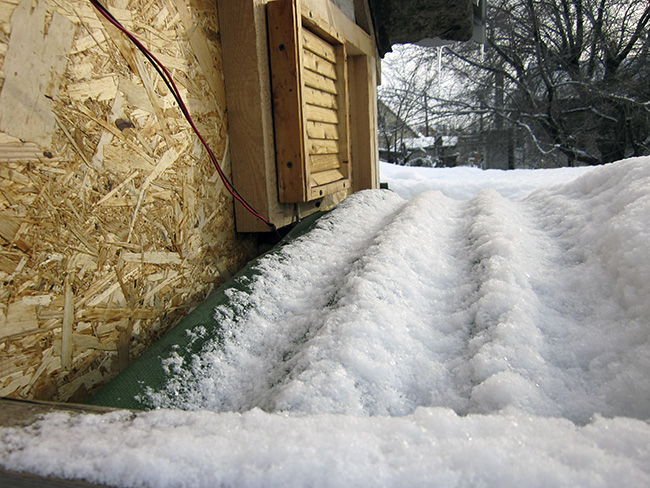 The hood from the street is closed with wooden blinds
  Hood - fan in the chicken coop
Walking chickens in winter

In order to protect the chickens on a walk from the icy wind and snow, our aviary is covered on all sides with a film and a banner in the fall.
There is no snow in it. The ground still remains dry and the chickens spend most of the day outside, as they do during the warm season. This leaves less manure in the chicken coop.
We have not yet hung the door to the chicken coop, because. it is not yet insulated and not sheathed on the outside. In severe frosts, when the chickens were not allowed outside, the door was simply screwed onto the screws.
At other times, film strips are hung on the door to slightly prevent heat from escaping. The wind does not blow into the door, as the entire aviary is covered with a film. Wooden slats were attached to the film using a furniture stapler, for weighting.
UPDATE: done and !
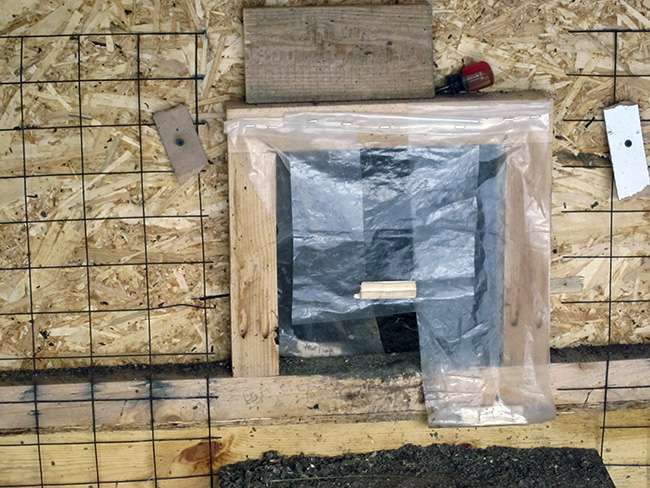
Here's what we've got so far.
Summing up the past winter, I can say that we will not pour any more bedding into the chicken coop. Dry wood flooring proved to be the easiest solution. Easy to clean - scrape with a garden hoe - that's the whole cleaning. For 8 years keeping chickens has never been so easy and convenient for us. No stench, no moisture, no dirt!
AND chickens lay all winter without stopping even at -20 0 C, contrary to all the rules :)
The heater was turned on in the chicken coop only when the temperature dropped below -10 0 C. During this time, the chickens managed to grow thick warm fluff, as happens in wild nature and got used to the cold.
Egg laying in frost stimulated good food- transferred completely to compound feed for laying hens. Twice a day, a little fermented food was given and.
That's all!
If you like it or have any questions, write to me below in the comments.
See you!


