Do-it-yourself floor with a dry prefabricated screed made of sheets of gvl or csp. Pros and cons of dry floor screed. Technology, features, reviews
For all, probably, people, any repair in their house or apartment is a lot of stress. The habitual course of life is disrupted, one has to experience a lot of domestic inconveniences and, in addition, to wage an ongoing struggle against the spread of construction dirt and dust throughout the premises. If repairs are being carried out in a new building, then, for sure, future residents literally count by the day when Yes, it will be possible to enter your area as full-fledged owners.
In a word, the maximum shortening of the repair time (without loss of quality, of course) in all cases is the first desire of homeowners. Modern construction technologies come to the rescue using latest materials– some technological processes are performed several times faster. One example is a dry floor screed. This is an excellent solution where the differences in the level of the coating are too high, and therefore the use of self-leveling bulk compositions is impossible, or in conditions where special requirements are placed on the thermal and sound insulation of the floor. How difficult is it to do a dry floor screed with your own hands? Let's try to figure it out...
If someone believes that a dry screed is an exclusively innovative product of building technologies, then he is very much mistaken. According to the “age” of its application (in a slightly different form, of course), it is much older than concrete, and even more so self-leveling and polymer-containing screeds. Since ancient times, a technique has been used when natural insulation material (sawdust, dry leaves or needles, stove ash or coal slag, etc.) was densely poured between the lags of the floor. Then the facial wood flooring- the floors at the same time turned out to be both smooth and warm. And at the same time - no "wet" work!
So the current dry screed is a modernized long-known technology, but, of course, with the use of advanced materials that provide both high floor performance and ease of installation of the coating.
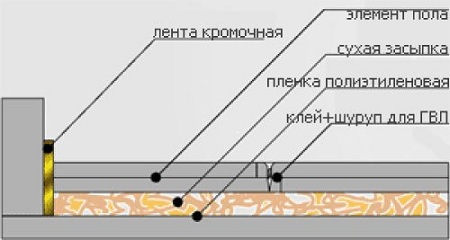
So, consider the schematic structure of the floor, made using the technology of dry screed:
- Positions 1 and 9 denote, respectively, capital interfloor overlap(or the concrete base of the floor of the first floor) and the vertical wall of the room.
- On a rigid basis, a layer of waterproofing material, for example, a polyethylene film (pos. 2), is necessarily spread.
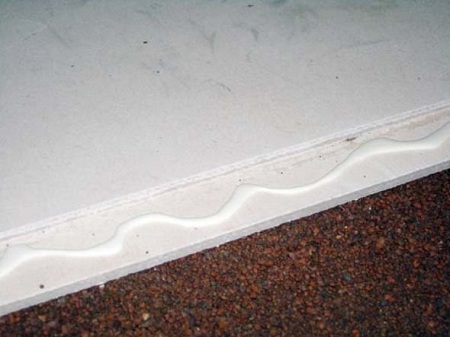
- A prerequisite is the compensation gap between the "puff" floor structure and the main wall. This is achieved by installing a porous plastic gasket - compensation tape (pos. 12).
- The very “dry component” of such a screed (pos. 3) is a poured, evenly distributed, compacted and leveled layer of backfill of their granular fine-grained filler (most often expanded clay).
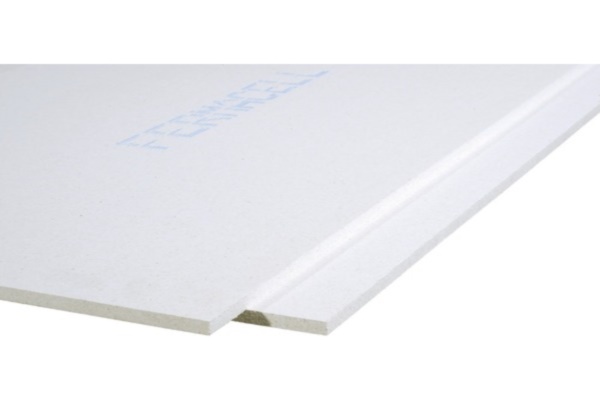
- Panel floor elements are laid on top of the dry backfill. In finished systems (sets), two-layer (pos. 6) are usually used gypsum fiber plates (GVL), having a special "castle" part along the edges - for reliable connection of adjacent elements.
- Between themselves, the elements of the floor are connected with glue (pos. 4) and with the help of self-tapping screws (pos. 5).
- On top of the floor laid using the dry screed technology, the appropriate underlay (pos. 7) and the selected top coat (pos. 8) can be laid.
- The gap left earlier between the wall and the “dry screed” at the end of the finishing coating is closed with a plinth (pos. 11), while it must be attached exclusively to the wall (pos. 10).
We deal with the advantages and disadvantages of dry screed
Dry screed has already gained some popularity, but still the “threshold” of bias and alertness to it has not yet been fully overcome. Many homeowners, perhaps due to the lack of necessary information, are in no hurry to make a choice in favor of such technology. Let's try to make our own contribution to the elimination of prejudices.
What are the main advantages of dry screed:
- When installing floors using this technology, the total mass of all materials is much less than when pouring a “classic screed”. This gives tangible savings and forces, and means of transporting everything you need and when climbing to the floors.
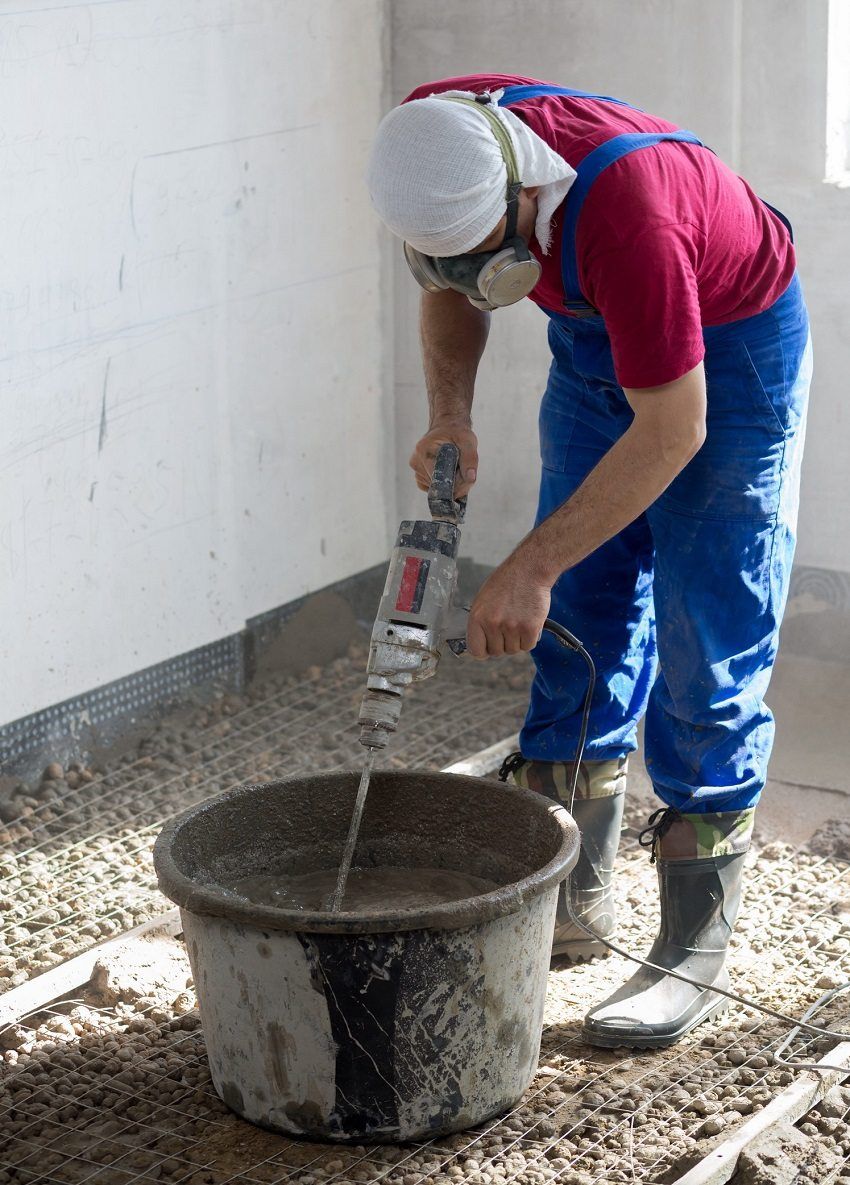
- Work on the dry screed device does not require any additional equipment - just the usual hand tool. Neither productive mixers for mixing a large amount of mortar, nor, moreover, concrete mixers are simply needed.
- The technology of pouring floors with cement-based solutions always requires sufficiently long - sometimes, even up to 1 month, time for the screed to harden, fully gain strength, and reduce humidity to a certain level. When installing a dry screed, this disadvantage is not present - you can proceed to the next stages of work immediately after completing the installation of GVL elements. This greatly reduces the time for construction or repair work.
- The owners have the opportunity to be quite flexible in planning the repair work. The point is that when work in progress for pouring "wet" screeds, this process, as a rule, covers all rooms at once and, accordingly, completely paralyzes all other "manifestations of activity" in the apartment for a long time. But when installing a dry screed, work can be carried out in stages - for example, moving from room to room. Moreover, in very large premises it is even possible to divide them into zones, with successive “closure” of the sections. The quality of the resulting coating will not be affected in any way.
- The absence of "wet" processes with this technology is a big plus for those who are most afraid of diluting the inevitable construction dirt. Of course, it will not be possible to get rid of dust, but this is already less of a nuisance. And the dust from dry expanded clay backfill is not as allergenic as the one that gives dry cement. This is very important in cases where there are people in the family who are prone to asthmatic attacks or with an allergic predisposition.
- If there is a need for any screed device, then this implies a sufficiently large thickness of the created floor - in no way less 20 — 30 mm. When pouring with any mortar of similar thickness, this will give a very large mass, and therefore - an additional load on the floors. Far from being in all buildings and not under any conditions, this is permissible, especially in houses of old construction. The use of dry backfill helps to solve this problem to a large extent - its weight is incomparably less.
- Dry expanded clay backfill itself is an excellent thermal and sound insulator. Therefore, the floor, made using the dry screed technology, also acquires these useful performance qualities. So, the coefficient of thermal conductivity should not be higher than 0.12 W / m × ° K, and a backfill thickness of 30 mm gives a drop in noise level by about 40 dB.
- Despite ease, the apparent "fragility", the instability of the dry backfilled layer, the resulting floor will have high strength properties. If everything is done correctly, in compliance with technological recommendations, then distributed load on the floor area, for example, from installed furniture, can reach up to 1000 kg per square meter. The resistance to the point application of force and temporary dynamic loads is also very high - the coating must withstand a force of about 400 kg without deformation.
By the way, such strength even allows you to build on such a floor lungs interior partitions, for example, using a frame made of galvanized metal profiles and drywall sheets. More powerful walls, for example, from tongue-and-groove gypsum panels or bricks, of course, on a dry screed floor will be unacceptable.
- The great convenience of the dry screed device also lies in the fact that in such a floor it is very convenient, with a sufficient layer thickness, to discreetly place various engineering communications or corrugated pipes with electrical cables.
- As already mentioned, after completion of floor installation using dry technology screeds, you can immediately proceed to the flooring of the selected finish. At the same time, there are practically no restrictions on its type - any of all existing ones will do, provided, of course, that the specifics of the preparatory work for each of them are observed.
It will be unfair if we do not note the disadvantages of the floor made using the dry screed method, and some limitations on the use of this technology:
- It makes no sense to arrange the floor using this technology in very cramped rooms - in such conditions it will be incredibly difficult to achieve the correct, uniform and dense distribution of dry backfill.
- No matter how you isolate such a screed from above, but it will always be very afraid of dampness or spilled over By lu liquid . If water succeeds in penetrating the top decorative coating into the backfill layer, then with a probability close to 100% you will have to remove the floor - the moisture will not evaporate on its own, which means that there may be a smell of dampness and other consequences of getting wet. In a word, if there was a risk of water getting on the floor in the room, then a dry screed should be discarded.
- A dry screed should not be considered as an option if some permanent increased dynamic loads are planned in the room. So, it is not suitable for rooms with a high intensity of human flow, for dance or training halls, game rooms in preschool institutions, is unacceptable in rooms with a high level of vibration. Its scope is calm residential or working office rooms, here it fully justifies itself.
- A dry screed is never performed in cases where the design of the building in the room provides for a slope of the floor surface at any, even a small angle to the horizon.
- A dry screed will not work if it is planned to place water or cable heating in the thickness of the floor. The only option is to lay film infrared heaters on top of a dry screed.
What and how much to buy for a dry screed device
We must once again immediately emphasize one important point. Dry screed is not only called dry backfill, which is distributed over the surface of the floor. The general concept includes the entire range of materials that was shown in the diagram above (with the exception of only skirting boards and topcoat.
Some options are possible here - for example, in the selection of backfill options. For example, under certain conditions it is more profitable to use fine expanded clay or expanded sand (perlite), crushed blast-furnace slag, or even fine gravel. Moreover, there are situations when the condition of the original floor covering is such that absolutely no leveling is required. Then it will be possible to get by with slabs of extruded polystyrene foam, which will be covered from above with the same GVL floor elements. And this will also be considered a “dry screed”.
Yes, and GVL panels are also not some kind of dogma. Of course, they are convenient, but instead of them, OSB sheets or moisture-resistant plywood, thin asbestos-cement slabs are often used - everything that has the necessary strength, surface evenness and is currently the most economical option for owners in terms of acquisition.
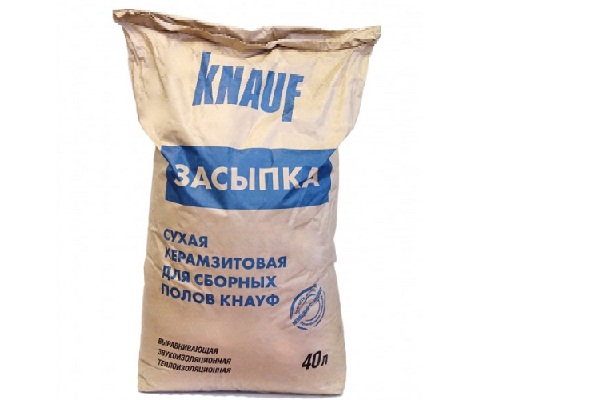
Nevertheless, in the conditions of private residential, construction or apartment renovation, ready-made kits produced by some of the leading manufacturers of building materials are in greatest demand. A typical example is a whole line of similar "dry screeds" from the famous company "Knauf".
The company's specialists have developed four technological sets of dry screed, which have their own individual characteristics, which received their names from the first letters of the Greek alphabet - "Alpha", "Beta", "Vega" and "Gamma". For the conditions of a residential building or apartment with the need to level the base, the Vega kit is considered optimal. Here it is worth considering as an option for self-assembly of a dry floor screed.
To make it clearer to the reader how much material should be purchased for work, consider an example in which the Vega kit (OP 131) is being prepared for a rectangular room 5 meters long and 4 meters wide (total - 20 m²). The planned backfill thickness is 40 mm.
So, for work you will need:
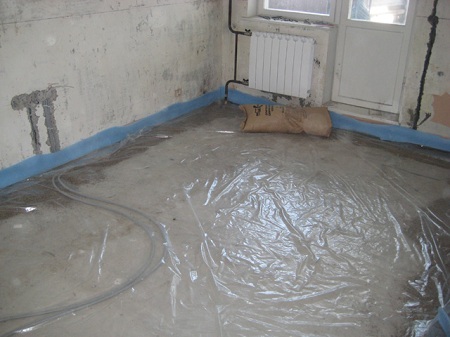
1. Layer of film waterproofing. In some sources, there may be a mention of some special membrane - you should not particularly believe this. An ordinary polyethylene film is used, dense enough (at least 200 microns thick), so that it can maintain its integrity under the influence of a dry backfill.
Such a film should be completely covered with the entire surface of the floor, with a vertical approach to the walls, approximately 150 mm. In addition, adjacent strips of foam must be overlapped on top of each other, also by 150 - 200 mm. Thus, we can proceed from the calculation that for 1 square meter of area we purchase with a margin of approximately 1.15 m² of film. Very often it is sold folded in half in the form of a kind of "pipe" - then it will be possible to divide it into one wide canvas. Moreover, the price of the film is very low, so if you wish, you can leave it in a two-layer form for reliability.
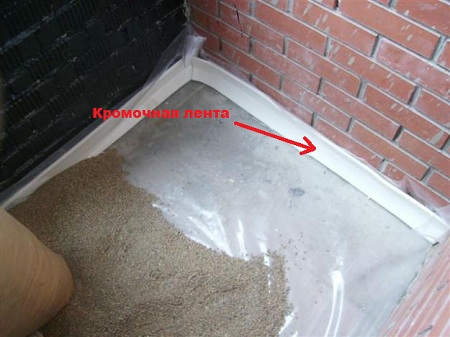
2. Edge damper tape. The importance of this component of the kit has already been mentioned - it will compensate for possible fluctuations in the size and volume of the dry screed.
Produced in rolls 100 mm wide, and length 20 m. The required amount is along the length of the perimeter of the room. In the case we are considering, the perimeter is 18 meters, that is, one roll will be enough. (Usually they are sold whole, without cutting along the length).
3. Dry backfill for the floor. Here are several options. Depending on the offers from the local construction company, or based on considerations of the cost of the material, it is possible to purchase different types of backfill.
- The most popular among the craftsmen and the full confidence of the head manufacturer "Knauf" enjoys backfill "Compevit". Most often - Belarusian production. She has a very high quality fraction of expanded clay - in the range from 1 to 4 mm, the granules have rounded neat edges.
This allows to achieve excellent uniformity and uniform density of the backfill when it is leveled on the floor surface. Such a composition is also highly praised for the fact that it practically does not contain dust during operation.
- Another dry composition fully coordinated with the Knauf technologists is the Kerafloor backfill.
By and large - almost the same in terms of quality, performance characteristics, but produced by another manufacturer (also in Belarus). The price for it is slightly lower than for "Compevit" - about 215 rubles. per bag (40 liters) versus 230.
- It would seem , the best option dry backfill should be branded, more precisely, licensed - "Knauf". By the way, it is the most expensive of all - the same 40-liter bag will cost about 280 rubles.
It would seem that it is a “branded” backfill, but sometimes it can bring an unpleasant surprise - it all depends on the specific manufacturer
However, contrary to the laws of logic, they scold her much more often than the already mentioned Belarusian compositions "Compevit" and "Keraflur". Apparently, nevertheless, the problem lies in the specific manufacturer, and not in the trademark. And so, they note that such a backfill has a higher dust content, and the composition is less uniform in fraction size. Perhaps someone has the opposite opinion - he came across a branded backfill of excellent quality.
- But backfilling "RDS" is definitely inferior in quality. True, it is produced in larger bags, 50 liters each, so the price per bag is about 250 rubles - it is easy to calculate that this is the lowest cost of the material.
In this backfill, the required fraction of expanded clay is achieved, apparently, by crushing large granules, so its composition is very heterogeneous, contains a lot of dust.
- In serious stores they will not offer the Vega kit, but still cheaper backfill options may catch your eye, which often do not even indicate the manufacturer.
True, the inscription on the package does not deceive. There are no special restrictions on the size of the fraction - from 0 to 5 mm, that is, from dust and fine sand to rather large grains. Usually this — screenings, expanded clay production waste that has passed the crushing stage. Such heterogeneity gives both extreme dustiness in the process of working with backfill, and difficulties with leveling, and a large shrinkage after the completion of laying the floor. In any case, if it is possible to avoid the use of such backfill, of course, you should choose a better one.
Video: which backfill is better to choose for a dry screed
In various sources you can find an assessment required amount filling in kilograms or in liters. Both manufacturers and buyers operate with liters more often - nevertheless, a volumetric measure is perceived easier. So, it is easy to imagine that to create a 40 mm layer of backfill on an area of \u200b\u200bone square meter, 40 liters of material will be required, 50 mm - 50 liters, etc.
In our example, for 20 m² and a layer of 40 mm, 800 liters of backfill will be required, that is, 20 standard bags. Of course, you should create at least a 5% reserve, that is, purchase 21 bags of 40 liters.
But to completely “save” and use any construction waste or slag from the boiler room as backfill, succumbing to the persuasion of “knowledgeable” people is the last thing. Such a floor is guaranteed to begin to “make noise” and “play” in the very near future - this will be facilitated by the inevitable uneven shrinkage of the material. So all the "savings" can then turn into the need to remake the coating completely.
4. Gypsum fiber floor elements "Knauf".
For laying the coating over the poured layer, it will be optimal to use ready-made elements, which are a two-layer structure made of conventional (GVL) or waterproof (GVLV) gypsum fiber sheets.
There are several types of floor elements. However, the panels proved to be the most convenient in work "Knauf" with dimensions of 600 × 1200 mm, 20 mm thick. Along the edge of each of the panels, providing a mounting protrusion (folds) - for their more convenient pairing with each other. The width of these mounting folds is 50 mm.
In some cases, it is more convenient to use floor elements 1500 × 500 mm. Their structure, except for the dimensions, is no different.
Another option - floor elements 1500 × 500 mm
They usually purchase floor elements even with a 15% reserve, since, in addition to fitting in right size, you will also have to cut the folded part in the places where the panels fit to the walls.
In our case: one 1200 x 600 mm panel gives 0.72 m² of floor area. If divided by the value total area rooms (20 m²) and add the necessary margin, we get 32 elements with a slight rounding.
5. Glue for installation of GVL
There is no need to invent anything here - ordinary PVA glue will do an excellent job with this task. The consumption will depend largely on how economically the glue will be spent. In any case, a liter should be enough for the area under consideration.
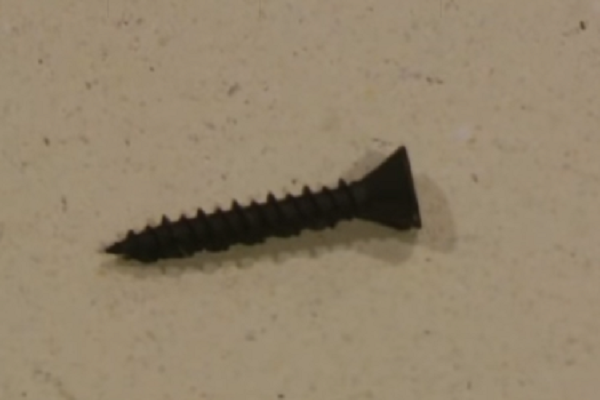
6. Self-tapping screws for fixing floor elements to each other.
The Vega kit includes, as a rule, branded self-tapping screws "Knauf" MN 3.9. They are characterized by a two-start thread, sharp self-piercing tip that does not require pre-drilling, countersinking ( self-sinking) countersunk head. Such fasteners are successfully used both for fastening GVL-elements to each other, and for mounting more complex structures using metal frame– self-tapping screws are capable of cutting holes in galvanized profiles up to 0.7 mm thick without drilling.
Such self-tapping screws are produced with a total diameter of 3.9 mm, length from 19 to 45 mm. For the installation of a dry screed, the optimal length is 19 or 25 mm - there is no risk of damaging the film or the communications passing below (if any). .
The approximate consumption of self-tapping screws is 10 - 12 pieces per square meter of area. It is best to take with a small margin. Often they are sold in packages of 1000 pieces per pack - it probably makes sense to buy a package - even if there is a surplus, such consumables are always needed in the household.
- In fact, this is all, but many craftsmen recommend not being limited to simple installation of floor elements, but also priming it and filling interpanel seams. To do this, you can also use the products "Knauf" or other suitable formulations. But in the dry screed kit "Vega" these components, Also, as well as repair mixtures to bring the starting surface in order, are not included.
Let's summarize the required amount of materials and their cost. (Prices are taken from the price list of one of the leading Moscow construction Internet trading platforms. Price level - as of April 30, 2015).
| №№ | Material name | Unit | Unit price | Quantity per 1 sq. m | The total required quantity, taking into account the reserve | total cost |
|---|---|---|---|---|---|---|
| 1. | Polyethylene film | m² | 10 | 1.15 m | 23 m² | 230 |
| 2. | Edge tape "Knauf" | roll 20 m | 300 | - | 18 m (one whole roll) | 300 |
| 3. | Dry backfill "Compevit" | bag 40 l (24 kg) | 230 | 40 l (1 bag) | 21 bags | 4830 |
| 4. | GVL floor element "Knauf" 1200 × 600 × 20 | PC | 310 | 1.4 pcs | 32 sheets | 9920 |
| 5. | PVA glue | kg | 150 | - | 1 kg | 150 |
| 6. | Self-tapping screws "Knauf" MN 3,9×25 | Pack (1000 pcs) | 320 | 12 | ≈ 320 pcs (better - 1000 pcs, i.e. the whole package) | 320 |
| TOTAL | 15750 | |||||
| On average, per 1 square meter | 788 rub |
To quickly spend more accurate calculations, in particular - the amount of dry backfill, we suggest using the built-in calculators.
Calculators for calculating the required amount of materials for dry screed
A. The amount of dry filling:
A few explanations before starting the calculation.
- First, you will be prompted to enter the level of floor elevation. This does not mean the height of the dry backfill, but the height to which it is planned to raise the base for further laying the floor finish.
- Secondly, the thickness of the dry screed lies within certain limits. The minimum is 30 mm of dry backfill, that is, a rise of 50 mm (taking into account the GVL floor elements). Maximum. As they say in the instructions - 100 mm backfill, but experienced builders put such a value in question!
It has been proven by practice that the stability of the floor will be fully ensured if the height of the dry backfill is no more than 80 mm, which, taking into account the GVL flooring, requires the required 100 mm rise. If a greater level rise is required, then an additional layer of GVL will have to be placed in the thickness of the backfill, approximately in the middle. Hence - a simple rule: more than 100 mm of rise is a two-layer backfill + additional GVL sheets.
For the intermediate layer, both single-layer GVL sheets (10 mm) and floor elements (20 mm) can be used. This means that the amount of dry backfill will also change. It would seem - is nonsense, but for a large area, the difference can be very noticeable.
This nuance is provided in our calculator.
- And thirdly, a dry screed allows you to even out the difference in the level of the subfloor. But for leveling, the backfill consumption will increase. This circumstance is also taken into account in the calculator.
Such a screed has significant advantages. It does not require drying. It is possible to lay floor coverings without waiting 45 days, as in the case of using Traditional mixtures, but the very next day. It is also significantly lighter than traditional concrete mixes. Now, with the optimal thickness of the screed from 3 to 7 cm, per 1 sq.m. it is necessary to stack from 70 to 120 kg. mixtures. Agree, this is a very serious load on the ceiling and load-bearing walls of the house: for an apartment with a total area of 100 sq.m., you will need to lay at least 7 tons. concrete mix.
The essence of the prefabricated floor with a dry screed is as follows. A fairly thick layer of dry backfill is applied to the floor slabs. From above it is covered with durable sheet material (dry screed). And already a finishing floor is laid on it. The number of layers and the materials used may vary depending on the characteristics of the floor and the requirements for its quality. A dry floor on backfill can be laid not only on slab floors, but also on floors with logs (both stationary and adjustable). In general, the idea of infill prefabricated floors has been known for a long time and was widely used in our mass housing construction 30-40 years ago. IN last years prefabricated dry floors received new life due to the arrival of modern building materials on the market.
Due to the absence of wet processes during the installation of dry floors, labor intensity and the duration of the construction cycle are reduced, it becomes possible to easily lay communication lines in the screed, provide high heat-shielding properties of the floor, and sometimes the required sound insulation.
The main problem with these bases is the fear of moisture, and leaks are simply fatal for them. Therefore, a vapor barrier layer is always laid on the ceiling. Next, a bulk material is applied to it, which serves to create a flat surface for flooring, as well as to provide the required level of thermal insulation and sound absorption.
The vapor-moisture-insulating layer protects the backfill located on it from moisture, which inevitably occurs in direct contact with the ceiling.
Moisture vapors appear from the underlying room or from the concrete of the ceiling, as well as from suction from the walls.
For steam and moisture protection, an ordinary polyethylene film with a thickness of 200-250 microns is most often used. (in the case of reinforced concrete floors), glassine or bituminized paper (for wooden floors), or other modern vapor barrier.
For backfilling, specially selected materials are used - screenings from the production of expanded clay, expanded perlite sand, quartz and silica sand, fine-grained slag, etc.
If the surface of the floor slab does not require leveling, instead of backfilling, slabs of extruded polystyrene foam (PSB-35, PSB-50) laid tightly to each other can be used. Also, polystyrene foam boards are used in addition to backfill to provide the required thermal protection and sound insulation.
The thickness of the backfill depends on the quality (the number and size of irregularities, the surface of the floor slab, as well as on the presence and characteristics of utilities and other equipment. Usually the layer thickness is 30-50mm. The best materials for a "dry" screed are moisture resistant boards(GVLV), moisture resistant plywood or chipboard.
The disadvantage of a "dry" screed is its hydrophobia, i.e. these floors must not be exposed to moisture, otherwise the plates will swell.
Installation of a "dry" screed is carried out, unlike the traditional one, after all plumbing and electrical work has been completed and the operation of engineering networks has been checked.
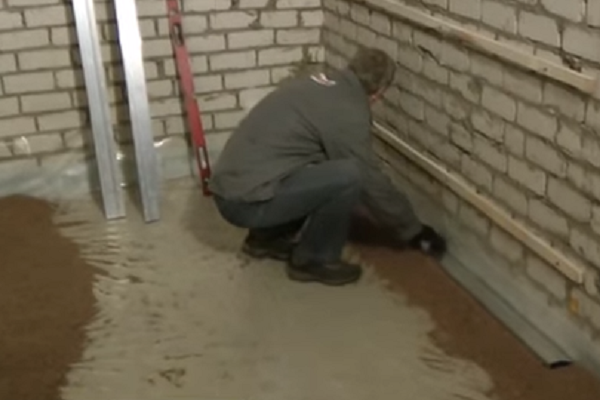
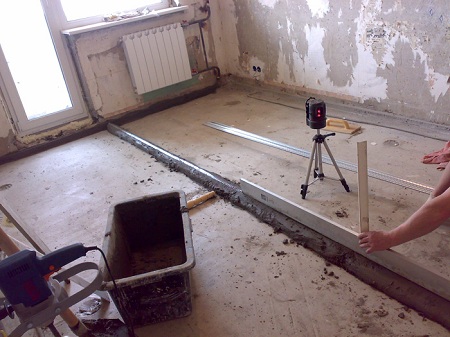
First, prepare the base - remove the old one, close up the cracks. Then, using a hydraulic or laser level, a backfill level mark is applied to the walls. To ensure vapor and moisture insulation, a polyethylene film is laid with an overlap of strips on top of each other of at least 20 cm. On the wall, the film should rise no lower than the level of the future backfill. That is, the backfill should be "wrapped" with a film.
Along the perimeter of the floor along the walls, a tape of mineral or glass wool grade M75 or M100, polystyrene foam or other similar material is laid. This is necessary for the thermal expansion of the future floor.
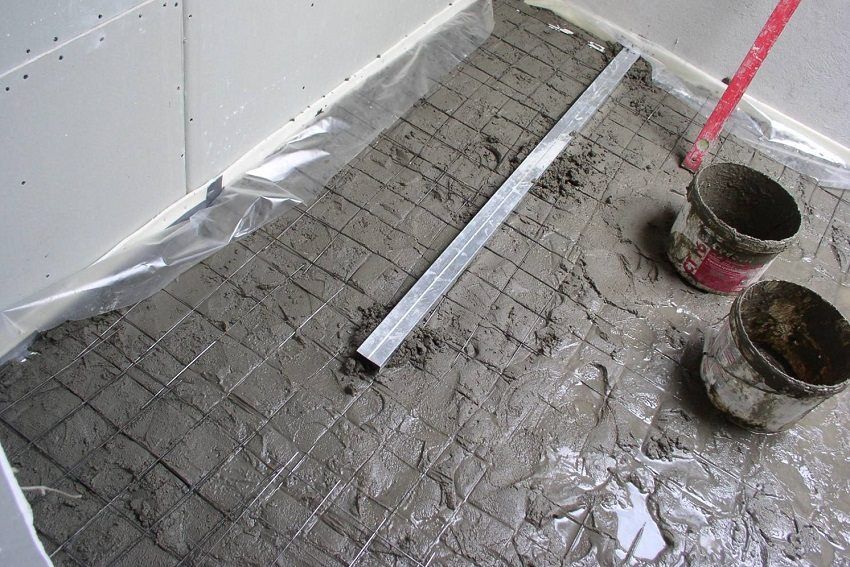
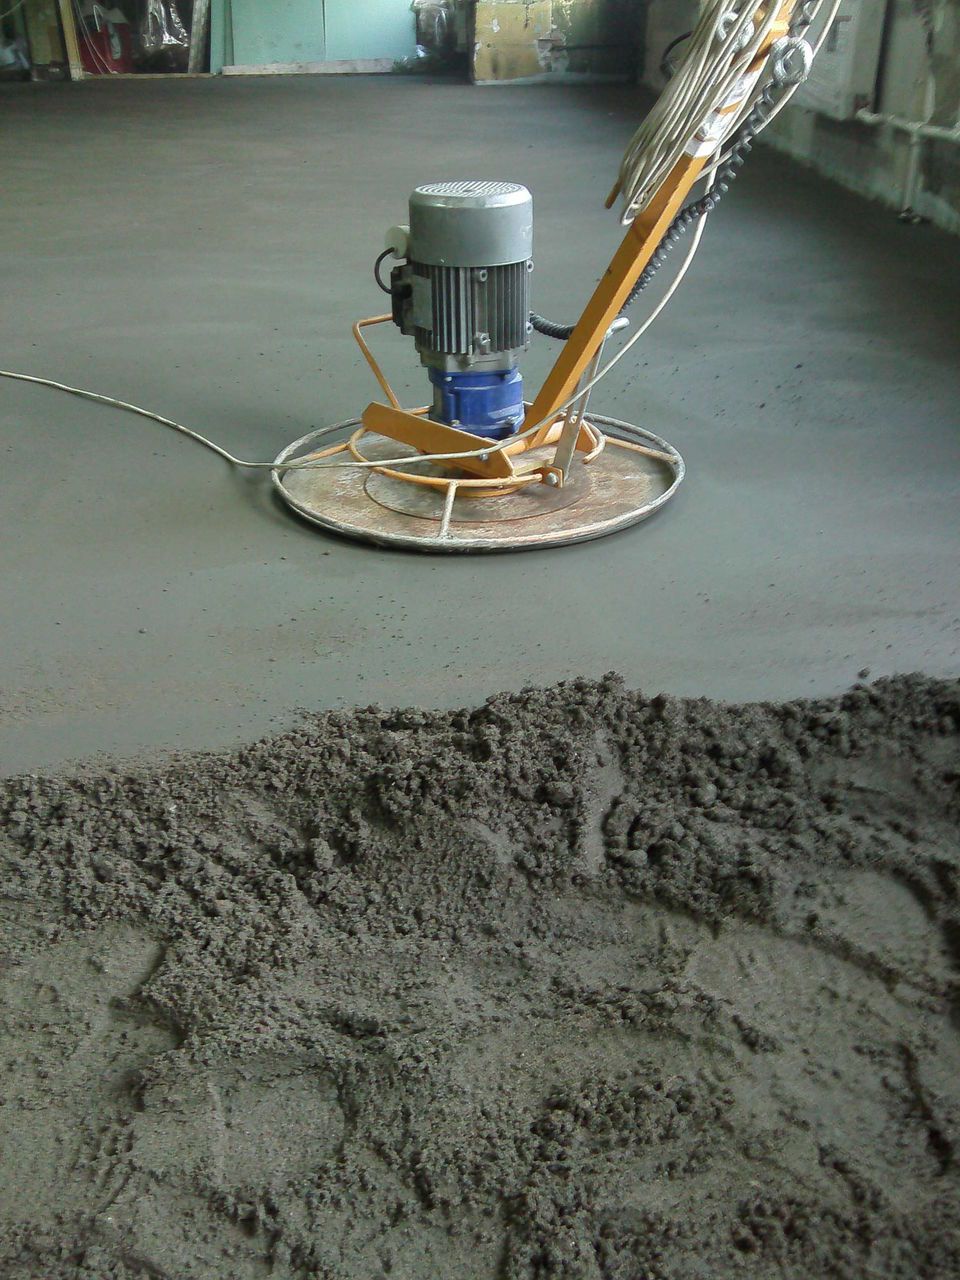
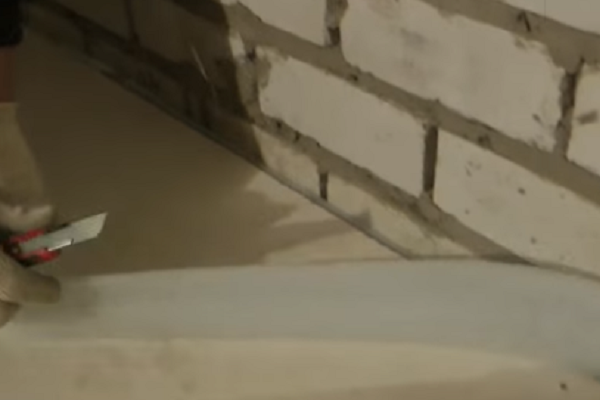
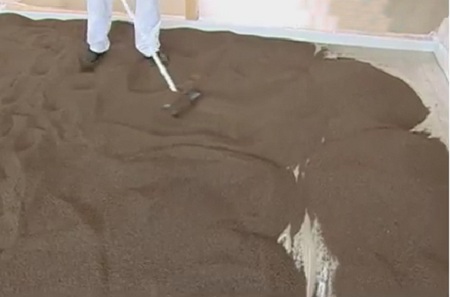
After that, the backfill is poured out and leveled with a rail at the marked level.
The laying technology is determined by the type of sheets used. Gypsum-fiber sheets are laid along the backfill in two layers, firmly fastening them together during installation with glue and self-tapping screws. Seams from fasteners puttied and polished.
A floor with a subfloor laid in this way can withstand the same loads as a concrete screed floor. The base has an impact noise reduction index of 18-22dB.
Chipboards, plywood or other sheet materials are laid, depending on the thickness, in one or two layers. The surface of the screed is covered with bituminous waterproofing.
One of the world's leading manufacturers of building materials, KNAUF, has developed special systems for the installation of a "dry" screed based on gypsum fiber sheets. These systems are very easy to use and can be purchased at any hardware store.
The KNAUF system is used in residential, office and administrative premises with a normal load, to form an even base, as well as to improve the heat and sound insulation qualities of the floor. The surface is intended for any subsequent coating, such as parquet, tiling, etc. This system has the following characteristics:
- Minimum construction thickness: about 45mm.
- Compressive strength of the screed: not less than 10 MPa.
- Thermal conductivity of the screed, W / m2., C: 0.22-0.41.
- Airborne noise reduction index, dB: by 2-4.
- Impact noise reduction index, dB: by 18-22.
The floor element (it is also called the superfloor) consists of two moisture-resistant gypsum-fiber sheets glued to each other with a 50mm offset at the factory. The size of each sheet is 1500x500x10mm. Thus dimensions the superfloor is 1550x550x20mm.
Floor elements are mounted in the above sequence - film, edge tape, backfill. The room temperature during operation should be at least 8 degrees.
Laying floor elements starts from the doorway to the window from right to left. The end fold of the top sheet is cut off with a knife or saw, and the element is placed close to the walls in the right corner farthest from the door. The folds of the laid sheet are made with PVA glue. Then the second and subsequent sheets of the first row are laid. This row is laid out along the cord.
The second row is laid out with the remainder of the last sheet of the first row in such a way that the offset of the joints of the sheets is at least 250 mm. Starting from the second row, the floor elements are fastened together with special self-tapping screws 19 mm long. They have a countersinking head, which allows you to drown the screw to a depth of 1 mm. For this purpose, you can also use special building brackets with a length of 18mm.
In the place of the doorway, under the upper fold of the element, a lining of GVLV with a width of 10 mm is laid.
If the top coating is linoleum or carpet, then the gaps in the joints of the plates must be puttied, sanded and primed.
After that, the protruding edge tape and film are cut off, the joint between the wall and the floor is sealed with sealant. And then you can lay the flooring.
It is difficult to independently determine which floor screed is better. If 10 - 20 years ago only cement-sand was used, now many different types of materials and manufacturing methods are known.
Despite this, the most popular options are "wet", "dry" and "semi-dry" methods.
Each of them has significant differences in installation and has its own specific advantages and disadvantages.
What should she be?
 Floor material, or rather the way it is laid, implies compliance with certain requirements for the base during implementation.
This applies directly to the surface on which the finish coating will be mounted. In general, when performing a screed, it is important to consider the following points:
- the area must be flat and leveled horizontally. Deviations not more than 0.3 mm per 1 p/m;
- any surface (dry, semi-dry or wet) must be protected with thermal insulation;
- the bottom of the base is protected from moisture by a layer of waterproofing.
 Positive characteristics inherent in each of the known filling methods:
- High strength.
- Resistance to atmospheric and climatic influences.
- Improve surface quality.
- Create good warmth, - hydro and - sound insulation.
Any of the types are good, but you can get the best result by completing the necessary list of works using different technologies and materials.
Wet screed
 For a wet screed, crushed stone or gravel filler is used.
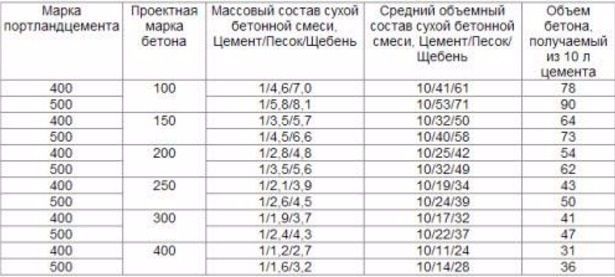
With a complete analysis of the question of which floor screed is better, you can start with the wet pouring method. It is made on cement, therefore there are only 2 options: concrete and cement-sand screed.
The difference between them is that the first method requires a filler with a large structure: crushed stone or gravel. The rest of the details are absolutely identical, but depending on the purpose of the pillow, the proportions of the binder composition may differ.
 If we compare the pros and cons of a concrete and cement-sand base, we can highlight the strength of the first method. Due to this, it is widely used both inside and outside the house for rough and finish screed. In addition, large-scale capital construction is carried out with its help.
Its wide popularity is due to additional features of the composition:
- The wet screed of their concrete is poured and hardens much faster than the cement-sand screed.
- When processing large areas, the total cost is much less than dry or semi-dry.
- It is allowed to make a layer of any thickness, which involves the use of concrete for leveling almost any curvature of surfaces.
 The hardening time of the mixture also depends on the thickness of the layer.
 Mortar analysis can reveal several disadvantages inherent in this method. First of all, this is a mandatory reinforcement of the structure. In addition, there are a number of reasons why many prefer other methods:
- long hardening time of the mixture, depending on the thickness of the layer;
- significant shrinkage and possible cracking;
- the flooded base must be constantly monitored and periodically moistened;
- time-consuming process of self-production of the mixture;
- sufficient complex alignment of the horizontal direction of the surface.
The completed base is quite heavy, which contradicts the requirements for pouring the screed into apartment buildings, and in private ones it will lead to an additional load on the foundation.
Semi-dry
 A mixture of semi-dry screed is evenly distributed throughout the room
The percentage composition of the components of a semi-dry screed is similar to that of which the wet screed is made.
However, the mixture differs in the level of moisture content. Based on the name, the amount of water in this case should be added half as much.
An example is the composition for the manufacture of a mixture in proportions of 1 to 3, respectively, of cement and sand. To do this, you need only 24 - 26 liters.
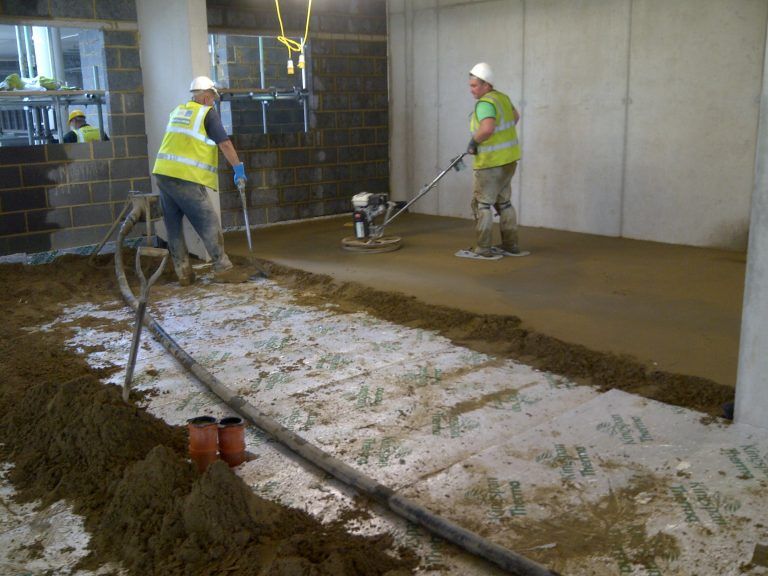
 After the distribution of the material, it is rammed
 Semi-dry screed is performed as follows. The composition is evenly distributed over the previously designated area. Laying takes place in several layers, where each is rammed.
Having reached the desired level, indicated by beacons, the excess is removed by the rule. Walking on the surface is allowed after 2-3 hours. At this time, you need to perform the final leveling and smoothing the base with a metallic brush.
To conclude which floor screed is best suited in your situation, you need to take into account some features of a semi-dry mixture before a wet manufacturing method. First of all, it is possible to single out the period during which the compositions, which were mentioned a little higher, solidify. In addition, there are several other distinctive features:
To level the floor for tiles, linoleum or laminate use various technologies. A dry floor screed allows you to create a reliable base for finishing materials in a shorter time compared to the traditional method of leveling the floor surface using a cement-sand mortar. When using this technology, there is no need to pause in the work to dry the materials.
The "dry method" allows you to prepare the base in one day and immediately begin finishing work. In addition, the materials used in this technology are much lighter than cement-sand mortars, so the ceiling on which the screed is installed is not overloaded. As a result, it becomes possible to make a screed of any thickness and hide communications without damaging the building in which the floor is leveled using this technology.
This method of leveling the floor appeared about 40 years ago, but did not have much popularity.
Thanks to modern materials produced under the Knauf brand, builders have the opportunity to create bases for floor coverings that meet the high requirements for European-style renovations.
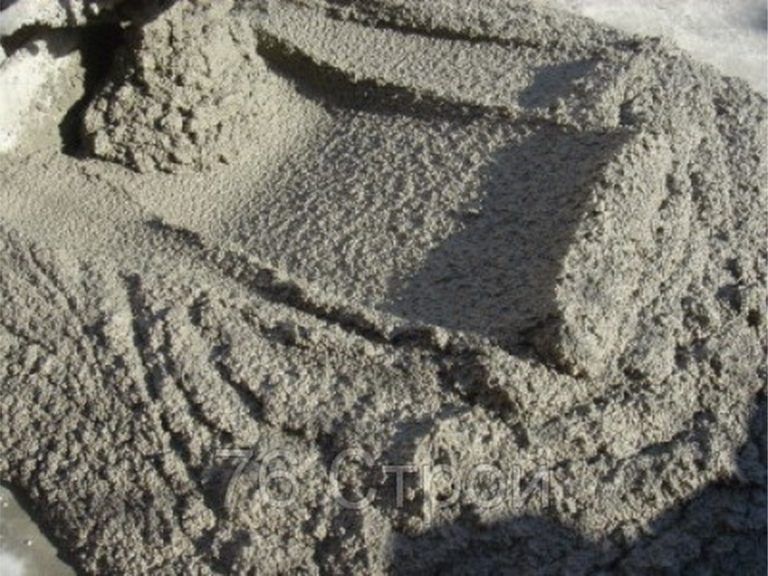
The composition of such a screed includes pure expanded clay of a fine fraction, in which there is no garbage and by-products from production.
 Pure expanded clay fine fraction
 Gvl (gypsum-fiber sheet) knauf, which has exact dimensions and special folds that serve for docking. To exclude the replenishment of moisture with expanded clay, waterproofing is arranged from the ceiling.
When installing any screed, it is necessary to prepare the base. If there are cracks in the room where work will be done on a concrete or tile floor, they are sealed. The joints of the plates and the joints of the walls are also treated with mortar, if necessary.
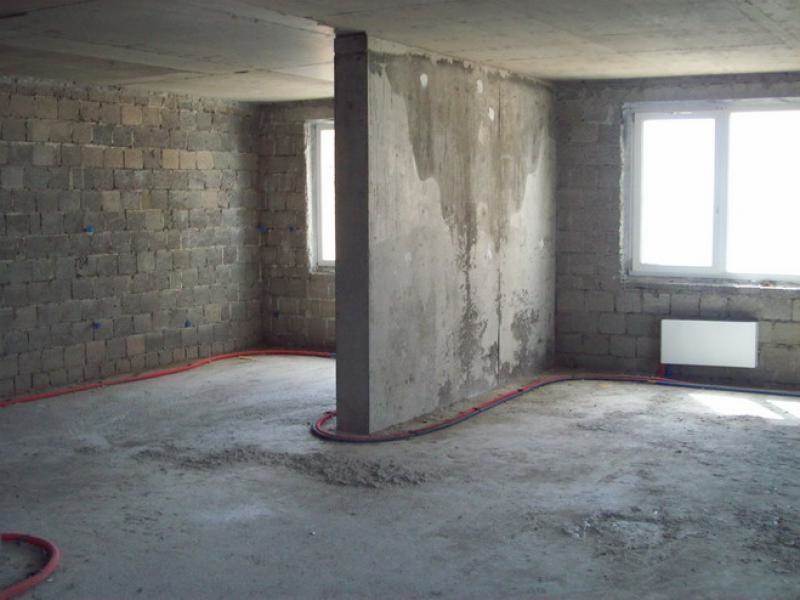
 Prepare the base
 Before starting the screed installation, it is necessary to install all communication pipelines, underfloor heating and electrical wiring, if any, in the room. If there is no experience in the communication device, you can watch the video on our website and do these works yourself. After completing this stage of work, proceed to the device of moisture insulation.
On concrete floors as a vapor barrier material, a polyethylene film with a thickness of at least 250 microns is used. Wooden floors isolated with glassine. The vapor barrier material is spread on the floor in a continuous layer.
 Use of polyethylene film
 Joints must be at least 15 cm; when laying the material, they can be glued with adhesive tape. Film or glassine should go on the walls. After completion of all work, excess material is cut off. Detailed description This process can be seen on the video on the Internet.
In order to prevent sound from the floor from being transmitted to the walls along the perimeter of the entire room in which a dry floor screed is made, they make sound insulation - they install a foam polyethylene tape.
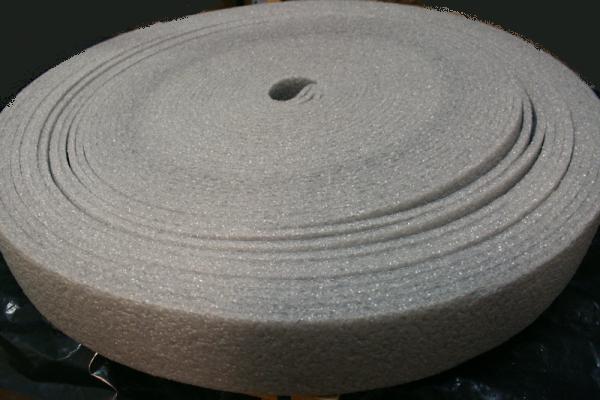 PE foam tape
 This material will absorb sound waves from walking on the floor and prevent them from being transmitted to the walls. And vice versa - from the walls to the floor. A tape 20 cm wide is glued to the walls with liquid nails.
 Mounting tools
 - screwdriver - required for screwing screws on GVL;
- jigsaw - needed for cutting sheets of GVL;
- rule - serves to create guides and leveling expanded clay;
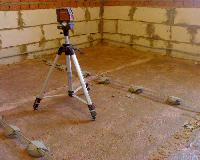
- laser level - will help you find the zero mark and make a flat floor;
- shovel - with its help, expanded clay is leveled;
- clerical knife - necessary for cutting insulation.
If there is no power tool available, it can be rented on the construction market.
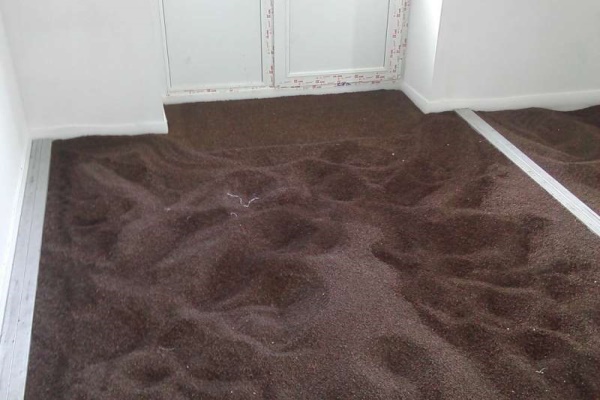
For a dry screed, it is preferable to choose expanded clay with a fraction of 1 to 5 mm, because this material is not combustible, holds heat well and gives little shrinkage.
 Expanded clay
 Do-it-yourself dry floor screed is done using a laser level. With it, they find the zero mark - this is the level of the finished floor. Next, expanded clay tracks are poured onto the base.
Putting a rule on them, the same distances from the laser beam to the rule are measured with a tape measure or ruler. Thus, the rule will be set by level. It acts as a guide rail.
 Guide rail function
 When choosing materials, preference should be given to manufacturers who have a good reputation.
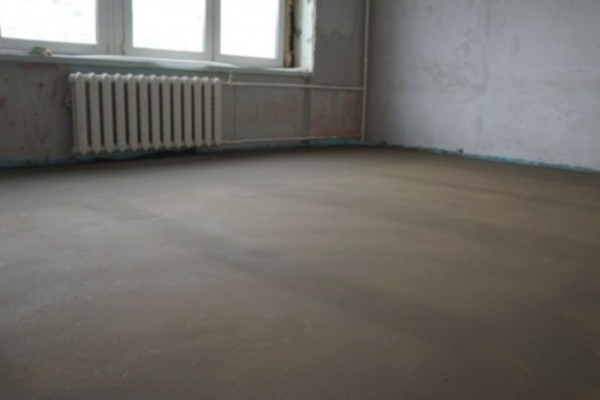
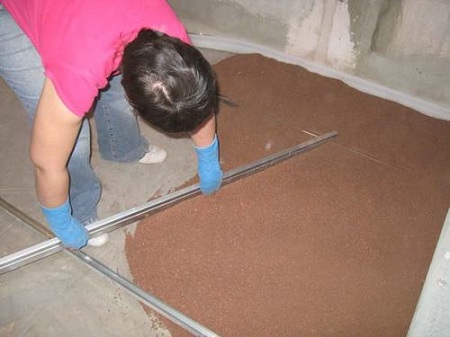
At a distance from the first guide rail, which is not more than the length of the rule, a second guide is installed. The space between the guides is filled with expanded clay. Further, with the help of another rule, the backfill is leveled. Leading by the rule, a layer of expanded clay is leveled along the guides.
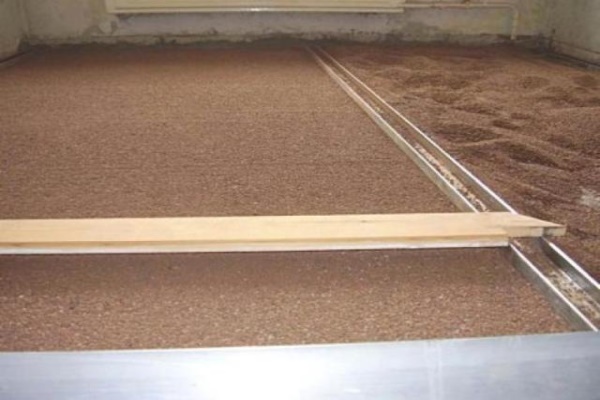 We level expanded clay
 In places where there is a shortage of expanded clay, it is necessary to add backfill and level again. How exactly to do this, you can see in the video, which is located at the end of the article.
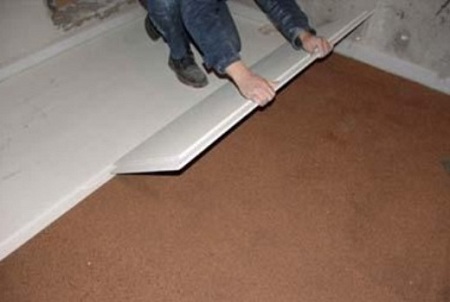
 GVL sheets knauf
 In order not to spoil an even layer of backfill, when installing sheets, a piece of plywood or other durable sheet material is placed on it.
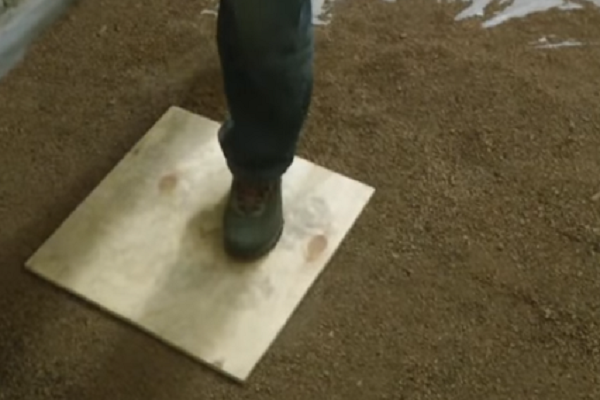 Lay a piece of plywood
 Knauf sheets are also suitable for these purposes.
Before installing the first sheet, a docking fold is cut from it from those sides with which it will be adjacent to the wall. This can be done with a jigsaw or hacksaw with a fine tooth.
 Cut off the seam
 Such an event is necessary so that the dry backfill does not fill the voids in the folds and the Knauf element does not fail.
During work, safety precautions must be observed. When working with the tool, wear protective gloves and goggles.
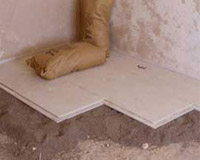
The first sheet of Knauf is placed close to the walls, the folds are coated with PVA glue and the next piece of the floor is laid.
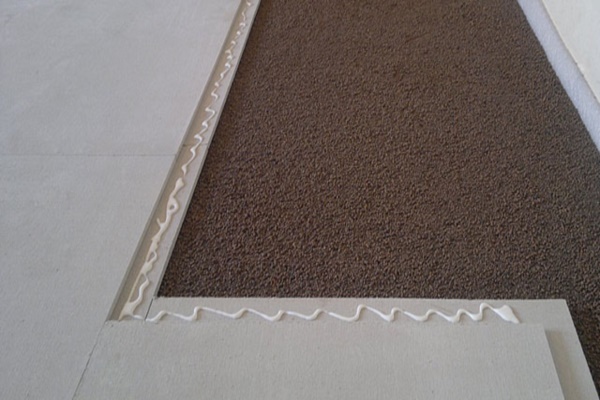 Lubricate the folds with PVA glue
 On all sheets of gvl that lie near the walls, folds should be cut.
After connecting the two floor fragments, their joints must be fixed with screws. For these purposes, use a screwdriver. The distance between fasteners should be no more than 10 cm.
To fix the Knauf sheets, special screws for GVL are used.
 Special screws for GVL
 They have a two-start thread and a specially shaped cap. When tightened, these screws go deep into the surface of the sheet and do not interfere with further finishing of the floor.
When mounting sheets, they are placed with a run. In such a way that cruciform joints are not formed. Once all the floor elements have been laid, cut off the soundproofing tape and the film that protrudes above the surface of the sheets.
After the dry floor screed is finished with your own hands, you can proceed to the finishing work. There is no need to pause for expanded clay shrinkage, therefore this method of leveling the floor is one of the most effective. Detailed stages of work can be viewed on the video.
Cost of materials
To make a high-quality screed, you should buy high-quality raw materials from trusted manufacturers, for example, Knauf. Such a backfill can be purchased for 225–300 rubles a bag.
Sheets for screed cost 250-310 rubles. These floor elements have a size of 1200-600-20 mm and 1250-500-23 mm.
Polyethylene film 250 microns costs depending on the width of the sleeve. On average - from 35 to 75 rubles.
Edge tape (damper), which is used as sound insulation, costs from 245 rubles per skein of 30 meters. Tapes vary in width and thickness, so the price may vary depending on these parameters.
Video
In this video, you will learn about the installation of a dry screed floor base from Knauf supersheets.
Thanks to this material, you will receive a lot of useful information.
Photo source: consultinfo.net, rovpol.ru
One of the most difficult stages of repair is considered to be pouring the screed. Indeed, such work takes a lot of time, effort and money. But time is relentless, and already in the bright head of one tired screed master, a brilliant idea arose: “Why not come up with a way to level the floor, which would be inexpensive, and would not have to spend so much time and effort on its implementation?” And he did come up with it! Now dry floor screed has become such a popular phenomenon that concrete counterparts are gradually fading into the background.
Advantages and disadvantages of dry screed
The principle of a dry bulk floor is simple to disgrace - quartz sand or expanded clay is poured onto the base, and sheets of plywood, chipboard or gypsum fiber are laid on top of it. In conclusion, the entire structure is fastened with special glue and self-tapping screws. Brilliant, isn't it?
But not only the high laying speed and relative cheapness have become the reason for the mass worship of the dry screed, but also a few other very attractive points.
- Cleanliness during work. The dry screed technology does not involve the use of water, as happens during the pouring of the cement-sand mixture. Hence the absolute cleanliness without gray-dirty puddles and heaps of sand.
- Additional floor insulation. Due to the use of expanded clay as a “cushion”, the floor is warm and maximally protected from winter cold.
- Light weight construction. "Air" expanded clay and thin sheets of plywood or GVL weigh very little, so a dry floor screed is ideal for old houses with "shabby" hardwood floors.
- Ease of communication. In a layer of expanded clay or quartz sand, it is much easier to lay vital communications: telephone and Internet cables, electrical wires, film heaters and any other equipment.
- The shortest possible completion of finishing works. Having finished the installation of a dry screed, you can immediately start laying the finishing floor covering, while it will take several weeks for the cement screed to dry completely.
But if everything is so good, then why is the cons of a dry screed mentioned in the subtitle? Indeed, this floor leveling technology has one very significant drawback - it is moisture fear. When moisture gets on GVL, chipboard or plywood boards, moisture begins to destroy the structure of the material, which leads to swelling of the floor and the appearance of defects on the surface of the floor covering.
The technology of laying dry screed on expanded clay
For a more detailed consideration of all the nuances of installing a dry screed on an expanded clay pillow, watch a short video clip.
And now you can highlight the intricacies of the process in detail, breaking it into several parts.
Subfloor preparation
Remove the old coating and check the condition of the screed. If cracks, crevices, gaps between ceilings and near walls are found on the concrete surface, they must be repaired with a classic cement-sand mortar. After the mixture has dried, sweep the floor with a broom. The base is ready for installation of a dry screed.
Laying waterproofing
Vapor barrier (waterproofing) is a layer of glassine or a dense polyethylene film, which is laid on concrete base. The film thickness must be at least 200 microns. In addition, you can use special paper impregnated with bitumen or vapor barrier materials, which in in large numbers sold in hardware stores.
The film is overlapped (if the strips are narrow), while the edges of the strips should overlap each other by 15 centimeters, and in order to increase the effectiveness of the vapor barrier, the joints are glued with adhesive tape. In addition, the film should go on the walls by 7-8 centimeters.
A waterproofing layer will prevent damage to the screed in the event of a water leak, condensation on concrete floors, or an emergency in the basement or apartment located under yours.
Bonding edge tape
Installation of a dry screed necessarily involves gluing an edge or damper tape, which prevents the appearance of unwanted squeaks and knocks arising from the contact of GVL sheets with the walls. Soft "plug" is a strip of foamed vinyl with a self-adhesive surface.
After removing the special wax strip from the back, simply glue the tape around the entire perimeter of the room directly onto the vapor barrier. Thus, you get a single workspace, completely protected from moisture and steam.
Lighthouses are needed in order to level the expanded clay layer, thus creating a perfectly even base for the future screed. If a concrete floor screed, the technology of which will be discussed in the next article, is not conceivable without beacons, then a dry one may well be limited to your own eye. But still with guides it will be much more convenient and easier to level the gravel.
To install beacons, you will need self-tapping screws, T-rails, a screwdriver, and a laser level.
Install the level in the center of the room. At a distance of 0.5 cm from one of the corners of the room, screw a self-tapping screw into the floor. Put a rule on it and mark with a pencil or marker the point of intersection of the laser and the rail (naturally, the mark must be made on the rule (rail)).
Your next step will be to tighten the second self-tapping screw at a distance of 15-20 cm from the first along the wall. Again, put the rule on the screw and check that the laser clearly passes through the mark made earlier. If this does not happen (the level is either above or below the mark), then simply correct the self-tapping screw by simply unscrewing or twisting it. According to this principle, mark up the entire room.
Now you can set the guides. Put a small pile of cement mortar on each screw and, having installed a profile on these piles, press it firmly until it rests on the screws. Remove the rest of the mixture with a spatula and leave your beacons to dry.
Expanded clay backfill
As a pillow for sheets of plywood, GVL and chipboard, not only expanded clay, but also quartz sand, and fine-grained slag, and even slabs of extruded polystyrene foam can act. The latter, by the way, are very convenient to use if the surface of the base is perfectly flat. Expanded clay for dry screed can be in the form of granules, slag or small gravel, but the size of the inclusions should not be too large. Otherwise, the screed sheets will lie unevenly.
The thickness of the backfill depends on the quality of the base surface (the size of the irregularities and their number), as well as on the features of the engineering communications laid in the expanded clay layer. As a rule, 3-4 cm is enough to provide a dense and even base for a future screed.
During backfill, make sure that the thickness of the expanded clay pillow is at least 3 cm, otherwise the GVL sheets after they are laid will “walk” under your feet, which will ultimately lead to the destruction of the structure.
Expanded clay should be filled in portions so that you have the opportunity to level the layer, standing confidently on two legs, and not staggering and slipping on round granules. Having laid a layer of expanded clay, a GVL sheet is mounted, then the next portion is poured and again a GVL sheet is laid on top of it, and so on until the end.
However, you can use another way of backfilling expanded clay, in which the entire room is first covered with gravel, then it is leveled with a rail and then a dry screed is installed. During leveling, you can lay small pieces of GVL or plywood, which in the future will become a kind of bridge that protects the expanded clay layer from accidental foot damage.
Laying sheet material
The technology of laying sheet material is determined by the type of sheets used. So, GVL is laid on expanded clay in two layers. It is necessary to fasten the sheets together with glue and self-tapping screws (for greater reliability), and the seams and joints formed during the fastening process are puttied and polished. Such a floor can withstand the same loads as a concrete screed.
Plywood and chipboard are laid in one or two layers (depending on the thickness), and after installation, their surface is covered with bituminous waterproofing.
Start laying from the far wall, gradually adding expanded clay, leveling it and laying new sheets. If you immediately fell asleep the entire area, then start working from the door, moving towards the opposite wall. Use the bridges built at the stage of backfilling expanded clay.
Lubricate each fold of the GVL sheet with glue, and after joining with the next, fasten them together with self-tapping screws 19 mm long. Such self-tapping screws have a countersinking head, which is deeply embedded in the material, which allows laying GVL without drops.
At the end of the work, do not forget to cut off the remains of the edge tape and film with a knife, and seal the joint between the wall and the screed with sealant.
Dry screed installation cost
The cost of work may vary depending on the materials used to level the floor. Thus, the knauf dry screed, which has established itself as one of the most effective floor leveling systems, is significantly inferior in cost to other similar analogues. In addition, such a screed has a minimum thickness of the structure, high tensile strength, and excellent thermal conductivity. Thus, a dry screed, the price of which is several times less than the cost of concrete, is an example of an ideal way to level the floor.
Laying a dry screed is not a difficult process, but it requires a certain amount of patience. All work can be completed in one day, and if desired, in a few hours. Good luck to you!


