Illumination and spotlights for plasterboard ceilings. How to choose a spotlight for the room? Installing a spotlight
By using detailed instructions you can independently perform work operations without errors professional level difficulties. But we must remember that when implementing technical projects, it is necessary to accurately use not only installation techniques. The choice of suitable components, especially the operation of the equipment, is essential. This article reviewed Spotlights For plasterboard ceilings. Following the recommendations below will be useful to save time, Money, rational use of labor and energy resources.
With the help of these devices, experienced designers create regular and multi-colored illumination of design elements. Professional placement of devices provides good visibility in certain functional areas without wasting electrical energy. For proper application, it is necessary to accurately formulate the task, to select suitable spotlights for plasterboard ceilings. A comprehensive analysis of the state of the market, costs during installation work and during subsequent operation will be useful.
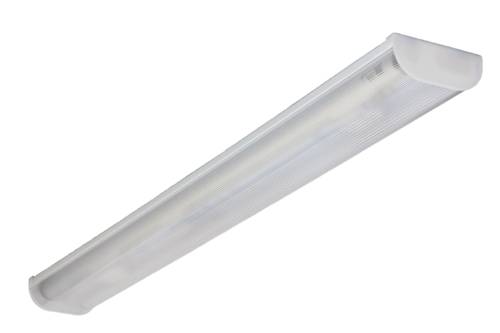
Designs of ceiling lights built into a plasterboard structure and other modifications

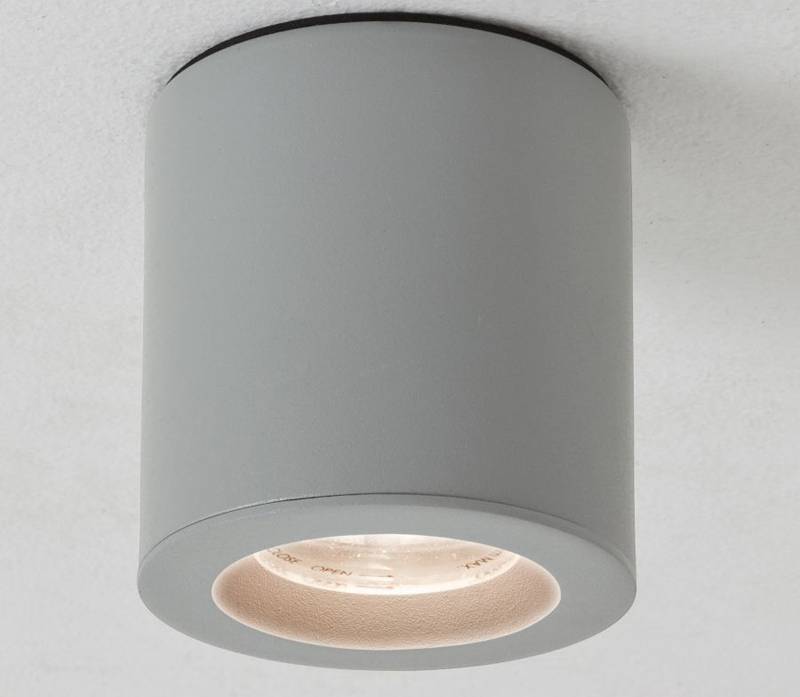
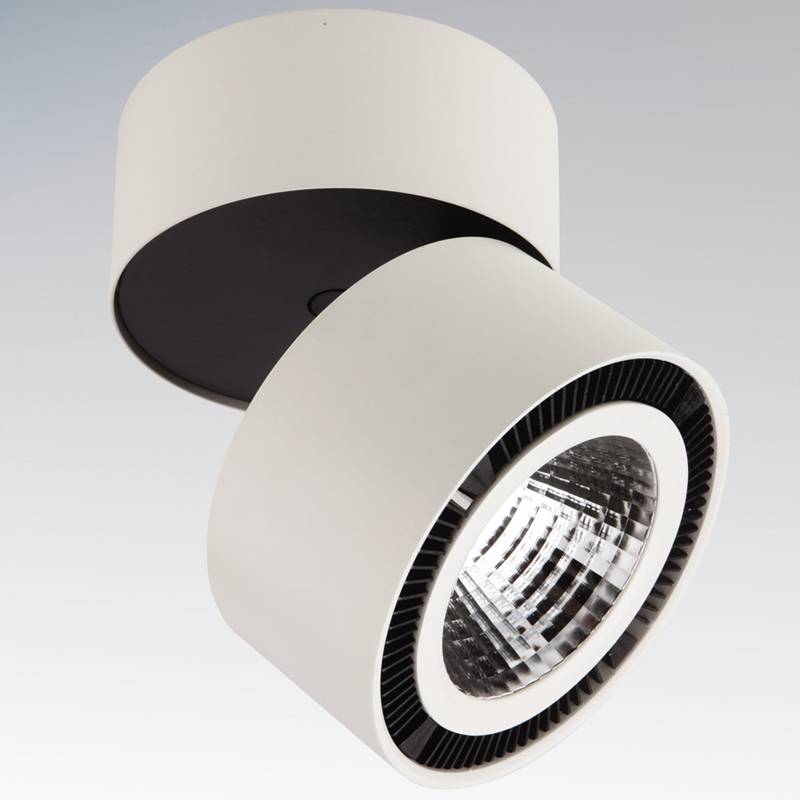
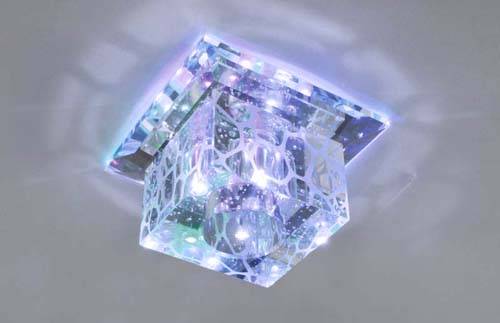
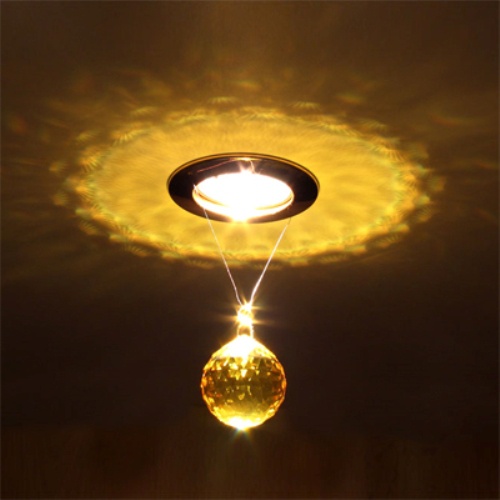
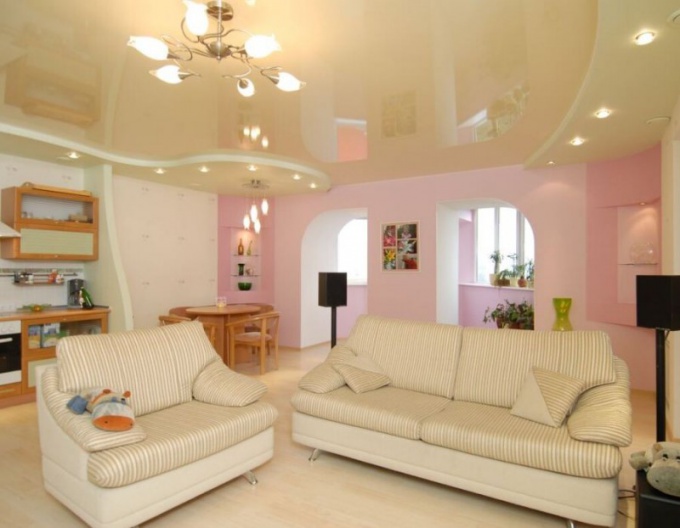
These devices are classified in the appropriate category, since the cartridges and lamps are inside the false ceiling. This design helps to use the available free space to good use. The photo shows an example with decorative crystal pendants. But if necessary, you can leave a minimum protrusion above the plane of the ceiling.
For your information! The disadvantage of this solution is the difficulty of replacing failed lamps, repair. To simplify such operations, fasteners are used that do not impede dismantling.
In this option, it is enough to drill small holes in the plate for cable routing.
1 of 6

Features of different light sources
For ease of comparison, the generalized indicators are summarized in one table:
| Light Type/Image | Advantages | Limitations and disadvantages |
 incandescent lamp incandescent lamp | Low cost | When choosing such a device, it is necessary to include in the calculations a large height (from 80 mm or more). Taking into account the dimensions of the cartridge and other parts of the structure, a significant reduction in the height of the ceilings is obtained. Additional disadvantages are: significant heating; high power consumption; significant probability of failure during voltage surges; short service life. |
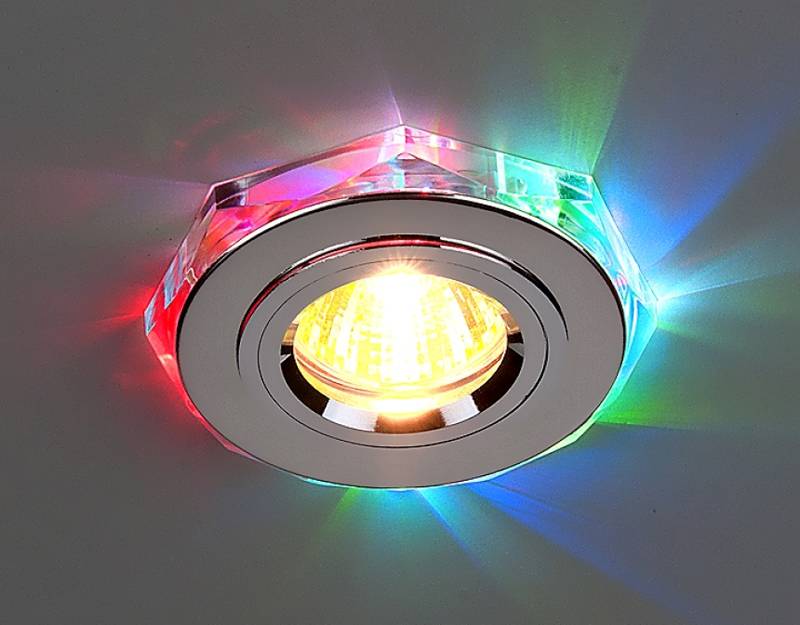
 Halogen Halogen | Strong luminous flux in a miniature size | These light sources operate on a voltage of 12 V. Therefore, you will need to install an appropriate step-down transformer. In order not to disable them prematurely, it is necessary to use special devices that ensure smooth switching on. "Halogens" waste a lot of power for nothing, for heating the surrounding space. |
 Luminescent Luminescent | Reasonable price, low power consumption | The composition of the phosphors, which are applied to the inside of the flask, there are harmful chemical compounds. These devices must be handled with care. They are disposed of according to special rules. The "minus" is the large size. The disadvantages of experts include low strength. |
 LED LED | Durability, resistance to vibrations and voltage drops, high quality luminous flux | The only significant "minus" of these devices is the high cost. However, this factor should be considered taking into account the long service life and reliability. You should also pay attention to the gradual decline in prices as the popularity of products increases and the volume of production increases. |
According to the program set by the user, or immediately, the color, brightness changes, the switch is performed. Such devices are connected to systems of the “smart home” category. With the addition of special equipment, their operation can be controlled via the Internet.
Related article:
How to choose the right device, what intensity of lighting is required, where to install the device, an overview of the original models - about this in the next material.
Protection from external influences
The IP standard value is used to check the suitability of the instrument for the operating conditions. The manufacturer provides these data in the technical documentation for a spotlight for plasterboard ceilings. Below are the characteristics of the different groups.
First digit (particulate protection):
- If 0 is specified, no special measures are taken in the product design. Such a lamp is installed in rarely ventilated rooms, where the likelihood of the corresponding pollution is minimized.
- The numbers 1, 2, 3 and 4 indicate the protection against penetration of objects and particles with dimensions in mm of more than 50, 12, 2.5 and 1, respectively. In particular, it can be checked whether accidental electric shock is prevented when touched with fingers.
- Designations 5 (6) confirm the presence of partial (complete) protection against dust particles.
The second digit indicates the protection against water:
- As in the previous list, 0 is the zero power.
- If 1 is given, it means that vertically falling drops will not penetrate inside the housing.
- Digits 2 (3) - protected against drops falling at an angle of 15° (60°) with respect to the vertical direction.
- 4/ 5/ 6 - prevents moisture from entering inside in the presence of splashes / streams of water / jets under pressure, regardless of their direction.
- 7/8 - protection is provided when immersed to a depth of 1 meter / moreover, not for a short time / for a long time.
For your information! The presence of rotary mechanisms reduces the protection from external influences. Tightness is easier to ensure in stationary structures.
How to buy recessed LED ceiling spotlights: photos, prices, recommendations
| Photo | Brand/Model | Dimensions in mm (length x width x height) | Maximum power of the device, W | price, rub. | Notes |
 | Feron/929 | 80 x 80 x 11 | 3 | 120-150 | Aluminum case, polymeric decorative bezel with metallized coating. |
 | Lightstar/ Fungo 070214 | 70 x 70 x 65 | 3 | 170-220 | Metal armature. |
 | Arte Lamp/ Praktisch A2100PL-3AB | 80 x 80 x 110 | 1,5 | 190-280 | Swivel mechanism. |
 | Arte Lamp/ Meander A1104PL-1CC | 100 x 100 x 50 | 1 | 290-360 | Crystal ceiling. |
 | ELVAN/VLS-703R-6W-3000K | 100 x 100 x 40 | 6 | 350-460 | IP44 protection. |
 | ELVAN/VLS-701SQ-18W-6000K | 180 x 180 x 25 | 18 | 860-940 | Mains supply 220 V/ |
 | Donolux/ DL18731/15W-White R Dim | 160 x 160 x 98 | 15 | 2800-3200 | The ability to adjust the brightness (dimmer connection). |
For your information! It is easier to buy spotlights for plasterboard ceilings if you compare the models you like in one table, which contains the necessary parameters.
The process of installing spotlights in drywall
| Photo | Description of actions and recommendations |
 | In addition to the fixtures themselves, it is necessary to prepare junction boxes, circuit breakers, and other components of the electrical network. The cable is selected taking into account the total load. It is convenient to use for their styling. Such a shell provides additional protection against moisture, mechanical damage. If there are no built-in power sources in the fixtures, they acquire the appropriate blocks that rectify and reduce the voltage to the required level. |
 | An exact list of the necessary tools can be compiled after a detailed study of the technology. |
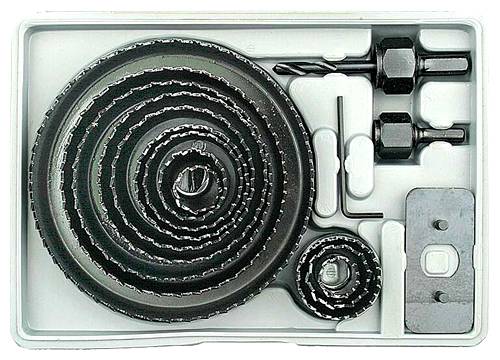 | To drill holes, you will need a crown with a diameter corresponding to the dimensions of the lamp. |
 | According to this scheme, recessed LED spotlights are installed for. In order not to complicate assembly operations, 220V lines are laid in advance to the places determined by the plan. Leave free cable lengths of 60-80 cm. After fixing (with the power off), holes are drilled. The driver is connected to the extracted cable, or the device itself is connected directly. Next, fix the lamp with the help of regular fasteners. |
| Overhead spotlights on the ceiling are installed according to the manufacturer's instructions. With a large weight of a certain model, a special rigid base is installed. It is connected to the power frame of the crate. |
After completion of all operations, a trial inclusion is performed.
The following tips will make certain operations easier:
- The diameters of the holes in the drywall for the spotlight create a few millimeters larger than the dimensions of the devices themselves. Appropriate corrections are made if there are fasteners or other parts of the structures protruding beyond the main dimensions.
- If it is difficult to remove the cable hidden in the structure, a suitable piece of wire is used. It shouldn't be too hard. The end part is bent to prevent accidental damage to the insulating shells.
- During installation electrical circuit it is necessary to observe the established connections of zero, phase and ground conductors. Use the standard color coding to rule out errors.
- Do not use twists to connect wires. Suitable universal terminals should be purchased in advance with a small margin.
- There are no gaps between the rim of a properly installed lamp and the drywall.
Article
Spotlights for plasterboard ceilings are various types and varied designs. They look neat on the plane of the ceiling and give maximum amount white or colored light that can be directed to a specific area of the room. Thus, with the help of them, you can divide the room into zones not only by the intensity of lighting, but also by the color scheme.
Spotlights are installed in suspended ceiling systems made not only of plasterboard, but also in mineral fiber slabs, for example, structures such as the Armstrong system.
The wiring for spotlights is hidden behind the suspended ceiling structure, so it does not have to do the laborious work of installing a strobe to drown the cable in them. In addition, the technical part of the device will also be hidden in the interceiling space or in the ceiling, and only the decorative part of the lamp will remain visible, so they will look aesthetically pleasing and neat.
In order to choose one of the types of spot lighting devices for different residential premises, to correctly draw up a project for their installation, it is necessary to understand their characteristics and classification.
Point devices are divided according to several criteria - these are the types of lamps, supply voltage, design, installation method and purpose for a particular room.
It is important to know these differences, since some of them will help save energy, others will help to comply with certain safety requirements when operating appliances, and still others will help harmonize the design of the room.
Luminaire design
If the design of spotlights is considered from different points of view, then they can be divided:
- for built-in and overhead;
- on rotary (cardan) and non-rotary;
- for single and cardan (block);
In addition, there is a division according to the type of lighting elements (lamps) used, by voltage, as well as by the level of moisture and dust protection.
- Embedded and overhead models
The design of such lighting devices, first of all, differs in the way they are installed. They are divided according to this criterion into overhead and built-in.
- Embedded options are distinguished by the fact that their entire technical part is located in the inter-ceiling space, and the decorative frame and the entrance to the cartridge for screwing in or installing a light bulb are on the outside of the suspension system.
- Overhead lights are fixed directly to the plasterboard surface, and their installation is significantly different from the built-in version. The installation of such models sometimes has more similarities with the installation of a conventional chandelier, since the lamp holder is located in the ceiling, fixed on the outside of the false ceiling structure.
A fixed lamp is “tied” to its lighting area
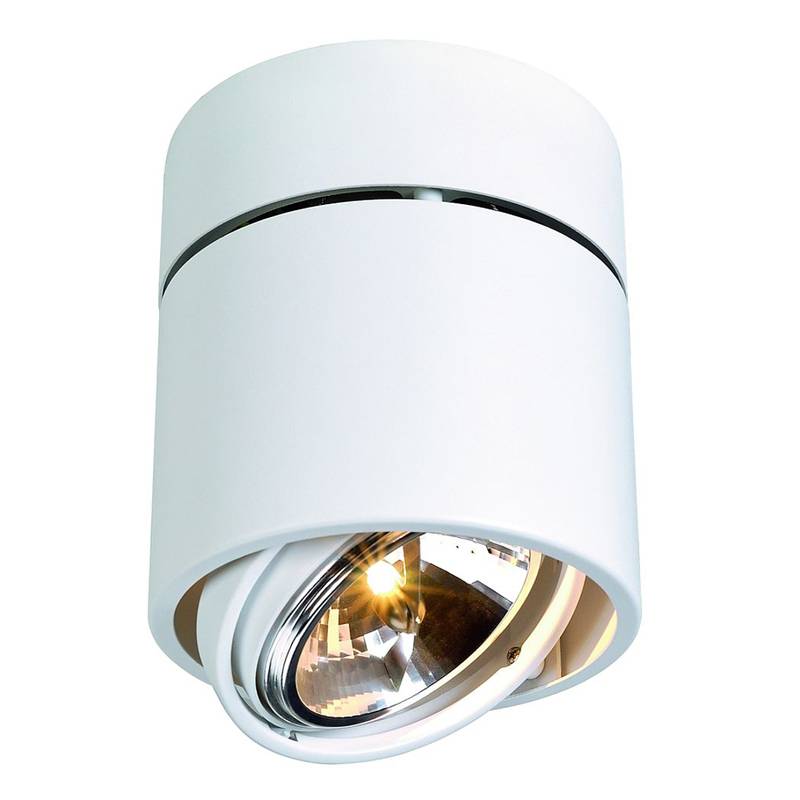
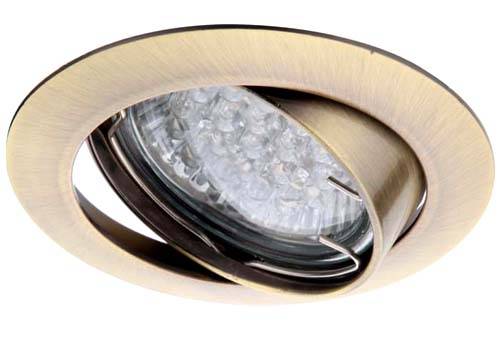
- Rotary (they are also called cardan) models are distinguished by the fact that the cartridge in their design is built into a special additional articulated device, for example, two rings on the axle shafts. It can be rotated and installed at different angles with a lamp screwed into it. It is these models that allow you to direct the light in the right direction to illuminate a separate area of \u200b\u200bthe room.
Rotary blocks can be equipped with both built-in and overhead types of spotlights.
The same type includes lamps fixed on a rod, the so-called spots. The lamp holder is located in a special housing, which has a hinged swivel mechanism. The case is mounted on a leg, with which it is fixed on a bar or decorative panel.
- Single and block lamps
Spotlights can be single or assembled in blocks of several units.
- Single lamps are equipped with one cartridge, respectively, have one lighting lamp.
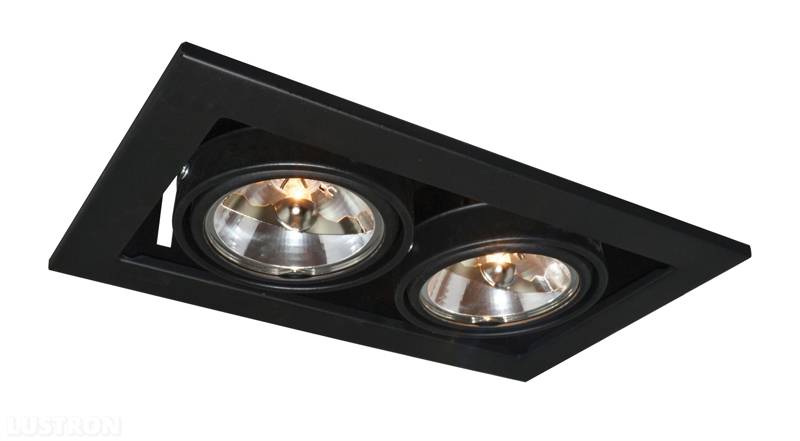
- Block lighting are a design consisting of several lamps that are built into one housing, which is either a box of any shape, or a special rod.
Depending on the design of block lamps, they can also be rotary and non-rotary, built-in or overhead.
Any design of such models is more massive, but it is also much more convenient to use, since by installing one unit with several rotary lamps, their light can be directed to different areas of the room.
Types of luminaires by lighting elements
In spotlights, they can be designed for the use of various lighting elements - this must be indicated in the instructions for the lighting fixture. So, in such lamps can be installed:
- incandescent lamps
— LED bulbs;
- halogen lamps;
- mercury (fluorescent) energy-saving lamps.
Lighting devices equipped with certain elements consume different amounts of electricity and can vary significantly in price.
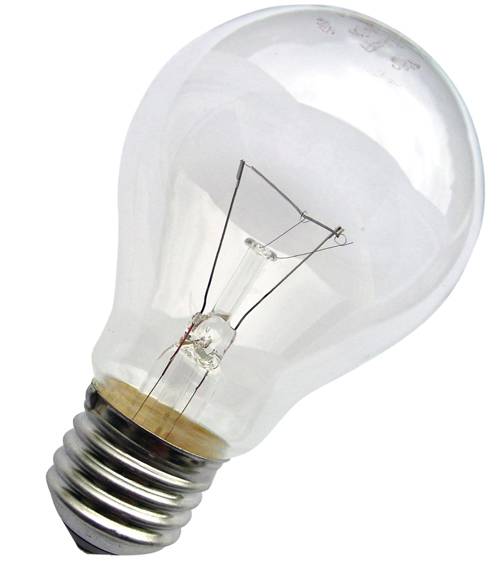
- Conventional incandescent lamps are now quite rarely used in spotlights, as they are uneconomical in operation.
Luminaires equipped with incandescent lamps are considered "classic" devices, since they do not require special equipment - it will be enough to stretch high-quality wiring.
In addition to the wastefulness of incandescent lamps themselves, lamps designed to work with them have several more significant drawbacks:
Firstly, this is their height, which varies from 86 to 110 mm. This parameter must be taken into account, since the ceiling will become much lower, because the suspended structure will have to be lowered to the height of the cartridge, adding about 15 ÷ 20 mm of margin.
Secondly, a pronounced "minus" of such a lamp can be called its strong heating, especially if a lamp is installed in the cartridge high power. Plastic elements lighting device may not withstand high temperatures and begin to gradually melt under their influence.
The only advantage of incandescent lamps is their affordable price, however, it must be taken into account that their service life is usually not very long.
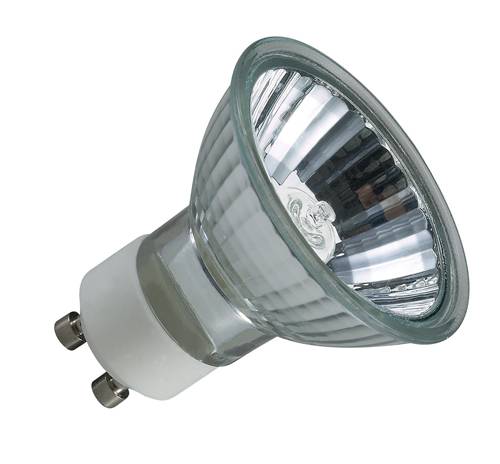
- Halogen lamps are used to obtain a powerful luminous flux, scattered by a special glass shade. However, when installing such lamps in lighting fixtures, it should be borne in mind that they do not contribute to energy saving in any way. Their prices are slightly lower than led light bulbs but they also last a shorter time.
Most often, halogen lamps have a plug base, so if you plan to use them, then you need to choose lamps with the appropriate connector in the cartridge.
The height of halogen lamps is comfortable enough to be built into a plasterboard structure, which will need to be lowered from the ceiling surface by only 50÷70 mm. Since some halogen lamps operate on a voltage of 12 V, you will have to purchase a transformer for the entire installed system. In addition, for any "halogens" a very important condition for their long-term operation is a soft starter - the lamp does not reach full power immediately, but within a few seconds. Often this device is combined with a step-down transformer.
Halogen lamps create a powerful luminous flux that exceeds the illumination from conventional or LED lamps. Lamps of this type allow you to use a special dimmer to adjust the intensity of lighting. The luminous flux from fluorescent lamps has its own shades - warm and cold.
Given all the positive qualities of this type of lamp, they can be called the most popular among all existing lighting elements used in spotlights.
- energy saving mercury lamps, which are most often called luminescent, save electricity quite effectively, but they have several significant drawbacks.
- First of all, it is that they adversely affect vision, can cause rapid eye fatigue.
- Such lamps require special disposal, as they contain harmful human body substances, in particular the highly toxic mercury
- Another disadvantage of this type of lamps is their height, which is almost the same as that of conventional standard incandescent lamps.
The intensity of illumination from these devices will be higher if they are installed in overhead fixtures. Well, if they are screwed into built-in models that are deepened into a plasterboard structure, then there is a significant weakening of the luminous flux, even despite the reflective surface of the ceiling.
In a word, for spotlights they can hardly be called a good option.
- LED lamps are quite expensive, but they justify themselves by the fact that during their operation a minimum of electricity is used, and this helps to significantly save on its payment. In addition, quality LED fixtures last much longer than any other lighting elements.
The most economical option is LED bulbs.
LEDs can have different luminous flux, as well as cold or warm light. Lamps having a cool shade are usually used for installation in office space because they improve performance. Elements that give warm lighting contribute to rest and relaxation, creating coziness, so they are recommended to be used in living rooms.
If it is decided to install spotlights with LED lamps, then you can use a special device that regulates the brightness of the lighting - a dimmer. It will allow you to create the right atmosphere in the room with the help of light intensity, scattering or "compacting" it.
Some types of these lamps are equipped with a special shade that can create various shadow or color patterns on the ceiling. This effect can be used to decorate a certain interior style.
Often, LED lamps are given a "classic" look.
LED lamps are made with different pinouts - for a conventional threaded cartridge (with Edison thread 14 or 27 mm) and with a plug connection characteristic of "halogen lamps". In addition, spotlights can also have specific sockets for GX70 and GX53 LED lamp bases. A sample is shown in the figure below.
Special base types - GX70 and GX53
Based on the foregoing, it can be argued that LED lamps are the best option for installation in spotlights today. The price is still high, however, they are safe, durable and economical, and quickly justify their purchase.
Differences in spotlights by voltage
As a rule, there are two main types of spotlights:
- devices designed for 220 V networks alternating current;
- lamps designed for 12 V;
You can find models with LED lamps that require 3 V DC.
This parameter is indicated on the packaging of both the lighting device itself and the lamps intended for it.
The voltage supplied to the lamp will directly depend on its type, so you need to decide in advance on the lighting elements, since connecting and drawing up a diagram of point devices has its own characteristics.
If you need to lower the voltage, you will need to use a transformer. Exploitation of certain varieties LED lamps will require the installation of an additional device - the so-called driver.
If it is decided to change the types of lamps installed in the lamps to others having a different design, principle of operation and supply voltage, then most likely it will be necessary to make changes to the wiring diagram.
Luminaire protection level
Spotlights can be open and closed - the place of their installation depends on this parameter.
The open design of the fixtures is suitable only for rooms with normal humidity, but they cannot be installed in bathrooms, and even more so in bath rooms. In such devices, the lamp is not covered by a ceiling, so moisture can significantly reduce the life of the prior or even cause a serious accident. Most of the lamps with rotary mechanisms can also be attributed to open - they also try not to use them in rooms with high humidity.
For bathrooms, swimming pools and bath rooms, it is necessary to purchase special moisture-proof lamps.
In order for lighting fixtures to serve for a long time and do not pose any danger, they must be protected not only from moisture, but also from dust. Usually, the degree of protection is indicated on the prior itself and, of course, in its technical documentation. This is the IP index followed by two digits.
The first indicator will tell you about the degree of protection against penetration. solids dust:
- 0× is a complete lack of protection;
- 1× - the device is protected from fragments up to 50 mm in size;
- 2× - indicates protection from 12 mm particles;
- 3× - from particles up to 2.5 mm in size;
— 4× — maximum size- 1.0 mm;
— 5× – partial penetration of fine dust is possible
- 6× - the device has a guaranteed protection against dust.
The second digit of the indicator will characterize the electrical appliance in terms of its protection from moisture:
- ×0 - moisture protection is completely absent;
— ×1 – the luminaire is protected from vertical ingress of water drops;
- ×2 - protection against drops falling at a small angle;
- ×3 - protection against splashes falling on the lamp at a large angle;
- ×4 - the lamp is protected from splashes falling on it at any angle;
- ×5 - there is protection against water jets;
- ×6 - the lamp is not afraid of direct exposure to a strong flow of water;
- ×7 - the device can be briefly immersed in water;
— ×8 – the luminaire can be under water for a long time, for example, when it is installed in swimming pools.
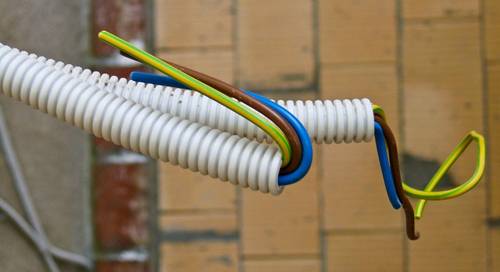
- Insulating corrugated pipe, in which the cable will be protected from various influences. The length also varies depending on the length of the wiring.
- Terminals for connecting wires when connecting fixtures. These can be screw terminals, spring terminals, or. And the most the best option- Vago reusable clamping terminals. Although they are more expensive, but not so much as to save on the convenience of work and on the security of connections.
- Voltage transformer. It will be required if 12 V halogen lamps are selected for installation. This device must comply with required power. Usually it is chosen with the expectation that its output power exceeds the total power of the installed lamps by at least 20 ÷ 25%.
- A current driver will be required when installing some low voltage LED fixtures. This device simultaneously plays the role of both a step-down transformer-rectifier and a current and voltage stabilizer - many LEDs are very sensitive to changes in circuit parameters.
In case of choice serial connection fixtures, the driver must have a current margin for the normal functioning of the entire circuit.
However, it should be noted that the serial connection has one important drawback - if one of the lamps fails, the entire circuit stops working. Therefore, it is recommended to carry out parallel installation, but in this case you will have to purchase a separate driver for each lamp. Some models of luminaires are equipped by manufacturers with their own drivers, in which case they can be connected in parallel without any problems. In any case, when purchasing, you should always carefully read the technical documentation of the devices.
- The spotlights themselves. Their number is determined depending on the drawn up scheme and the size of the area of the room. Usually they are mounted at a distance of 500 ÷ 1200 mm from each other.
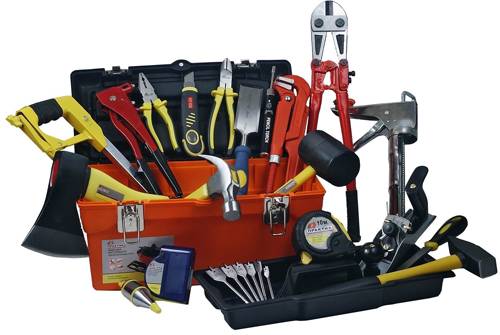
Tools for installing spotlights
For convenient and high-quality installation of fixtures, you will need the following tools:
- Electric drill or screwdriver for cutting holes in drywall.
- A drill bit for cutting holes of 60÷75 mm or an adjustable version of the drill ("ballerina"), on which you can set the desired hole diameter.
- Roulette and a long ruler.
- Indicator for determining the phase of the voltage.
- Screwdriver Set
- Wire cutters, pliers - if you plan to crimp the connecting sleeves.
- Insulating tape or heat shrink tubing of the correct diameter
- A sharp knife or wire stripper for stripping wires before splicing them, or a protective device.
Installation of spotlights on a plasterboard ceiling
In order not to be mistaken in the amount of material purchased, to determine in advance the location of the fixtures, and also to plan the cable layout for them, you need to draw up your own or find a ready-made scheme.
- The first thing they do before starting the marking and installation of cabling is to mount a frame made of a metal profile or a wooden beam for a plasterboard ceiling.
Here you need to take into account which lamps will be installed - overhead or built-in, since their installation is somewhat different from each other.
For example, for overhead lighting fixtures, it is necessary to fix a rigid base to the ceiling or to the frame, on which the panel of the overhead model will be installed and screwed through the plasterboard.
- The frame crate can be used to attach cable wiring to it, which is best to immediately “put on” in a corrugated plastic pipe.
- The tube is fixed on the crate on special brackets or screwed onto plastic clamps in several places, and the cable segments or loops 200 ÷ 300 mm long, to which the lamps will be connected in the places determined for their installation, are left in a free state.
- For ease of installation of lighting fixtures and for aesthetic reasons, they are placed at the same distance from each other - usually it is 500 ÷ 1200 mm. Later, the cable loops will be passed through the holes cut for them in the drywall and passed to the outside of the ceiling.
- Further, along the crate, drywall sheets are fixed, on which, using a tape measure and a ruler, focusing on the sheet connection line, the places where the lamps will be installed are marked. At the same time, it is very important to prevent a very common mistake by novice electricians when the intended hole suddenly falls on the frame guide.
- You also need to take into account that between the center of the future circle for installing the lamp and the wall there should be a distance equal to no more than 550 ÷ 600 mm
- If the circuit provides for the installation of a transformer, it is installed above the false ceiling, in the interceiling space, fixed on the crate elements or even simply laid on top of the sheet surface.
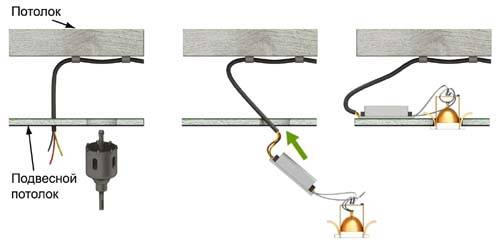
1 - overlap;
2 - plasterboard false ceiling;
3 - power cable supplied to the lamp;
4 - clips (clamps) holding the cable on the floor;
5 - transformer or driver.
- All wire connections that remain above the ceiling surface must be insulated with high quality. The best option- the use of modern Vago terminals. If twisting is planned, then it is pressed into a copper sleeve, and then it is qualitatively insulated with a heat shrink tube or insulating tape. Bare contacts or connections must not be left.
- It is very important to remember that no matter how the wiring diagram is drawn up, it is not recommended to run the cable diagonally, since if a malfunction occurs, it will be much more difficult to detect it.
- If selected complex scheme wiring, then a junction box is used for it, into which the main supply cable is connected, and the rest of the branches are made from it.
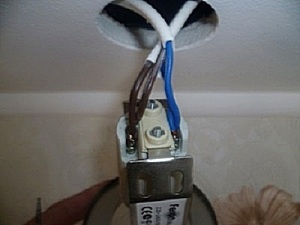
Illustration Brief description of the operation to be performed In the marked places, using a drill-crown for wood or a “ballerina”, as in the illustration, nests are drilled with a diameter several (2÷3) millimeters larger than the installation size of the lamp, but necessarily less than the outer diameter of the decorative flange that will close the hole.
Work should be carried out with great care, carefully, slowly, so as not to damage the cable and not crumble the drywall sheet.It is very important to observe the correct connection of the wires, otherwise, when connected to the power supply, the lamps may burn out, especially when they are switched in series.
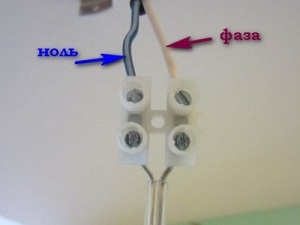
This is easy to observe, based on the color marking of the conductors.
The blue color is always the “working zero”, yellow, green or yellow-green is the “ground zero”, and the color of the “phase” can be different. White, brown or red phase wires are more common, but this is not a dogma.
If the luminaire itself also has a color code for the wires, this should also be observed.
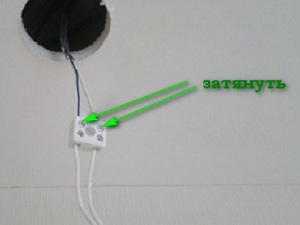
In the circuit breaker, only the phase wire should open.After the cable ends are cleaned, they are inserted from one side of the terminal and clamped with a screwdriver.
If spring terminals are used (only for single-core wires or when a special tip is installed on the "multi-core"), then the wire is inserted until a secure clamp is provided.Even more convenient - Vago reusable crimp terminals with a locking lever.
They are versatile and reusable.
The wires are inserted with the stripped section into the hole until the insulation, and then the lever snaps down all the way.Similarly, wires coming from the lamp are connected to the terminals.
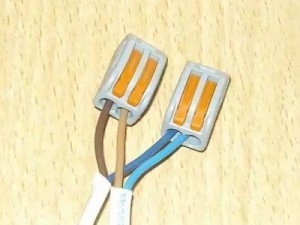
Often there are devices that are not equipped with wires. In this case, the power wires coming out of the above-ceiling space can be attached directly to the lampholder terminals, as shown in the figure.
However, it is more convenient, nevertheless, probably, at first to connect the wire segments to the lamp, and then - just as described above, through the terminal - if necessary, dismantling will simplify the work.
But twists, even with reliable insulation, should be avoided - in the space above the false ceiling it is difficult to control their "behavior" - and sparking, heating, etc. are not excluded.Included with other models (usually those that are also suitable for stretch ceiling) includes a special ring that frames the cut hole.
This is a fairly sensible solution - drywall along the cut edge will not crumble when installing or removing fixtures, and the device itself will be securely tightly installed in the socket.
During installation, the "antennae" located behind the facing decorative flange of the luminaire are compressed, the luminaire is carefully inserted into the prepared hole.
After installing the stopper, they open themselves and securely hold the lamp on the surface of the plasterboard ceiling.As a result, the lamp should neatly, tightly, without the slightest sag, stand in the place prepared for it. Installation of an overhead spotlight, after fixing the drywall on the crate, takes place in a similar way, but with some features.
- When installing an overhead luminaire, the hole in the plasterboard false ceiling should not be made large, since the technical part of the luminaire will not be inserted into it. It will serve only to pull the cable loop to the ceiling surface for connection. A hole is also made in a certain place, where a rigid base (a platform or a piece of timber) is installed on top of the suspended ceiling to fix the fixtures.
- Further, the elongated cable is cut, its ends are stripped, and then, switched in the terminal.
- The contact wires of the lamp with stripped ends are also connected in the terminal, according to the wiring diagram, observing the color marking of the wire (phase-zero).
- On each overhead luminaire, the manufacturer provides a special bracket (mounting plate) (pos. 2), which must be fixed from the outside of the false ceiling to a rigid base. It should be noted that in different models of devices, such brackets may have different designs - but it is usually not difficult to deal with this.
- Excess cable (pos. 4) is tucked into the hole so that it does not interfere with the fixing of the bracket.
- Then, the bracket is screwed through the false ceiling to the rigid base.
- Further, the lamp itself is installed and fixed in it. Depending on the model, it can be screwed on both sides to the housing (pos. 1) with a plafond (pos. 3), open or with rubber seals, or even the plafond itself can be screwed into a mounting bracket.
Upon completion of the installation work on cabling and installation of fixtures, the wires are connected to the switch (phase with phase, and zero with zero). this work must be carried out according to the drawn up scheme. And it remains to turn on the power supply to the room in order to check the operation of the installed lighting.
The article should end with an important note: if there is no practical experience in installing electrical appliances with complex wiring, then it is better to entrust this process to a specialist. Amateurs do not like high voltage!
Video: an example of the practical installation of spotlights on a plasterboard ceiling
Instruction
Measure the area of the room in which you want to install the fixtures.
The number of fixtures per 1 sq. m. of area depends, first of all, on the power of the lamps. If the lamps in the fixtures have a power of about 35 W, you need to install one lamp per 1.5 square meters. m. There is a rule according to which lamps are distributed: every 1 sq. m. area should be illuminated by 20 watts.
If spotlights are installed as an addition to the main lighting, for example, a chandelier, then their number can be reduced or placed in a specific area for illumination.
The minimum distance between spotlights should be about 30 cm. And from the corner of the wall to the lamp - about 20 cm.
note
In stores you can find many types of spotlights. They differ in the direction of the flow of light and the type of scattering. There are spotlights equipped with a swivel mechanism, thanks to which you can easily adjust the direction of light. You can also find fixtures with a lamp located outside. As a rule, they have an external ceiling, which allows you to increase the angle of dispersion of the light flux. Such lamps will be required less, as they are able to illuminate a larger area of \u200b\u200bthe room.
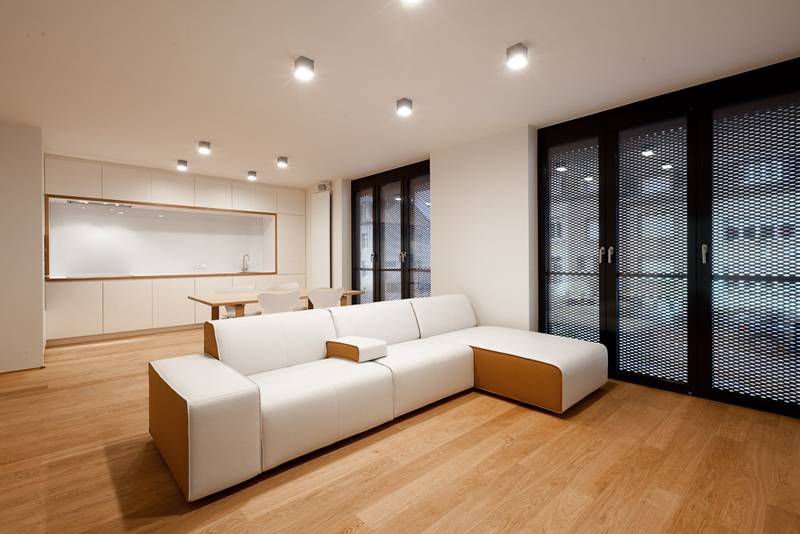
Arrange the lights using different options. The most popular way is the arrangement in two or more rows around the perimeter of the ceiling. You can arrange the lamps in the form of a circle.
When illuminating a square room, use the advice of designers and place spotlights at the corners of an isosceles pentagon.
For uniform illumination of the room, use a checkerboard arrangement.
Sources:
- How to calculate fixtures.
- how to place spotlights
Nothing is eternal. So light bulbs have their own lifespan, and then burn out. And if the owner, and more often the hostess, is well aware of how to change light bulb in an ordinary ceiling chandelier, then if it is necessary to replace the light bulb in a spot lamp often there is some confusion: suddenly it needs to be done somehow differently.
You will need
- A light bulb of the same shape and the same size base as the one that burned out.
Instruction
Turn off the electricity in the room where there is a spotlight with a light bulb that needs to be replaced - this is an indispensable condition, by doing which you will protect yourself from possible damage electric shock. Switching off can be done by turning off the toggle switch of the circuit breaker located in the electrical panel. If you don’t know exactly which of these toggle switches is responsible for turning off the electricity exactly in the room you need, then you can determine this empirically, turning them on and off one by one - so, by the light that went out and turned on in a particular room, you will determine the toggle switch you need .
Unscrew the burnt light bulb from a spotlight, moving counterclockwise. Try to do this carefully, without damaging the light bulb itself. Otherwise, you can get hurt on its surface.
Keep the whole light bulb, which you are going to screw in to replace the burned out one. If you did not know in advance what parameters of the new light bulb you need, then after unscrewing the burnt out light bulb, you should take it with you as an example when buying a new light bulb in the store.
Screw in a new whole light bulb into a spotlight, moving in a clockwise direction. Do it carefully without twisting. light bulb too tight at the base.
Turn on the electricity that you previously turned off in the room in which you should have replaced light bulb by replacing the toggle switch of the circuit breaker. Close the electrical box.
Try to see if you have replaced the light bulb in the spotlight correctly. lamp by moving the switch lever to the "on" position. When turned on, you should not be directly under a spotlight, since in the event of a possible manufacturing defect (such a possibility cannot be completely ruled out) of the bulb you screwed in, it may shatter into fragments and injure you.
note
Wait for the bulb to cool completely before replacing it.
Helpful advice
If you do not decide on such actions on your own, then it is better to invite a professional - an electrician, who, by virtue of his profession, knows how to replace light bulbs.
Before connecting fixtures, cut off access to electricity by turning off the circuit breaker.
The dimensions of a luminaire are largely determined by the type of lamps they use. In the case of conventional incandescent lamps, the size of the lamp will be about 10 cm, and when using halogen lamps, the dimensions will be half or three times smaller. Please note that more compact lamps will cost more.
A spotlight with a conventional incandescent lamp may have an open or closed casing. The casing protects the product from dust and condensation, so it can be used in the bathroom. When choosing a spotlight for a bathroom, you should know that there are lamps with varying degrees of moisture protection.
Lamps with halogen lamps usually have a reflector that performs the function of increasing brightness. The scattering angle of the reflector is in the range from 8 to 60 degrees.
If you choose to use point lamps with halogen lamps rated for 12V, you will need to install transformers. This is justified, since the service life of such lamps is much longer and they will have to be changed less often.
When choosing a spotlight, also pay attention to its versatility, practicality, workmanship and the absence of visible defects.
Related videos
note
Spotlights have become widespread: they can be found in the kitchen or in the office, or in more original rooms, for example, at exhibitions, museums and art galleries. In trade, spotlights play a key role: the more interesting the shelves, showcases and stands are illuminated, the more they will draw attention to the product itself, which looks irresistible in such a light.
Helpful advice
In the interior, spotlights in combination with a central lamp or chandelier are used more and more often. You can easily use them to create any light and color effects and focus on individual elements of the room. How to choose a spotlight? To begin with, it is worth noting that these fixtures are built into suspended ceilings - modular, slatted and plasterboard ceilings. They can also be used in suspended ceilings.
Sources:
- How to choose spotlights
To carry out lighting in the house is still half the battle, you need to be able to deal with new technology. For example, it is important to change lighting lamps correctly and in a timely manner, and if the usual lamps do not, as a rule, cause difficulties, then you have to “tinker” with point
You will need
- Insulation tape, insulation stripping pliers, tester, drill with a long drill bit for concrete, crimping pliers or regular pliers
Instruction
First, de-energize the line to which the luminaire is connected and, for greater reliability, check the line with a special tester. After that, disassemble the junction box and disconnect the wires. The old lamp can be removed.
At the time of installation, the new lamp must be assembled without bulbs. If necessary, prepare the wires of the electrical wiring and the lamp for connection. Then open the junction box and connect the wires together so that they match each other in color. After connection, crimp the wires with special tongs, and close the connected wires with protective caps.
Lay the wires neatly in the box and install the lid on it. The design is assembled, you can proceed with the installation of light bulbs. When doing this, remember that it is forbidden to install lamps in lamps, the power of which is greater than indicated on the flask.
When replacing a burned-out light bulb, screw in exactly the same or with less power in its place. The process of replacing the lamp is completed by connecting the voltage.
When installing stretch ceilings in an apartment, changing spotlights will have its own characteristics. On the eve of the installation of stretch ceilings, in the places where the fixtures are attached to the main ceiling, fix special suspensions so that the bottom of the suspension is flush with the stretch ceiling. Install a new lamp only after the canvas is stretched.
Related videos
Sources:
- replacement of spotlights
Spot popularity lamps knows no boundaries. They are used almost everywhere: in the kitchen, in the bathroom, in the office, at exhibitions and even in art galleries. Fixing spotlights is easy. This stage of work is started after the plasterboard ceiling is made and the wiring is carried out.

You will need
- - ruler;
- - pencil;
- - electric drill;
- - crowns;
- - screwdriver;
- - knife;
- - side cutters;
- - lamp.
Instruction
Before proceeding with the installation of a spotlight on a suspended plasterboard ceiling, you need to make an appropriate hole for it. In order not to break the symmetry and organize the correct lighting, it is recommended to make markings. It will allow you to determine the required number of spotlights and their location.
Armed with a building rule or a long spirit level, get down to business: draw diagonal lines with a pencil, find the center of the ceiling and mark the future location of the spotlights.
Fix a metal “crown” in the electric drill on drywall or wood, then drill required amount holes (they are already marked on the ceiling). The diameter of the metal "crown" must correspond to the diameter of the inner part of the spotlight, due to which the outer part of the luminaire will completely cover the drilled hole.
Proceed to connect the fixtures. First of all, strip the ends of the wires using side cutters or a sharp knife. After that, twist the stranded wire: this will give it rigidity.
Then, using a screwdriver, unscrew the clamping screws of the terminals. Next, connect the wires to the terminals and tighten the screws firmly for a secure connection.
Firmly press the spring fasteners of the lamp to its body. Without releasing the mount, carefully insert the "point" into the ceiling hole until it stops: the springs will open and the lamp will be securely fixed. If necessary, touch the front of the lamp with your hand.
note
Disconnect the power supply before starting work!
Helpful advice
Sources:
- How to install a recessed spotlight in 2017
Stretch ceilings are popular among those who prefer stylish design solutions. The design of such a ceiling involves the installation of special fixtures. A properly selected lighting system for tension flow will create comfortable conditions and will allow the maximum use of the advantages of the tensile structure.
![]()
How to choose fixtures for a tensile structure
Stretch ceilings are convenient in the sense that they make it possible to mount lighting fixtures of various designs in them. These can be traditional chandeliers, LED or spot designs. When choosing a particular type of luminaire, one should focus not only on the design of the luminaires and their attractive appearance, but also on functional characteristics, cost-effectiveness, as well as ease of installation.
Before buying a specific type of fixtures, choose the design of the lighting design of the room. On the floor plan, draw up a layout of fixtures, determine where the wires and fittings will pass.
After drawing up a detailed plan, you can calculate the number of lighting fixtures, select their type and power consumption.
When choosing fixtures for stretch ceilings, pay attention to their durability. Keep in mind that tension structures are designed for a long service life. With proper and careful handling, such ceilings can last more than a dozen years. Therefore, it is desirable that ceiling lamps were also designed for a long service life.
Give preference to well-known manufacturing companies that specialize specifically in the production of lighting fixtures. Best Features in terms of price-quality ratio, light bulbs from European manufacturers are considered. Widespread Chinese-made lighting fixtures are cheaper, but not as reliable and less durable. Don't try to save on lighting.
Choosing a chandelier for stretch ceilings
Pay attention not only to the design of the lamp you like, but also to the way it is attached. When choosing a chandelier, keep in mind that it can have one of two mounting options: on a bar or on a hook. The plank chandelier is mounted on a special overhead bracket attached to the ceiling. Chandeliers of the second type cling to a hook embedded in the surface.
It is considered more practical to mount on a bar. If you have chosen this type of luminaire for a stretch ceiling, pay attention to whether there are light-reflecting elements between the body and the lamp.
Without a reflector, the lamp can become very hot. The consequence of such overheating will be deformation and melting of the tension web.
But when installing a hook-type chandelier, problems with the deformation of the tension structure usually do not arise. The main thing is that the chandelier is equipped with shades, which should not be directed upwards, but to the sides or down. Otherwise, over time, dark spots may form on the canvas. If you really liked a chandelier with shades pointing upwards, use only fluorescent or halogen bulbs with a special coating for lighting. The distance from the lamp to the ceiling surface should not be less than 10 cm.
Spotlights for stretch ceilings
Spotlights fit very well into the design of a room equipped with a stretch ceiling. When choosing such lighting fixtures, pay attention to the method of their manufacture. For a tension structure, only those devices that are produced by stamping are suitable.
The fact is that when installing a spotlight, a slot is made in the canvas, where an insulating ring is then inserted. Such a ring is subsequently covered by the side of the lamp. If the lamp is not stamped, but cast, it will not work to attach it to the tension structure, since it does not have a side.
Of all the fixtures that are made by stamping, those that are of the rotary type are best combined with stretch ceilings. This design is less susceptible to heat from the light bulb.
Both traditional incandescent lamps and other types of light bulbs, for example, energy-saving or halogen, can be installed in a stamped-type spotlight. Keep in mind that the power of incandescent lamps should not exceed 60 W, and halogen and energy-saving lamps - 35 W.
When choosing the power of lamps for lighting fixtures, always remember that the more powerful the light source, the more it heats up all structural elements that are associated with the lamp. If the fabric of the stretch ceiling is exposed to high temperatures for a long time, the material will begin to turn yellow, and eventually lose its elasticity and crack.
And one more important remark. When looking at spotlights, also specify what is the method and size of their attachment. It is important that the size of the spotlight mount exactly matches the internal diameter of the platform. If the size is larger, the lamp will not hold securely. If the mounting size is smaller, the device will not fit into the mounting hole.
Tip 9: We select spotlights for suspended ceilings
Properly selected lighting in the house completes the interior decoration and allows you to favorably emphasize its individual elements. For a traditional ceiling, both luxurious chandeliers and other lamps of the most intricate shape can be suitable. If you are planning to make a suspended ceiling, one of the most good decisions may be the use of original spotlights.
Features of spotlights
Spotlights of the most diverse design in Lately are in high demand in the world of interior design. They owe this not to last turn its functionality. Properly selected and correctly located spotlights make it possible to control the luminous flux, distributing the lighting as you need at the moment.
During installation, they try to group such lighting fixtures, connecting them into complexes that can be controlled from different points in the room using special switches.
Spotlights are successfully used in rooms for various purposes.
If desired, you can pick up spotlights with a reflector or with halogen lamps. Mirror lamps are often used in suspended ceilings, which make it possible to create quite intense lighting without local overheating. Halogen lamps used in spot designs have a very small diameter. This feature allows you to lower suspended ceilings a very short distance - only 5-6 cm.
An additional advantage of lamps with halogen lamps is a longer service life when compared to traditional incandescent lamps.
Spotlights in the interior
Modern technologies make it possible to design and manufacture spot-type ceiling lamps from practical materials. At the same time, the size and shape of lighting fixtures can be very different. It is difficult to list all the options for design and engineering solutions.
In the manufacture of lamps, plastic, wood, metal, fabric, wicker and even durable types of rice paper are used. You may well choose the product that is most suitable for your interior and will be in harmony with other details of the situation.
The design of the fixtures is, without a doubt, important. But we should not forget about their functionality. The purpose of lighting devices is to create an effective luminous flux in the right place in the room. Going well with suspended ceilings, spotlights make it possible to emphasize the dignity of the room, highlight a certain area and at the same time hide possible flaws, without which even the most sophisticated design cannot do.
When planning the placement of spotlights on a false ceiling, remember that any lighting should not be too bright. It is best if you have the opportunity to regulate the luminous flux not only by turning individual lamps, but also by turning them on in groups. For example, you can turn on all the fixtures, illuminating the room as much as possible, or leave only the corner lights on, which will give a soft and subdued light.
Spotlights are also called recessed. This is due to the fact that during installation they are usually embedded in a certain base, for example, in a plastic panel or drywall sheet. Suspended ceiling structures, during the installation of which voids are formed, are the best suited for spotlights.
When choosing a specific lamp, be sure to consider how its design corresponds to the size of the voids. For incandescent lamps, this dimension should be slightly larger than for halogen lamps.
When choosing a spot type luminaire, inspect its housing. It can be made from the most different materials, of which glass, metal or plastic are considered the best. These materials have good moisture resistance. For this reason, lamps in such housings are best used in the kitchen, bathroom and other areas with high humidity.
When buying, pay attention to the quality of products, which is determined by the country of origin. Most often, the consumer has to deal with Chinese-made lamps. At a relatively low price, they are of average quality. If a spotlight has an indication that it is made in Europe, this indicates higher manufacturing standards. Often there are spotlights of Polish, Ukrainian and Russian production.
Specify how the spotlights you like are mounted. The mounting method does not always correspond to the design of the suspended ceiling. Evaluate the reliability of the fasteners. In some cases, problems may arise during installation and it is necessary to think over additional ways of attaching the fixtures to the base.
If you buy several lamps at once, make sure that their color is the same. It happens that the products are slightly different in color, even if they are taken from the same batch. Such a difference will be evident after installation, especially if the fixtures are planned to be placed at a small distance from each other.
Tip 10: How to install lights in stretch ceilings
Currently, the installation of fixtures in stretch ceilings is an integral part of the design of the room and its original lighting. Every man can mount a chandelier or embed LED lights in a ceiling structure if he follows the instructions exactly.
Instruction
Are you wondering how to install fixtures in stretch ceilings, and what is better to use - a traditional chandelier or economical LED bulbs? It is better to choose recessed fixtures and mount them immediately after the stretch ceiling begins to cool after installation. Firstly, prepare in advance a special round profile applied to the ceiling structure in the place where the stand intended for the lamp was previously located. Remember that it is recommended to glue the profile well directly under the rack itself.
Secondly, cut out a part of the canvas glued to the rack along with the profile along the intended contour. inner surface. Make a hole in the stretch ceiling through which you can take out the wiring for your future lamp, and then surround the recess itself with an attractive decorative profile. Before installing lights in a stretch ceiling, first buy halogen or fancy fluorescent lamps or classic tungsten filament light bulbs. Moreover, if you want to mount them in the traditional way, without adding a thermal insulating ring to the ceiling structure, then you can also use classic incandescent lamps with a power of no more than 20W.
Modern installation of fixtures in stretch ceilings will allow you to transform the room, but do not forget about the recommended power of the lighting fixtures used. It is better not to use powerful halogen bulbs, as they can overheat the PVC film from which your stretch ceiling is made. To create bright illumination from many small bulbs, be sure to use special thermal insulation for each of them. Otherwise, the canvas of your stretch ceiling will sag or overheat.
You can purchase steel fixtures cut into the ceiling. With their help, you will achieve original spot lighting of any objects in your room, as well as highlight individual sections of the living space with a beautiful light flux. Among recessed fixtures, it is recommended to consider cardan bulbs with the ability to conveniently adjust the desired position of the reflector, then light streams It will be very easy to direct absolutely anywhere in the illuminated room. Having learned the subtleties regarding the choice of fixtures, it will be easier for you to perform an independent installation of lighting fixtures.
Related videos
Tip 11: Spotlights with a halogen lamp: pros and cons
Spotlights in the interior are very popular among designers. Manufacturers have supplied this interesting device with halogen lamps, which makes them even more attractive. But, like everything else, spotlights with a halogen lamp have their advantages and disadvantages.

Advantages of spotlights with a halogen lamp
Spotlights are used not only as an additional source of lighting. Sometimes spotlights with a halogen lamp are the main light in the interior. And this is not surprising - they have a lot of advantages.
First, I would like to highlight the efficiency of spotlights. For the working process of such a lamp is not required a large number of electricity. This is precisely the benefit of purchasing spotlights with halogen lamps.
Secondly, do not disregard the ergonomics of spotlights. This is manifested in the small dimensions of the device, thanks to which you can install spotlights anywhere in the room.
Thirdly, with the help of spotlights with halogen lamps, the most interesting and unusual ideas of interior designers come to life. Many original compositions, such as the starry sky, are created using these devices. Place lamps not only on the ceiling. They can be found both on the floor and on the wall. Now very often there is additional lighting of cabinets and paintings with the help of spotlights.
Fourthly, spotlights please with their affordability in terms of cost.
Cons of spotlights with a halogen lamp
Despite all their advantages, spotlights also have a number of disadvantages. First of all, a special lamp is needed for a halogen lamp, where it will be completely impossible to screw in another type of lamp.
In addition, for spotlights with a halogen lamp, a special power supply is required, which must be built in somewhere. Most often, the power supply is built into the false ceiling.
Spotlights must be handled with great care. In no case should you touch the glass, even if the lamp is turned off. Otherwise, the halogen lamp will burn out immediately. If, nevertheless, for some reason you have to touch the glass, then for this you need to wear gloves or use a napkin. Accidental contact with fingers can be wiped off with a napkin before the lamp is turned on.
The halogen lamp heats up very quickly, reaching high temperatures. It is for this reason that it is necessary to exclude the contact of human parts of the body and any other objects with a halogen lamp.
Related videos
Sources:
- About halogen lamps for stretch ceilings
Stretch ceilings are confidently leading when choosing finishing materials for ceilings in shopping malls and apartments of citizens. They are beautiful, versatile and functional. Almost any type of luminaires can be mounted in a stretch ceiling.

You will need
- - low-power lamps or a light chandelier;
- - wires for wiring;
- - thermal rings;
- - reinforcing rings according to the number of fixtures.
Instruction
Visit the store and consult with an employee of the electrical department. Your task is not just to choose fixtures, but also to choose the right type of wiring and fastening, in addition, important indicator will be the power of the lamps used. So, when working with stretch ceilings, you can not use lamps with a power of more than 40 watts.
Decide on the type of fixture fixtures. The most popular is the hook mount. In finished apartments, such a structure is already mounted in the center of the ceiling, and wiring is also connected to it. However, it is not fashionable today to mount a chandelier on tension structures, most use spotlights, which seem to be scattered over the panel.
On the mounted supporting structure of the ceiling, apply markings corresponding to the location of future fixtures, if necessary, make holes to fix the base of each element. Route the wiring to each of the bases of the fixtures, be careful with the insulation.
Stretch the ceiling. Focusing on the markings made, attach thermal rings to the ceiling film, they will help protect the canvas from tears and arrows. With a sharp construction knife, make an incision that is sufficient for mounting the lamp base. Insert the reinforcing ring from the inside of the ceiling foil. As a rule, such rings have an adhesive surface, so they do not require additional fixation.
Attach the base of each lamp to load-bearing structure ceiling and secure the wires. It is more convenient to mark the wire along the frame and fix it with plastic staples or adhesive tape.
If it is not possible to permanently fix (using holes in the ceiling frame) the luminaires to the ceiling support frame, use a mounting wooden plank.
Install the lamps in the fixed bases. Lamps must strictly match the diameter of the reinforcing ring, which will not allow the formation of holes or gaps around the lamps.
Related videos
Spotlights are great for both office centers and home living rooms. They can be used as an independent decor element and a source of light, or in combination with classic chandeliers, sconces, floor lamps, as a room decoration or an indispensable interior element. They are practical and elegant. But, perhaps, their most important advantage lies in the fact that such lighting fixtures can be used anywhere: on the ceiling, in cabinets, walls or even on the floor.
Shape, color, structure of spotlights
The decorative spotlight has gained its huge and rightfully deserved popularity along with the spread of arched openings and suspended ceilings. Nevertheless, the installation of such a lighting device can be made absolutely in any place of the apartment convenient for you. The most important thing is to decide on the choice of a variety of spotlights.
According to their structure, spotlights are divided into swivel and non-swivel.
From the name it becomes immediately clear that rotary lamps can easily rotate around their axis. This possibility is achieved due to the special structure of the lighting device, namely, with the help of a movable part located in the external fittings. This type of lamp is very convenient, because the beam of light can be directed anywhere with a slight movement of the hand. The nature of the lighting of the room, therefore, may vary depending on the personal desire of the owners of the house and their guests.
Unlike swivel luminaires, non-swivel luminaires do not have a movable mount, so they can only be installed once and for all. However, manufacturers compensate for the lack of such movable fittings with intricate shapes of this type of “points”, which, undoubtedly, additionally decorates your interior. In stores, spotlights can be found in the form of crystals, drops or petals.
Both types of spotlights are made of glass and metal. In more rare cases - from thermoplastic and brass. In both cases, unfortunately, you will not find any special variety of colors. The most commonly used are black or white, bronze, chrome and brass. But exceptions still occur, especially often in overhead fixtures. Recently, their body has increasingly begun to be painted in colors unusual for this type of lighting fixtures. In addition, there are a large number of manufacturing companies that manufacture lamps for individual orders.
In the case of an individual order, both color and shape depend only on the imagination of the customer.
Location options for spotlights
Before you buy spotlights, carefully examine the ceiling of your home. It will depend on its device what kind of backlight, that is, what kind of "points" will illuminate the room. In suspended ceilings, the most common installation of mortise fixtures, as they are well "recessed" into the ceiling canvas and practically do not protrude beyond it. If in one of the rooms you want to imitate the sky on the ceiling, and with the help of “dots” depict the starry sky, also look at the recessed lamps. They will best play the role of stars on such a design decision. The same light bulb can also be used to illuminate drywall openings, illuminate cabinets or niches. Its main advantage lies in the fact that the body of the lamp itself is not noticeable at all. This creates the illusion that the light is coming directly from the wall or ceiling, as if by itself.
If the ceilings in your apartment are not stretched, this does not mean at all that spotlights do not suit you. Pay attention to the so-called overhead lamps. The lamp in them is located below the ceiling level and is separated from it using a special platform. Thanks to this design, the halogen type of lamp can cool faster. In theory, this important point turns the overhead lamp into a safer type of lighting. In all other respects, overhead and recessed lamps in their technical features and characteristics are almost the same.
Colored spotlight will find a good place for location in absolutely any room of your home. They are able to change the space of the room. For example, the room will seem larger, the ceiling will be higher if such a light is installed along its perimeter. "Points" are able to emphasize the non-standard design of a multi-level ceiling. They will give the room a mysterious look and fill it with a romantic mood if they are mounted in an arched opening.
But do not think that this type of lighting can only be used for design purposes to "bring beauty" in the apartment. They are simply indispensable in the kitchen, above the working surface of the countertop, if it is impossible to install a spot in this place. In addition, there are special sources of artificial lighting that are installed in the shelves of cabinets to make the process of finding the right thing more convenient and faster. Swivel spotlights are well implemented on the dressing table, in the hallway or bathroom above the top bar of the mirror. It is this kind of lighting that can ensure the perfect application of makeup or shaving.
Small bulbs built into the steps of your stairs will help save energy on the main lighting and not fall when going up or down from floor to floor in the dark.
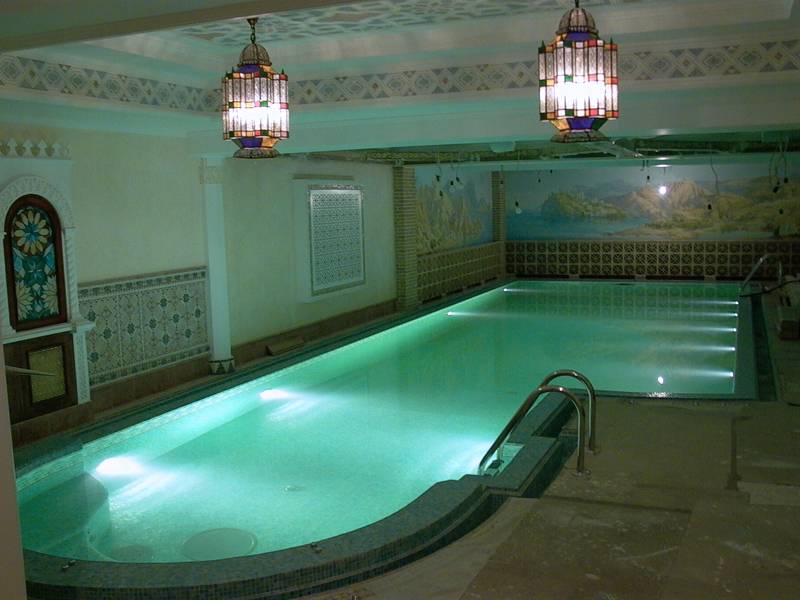
Spot light is widely used in outdoor lighting. On a suburban area, they can be mounted in the railing of the veranda, along the path or along the perimeter of the flower bed. Even the pool can be illuminated underwater. But you should not think only about the beauty of the design, please remember the safety rules as well.
Related videos
Spotlights have advantages over conventional chandeliers, sconces or fluorescent lamps linear type. They practically do not occupy the volume of the room, they are compact, they can be grouped, making up convenient schemes connections. And yet, the installation of spotlights in an apartment requires accuracy, certain skills and abilities.
You will need
- - Spotlights;
- - flexible stranded wire;
- - pencil;
- - roulette;
- - pliers;
- - wire cutters;
- - screwdriver;
- - electric drill;
- - nozzle in the form of a "crown";
- - junction box;
- - clamping terminals (blocks).
Instruction
Determine the places where you plan to install spotlights. The number of lighting devices, the distance between them and their power should provide an effective light flux in the room. Before starting the installation of the ceiling, it will be enough to lay the wire to the first lamp, and then stretch it sequentially to each point. It is best to use stranded copper wire for connection, which has sufficient flexibility.
When installing spotlights in a plasterboard or plastic ceiling, cut holes in it of the appropriate diameter and shape. Most often you have to deal with lamps, the body of which has rounded contours. Make sure that the diameter of the cut hole matches the instrument. When making holes, only slight distortions or uneven edges are allowed.
When fixing fixtures in a stretch ceiling, provide for their relative position in the space of the canvas at the stage of designing the structure. In this case, you will need thermal rings that prevent the film coating from melting, since the heating of the lamp can be significant. For a tension structure, not halogen, but LED lamps are better suited.
Install the fixtures directly after the ceiling is completely finished, for example, after pasting or painting. To begin with, the wires are laid in each hole. Then the installation of the lighting device is carried out. The most common design of the lamp provides for the presence of special spring antennae. These clamps are brought together, inserted into the ceiling opening, where they straighten out, holding the fixture securely in place.
After installing all devices in the places intended for them, connect the flexible leads of the socles to the installation wire. In some cases, it is more convenient to make connections in a special junction box, then leading a separate wire to each device. Use clamping blocks or terminals to mount the wire ends. Such a connection will be safe and comply with the standards adopted in electrical engineering.
Related videos
For proper lighting room, corridor or a separate object, such as an aquarium, it is necessary to correctly determine the type of lamp required: the number, location and power lamps installed in it. There are several rules, following which, it is quite simple to complete this task.

You will need
- tape measure, sheet of paper, pen, calculator
Instruction
For the general calculation of fixtures, use the following formula: P=pS/N, p is the power of specific lighting, measured in watts per square meter (average is 20 watts per square meter), S is the area of the room for which this lamp is calculated in square meters and N is the number of fixtures.
Example: To calculate in a room, measure the length and width of the room. Multiply the results obtained (say, 3.3 meters long and 4.5 meters wide) among themselves and get the area of \u200b\u200bthis room (3.3 × 4.4 \u003d 14.85 square meters). Multiply this figure by 20 and divide by the estimated number of lamps in the fixtures. For example, take 3 lamps of 2 lamps in each . In this case, multiply 14.85 by 20 and divide by 6 (3×2=6). Get a result that means that in this case you need 6 lamps of 49.5 watts.
You can vary the power of the lamps in each lamp, dividing the room into several zones with different lighting. The total power of all lamps in the room should not be less than 297 watts.
In some cases, it is necessary to take into account the specifics of the room for which you are calculating the total power of the installed lamps. In this case, make the calculation by substituting the value of the coefficient p from the table below: Type of room|Incandescent lamp|Halogen lamp |Lamp daylight Children's room..............30-85......................70-85........ ............15-22
Living room..................15-35.......................25-35.. .................7-10
Bedroom...................10-25..............15-17. ...................4-7
Corridor...................10-20...............10-13. ...................3-5
Kitchen.........................15-40......................30- 37............6-10
Bathroom.............15-30.....................22-27....... .............6-9
Storage room, garage..............12-15...............11-14....... ..............3-5Here, to calculate, for example, lighting in a kitchen (3 square meters) using fluorescent lamps, take the coefficient p (average value of 9) from the table, multiply by the area kitchen and, if there is a three-arm lamp, divide by three: 9 × 3/3 \u003d 9 watts in each of the three lamps installed in the lamp.
Sources:
- how to determine lamp power
Incorrect lighting can not only create discomfort, but also cause eye disease. Therefore, the design and installation of the electrical network, and in particular, determining the number of fixtures, should be taken responsibly.
You will need
- - roulette;
- - calculator;
- - table with safety factors;
- - table with utilization factors.
Instruction
Measure with a tape measure the length, width and height of the room for which you want to calculate quantity lamps. Find the area of the room, that is, multiply its length by the width.
Determine the safety factor. Its rate depends on the intensity of use. lamps, the degree of pollution of these light sources and their frequency Maintenance. The value of the coefficient can vary between 1.2 and 2. This coefficient is determined on the basis of special tables.
Find the usage factor. To do this, using special tables, first find the reflection coefficient of the ceiling, walls, and also the floor. Yes, the surface white color reflects light by 70-80%, a light surface by 50%, a surface painted gray by 30%, a dark gray surface by 20% and a dark surface can only reflect light by 10%. Knowing this, calculate the utilization factor using the formula: φ=S/((h1-h2) (a+b)), in which φ is the utilization factor, S is the area of the room, h1 is the height of the room, h2 is the height of the calculated surface, and (a + b) - semi-perimeter, that is, the sum of the length and width of the room.
Calculate the right quantity lamps according to the formula: N \u003d (E * S) / (U * n * Fl * Kz), where N - quantity necessary lamps, E - the required illumination of the horizontal surface, U - utilization factor, n - quantity After that, using a ruler, caliper, or using a special scale on the scales, find the distance between these charges. Keep in mind that unlike charges attract and like charges repel. Measure force in Newtons and distance in meters.
Calculate the value of the modulus of one point charge q. To do this, divide the force F, with which two charges interact, by a factor of 9 10 ^ 9. Take the square root of the result. Multiply the result by the distance between charges r, q=r √(F/9 10^9). You will receive the charge in Coulombs.
If the charges are not the same, then one of them must be known in advance. Determine the force of interaction between the known and unknown charges and the distance between them using the Coulomb torsion balance. Calculate the modulus of the unknown charge. To do this, divide the force of interaction of charges F, divide by the product of the coefficient 9 10 ^ 9 by the modulus of the known charge q0. Take the square root of the resulting number and multiply the result by the distance between charges r; q1=r √(F/(9 10^9 q2)).
Determine the modulus of an unknown point charge by introducing it into an electrostatic field. If its intensity at a given point is not known in advance, bring the sensor of the electrostatic field meter into it. Voltage is measured in volts per meter. Introduce a charge to a point with a known intensity and, using a sensitive dynamometer, measure the force in Newtons acting on it. Determine the charge modulus by dividing the value of the force F by the electric field strength E; q=F/E.
Related videos
- an ordinary bulb of Ilyich, i.e. incandescent lamp, withstands work of 1,000 hours.
The service life of LED lamps can reach up to 27 years, subject to daily use of at least 10 hours.
Of course, LEDs also have a minus - this is their strong heating, so when using this kind of lamps, you have to control this parameter. A cheap energy source is the main reason homeowners choose LED lights. However, experts say that it is necessary to be very thoughtful when purchasing such lamps, since they have certain differences that noticeably affect their functionality.
The subtleties of choosing LED lamps
The main criteria for choosing an LED for lighting both an apartment or a house, and a street in the adjacent space are 3 points:
- price;
- quality and reliability;
- specifications.
The first point is cost. It should be borne in mind that when you come to the store, you will find a whole rack with lamps of completely different prices: something cheaper, something more expensive. And in this situation, it is necessary to clearly understand the pricing mechanism for such a product as an LED lamp. At first glance, it may seem that all lamps are the same - the body, wires, the LEDs themselves, the diffuser. But it is worth digging into the details, and everything becomes not so obvious.
By the way, the diffuser is quite often not found in cheap models. It is advisable to refuse such, since the lighting capacity of such a device will be noticeably less.
The body itself for expensive and cheaper light bulbs is made of different materials. In most cases, the simplest model is used. The main disadvantage of such lamps is that they are quite irritating to the eye, even if you do not look at the lamp directly. Therefore, you should pay attention to models whose body is made of reliable materials, especially for this lamp and no other (all such information is usually indicated on the label).
Of course, the bulk of the cost - about 80% of the price of a light bulb - is occupied by LEDs. Hence the conclusion: the better and more reliable the LED, which is used in this type of lamp, the more expensive it is. What is cheaper on store shelves is nothing but Chinese production. Such lamps are less reliable and not the fact that they will work smoothly. The optimal price of a reliable LED today is 4-5 thousand rubles. (depending on the power and the number of LEDs used).
There are no unimportant details in a lamp of this type. Therefore, it is very important to also look at the power source. A poor-quality or weak power supply leads to a quick failure of the device and, accordingly, quite a lot of money thrown away. You can check the quality of the power source of the LED lamp by checking the documentation for it (the seller is obliged to provide papers upon request). If the manufacturer is an unknown brand, be it Chinese, American, Indonesian, etc., even he himself is most likely not sure of the quality of such a lamp. An important parameter when checking the power supply is the ripple factor. So, it should be at least 10%. If in front of you is a device that consumes 25 watts and at the same time gives a ripple factor of 0, such a device is of poor quality. Even if there are appropriate papers for it, most likely they were simply bought.
Naturally, such a parameter as a source of pulsations is checked only by specialists and only in the factory. Therefore, the buyer can only trust (preferably a reliable and trusted manufacturer).
The second point, which is an important nuance when choosing an LED lamp, is its reliability and quality. First of all, look at the resource. Its run-up can be huge - from 30,000 to 100,000 hours. The final figure is the result of adding together several important parameters: LED life, power supply, and the presence of a diffuser. The maximum resource is provided by those lamps that are produced by well-known and reputable brands. In this case, the reduction in lamp efficiency over 100,000 hours will be no more than 25%.
As for the power supply, it remains only to trust the manufacturer. Again, if you choose a brand that has been on the market for more than a decade and has proven itself (it is better if it has a worldwide reputation), this will be your guarantee of the reliability of the power supply for this lamp. Alternatively, you can check via the Internet, driving in the technical specifications on certain sites. But, firstly, no one will allow you to take the lamp home for testing without payment. Secondly, this procedure is quite laborious and unjustified.
The diffuser also has its pitfalls. So, for example, if it is not made of lighting polycarbonate, there is a risk that it will simply become cloudy in 3-4 years, and its light transmission will significantly decrease.
Carefully study such an item as technical specifications. They are, as a rule, registered on boxes with lamps or in manufacturers' catalogs. Under technical specifications luminous flux, output and power consumption are understood (it is this indicator that provides energy savings). Often, the figure indicated on the package indicates the total power of the lamp, and not just one LED, as manufacturers try to present it. Keep in mind that normal consumption is 67-75 lm/W.
Types of LED lamps
LED lamps are divided into street, industrial and household. They differ from each other in the light emitted by the LEDs. Street lights usually emit white light. They are commonly used to illuminate roads, parks and various architectural buildings. Their main disadvantage is that they do not have a replaceable lamp.
Office fixtures also emit white light. They are used to illuminate housing and communal facilities and industrial workshops. They also don't have replaceable elements and they are virtually maintenance free.
Household LED lamps have yellow light and low power. Their distinguishing feature- original appearance.
Please note that the article, trademark, barcode must be printed on individual packaging. The box must be solid and made of good quality cardboard.
Due to the ease of work and affordable price, lining is one of the most popular and sought-after finishing materials. In addition, it is quite versatile, its scope is limitless: both baths and balconies are sheathed with clapboard.
Calculating how much lining you need for wall cladding is quite simple. Knowing the area of \u200b\u200bthe room, you can easily calculate how many rails you need. True, there is one caveat: the lining is sold in cubic meters, and not in pieces or running meters. Therefore, some calculations need to be made.
Choice of quality material
In order to calculate as accurately as possible how many rails you need, you need to choose good solid slats. Attention should be paid to the direction of the cut, it must coincide with the direction of growth of the tree. You also need to pay attention to the location of the annual rings. They should go beyond the board, this parameter directly affects the strength.
When choosing a finishing material, each person, first of all, thinks about aesthetic appearance. In order for the surface sheathed with clapboard to look decent, you need to choose planks with smooth edges, while taking into account the moisture content of the tree, which should not exceed 17%. Otherwise, the board may be brittle and break during processing. You should also pay attention to the number of knots allowed for a given tree species.
The right lining will allow you not only to enjoy for a long time beautiful finish premises, but also calculate how much material you need.
Calculation of the amount of lining
In order to calculate the amount of lining needed, you need to calculate the area of \u200b\u200bthe room by multiplying the perimeter by the height and taking into account the door and window openings. Next, you need to calculate the area of \u200b\u200bone rail, multiplying its length by its height, and knowing its thickness, you can get the volume of one rail. To get the required number of rails, you need to divide the area of \u200b\u200bthe room by the area of \u200b\u200bone strip. And knowing the volume of one board and the number of boards, it is easy to calculate how many cubic meters of lining will be required to finish the room.
You should choose a lining, the length of the strip of which is a multiple of the height of the room, this will minimize waste. But in any case, the resulting volume must be multiplied by 0.15, because no matter how hard you try to reduce waste, they will still be. 10-15% of the total volume is considered the norm, calculated according to ideal indicators.
resize
Spotlights - dimensions, dimensions.
Spotlights, although they are modest in size, for ceiling lighting, even a couple of centimeters can play a decisive role.
All this suggests that it makes sense to be interested in the dimensions of spotlights even at the stage of their planning.
How to install a spotlight in the ceiling?
One of the important parameters of such luminaires, designed for suspended or false ceilings, is the built-in depth.
Spotlights come with a partially and fully exposed body to the ceiling.
This, in turn, suggests that a certain space must be provided between the false ceiling, which is necessary in order to properly fix the lamp.
In this case, you can leave a minimum of 2.5 centimeters, a similar size depends mainly on the type of lamp and on the type of lamp that is installed in it.
To install spotlights, we do not need any special skills.
The most important thing is to foresee and stretch the wiring to those places where we plan to install a spotlight, even before installing the ceiling.
After installation in pre-planned places with the help of a hole saw, or in the common people with a crown, holes of the desired diameter are made.
Then, a ceramic cartridge is connected to the prepared wiring inside the ceiling, which will power the lamp.
Spring clamps on the luminaire body are reduced and inserted into the ceiling hole, then they are unclenched and tightly press the luminaire from the back of the false ceiling. We install the lamps in the socket and with the help of the fixing ring we fix them in the lamp body.
After installing the halogen lamp, it is necessary to wipe off fingerprints from it to prolong its service life.
Turn on the lighting, thereby checking the correct connection of the spotlight to the electrical network.
Before connecting spotlights, you need to accurately calculate the sufficient power and voltage of the lamps used. It is very important to find out exactly the technical aspects of the respective lamps, and to exclude the operation of those devices that do not have sufficient technical data.
How to choose a spotlight for the room?
 If we talk about the dimensions of spotlights, and more specifically about their width, length and diameter of the device, then in this case these indicators should fit the dimensions of the room for which they are intended. At the same time, if you choose too large a lamp, then the space visually decreases. And on the other hand, if there is not enough light, then, accordingly, the corners of the room will remain dark.
If you are using fully recessed luminaires, then the recess depth should be close to the height of the luminaire.
For square-shaped rooms, it is best to choose round point-plan models as the main lighting. If the room has the shape of a rectangle, then lamps in the form of a square, oval or irregular shape will do. Ceiling-integrated ceiling lamps usually have rounded shapes, while they are an excellent solution for any room.
Very often, spotlights are successfully used to decorate suspended ceilings, arches, walls finished with plasterboard, etc. At the moment, it is with such lamps that they began to complete furniture, thereby giving it an even more attractive look.
How to connect a spotlight?
 There are several common ways to connect spotlights, then I propose to consider the three most basic ones:
1) Method of serial connection of spotlights.
The simplest and most common way, the so-called daisy-chain method of connecting fixtures. With this connection, all fixtures are connected with one contact to a common phase, and the other to a common zero. The design resembles a garland, as the name implies. A feature of this connection method is that the control of turning on all the lamps is carried out with just one key.
Method of parallel connection of spotlights.
2) This connection method differs from the previous one, in that here each lamp is connected to its own conductor coming from its own distribution cup. Connection is not very difficult in terms of installation work. The peculiarity of this connection method is that it is possible to control each lamp with a separate switch. It is worth noting that with such light control, more electricity is saved, because unnecessary lamps simply do not consume electricity.
Recessed LED ceiling lights are used when mounting any suspended structures and stretch films. With the help of these lighting devices, you can create the desired light atmosphere in the room.
Rules for installing ceilings with recessed LED lights
Spotlights are ideal for additional lighting in large areas (bedrooms, halls, kitchens) and the main one in small rooms (bathrooms and hallways). But the use of recessed lighting devices has one drawback - the need to lower the ceiling level by a distance corresponding to the height of the lamp. For devices with incandescent lamps, the ceiling level must be lowered by 10-12 cm, with halogen lamps - by 8 cm, with LEDs - by 6 cm.
Since the main direction of modern interior design is to strive, it will be an unsuccessful decision to lower the ceiling by 6-12 cm over the entire area of \u200b\u200bthe room. The correct solution is to choose a chandelier located in the central part of the ceiling as the main light source. And recessed fixtures need to be installed around the perimeter of the room, while lowering the ceiling to the distance required for the installation of specific devices.
Using multi-level structures with built-in spotlights, you can create a certain mood and visually change the amount of space. When the main and additional devices are turned on at the same time, an atmosphere of a bright sunny day is created. When using only additional light, they get a cozy atmosphere conducive to relaxation and conversation.
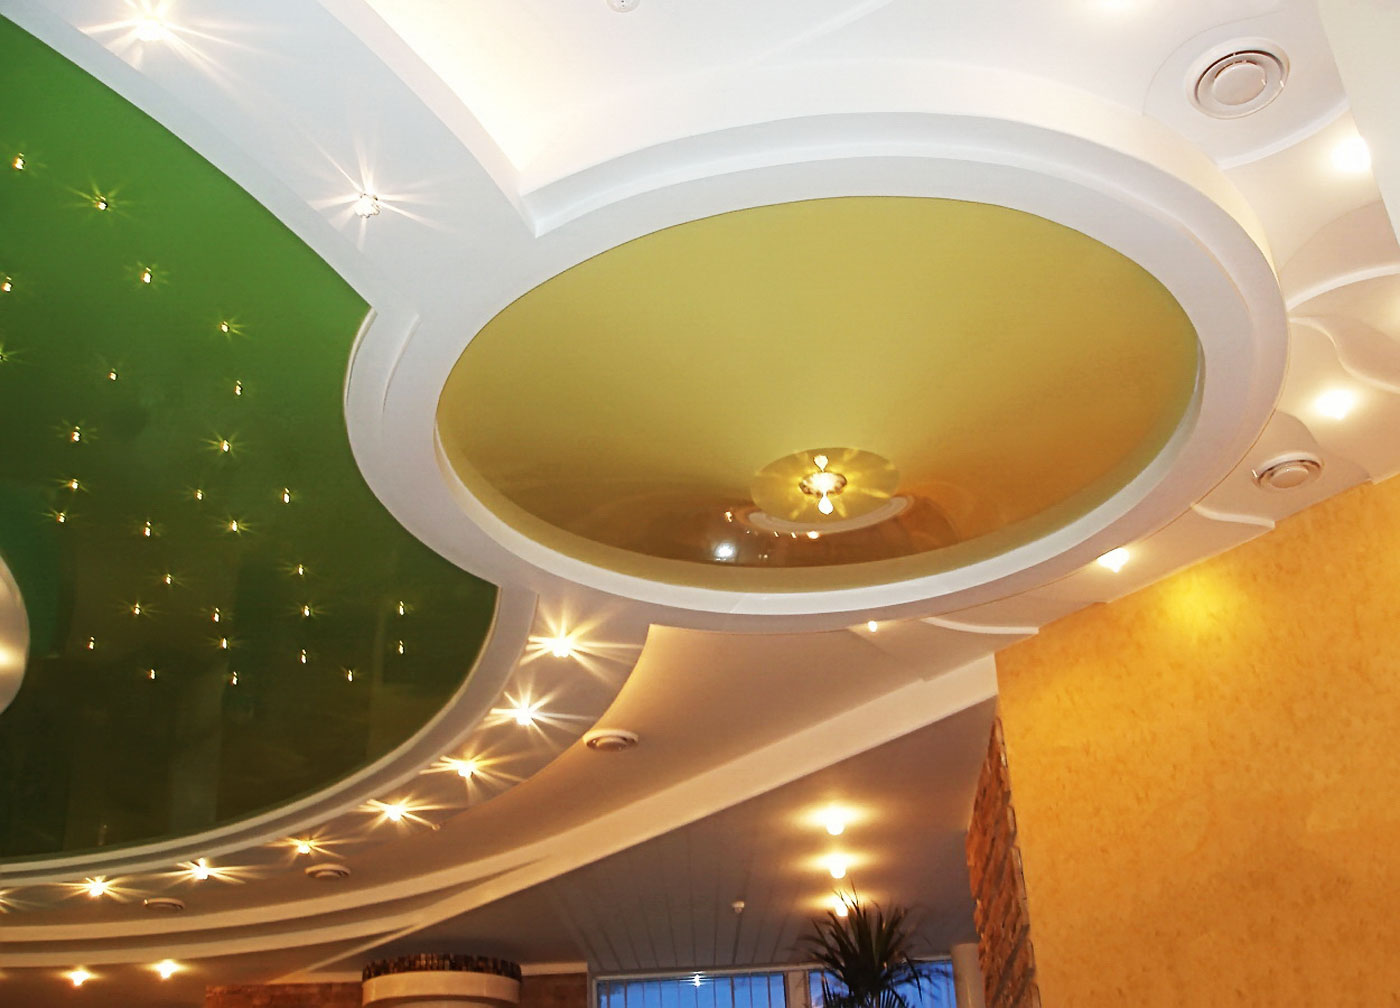
In bathrooms, bathrooms and hallways, they traditionally mount or. In this case, the level of the base surface inevitably falls. Therefore, in these rooms it is most convenient to use recessed LED ceiling lights as the main lighting. Using lamps of different brightness, you can focus on some elements of the interior and hide others.

Types of ceiling LED lights
LED lamps occupy one of the first places among devices for indoor and outdoor lighting. Ceiling recessed lamps are produced by many enterprises, domestic and foreign. But for all types of products of these companies there are uniform standards for marking, sizes of flasks and socles.
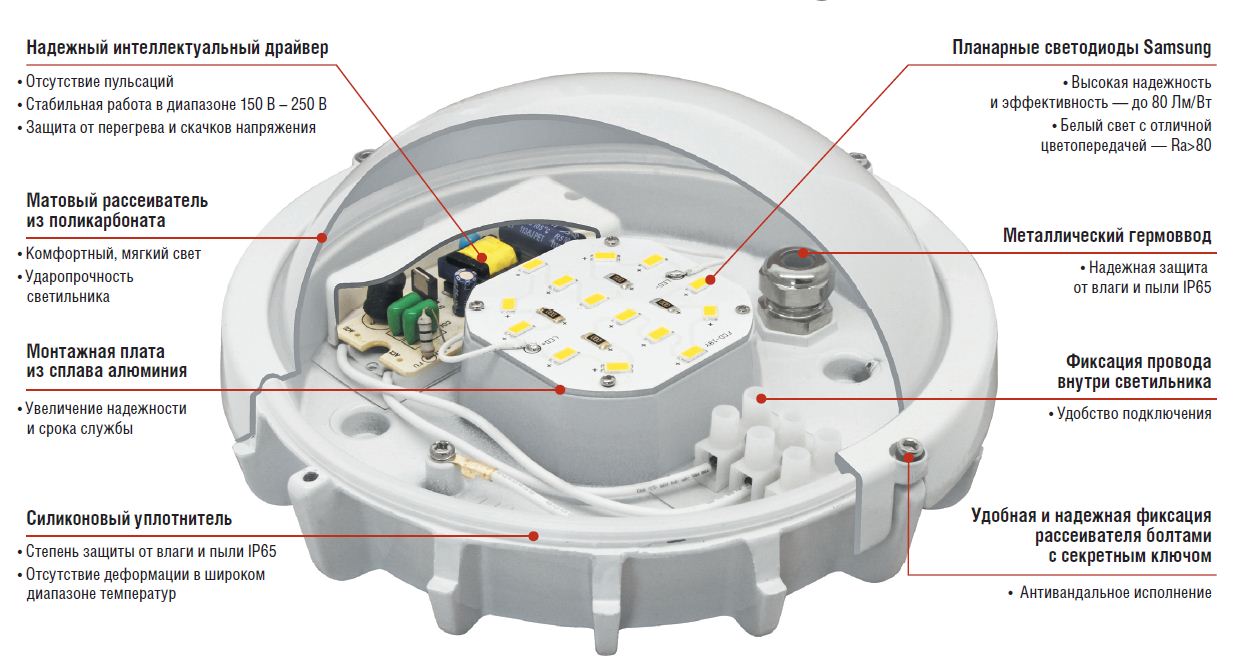
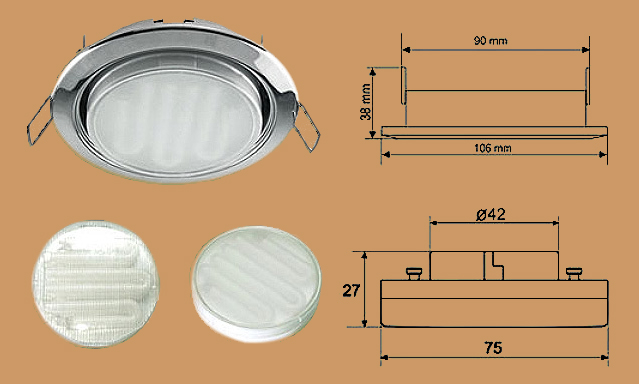
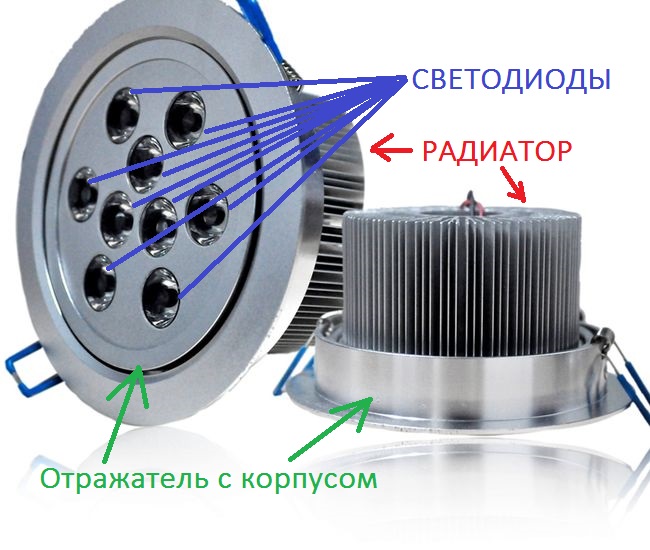
Recessed ceiling lights in the language of professionals have their own name - "spots". Some models are equipped with a bracket that provides the ability to rotate and change the angle of incidence of light rays. Luminaires can be installed not only horizontally, but also vertically.
Thus, all recessed lighting fixtures can be divided into two categories:
- rotary;
- fixed.
The first are equipped with a movable upper part, which is directed in the right direction.
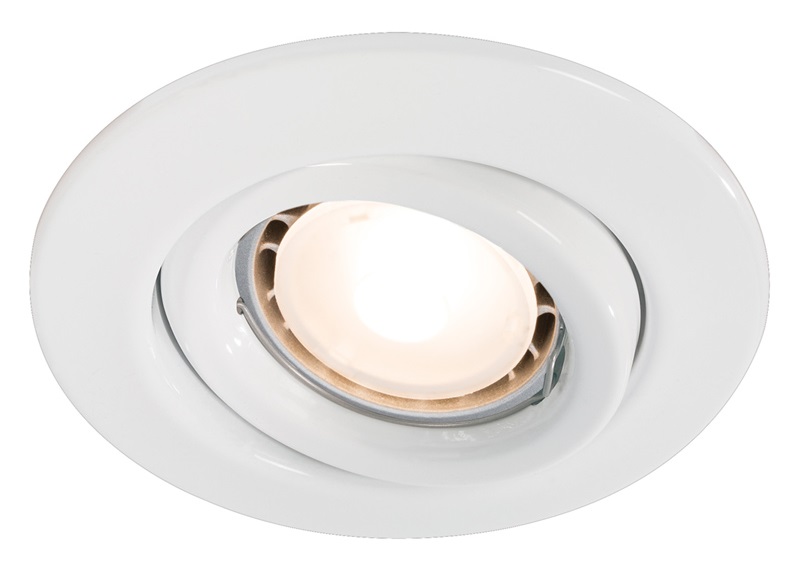
Manufacturers offer spot lighting devices for different type rooms: with normal and high levels of humidity. The outer part of the lamp can be made of plaster, glass, crystal or aluminum. In the design of the device, various crystals, stained glass inserts, wooden or glass linings can be used.
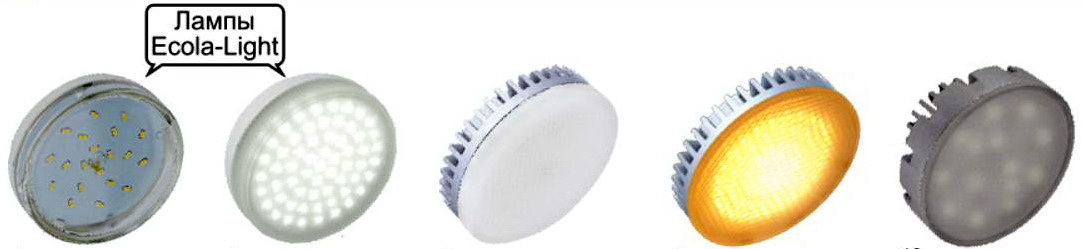
The design of lamps can be very different: from hi-tech to antique. There are models whose task is to minimize the presence of the device on the ceiling. These lamps have a minimalistic design. Due to the variety of styles and colors, you can choose exactly the model that will harmoniously fit into the interior of the room.
Device of recessed LED ceiling lights
According to the manufacturing method, all spotlights are divided into two groups: stamped and cast. The former are easy to distinguish from the latter: you need to turn the lamp over and examine its seat. For stamped, it is the same around the entire circumference. The width of the seat must be at least 9 mm. In cast fixtures, technical tides are visually noticeable on the surface of the seat - areas of a lighter and darker color.
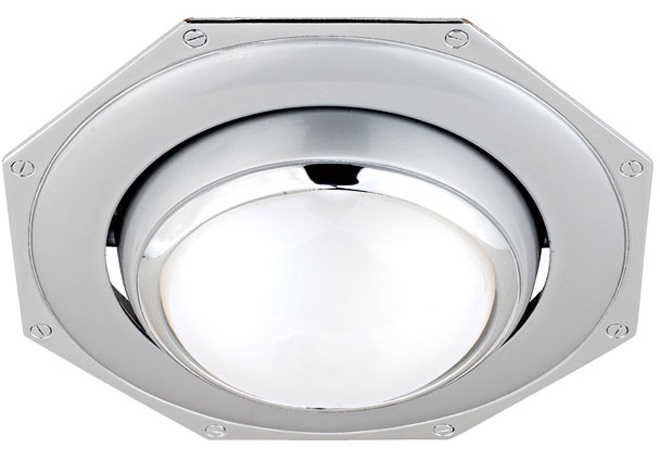
For the lighting of stretch ceilings, only stamped lamps can be used.
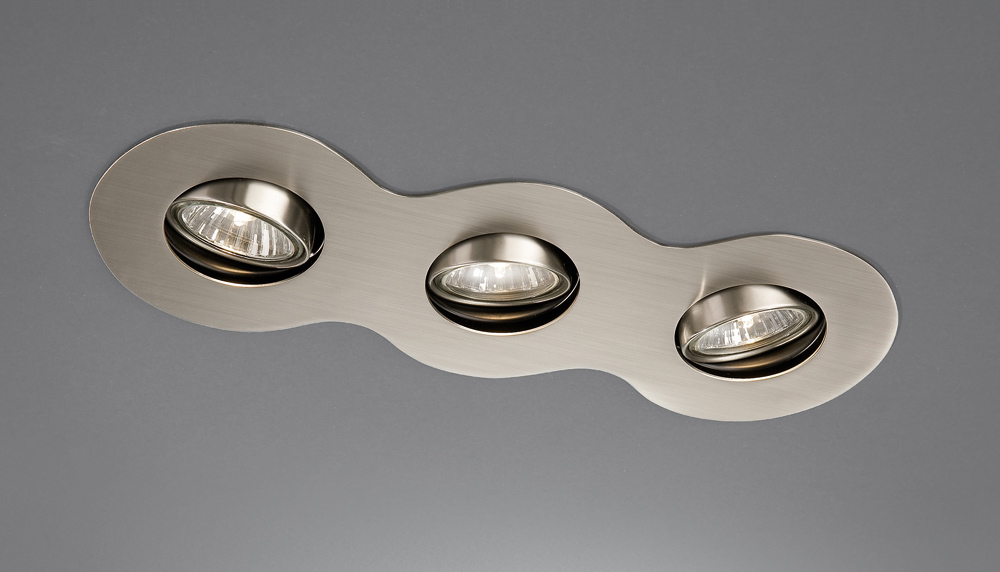
Instrument bases are of two types: threaded and pin. The first are marked E, the second - G. Next to the letter designation of the type of base indicate the dimensions in numbers. For example, E27, GU5. more modern. But in the device of recessed lamps, lamps with both types of socles are used.
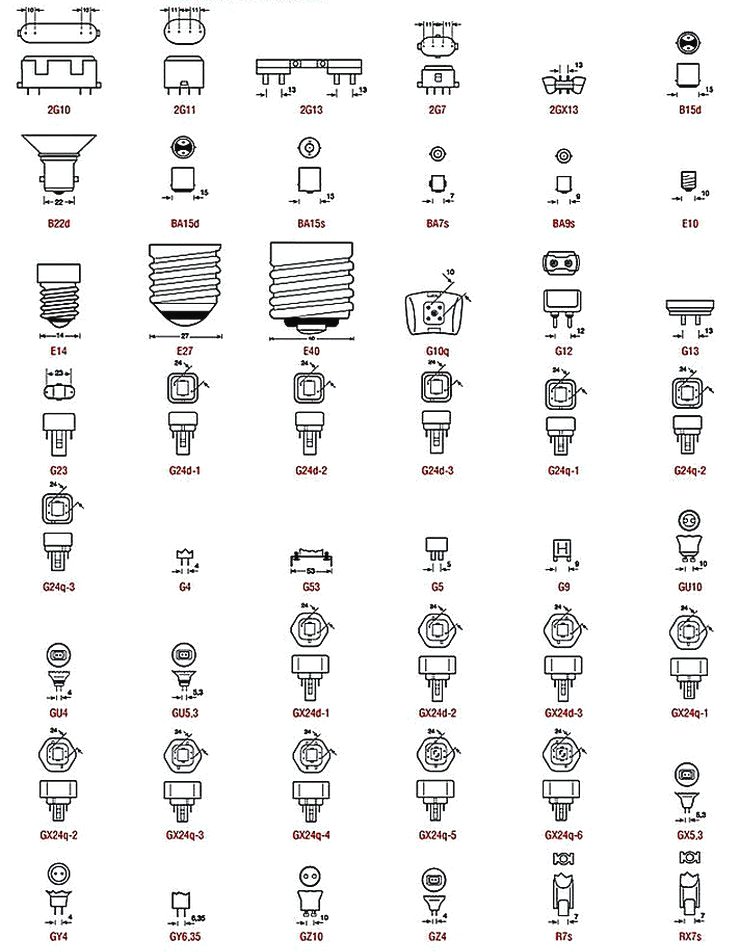
Table. The main types of plinths.
| Plinth marking | Luminaire features |
|---|---|
| Used for decorative lighting, has a high light output. The base contacts are loop-shaped. Luminaires are designed to operate from the mains without the use of transformers. |
| Two-pin base, the presence of a swivel mount. The pins of the GU base are equipped with small knobs. The numbers next to the marking indicate the distance between the pins. |
| Belongs to the category of two-pin. Does not have thickenings on the tips of the pins. |
| Equipped mainly with LED linear lamps. The numbers indicate the distance between the pins. |
| Plinth "minion". Equip lamps in the form of a candle or a cylinder. |
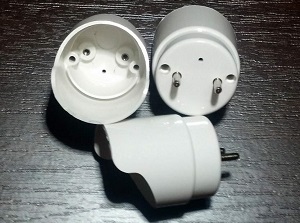
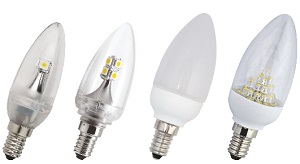
On the body or packaging of LED lamps indicate:
- power in W (the amount of electricity consumed in 1 hour);
- type of flask and base;
- color temperature (hue of emitted light) in Kelvin (warm tones 4000-5000 K, cold tones from 6000 K);
- intensity of the light beam in lumens (Lm);
- dispersion angle.
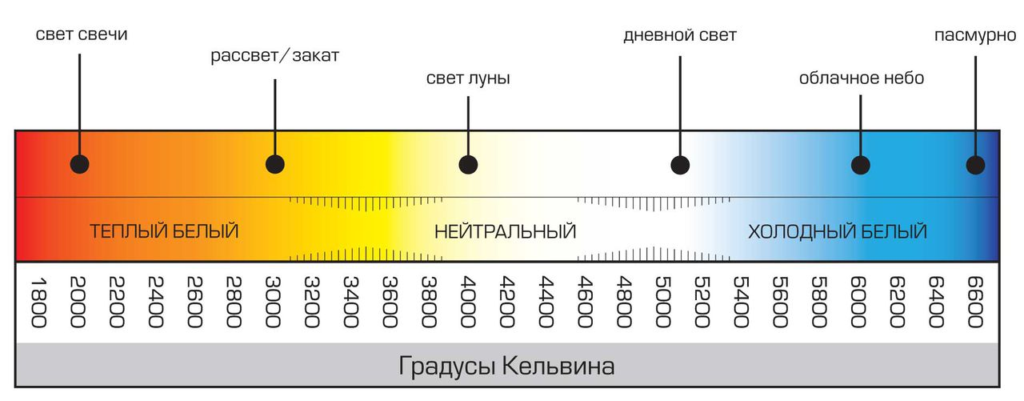
All LED lamps are labeled led. Additional characteristics can be indicated: power and estimated number of hours of operation. All this data can be seen on the lamp body, glass or bulb. On some products, the manufacturer is also indicated.
An important characteristic of recessed LED lamps is the number of cartridges. There can be up to 8 of them in one device. Thanks to the movable base, you can change the direction of the cartridges, thereby illuminating several zones at once.
Advantages and overview of models of ceiling LED lamps
The main advantages of lamps of this type include:
- a small amount of electricity consumed;
- environmental Safety;
- weak heating of the body (therefore, recessed luminaires do not require additional cooling and ventilation);
- low cost;
- availability;
- long service life (up to 50 thousand hours);
- high resistance to mechanical stress;
- no disposal requirements.
It should be noted that LED ceiling lights are brighter than halogen ones. A definite plus of these devices and in the absence of annoying flicker.
Table. Popular models of LED recessed fixtures.
| Model brand | Description | Characteristics |
|---|---|---|
| It has a stylish flat body, ultra-thin, with three-mode backlight. Mainly used in the installation of stretch ceilings. | Outer diameter 107 mm. Recessed diameter 95 mm. Beam angle 120°. Working temperature -30°С – +30°С. |
| It has two backlight options - blue and green. The lower surface of the bulb is flat, matte, with mirror reflectors around the circumference. Body is white, diffuser is frosted glass. | External diameter 160 mm. Case height 20 mm. Electricity consumption 15 W per hour. Aluminium case. |
| Wide range of body colors. Plastic and glass diffusers, matte. Energy saving. Stylish design, compact and durable. Convenient lamp replacement, as no removal of the retaining ring is required. | Power 3-20 W. Dimensions from 38x106 to 58x125 mm. Mortise hole(inner diameter) 90-110 mm. |
| With white and blue illumination. Glass diffusers, transparent. They produce lamps in the form of a circle and a square. Are equipped with the switch of the modes of color and intensity of illumination. | External diameter 160 mm. Internal 110 mm. Power 12 W and 18 W. Color temperature 4000-6000K. |
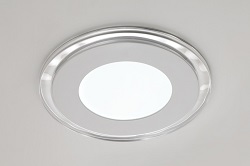
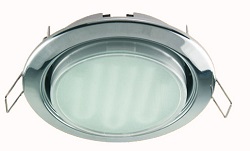
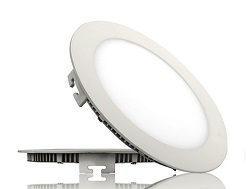
Rules for choosing recessed LED ceiling lights
You need to be most careful when choosing spotlights for a stretch ceiling. In this case, it is especially important to know such a characteristic of the lamp as the degree of heating. Mistakes in the choice can lead to deformation of the stretch ceiling, its sagging and damage to the film.
You should know that the stretch ceiling is highly sensitive to high temperatures. When heated, the bar may melt or stain. It is possible to install LED recessed luminaires of any power, but it is necessary to provide high-quality ventilation designs.
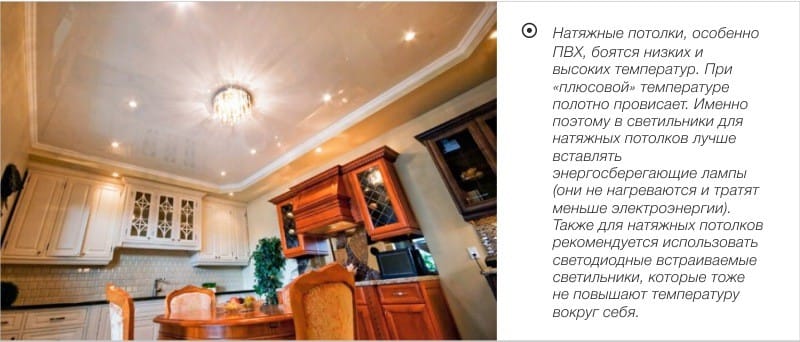
A similar requirement for ceilings made of PVC panels or plastic slats. But for these designs it is recommended to use devices with lamps with a power of not more than 40 watts. It is important to take into account the quality of plastic lining or PVC panels. If they are thin and soft enough, it is recommended to purchase low-power lamps, but increase their number. Thus, the desired degree of illumination of the room will be achieved.
When choosing LED ceiling lights, consider:
- operational purpose of the premises;
- size of the area of the room;
- type of material from which the ceiling will be mounted;
- lamp power.
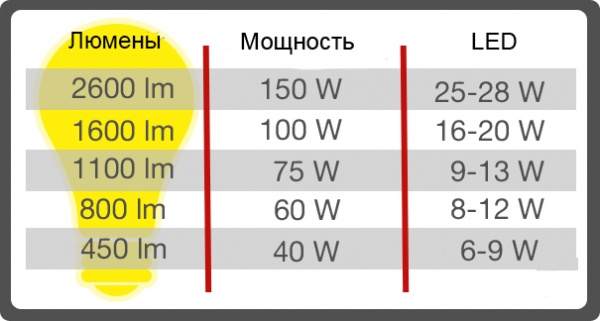
For stretch ceilings, only LED lamps are used.
Installation of ceiling LED lights
Spot lighting devices are installed simultaneously with the installation of the ceiling structure. The gap between the new and the base ceiling should exceed the height of the luminaire body by 1-1.5 cm. Thus, the ventilation necessary for the operation of these devices will be provided.

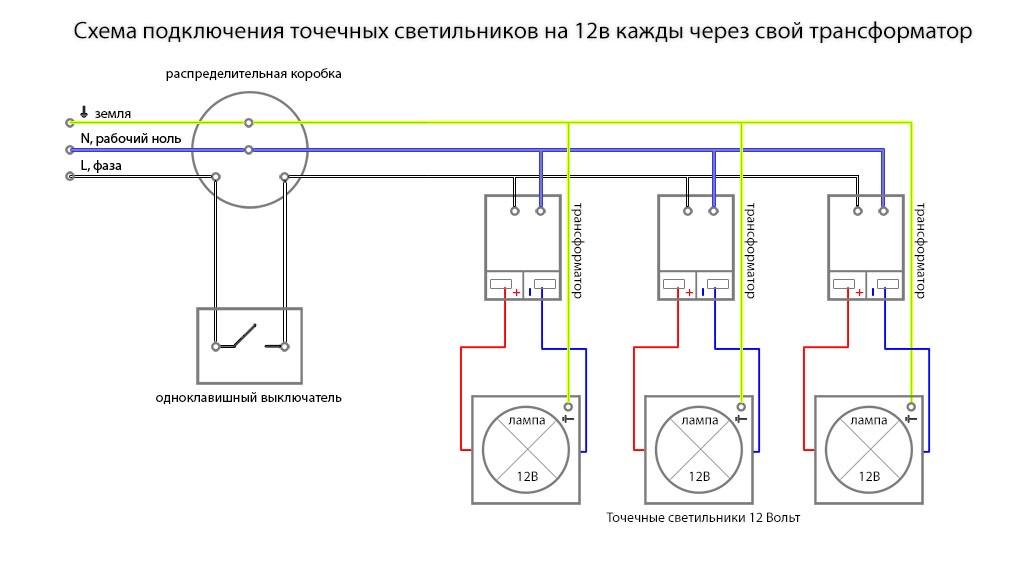
Wiring diagram for 12 V spotlights with individual transformers
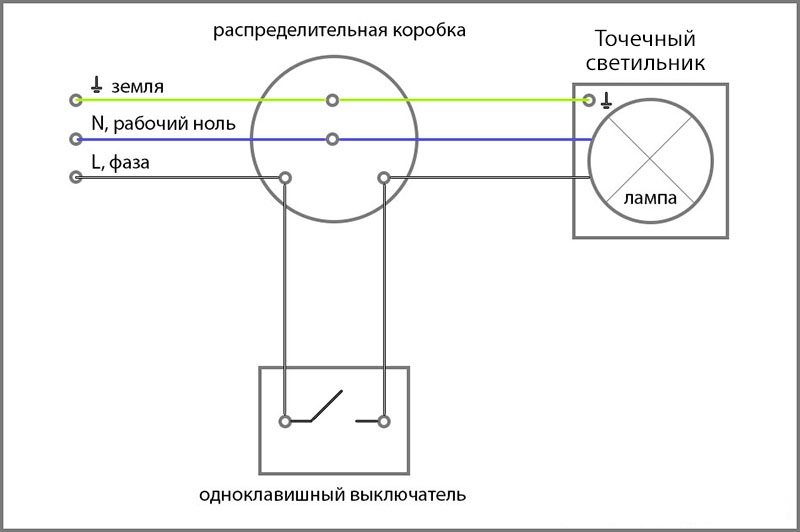
Scheme for connecting spotlights 220 V to a single-gang switch

If a plastic or plasterboard ceiling is being installed, the holes for the lamps are drilled before installation. plastic panels or GKL canvases. To form openings, a crown of a certain diameter is used. Some manufacturers indicate the required hole size on the package. Usually it is 60-70 mm.
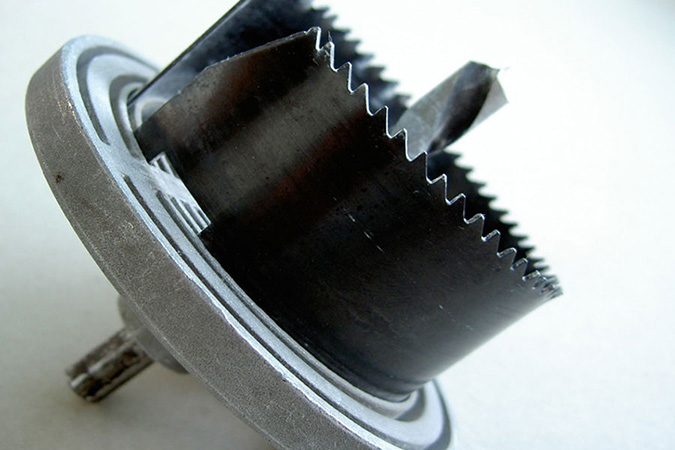
- connect the wires to the lamp terminals;
- lead the wires into the hole in the ceiling and in some way fix the lamp in suspension;
- then use your fingers to bring together both springs located on the lamp body;
- without releasing the springs, insert the lamp body into the hole in the ceiling;
- release the springs.
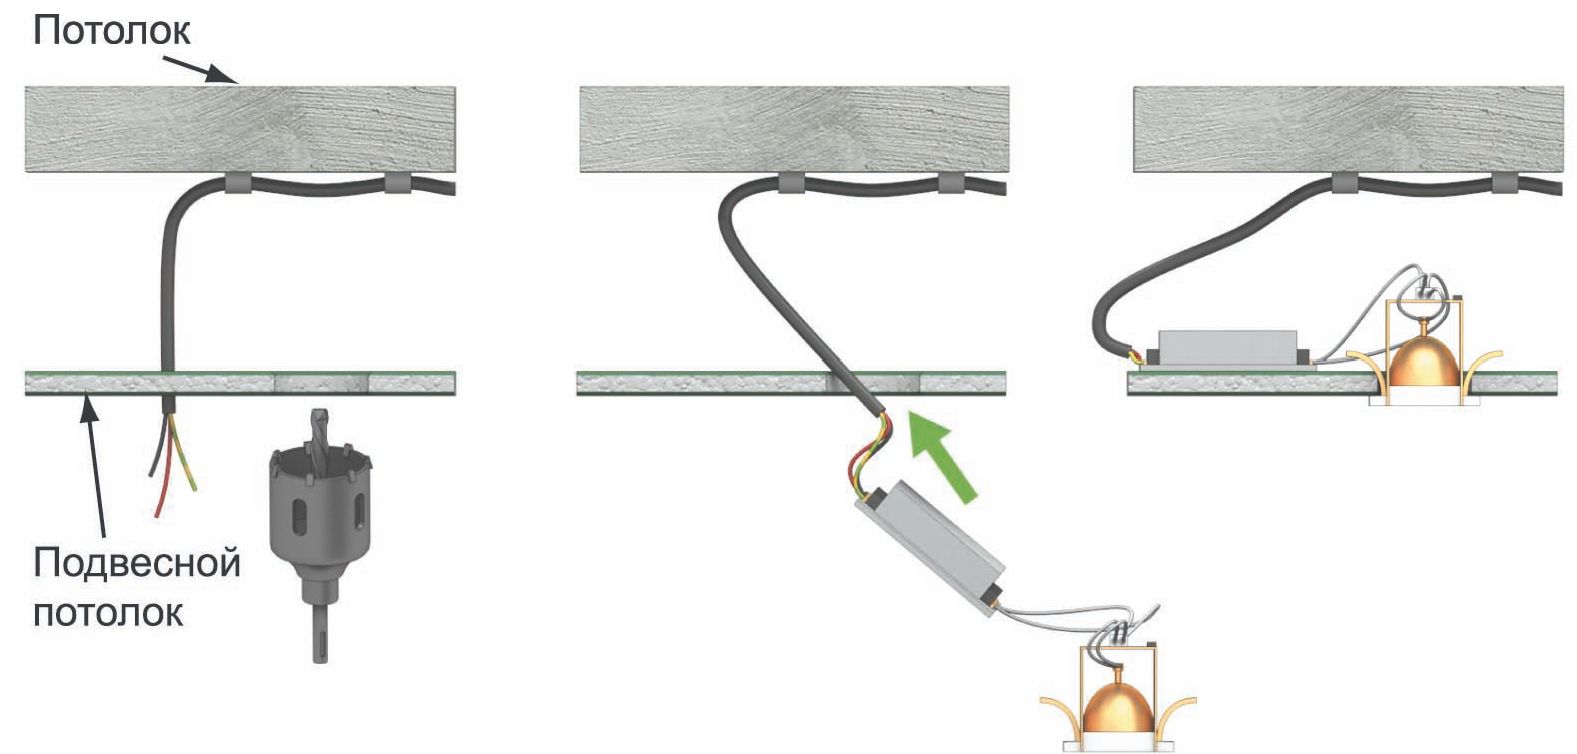
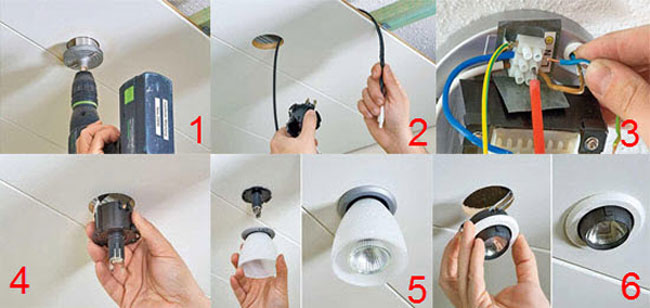
When installing a stretch ceiling, the installation of recessed fixtures has its own nuances. Since the holes cut incorrectly on the film can no longer be masked, it is necessary to know the correct sequence of work.
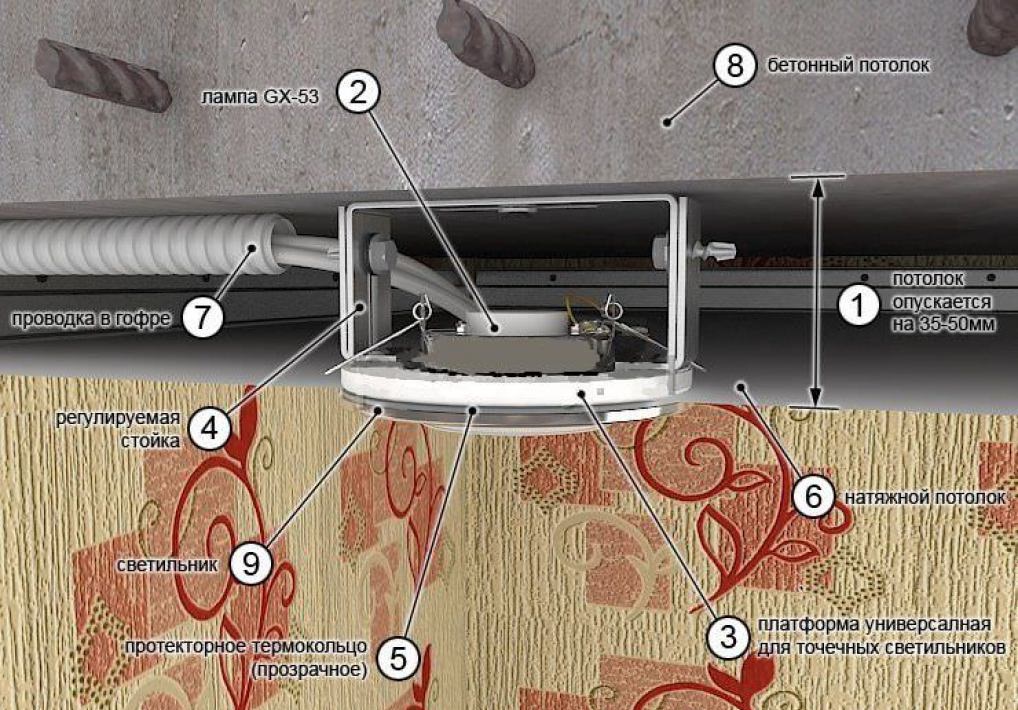
Step 1. Develop a scheme for installing fixtures.
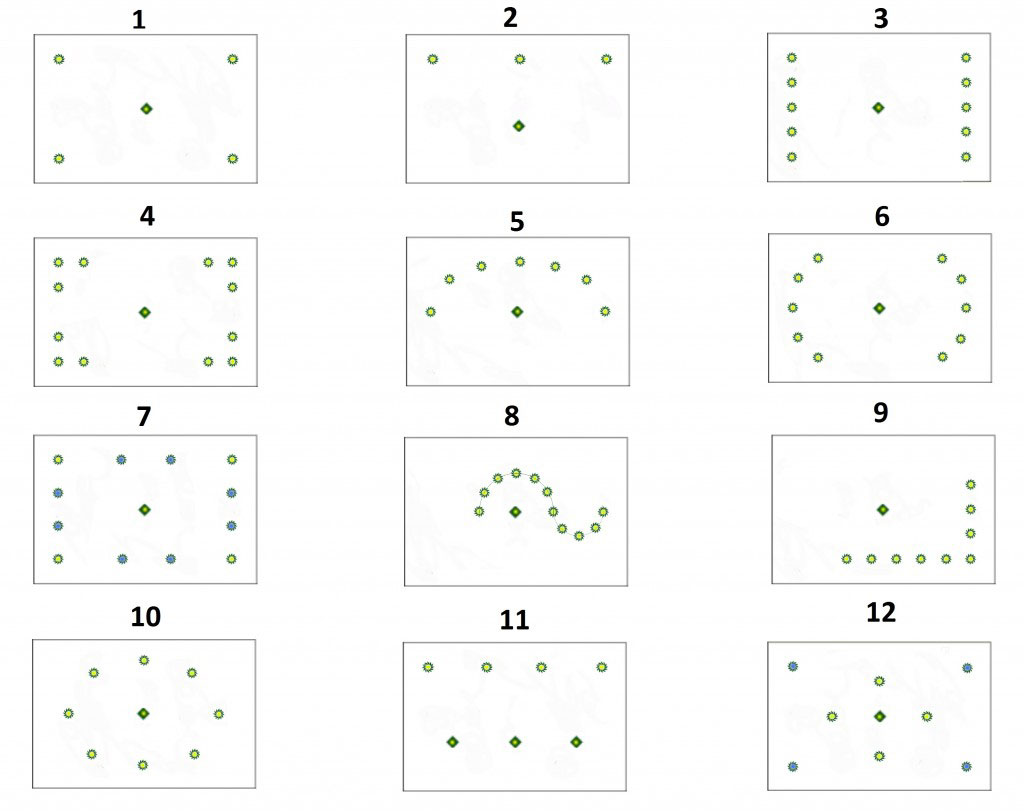
Step 2 On the surface of the base ceiling, the points of attachment of lighting devices are marked.
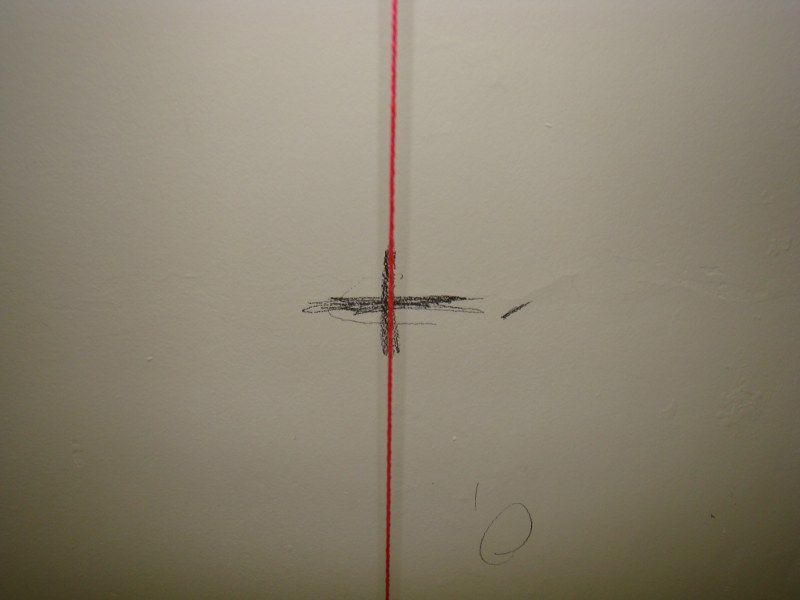
Step 3 An electric cable is brought to the locations of the devices. Upon completion of the installation, the wiring is checked for operability.
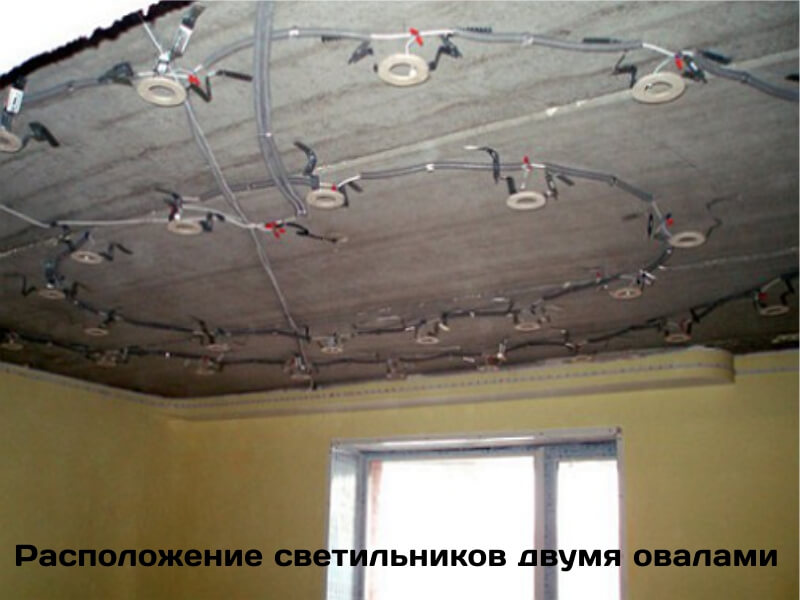
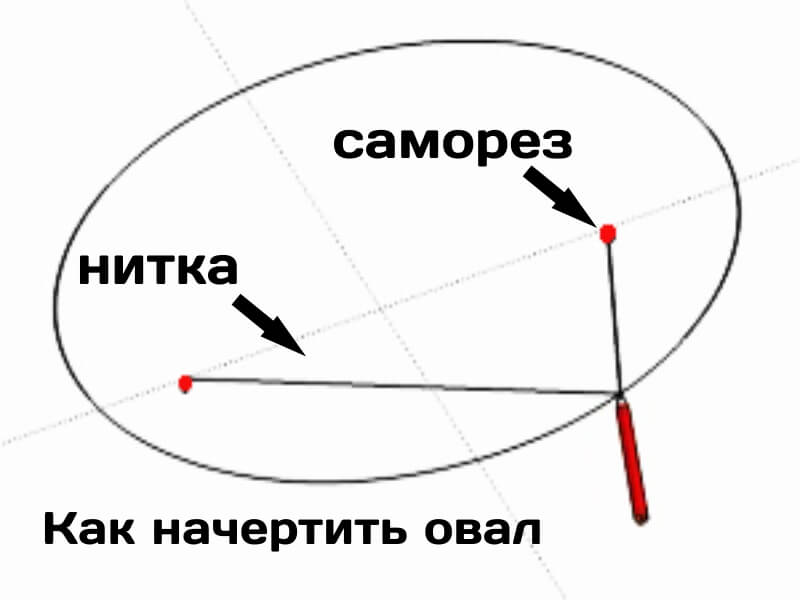
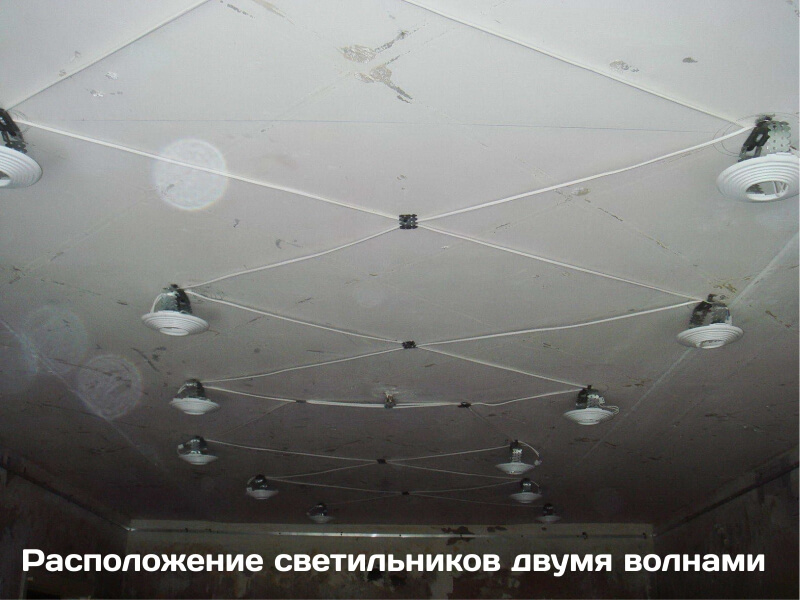
Step 4 Mount fasteners for installation and alignment of fixtures in the same plane. Most often, suspensions are attached to the base ceiling, which are used when installing plasterboard ceilings. With the help of these metal plates, special mortgages for lamps are fixed in the desired position.
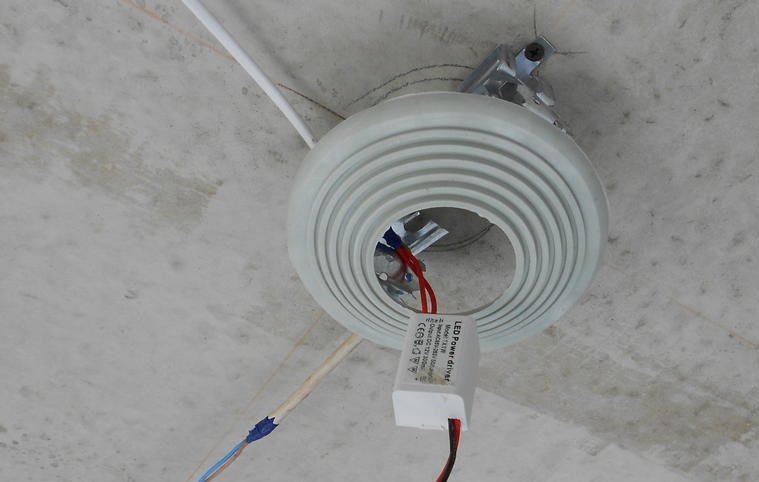
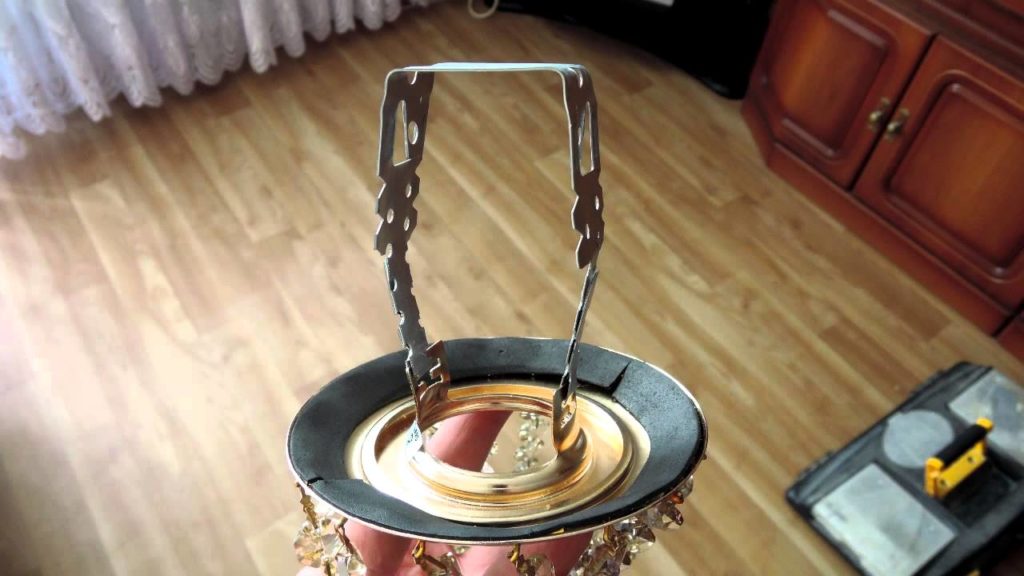
Step 5 Install a stretch ceiling.
![]()
Step 6 In the places where the fixtures are installed, a thermal ring is glued onto the film, corresponding to the diameter of the mortgage. You can use super glue. The thermal ring is necessary to limit the mechanical impact on the material of the stretch ceiling.
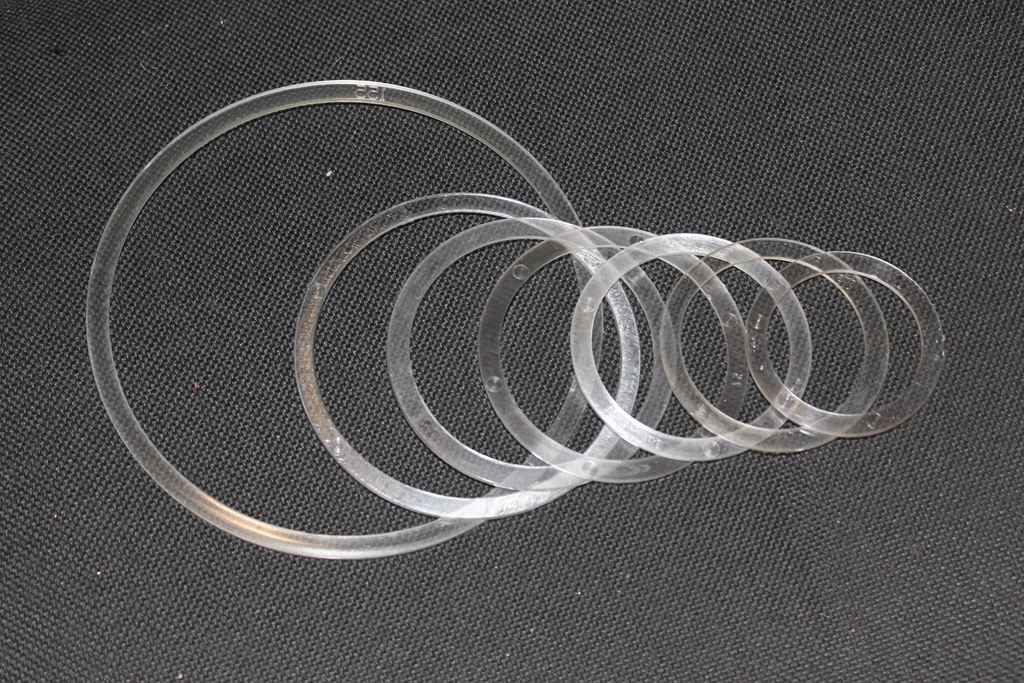
Step 7 With a sharp knife, cut out the film inside the ring.
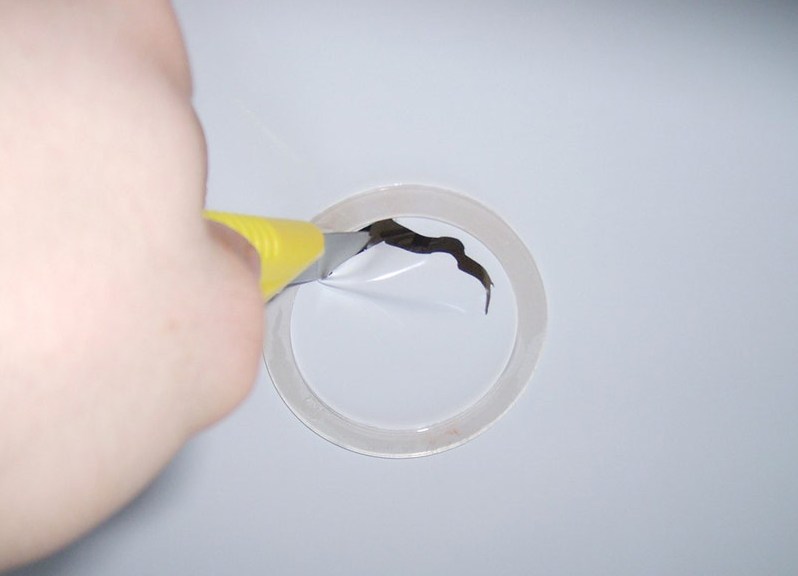
Step 8 Bring out the electrical wires.
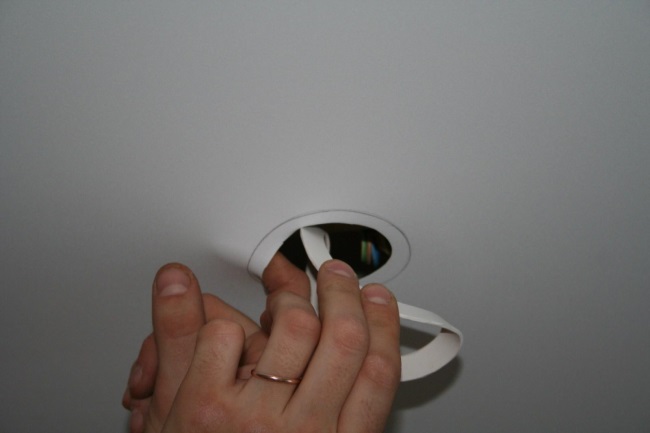
Step 9 Connect the device to the wiring using the terminals.
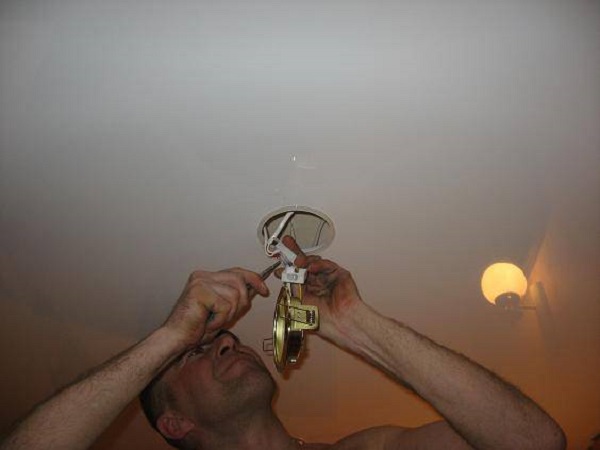
Step 10 Install the lamp in the ceiling.

Recessed LED ceiling lights can effectively solve the issue of primary and secondary lighting. But for long-term and safe operation, you need to know the rules for choosing and installing these devices.
Video - Which fixtures are best for a stretch ceiling
("config":("idpartner":29","siteId":162))